How to Disable File Explorer History [Quick Steps]
3 min. read
Updated on
Read our disclosure page to find out how can you help Windows Report sustain the editorial team Read more
Key notes
- If you are looking for ways to stay even more private nowadays, here's an awesome guide for you.
- For some, using shared PCs, the search history for the File Explorer can prove quite a nuisance.
- You can disable this preference if you want, in a few seconds, by tweaking some system settings.
- Follow this step-by-step guide we've prepared, and you will have turned off the feature in no time.
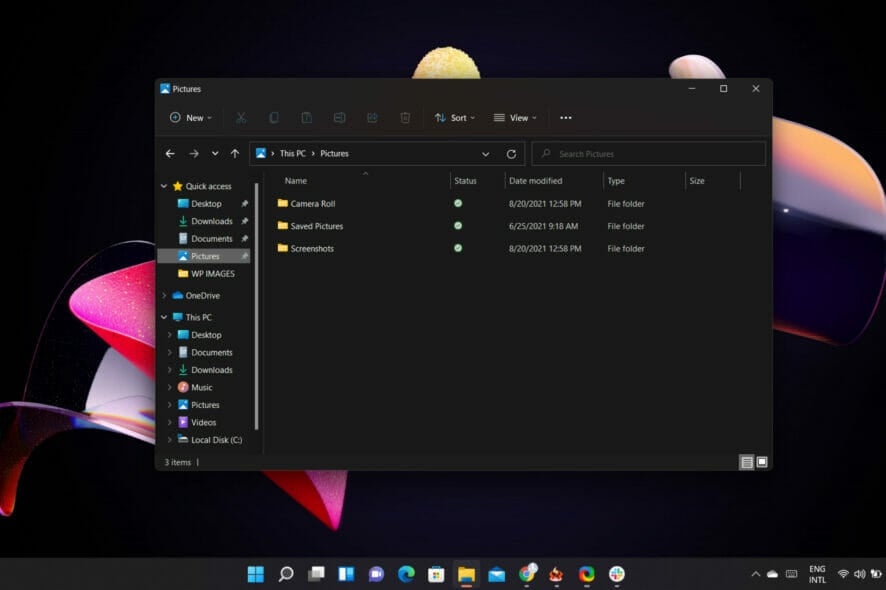
By now, there is no more need to mention that the File Explorer is Windows’ way of letting users browse through the files and folders on their system.
And even though most people know the exact locations of the files they require, sometimes searching for them, with the built-in function, is easier.
Whenever you search for anything in the File Explorer, the query is stored in the system and shows up in a drop-down suggestion when your try to search for something else.
For some people, this can be a bit problematic if they are using a shared PC or are trying to search through personal or private data.
And if you find yourself in a similar situation and are looking for a solution to disable the search history feature for the File Explorer in Windows 11 operating system, then you are in the right place.
How do I turn off the search history for File Explorer?
In order to get this done, you will use the built-in Local Group Policy Editor feature. It is a tool that allows you to configure Group Policy settings for a Windows PC or a group of PCs.
Basically, it gives you the ability to control the features and functionalities of the Windows-powered machine.
Here’s what you need to do:
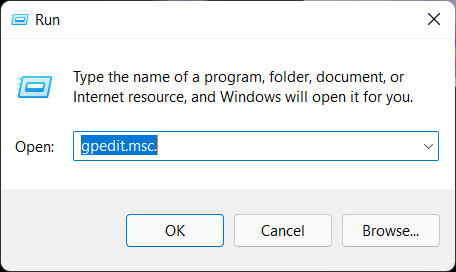
- Press Windows key + R to open the Run prompt.
- Type gpedit.msc. and press Enter.
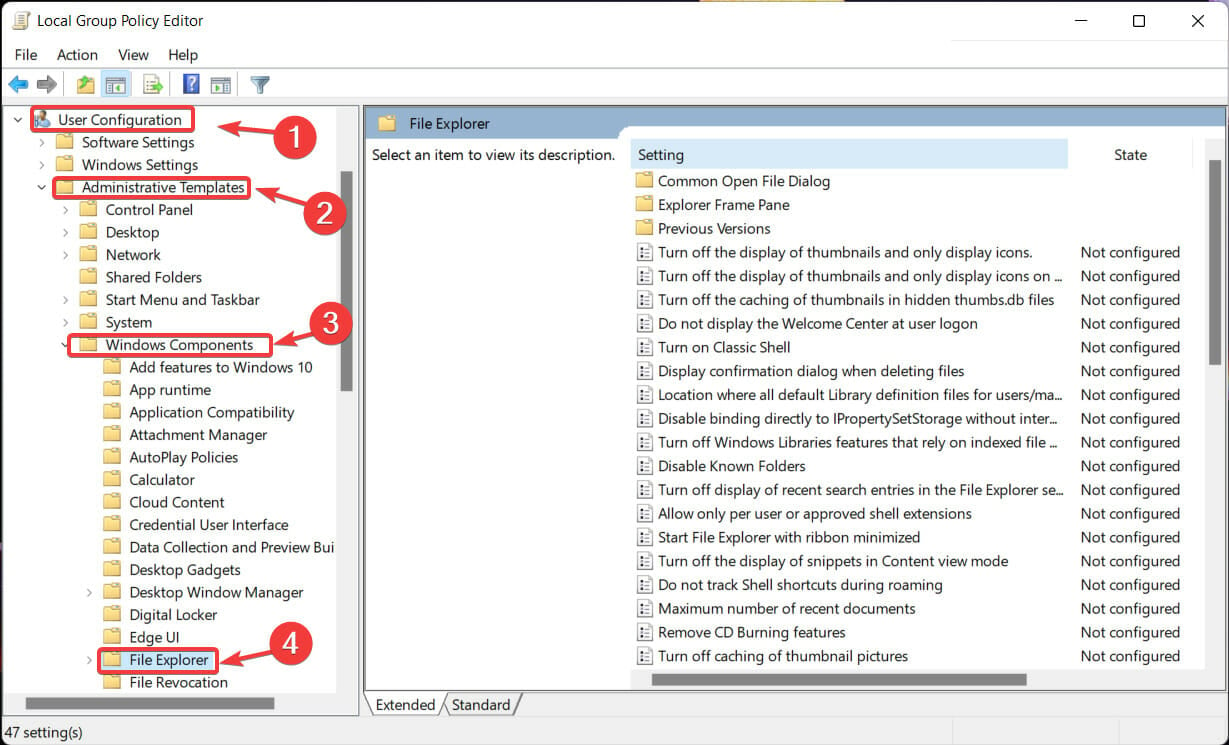
- From the left hand side, select User Configuration, followed by Administrative Templates, Windows Components, and then File Explorer.
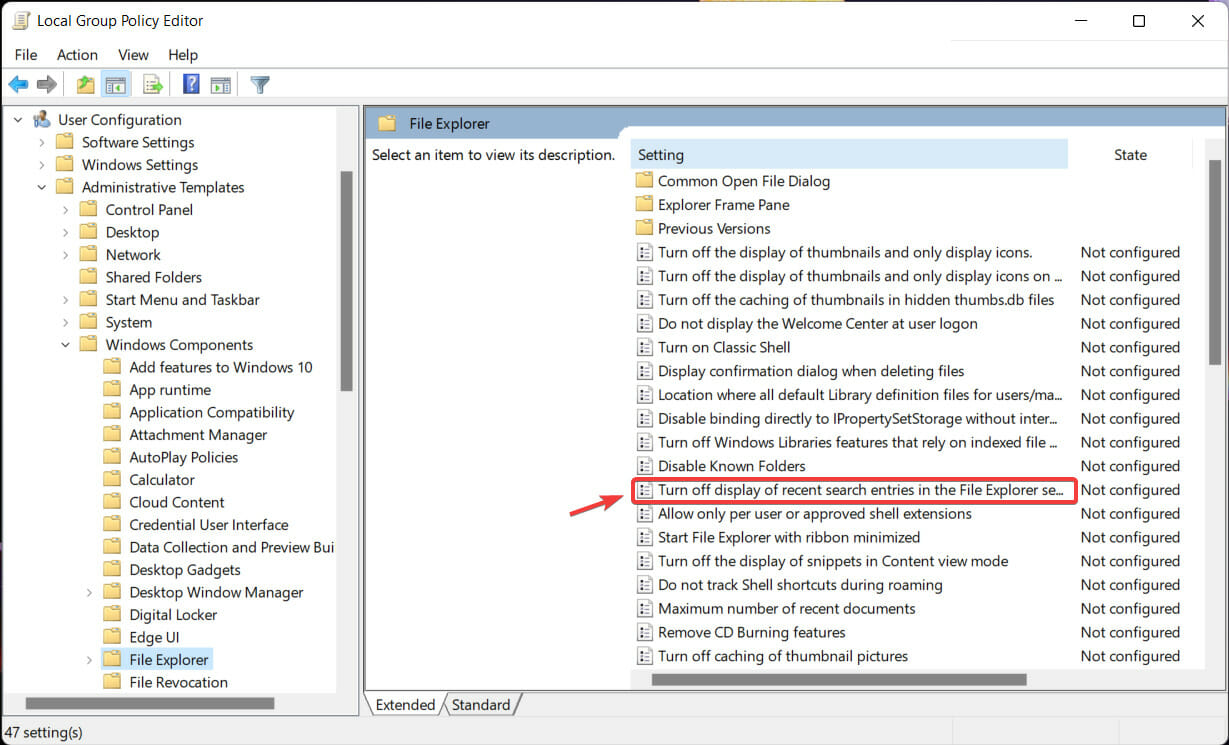
- From the right hand side, double click on the Turn off the display of recent search entries in the File Explorer search box option.
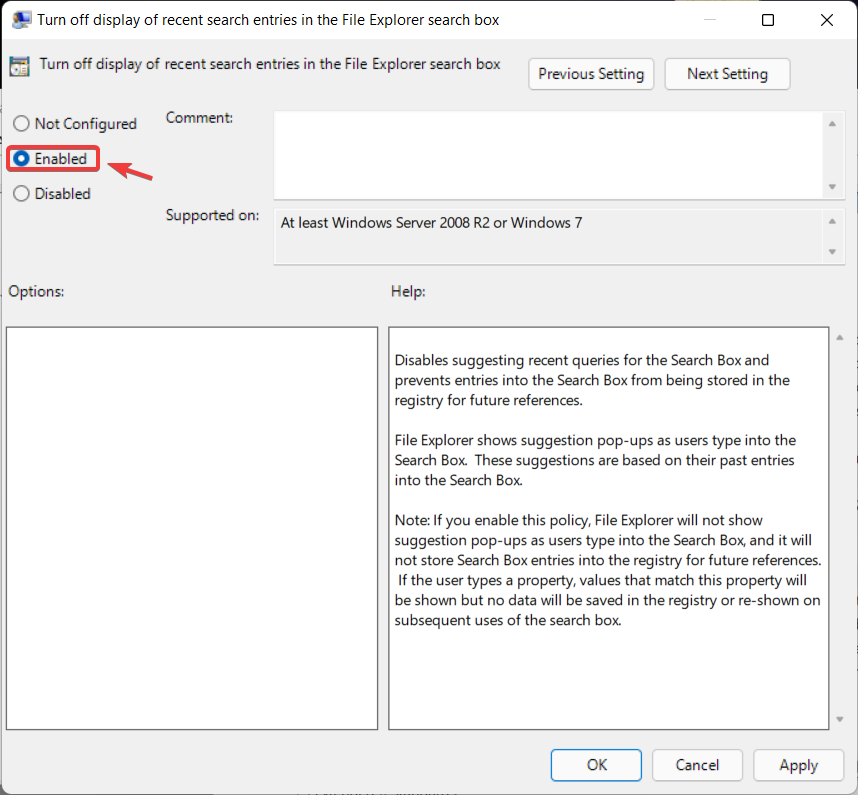
- In the new window, select the Enable option, and then click Apply.
This is the entire process and once you perform these actions, the search history for your Windows 11 File Explorer will be disabled.
Why should I disable my search history?
First of all, you shouldn’t do anything you don’t want to. Secondly, nobody says it’s absolutely necessary to do so.
As we mentioned at the beginning of the article, this is a safe way to keep your information private if you are using a shared device.
You should only disable this preference if you feel like it’s an efficient way to protect sensitive data.
Recently, we’ve been also talking about the process of uninstalling the FeedbackHub for Windows 11, so you might want to check that out as well.
Was this guide useful for you? Let us know in the comments section below.

