Disable Laptop Keyboard: How to Easily Do It in 9 Steps
Disable your laptop's damaged keyboard before replacing it for good
Key notes
- Disabling your laptop's keyboard, although it may sound extreme, can be beneficial in certain circumstances.
- You should do this whenever your laptop is damaged and you want to use another option.
- To disable it, you'll have to go into your PC's Group Policy Editor and adjust some files.
For many people, laptops have become the main computer in their lives. You have a wide variety to choose from, from more business-centric laptops to gaming rigs.
If you’re one of these people, you may be interested in improving your laptop usage. For example, you could purchase a brand-new Bluetooth keyboard and disable the one your laptop has.
Why would I want to disable my laptop’s keyboard?
Disabling your laptop’s keyboard may seem like a pretty extreme thing to do, but it does have its benefits:
- Typing on a laptop keyboard can be difficult – Laptop keyboards aren’t the most spacious as they have to conform to the screen. Desktop keyboards offer the most room and comfort.
- Desktop keyboards are typically higher quality – To maintain a low weight, laptops must be made out of lighter material but sacrifice sturdiness. External keyboards don’t have this problem.
- The keyboard may be damaged – If the keyboard is damaged, you’re better off getting a new device altogether. If you can’t afford it, getting a Bluetooth keyboard is your other best option.
How can I disable my laptop’s keyboard?
There are various ways you can disable your laptop’s keyboard, and they’re all pretty easy to do. However, we don’t recommend opening your laptop and physically disabling the keyboard.
You could accidentally and permanently damage the internal hardware of your computer. Instead, it’s better if you opt for a software solution.
- If you prefer to disable just a few keys instead of the whole thing, be sure to download some keyboard mapping software like KeyMapper.
- Of course, you could always connect a Bluetooth keyboard to your laptop without disabling anything. However, Bluetooth devices do come with their own problems.
- Additionally, you could go into your computer’s Registry Editor and modify a file in the directory to disable your keyboard.
1. Disable via the Device Manager
- Launch the Device Manager from the Windows Search bar.
- Expand the Keyboard section on Device Manager. Right-click the internal keyboard.
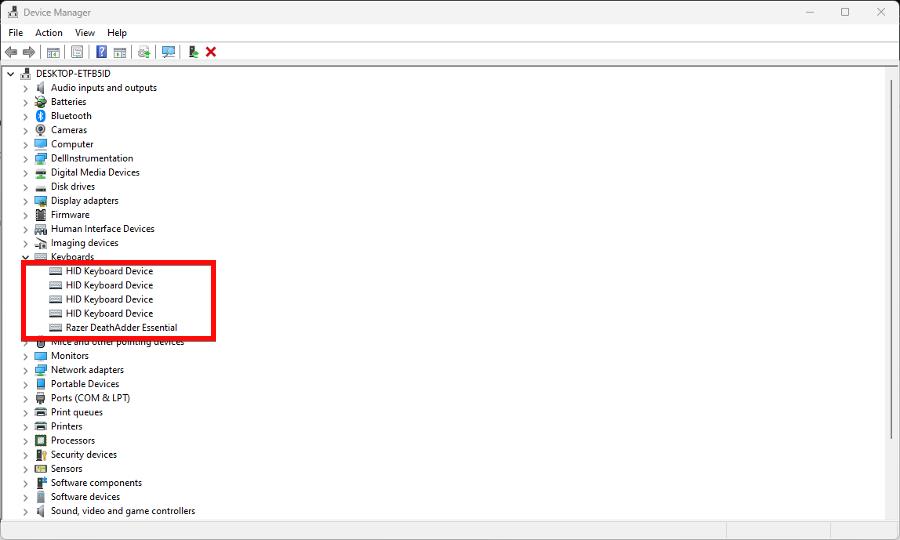
- A new context menu will appear. Select Disable. If that option isn’t available, click Uninstall device instead.
- Select File at the top of the Device Manager, then click Exit.
It’s possible that after uninstalling, the Device Manager will automatically detect and reinstall the keyboard if you have the app scan for new hardware.
If this happens, you’ll need to uninstall the laptop’s keyboard again.
2. Disable through the Group Policy Editor
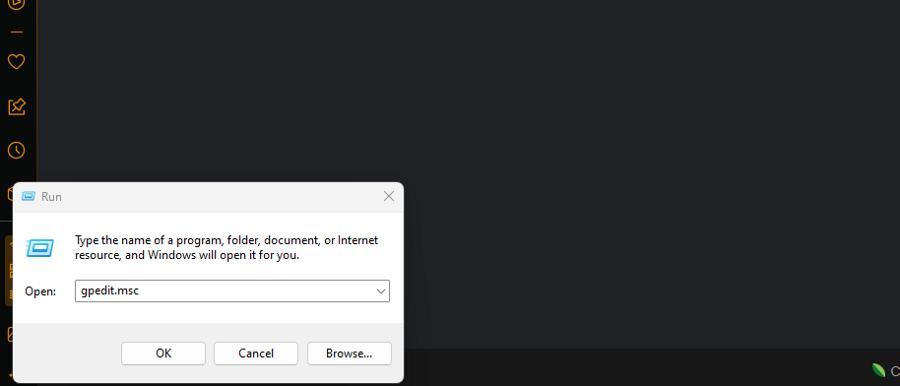
- Right-click the Windows Start icon in the lower left-hand menu and select Run. In the window, type in gpedit.msc.
- Under Computer Configuration, go to the Device Installation Restrictions folder. You can find it by opening the following folders: Administrative Temples > System > Device Installation.
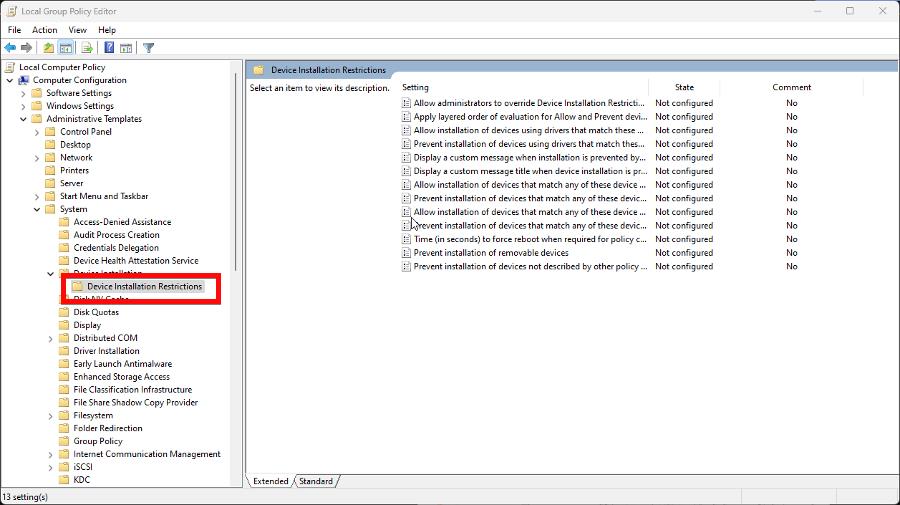
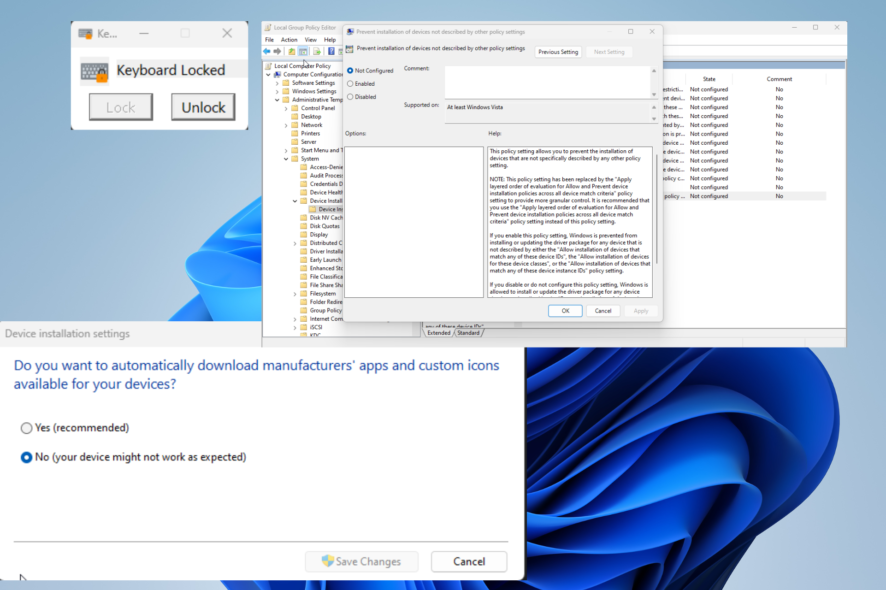
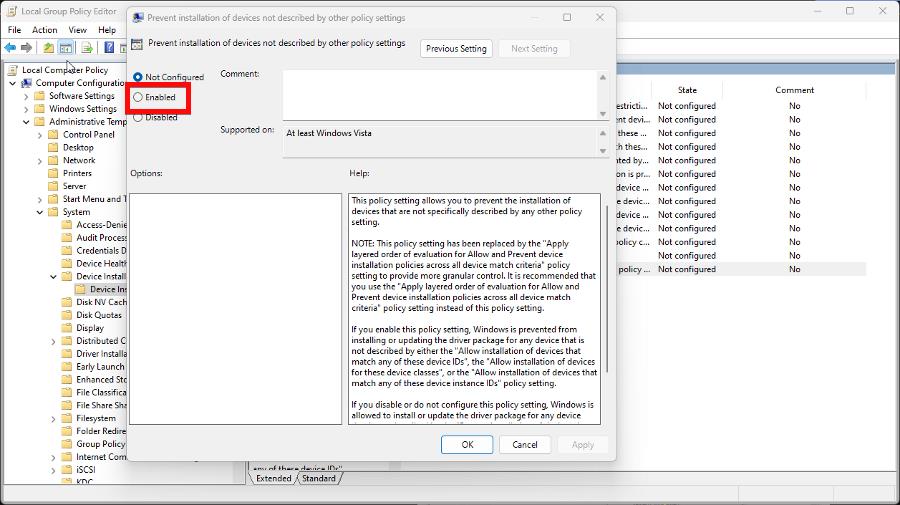
- Right-click Prevent installation of devices not described by other policy settings and select Edit.

- In the new window that appears, select Enabled. Click Apply, then OK.
- Return to the Device Manager, and like the previous solution, expand Keyboards.
- Right-click your laptop’s keyboard and choose Uninstall device.
- Restart your computer, and it should be disabled.
The Group Policy Editor isn’t normally available on Windows 11 Home, but it is possible to enable it. Be sure to read our guide on opening Group Policy Editor in Windows 11.
3. Install KeyboardLocker
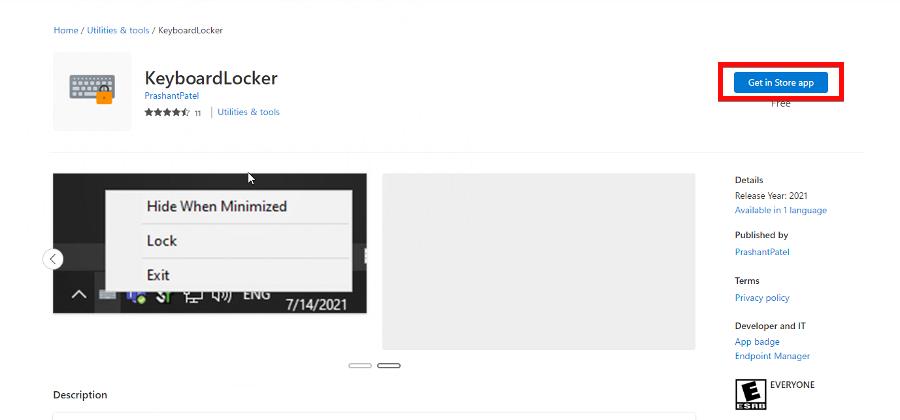
- Go to the webpage for the KeyboardLocker app. Select Get in Store app. The Microsoft Store will automatically open, and in this new window, click the Get button.
- Open the app when it finishes.
- KeyboardLocker opens as a small window. Click Lock to lock your keyboard. Your laptop will not accept input.
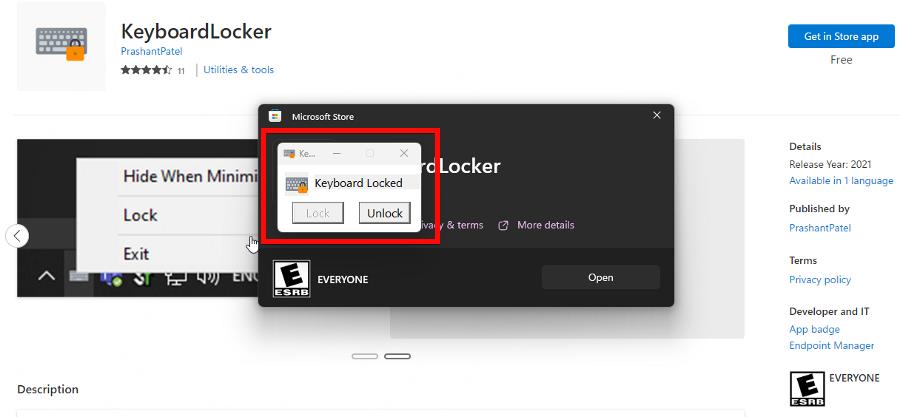
- Select Unlock to re-enable it.
4. Use the wrong driver
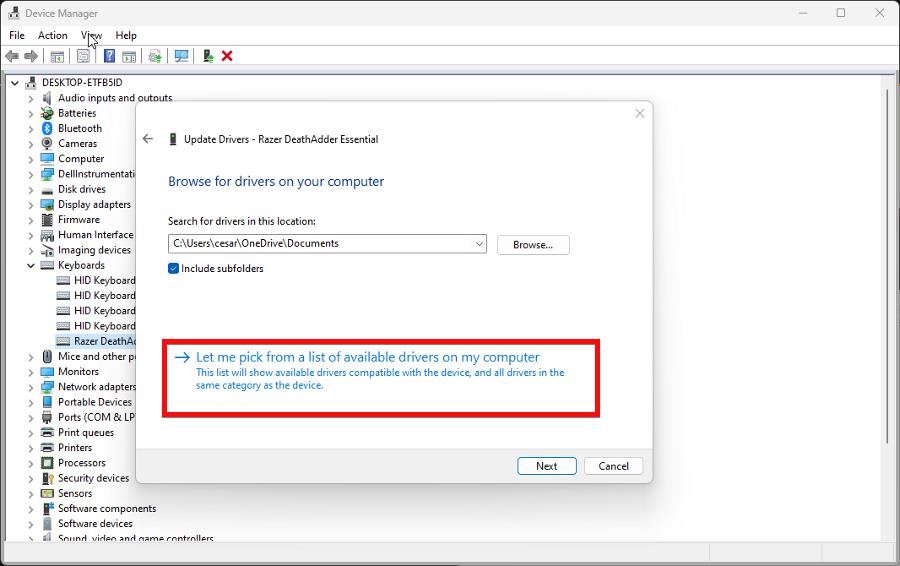
- Go to the Device Manager again, expand the Keyboards listing, right-click your device, and select Update driver.
- Click Browser my computer for drivers.

- On the following page, select Let me pick from a list of available drivers on my computer.
- Click the box next to Show compatible hardware. Scroll through the box below and select a manufacturer different from your laptop. When done, choose Next.
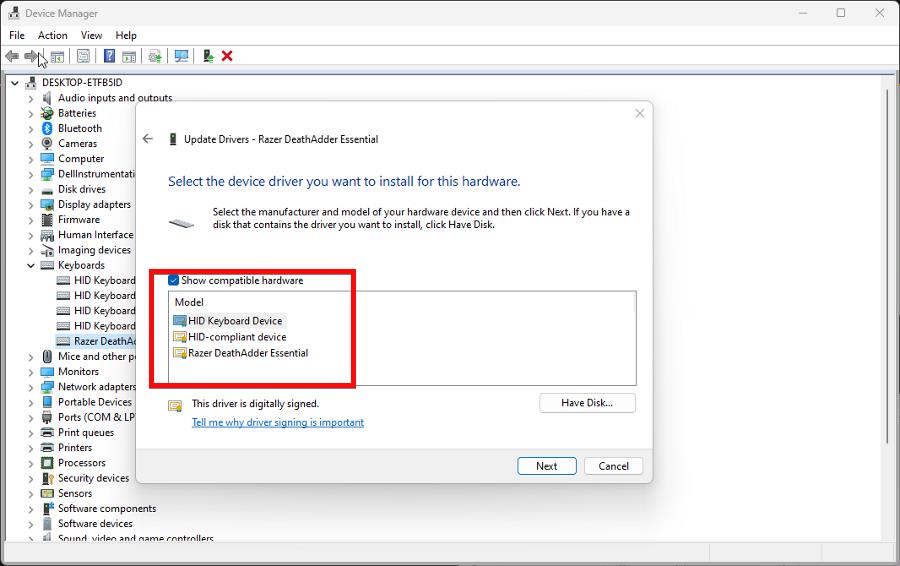
- The drivers will install automatically. Click Close when done.
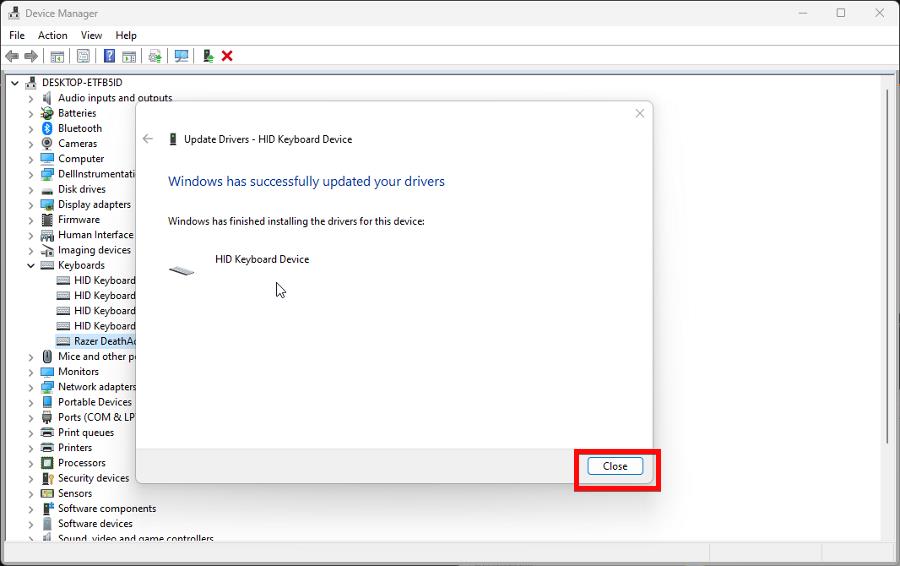
- Now restart your computer to finish the process.
- To undo the process, go back to the Keyboards entry, right-click it, and select Update drivers.
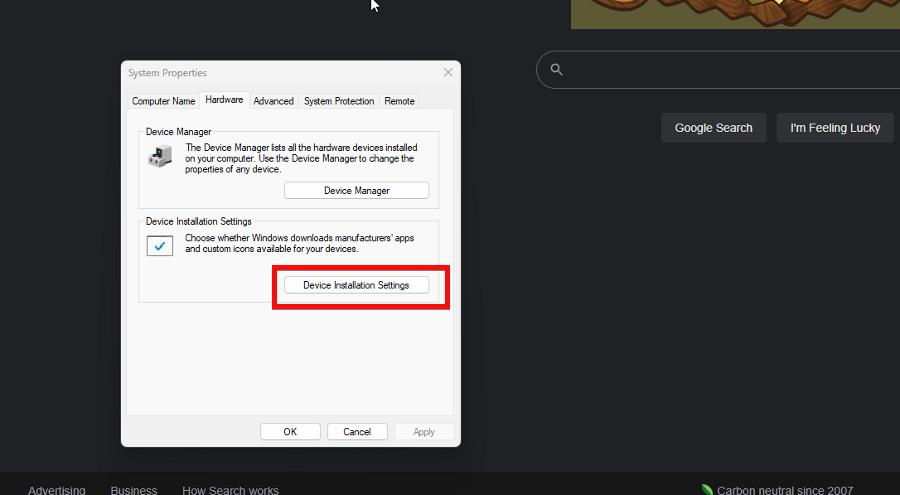
5. Adjust installation settings
- Right-click the Windows logo in the lower left-hand corner, choose Run, and type in sysdm.cpl
- Go to the Hardware tab and select Device Installation Settings.
- On the new window that appears, click No, then Save Changes.
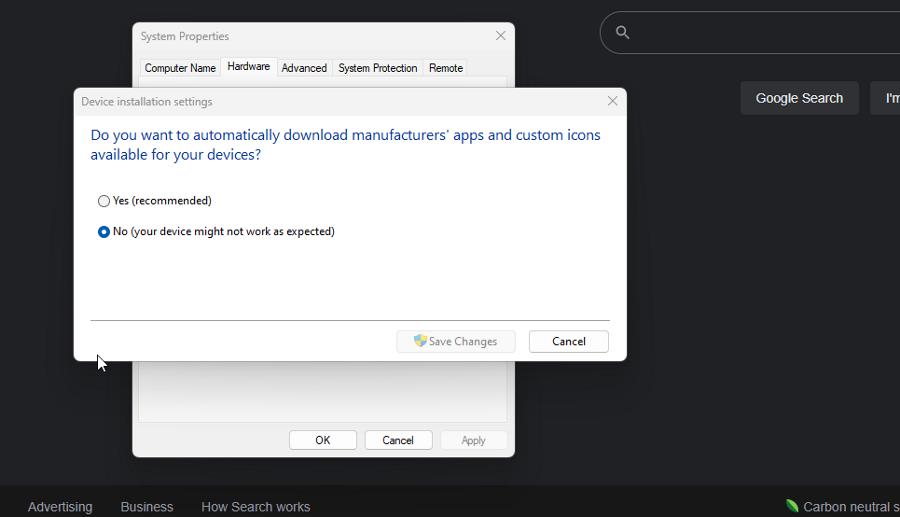
- Now open the Device Manager. And like before, uninstall the keyboard from the app.
6. Disable the keyboard via the Command Prompt
- Use the Command Prompt on your Windows Search bar and select Run as administrator.
- Enter the following command:
sc config i8042prt start= disabled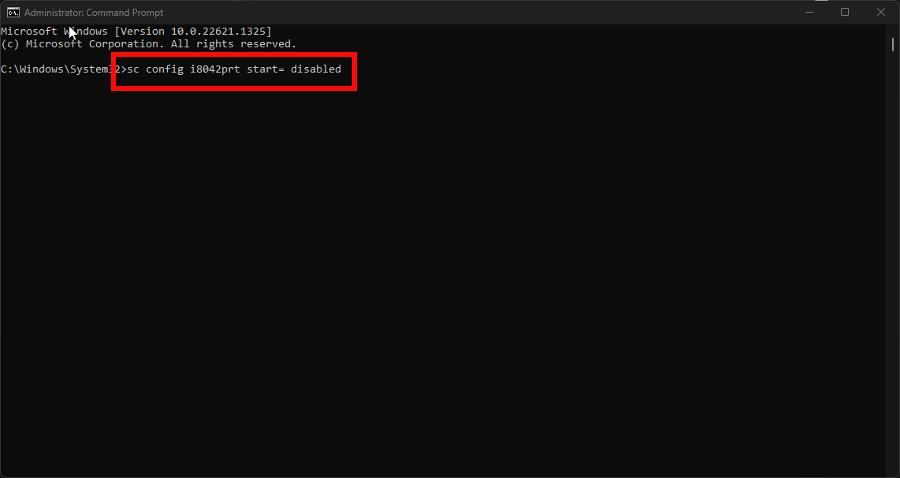
- When done, restart your computer.
- To re-enable the keyboard, enter the following:
sc config i8042prt start= auto
What can I do if my keyboard isn’t working on Windows?
Some of you experience your keyboard suddenly not working for whatever reason. Assuming you don’t have KeyboardLocker accidentally open, you may have a problem with your computer’s BIOS.
To solve this, we recommend connecting an external keyboard and adjusting your machine’s BIOS settings. Specifically, make sure the USB Legacy Support is enabled.
While we have you, we recommend learning how to create a custom keyboard layout on Windows 11. Having different layouts can be useful when adding characters unique to foreign languages.
There are a couple of ways you can do this. You can either go into the Time & language tab in the Settings menu or add them via Windows PowerShell.
Feel free to comment below if you have other keyboard questions. Also, leave comments below about reviews you’d like to see or information on Windows 11 hardware.
Read our disclosure page to find out how can you help Windows Report sustain the editorial team. Read more


Improve this guide


User forum
0 messages