DLL Files Missing in Windows 7? 8 Ways to Fix It
Reinstall the affected program to fix the issue
6 min. read
Updated on
Read our disclosure page to find out how can you help Windows Report sustain the editorial team. Read more
Key notes
- The DLL error can be caused due to malware infection, broken registry entries, or corrupted system files.
- To fix it, you can use a DLL fixer, run a malware scan or SFC scan via Command Prompt.
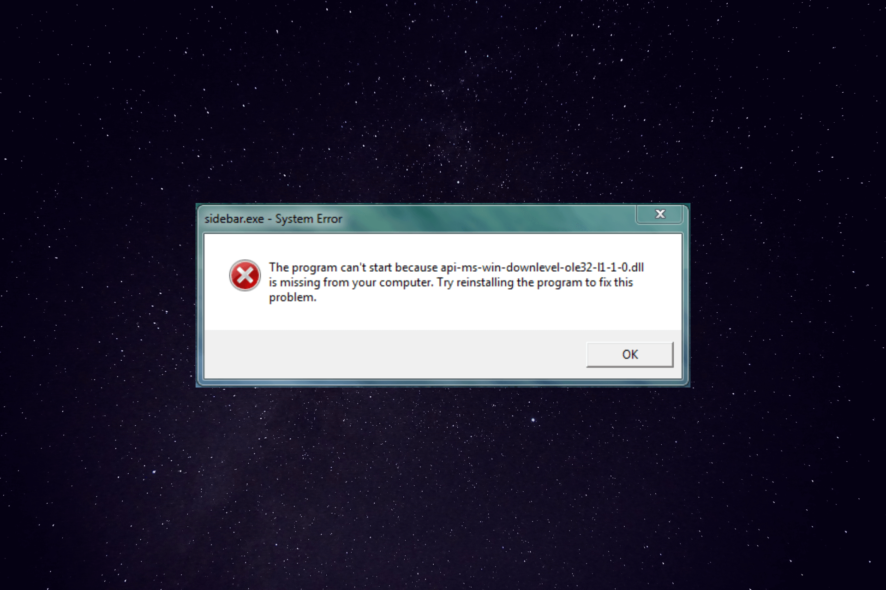
Dynamic Link Libraries, or DLL files, are important for the smooth functioning of your Windows 7 operating system.
In this guide, we will explore the causes of missing DLL files in Windows 7 and provide some solutions for fixing the issue.
What causes the DLL files missing error on Windows 7?
There are various reasons for the missing DLL files on Windows 7; some of the common ones are mentioned here:
- Deleted accidentally – DLL files can be deleted unintentionally at the time of removing unwanted apps or cleaning your PC. Try reinstalling the affected app.
- Corrupted system files – These files may get corrupted due to system crashes, malware attacks, or sudden power failures. Try running an SFC scan to fix the error.
- Faulty installation – DLL files can be missing if a program was interrupted when getting installed on your computer. Reinstall the affected app.
- System errors – System errors such as blue screen errors or stop errors can also cause DLL files to go missing or become corrupted.
- Software installation – When installing or updating a program, DLL files required by that program may be overwritten or deleted.
Now that you know the causes, let us check out the solutions to fix the issue.
How can I fix the DLL files missing error on Windows 7?
Perform the following preparatory checks to ensure that the error is not a result of basic issues which may require only subtle tweaks:
- Restart your computer.
- Try reinstalling the app throwing the error.
- Ensure your Windows is up to date.
- Check the Recycle Bin for deleted the DLL file.
If these steps didn’t help you, move to the actual troubleshooting methods to fix the error.
1. Use a DLL fixer
Fixing DLL missing errors manually could be tricky and harm your PC if you are not tech-savvy. Therefore, it is suggested to use a third-party DLL fixer tool to handle this issue effectively.
Such a tool can scan your computer for corrupted DLL files and quickly restore or replace them. Thereby resolving the conflicts between third-party apps & operating systems, enhancing system performance, and achieving greater stability for your PC.
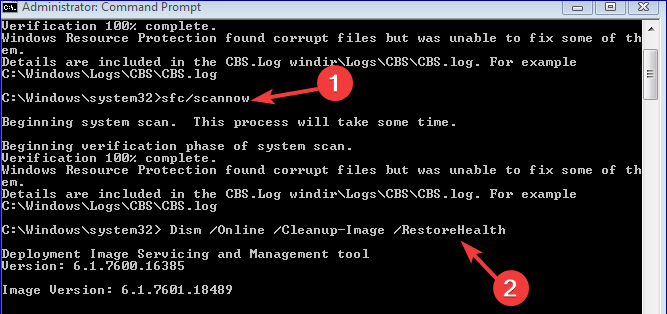
2. Run SFC & DISM scans
- Press Windows + R to open the Run dialog box.
- Type cmd and press Ctrl + Shift + Enter to run Command Prompt with administrative privileges.
- Copy & paste the following command to repair system files and hit Enter:
sfc/scannow - Wait for the scan to complete, then type the following command to restore Windows OS image files and press Enter:
DISM /Online /Cleanup-Image /RestoreHealth - Once the command is executed successfully, restart your computer to let the changes take effect.
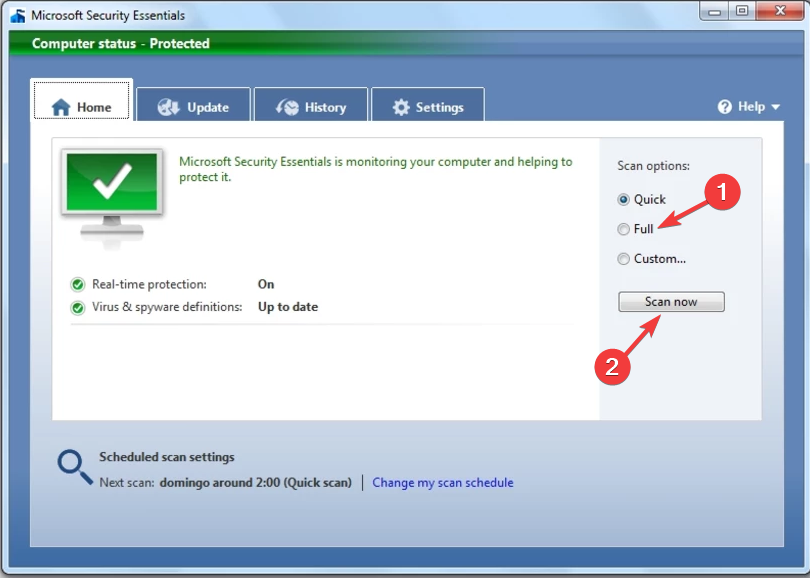
3. Run a malware scan
- Select the Start icon, type Microsoft Security Essentials, and then press Enter.
- From the Scan options, select Full.
- Select Scan now.
- The tool will scan your computer and list out the threats and remove them to resolve the problem.
You may also choose one of the best antiviruses for Windows 7 and run a full scan on your PC.
4. Perform a System Restore
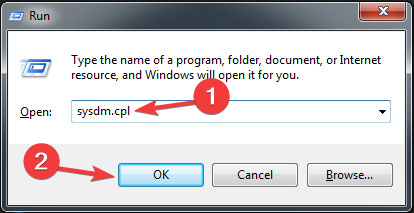
- Press Windows + R to open the Run window.
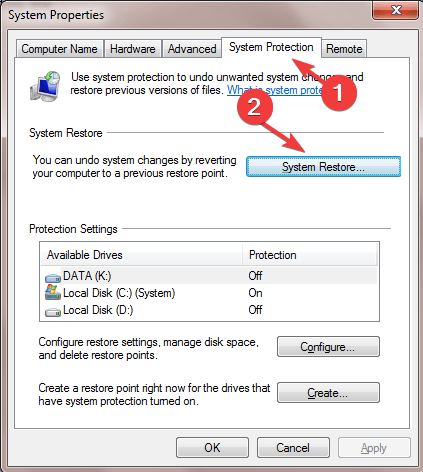
- Type sysdm.cpl and click OK to open System Properties.
- Go to the System Protection tab, and click the System Restore button.
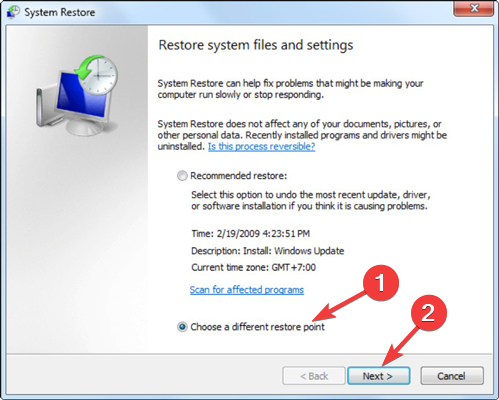
- On the System Restore window, click Choose a different restore point and click Next.
- Select a restore point and click Next.
- Click Finish.
Windows will restart and be restored to the chosen point. If System Restore didn’t successfully complete, you can follow the steps mentioned in this informative guide.
5. Reinstalling the Visual C++ Redistribution
 NOTE
NOTE
- Download the Visual C++ Redistribution package from the official website.
- Double-click the installer to initiate the installation.
- Click Install and follow the onscreen instructions to complete the process.
6. Perform a clean install
 NOTE
NOTE
- Insert the Windows 7 installation disc or USB drive into your computer and restart it.
- Press any key when prompted to boot from the installation media.
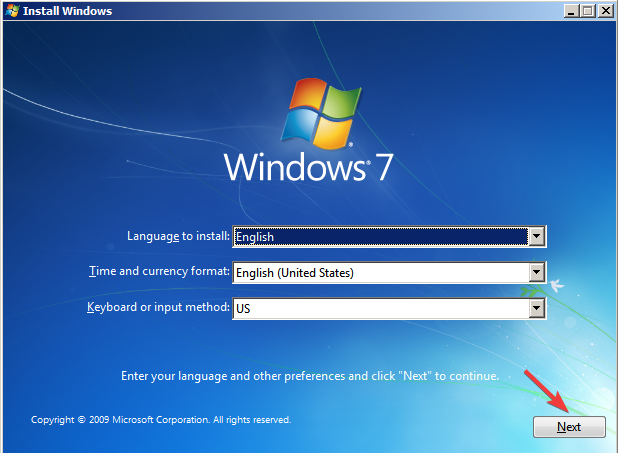
- Choose your preferred language, time, currency, and keyboard settings from the options provided and click Next.
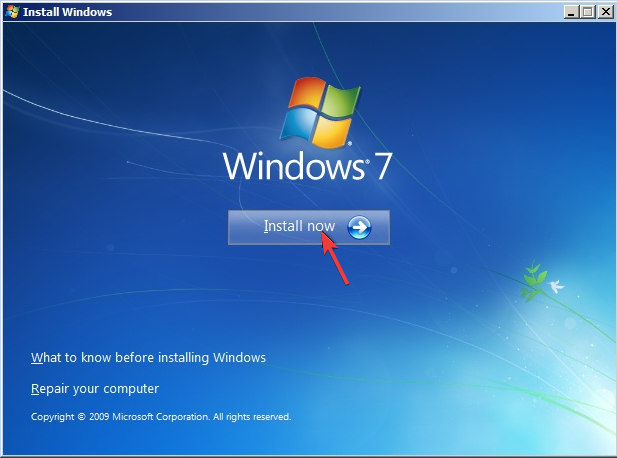
- Click Install now.
- Wait for the computer to boot. Next, read and accept the license agreement to proceed with the installation process.
- For Which type of installation do you want page, select Custom (advanced).
- If you want to create or delete partitions on your hard drive, you can do so during the installation process.
- Choose a physical location to store Windows 7.
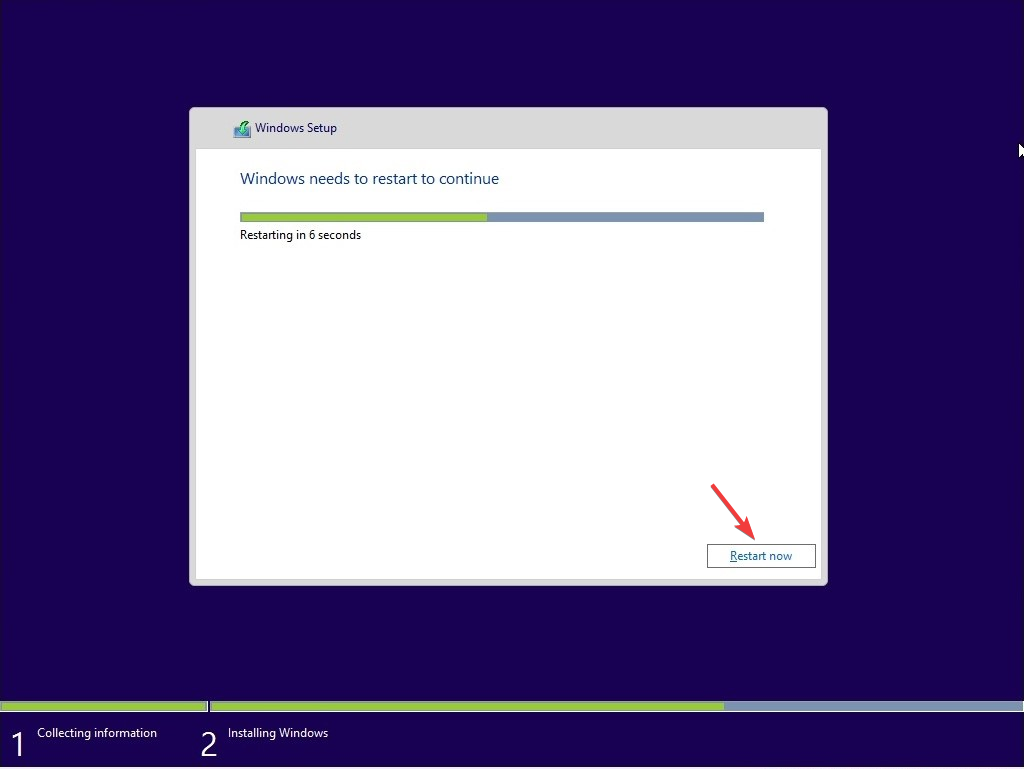
- When the installation is nearly complete, and your system doesn’t restart automatically, then click Restart now.
- The installation will continue; wait for the setup to complete; your computer will restart.
- Now you can install the necessary drivers for your hardware and update Windows 7 with the latest security patches and software updates.
Once done, your computer will restart and install the apps that you like. This removes all the data from your computer and will install a fresh copy of Windows 7 on your computer.
7. Perform a Startup Repair
- Insert the Windows 7 installation disc or USB drive and restart your computer.
- Press any key when prompted to boot from the installation media.
- Wait for the Windows to load, then select your language preferences and click Next.
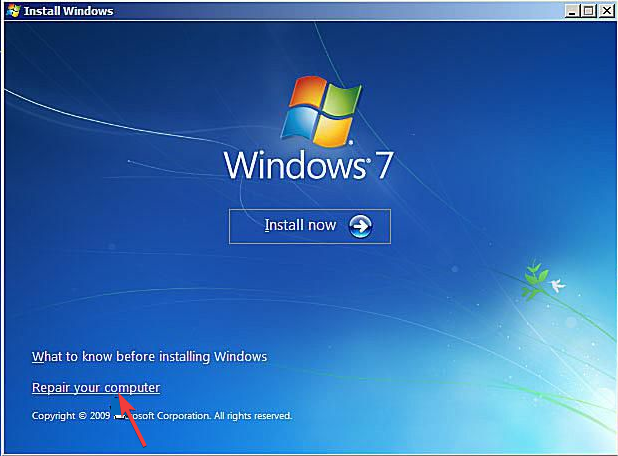
- Click Repair your computer on the bottom left corner of the screen. Wait for the System Recovery options to locate Windows 7 on your PC.
- Select the operating system you want to repair, i.e., Windows 7, and click Next.
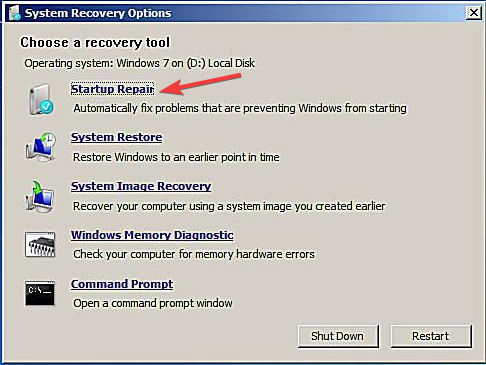
- Click Startup Repair.
- The Startup Repair tool will look for problems with crucial files responsible for the proper functioning of Windows 7. Wait while the tool tries to repair the system files; once done, click Finish. Your computer will restart to complete the process.
If you do not have the installation media, you can access the Windows Recovery Environment (WinRE) by pressing F8 during startup and selecting Repair your computer from the Advanced Boot Options menu.
8. Download a DLL file manually
 NOTE
NOTE
- Go to the DLL Files website, search the DLL file using its name, select an appropriate option, and click Download.
- Double-click the downloaded folder to open it, and locate and copy the .dll file.
- Go to this path and paste the file:
C:\Windows\System32\ - Restart your computer to confirm the changes.
If you are facing missing the DLL files issue on your Windows 10, we advise you to read our informative guide to know solutions for this common problem.
So, these are methods that you can use to fix the DLL missing error on Windows 7. However, we remind you that Windows 7 is obsolete, and we recommend upgrading your OS to Windows 10 or 11.
If you have any questions or suggestions, feel free to mention them in the comments section below.






User forum
0 messages