Eclipse for Windows 11: How to Download and Install
Installing Eclipse IDE on your Windows 11 device made easy
Key notes
- Eclipse is among the most popular open-source software for Java developers.
- Downloading Eclipse is pretty straightforward, though setting it up comes with a few tweaks.
- Install additional software and prepare your device to avoid any installation issues.
Eclipse is among the leading IDEs (integrated development environments) for computer programming, especially for Java developers. The SDK is free and open-source, so it’s no wonder many users are looking for ways to download Eclipse for their Windows 11 devices.
So, how to download and install Eclipse on Windows? Read this step-by-step tutorial to find out. Let’s start!
Does Eclipse work on Windows 11?
Eclipse is compatible with Windows 11, but as it’s Java-based software, it requires a Java Development Kit (JDK) to run. Though, if you do not plan to use it for software development, you can install Java virtual machine (JVM) or a Java Runtime Environment (JRE).
Eclipse IDE offers several package choices, all depending on your needs. The good news is that features from different packages can be combined into one. In other words, Eclipse can also be used to develop apps in other programming languages, but it requires plug-ins.
Here’s an example, say you want to use Eclipse for Java and some PHP development. Then you should choose the Eclipse IDE for Java Developers (the most popular option) and then add the PHP package by visiting the software’s Help menu.
If you don’t have JDK installed yet, we’d advise you to take care of that first and install Java JDK on Windows 11 here. Also, make sure your system is up-to-date by automatically installing Windows updates.
How do I download Eclipse on Windows 11?
- Go to the official Eclipse Downloads page.
- Choose Eclipse’s latest version (at the time of writing, that is Eclipse IDE 2023-06 for Windows 64-bit).
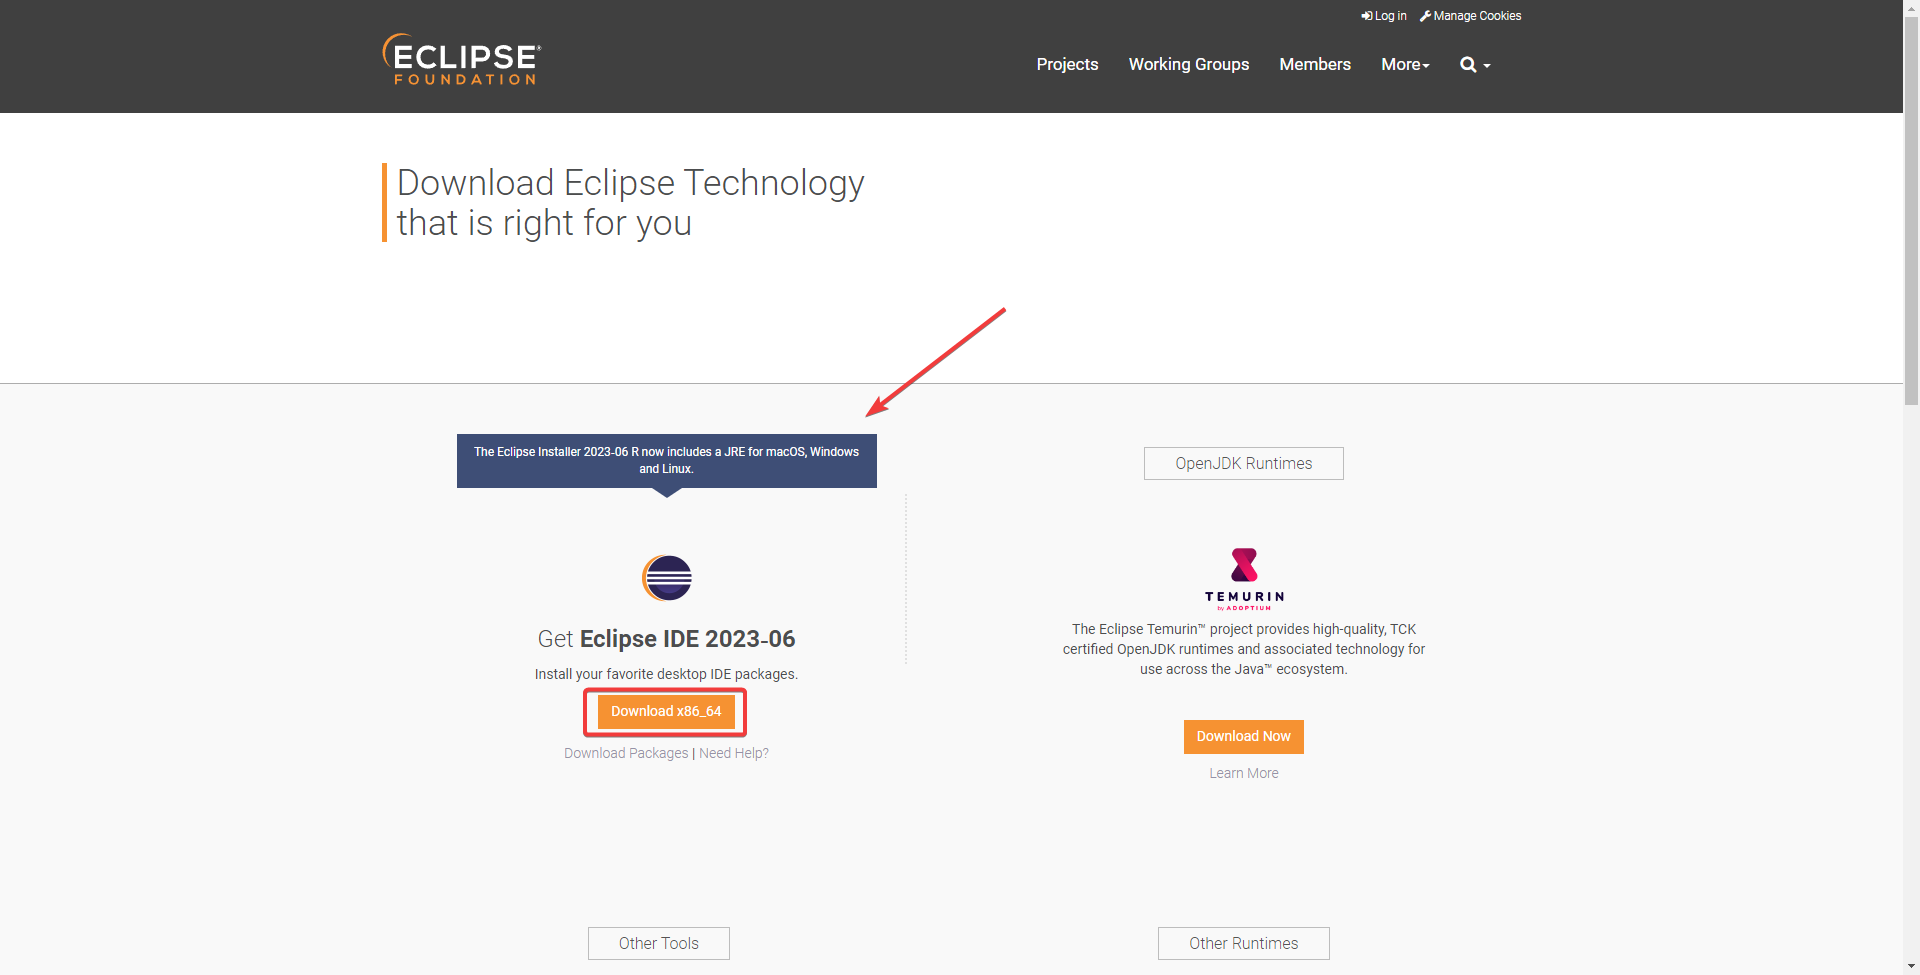
- Click on Download and wait for the process to finish.
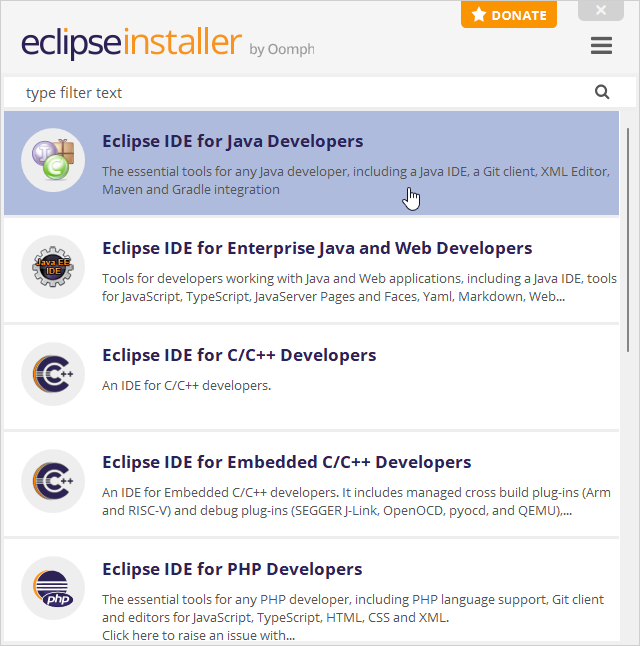
- Run the installer.

- Choose the right package to install.
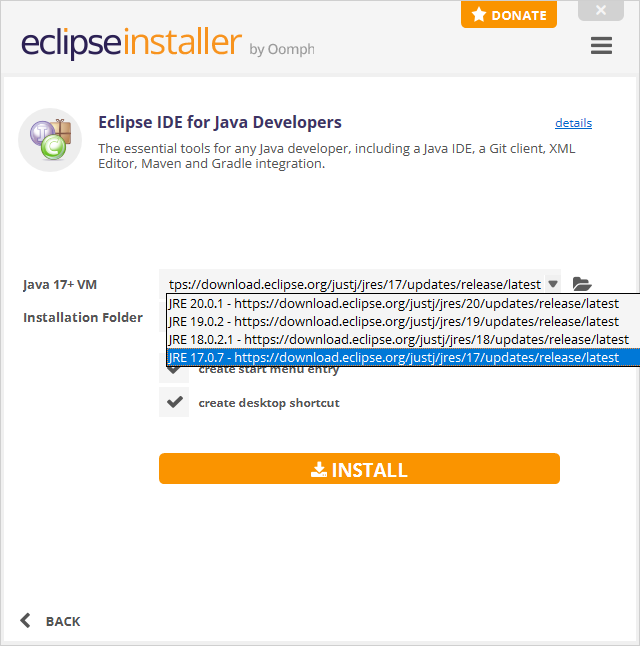
- Select the installation folder and finish the installation process.
- Launch Eclipse.
Those who haven’t previously downloaded and installed a JDK on their device are also covered. The Eclipse Installer now includes a JRE. So, if you haven’t taken care of that step, you’ll see the option to install all essential tools and add-ons.
Additionally, it’s strongly recommended to configure Eclipse with the specific JVM you’re using. To do so, follow the instructions on Eclipse’s official tutorial page.
There you have it! That’s how to download and install Eclipse IDE on your Windows 11 PC. Follow the steps above, and you shouldn’t encounter any issues.
If you still haven’t upgraded to the latest version of Windows, we’d advise you to do so. Here’s how to seamlessly upgrade to Windows 11 and enjoy your OS and programs running smoothly.
Do you have any questions or suggestions regarding your Eclipse download? Feel free to share them in the comments below.
Read our disclosure page to find out how can you help Windows Report sustain the editorial team. Read more


Improve this guide


User forum
0 messages