How to Download and Install FFmpeg on Windows 10
Detailed steps to install this software effortlessly
3 min. read
Updated on
Read our disclosure page to find out how can you help Windows Report sustain the editorial team Read more
Key notes
- To install the FFmpeg software, you need first to download the installation files from the official website.
- After installing the software, you need to add the path manually.
FFmpeg is a popular open-source tool that is used to perform several operations on audio and video files. These operations include multiplexing, de-multiplexing, encoding, decoding, filtering, streaming, etc.
It is also used for scaling and rotating videos and extracting information regarding files stored on your Windows PC.
However, the app does not come with a GUI, and that is why users often experience problems while installing FFmpeg. Follow this installation guide if you are wondering how you can install FFmpeg on Windows 10.
How do I install FFmpeg on Windows 10?
1. Download FFmpeg installation files
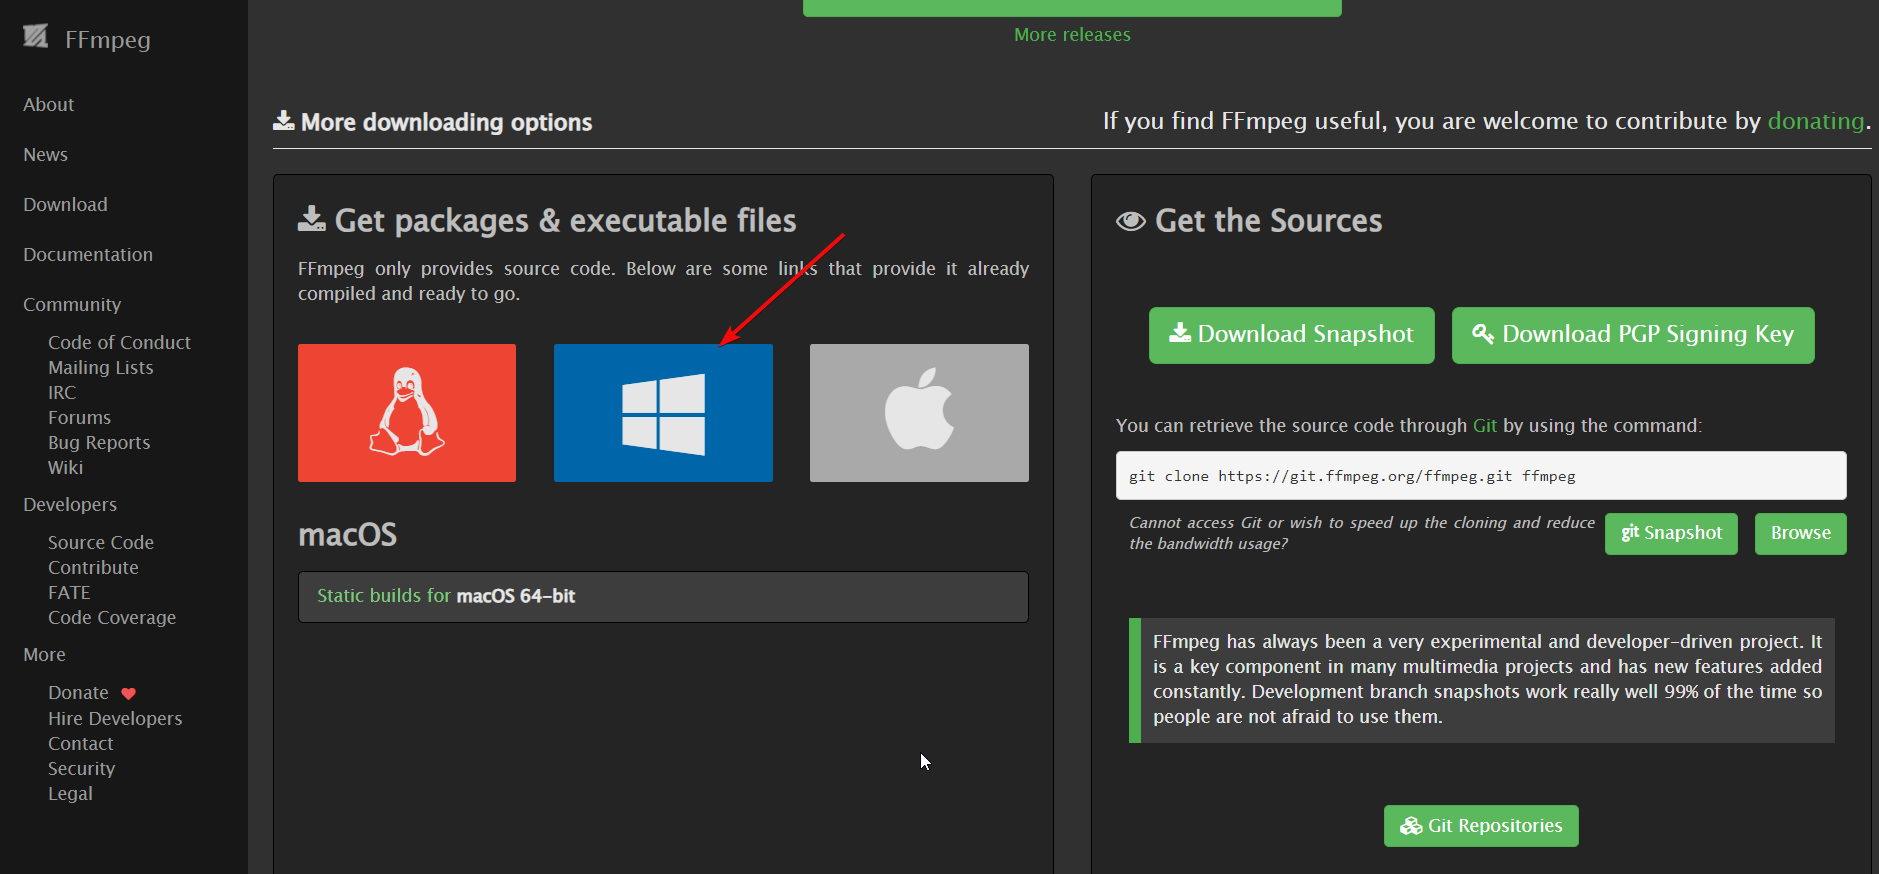
- First and foremost, visit the official website of FFmpeg and hit the Windows logo to download the installation files.
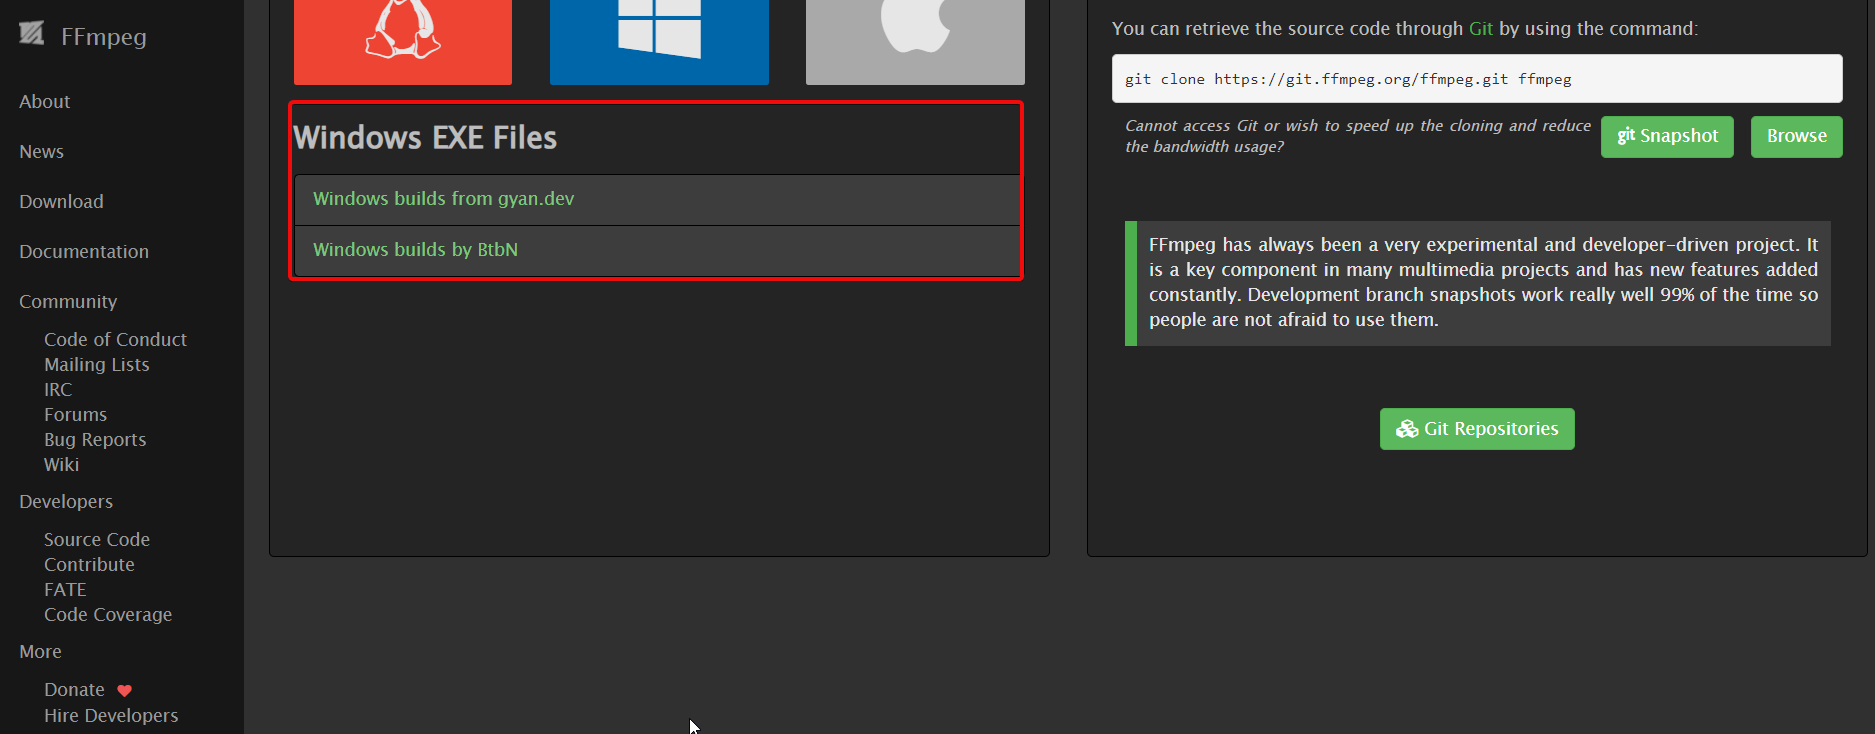
- Choose one of the Windows build providers.
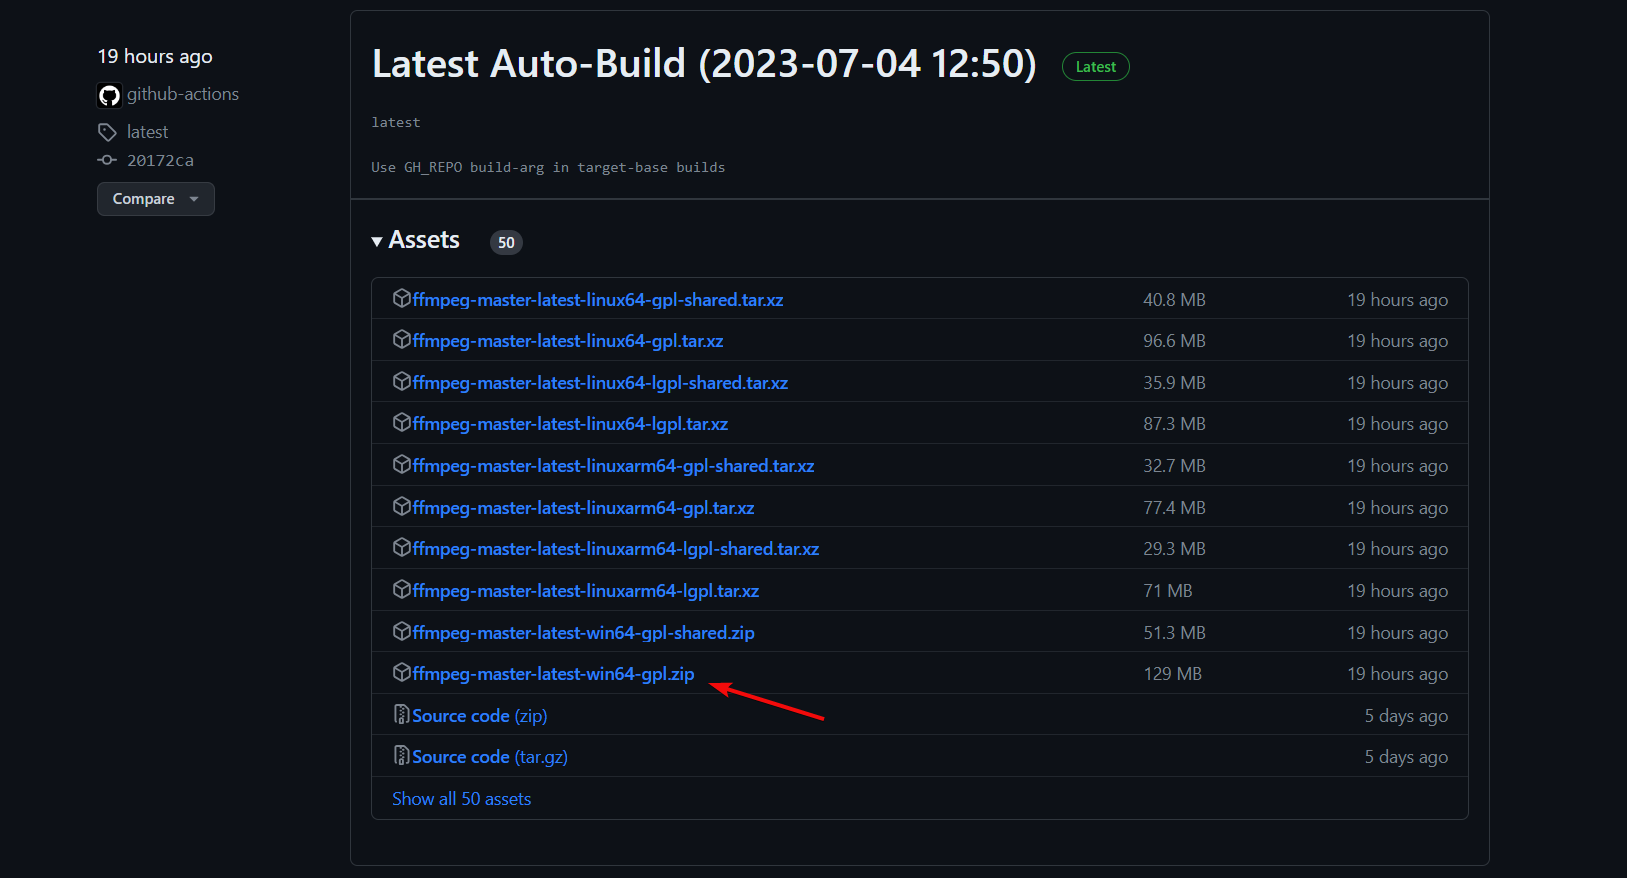
- Locate the version of FFmpeg that meets your processor and operating system requirements and click the download link.
- Wait until the download process is complete, and unzip the download folder.
- Now right-click the new folder, click rename and type FFmpeg to change its default name.
- Right-click the FFmpeg folder and click Copy.
- Go to your C drive and paste the FFmpeg folder there. It will allow you to run the FFmpeg commands in the command prompt.
2. Use Environment variables to add FFmpeg to Windows 10 path
- To enable FFmpeg in Command Prompt, right-click This PC and select Properties.
- Navigate to the top left-hand side of your screen and click Advanced System Settings.
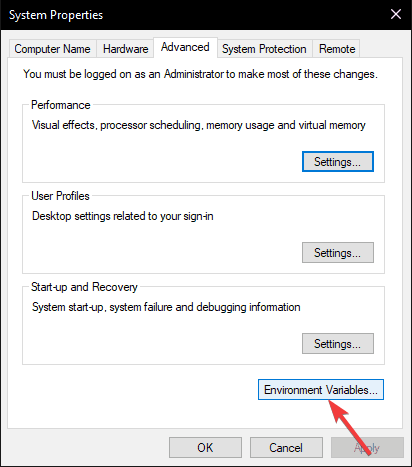
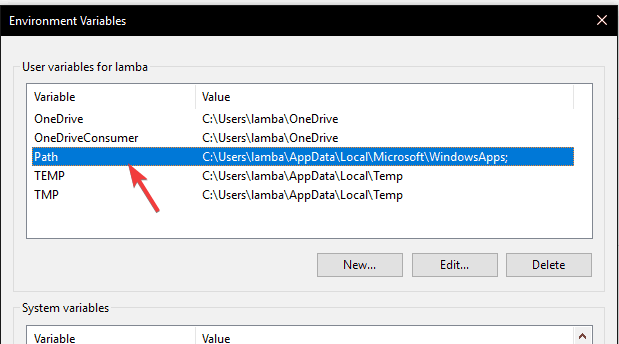
- Click the Advanced tab and select the Environment Variables option at the bottom of the window.
- Once the Environment Variables window is open, double-click the Path variable under the User variables for lamba section to Edit it.
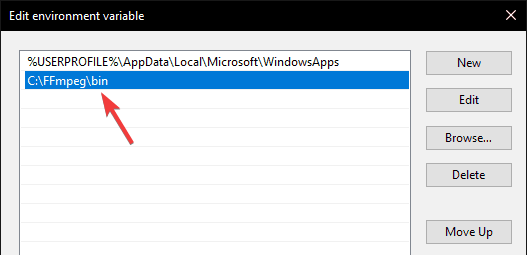
- Click the New button, paste C:FFmpegbin, and click OK to save the new path.
- FFmpeg files are now added to the system path on your Windows 10 PC. Finally, close the environment variable window to use FFmpeg.
3. Verify the FFmpeg path in Command Prompt
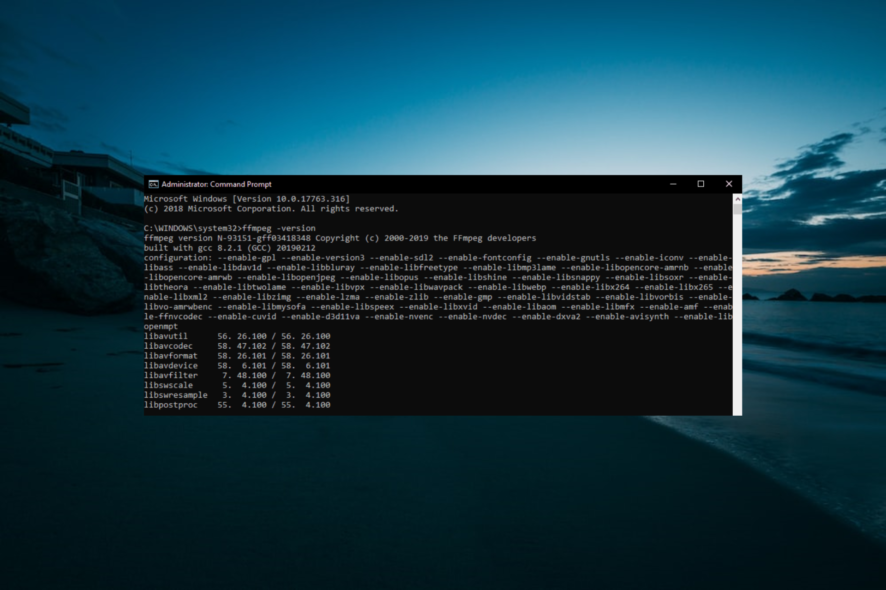
- Now you need to check the installation process, press the Windows + S keys, type cmd, and click Run as administrator under Command Prompt.
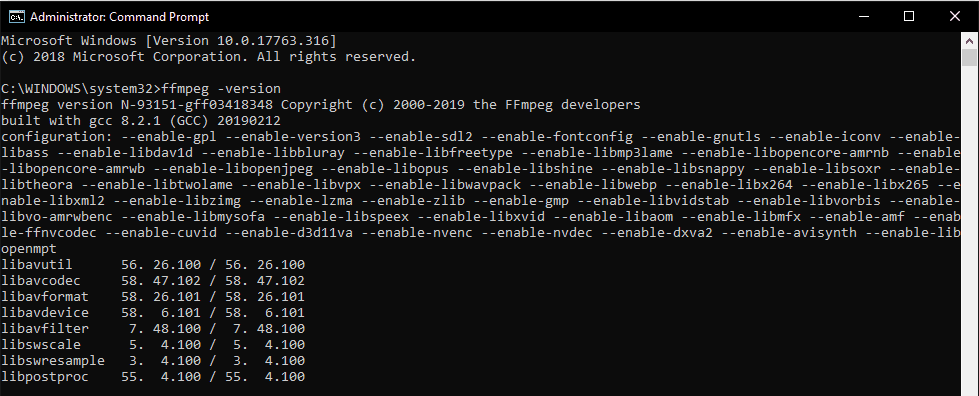
- Once the Command Prompt opens on your screen, type the command below and hit Enter:
ffmpeg -version - If FFmpeg is installed on your Windows 10 system, you will see details such as configuration or version number.
- However, if the installation is unsuccessful, you will see the following message: ‘ffmpeg’ is not recognized as an internal or external command, operable program or batch file
In this case, check to see if you have properly followed all the steps to add the FFmpeg folder to the system path.
We hope that these instructions helped you to install FFmpeg on your Windows 10 system. If you have any questions, feel free to let us know in the comments section below.

