How to download Salesforce for Outlook
2 min. read
Updated on
Read our disclosure page to find out how can you help Windows Report sustain the editorial team Read more

Salesforce is a company that primarily focuses on customer relationship management (CRM) service.
It advertises itself as being able to transform your business by uniting marketing, sales, commerce, service, and IT to deliver the personalized experiences to your customers.
Salesforce is available in both a web-app version, but you can also download it as a desktop client.
Salesforce also features several add-ins, one of which is an add-in for Microsoft Outlook.
Up until very recently, getting Salesforce for Outlook used to be extremely easy.
All you needed to do is download the client from their website, and install it like your typical program.
However, now things are a bit more complicated, and you need to modify some settings both in the salesforce dashboard and in Microsoft Outlook.
So, we’ve compiled this neat guide will help you through the process step-by-step.
How do I install Salesforce for Outlook?
1. Prepare Salesforce for Outlook integration
- Log into your Salesforce environment
- Select the gear icon in the top-right corner of the screen
- Select Setup
- Locate the Quick Find bar, and type in Outlook
- Select Outlook Integration and Sync
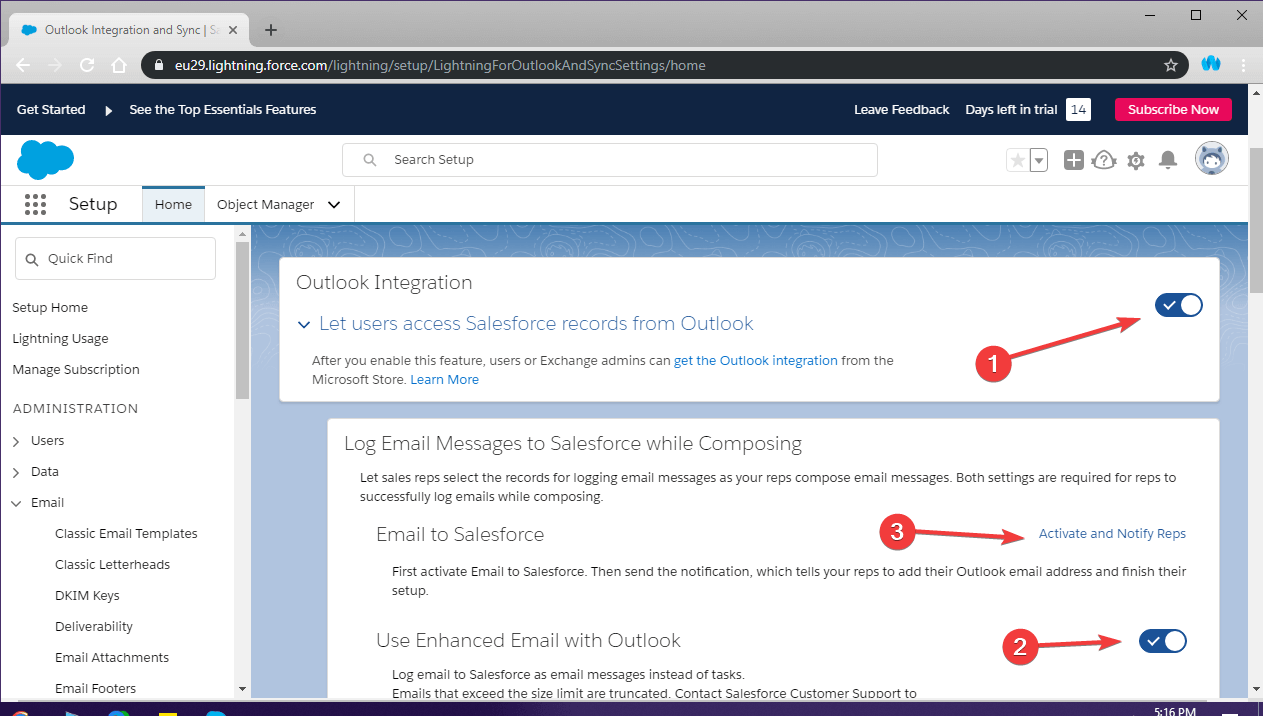
- Go to the Outlook Integration tab
- Click and activate the sliders next to:
- Let users access Salesforce records on Outlook
- Use Enhanced Email with Outlook
- Click on Activate and Notify reps next to Email to Salesforce
- Click on Edit
- Check the Active checkbox
- Select Save
2. Get the add-in through Microsoft Outlook’s add-in library
- Open Outlook
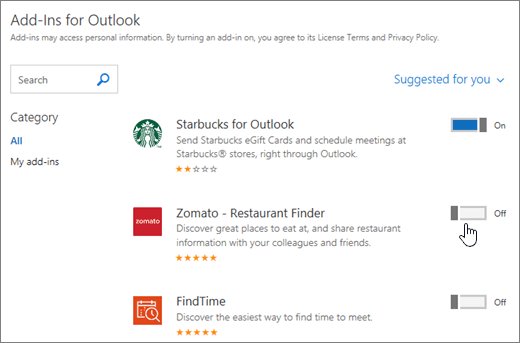
- Select Get Add-ins
- In the Search bar, type in Salesforce
- Choose the add-in labeled Boost Productivity by bringing the power of the Salesforce Platform to Outlook
- It will most likely be the first result of the search, anyway
- Select Add
- Log in to Salesforce
- Input your Salesforce credentials
- You will be prompted to confirm the connection between your Salesforce account and the email account
- Select Confirm
As soon as you see the Salesforce side-panel within Outlook, the process is complete.
You will now be able to automatically sync contacts, events, and tasks between Outlook and Salesforce.
What’s more importantly, you can see Salesforce contacts and leads related to your Outlook emails.
Do you have other questions regarding how to use Salesforce or any of its services? Let us know in the comments section below.
RELATED ARTICLES YOU SHOULD CHECK OUT:
- Why you should download Salesforce Chatter from the Windows Store
- Salesforce Mobile App For Windows 10

