DTS Audio Processing Settings Are Unavailable: How to Fix
First, run the inbuilt audio troubleshooter
4 min. read
Updated on
Read our disclosure page to find out how can you help Windows Report sustain the editorial team. Read more

If you are encountering the DTS Audio Processing settings are unavailable as audio service connection is lost error message upon launching DTS, this guide can help!
We will explore the expert-recommended solutions with step-by-step instructions to fix the issue right after discussing the causes of the same
How do I fix DTS audio processing settings are unavailable?
First, restart your PC to fix the basic software glitches. Also, ensure your PC is up to date and disable audio-enhancing software. With those out of the way, let’s move on to more advanced options:
1. Run the built-in audio troubleshooter
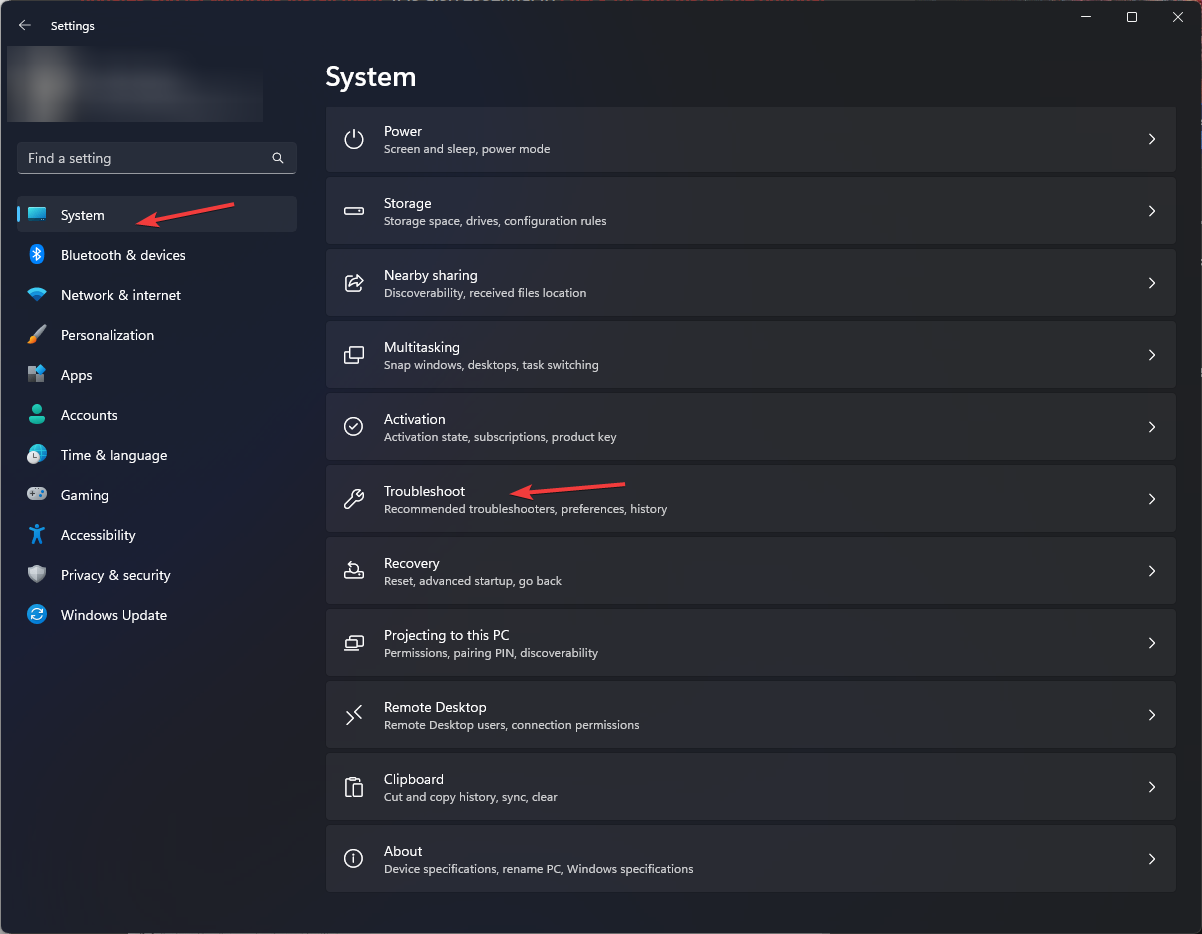
- Press Windows + I to open Settings.
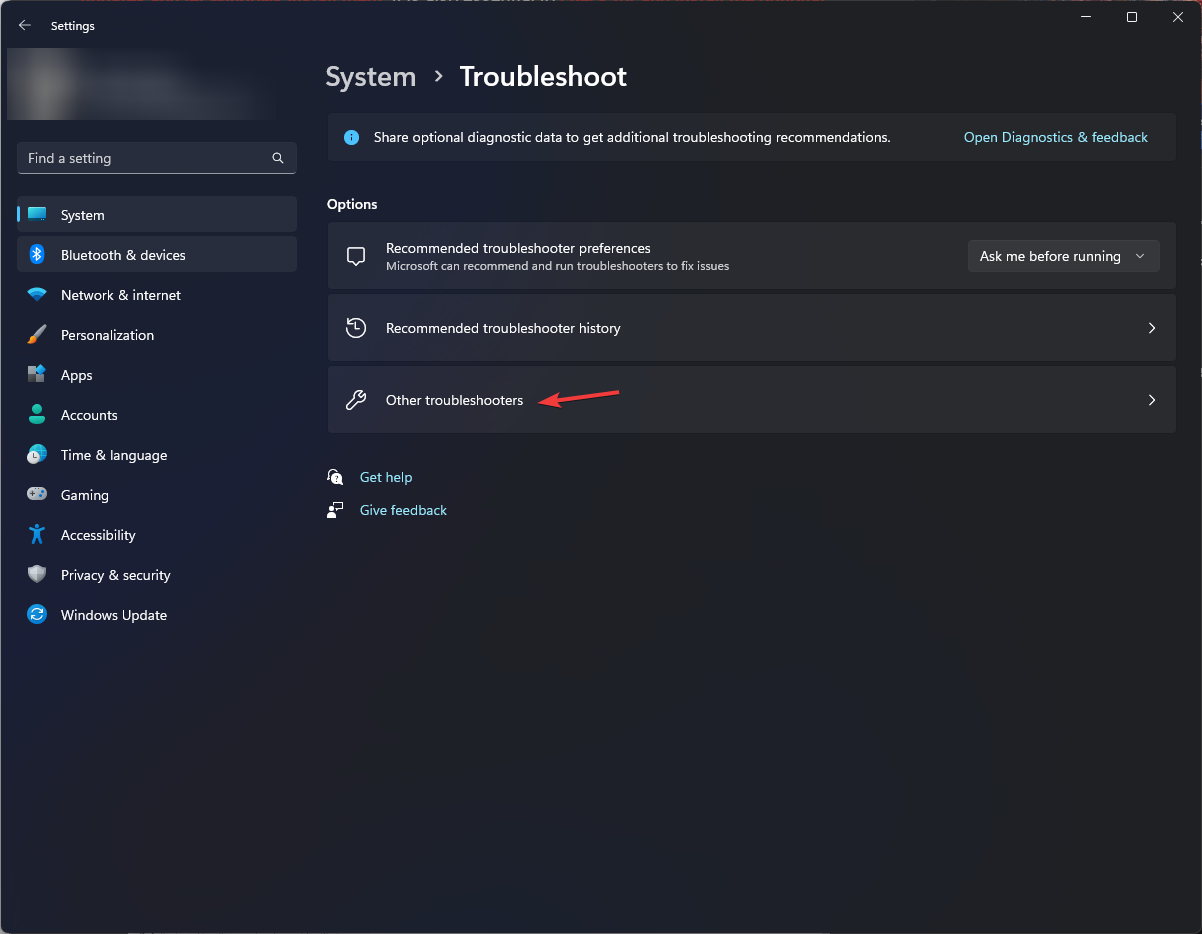
- Go to System, then click Troubleshoot.
- Click Other troubleshooters.
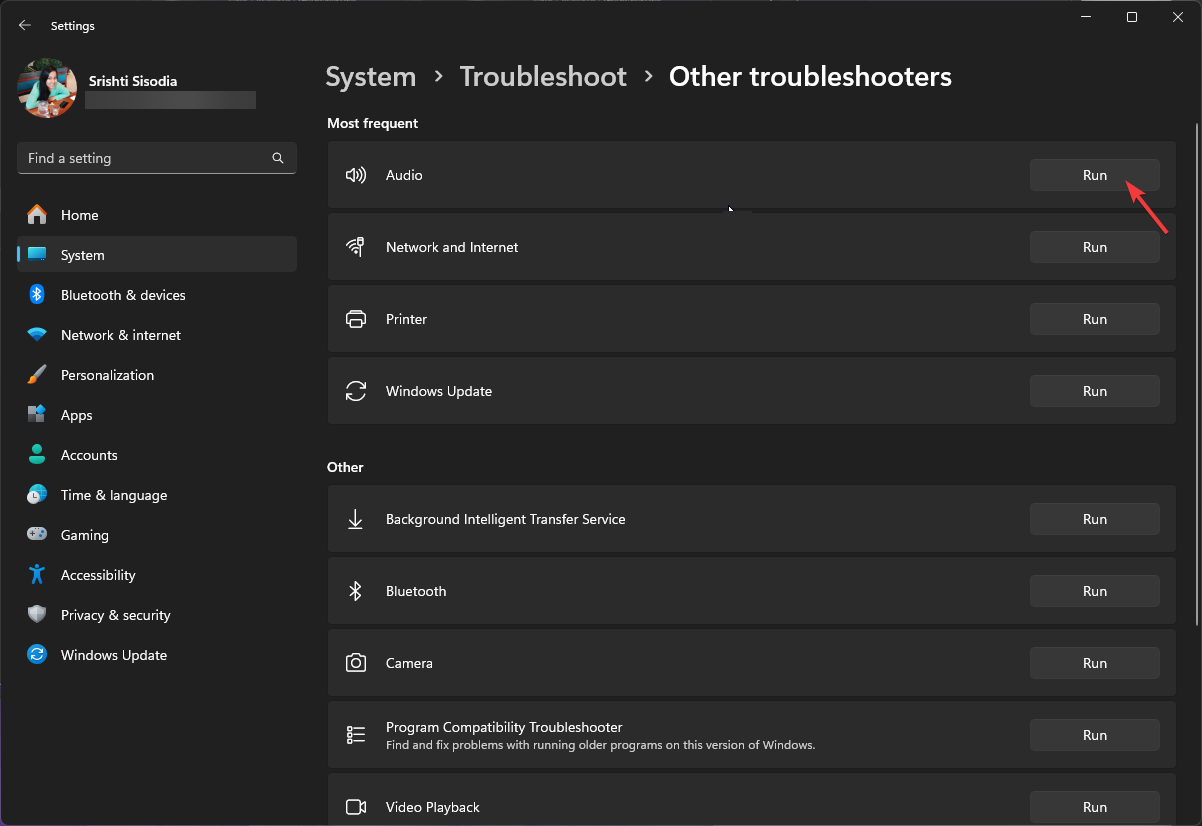
- Locate Audio and click Run.
- Follow the onscreen instructions to fix the audio devices related issues.
Running an audio troubleshooter can help you fix other common DTS issues like DTS:X Ultra not working issue; read this guide to learn in detail.
2. Restart the DtsApo4Service
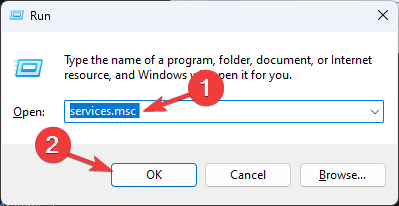
- Press Windows + R to open the Run dialog box.
- Type services.msc and click OK to open the Services app.
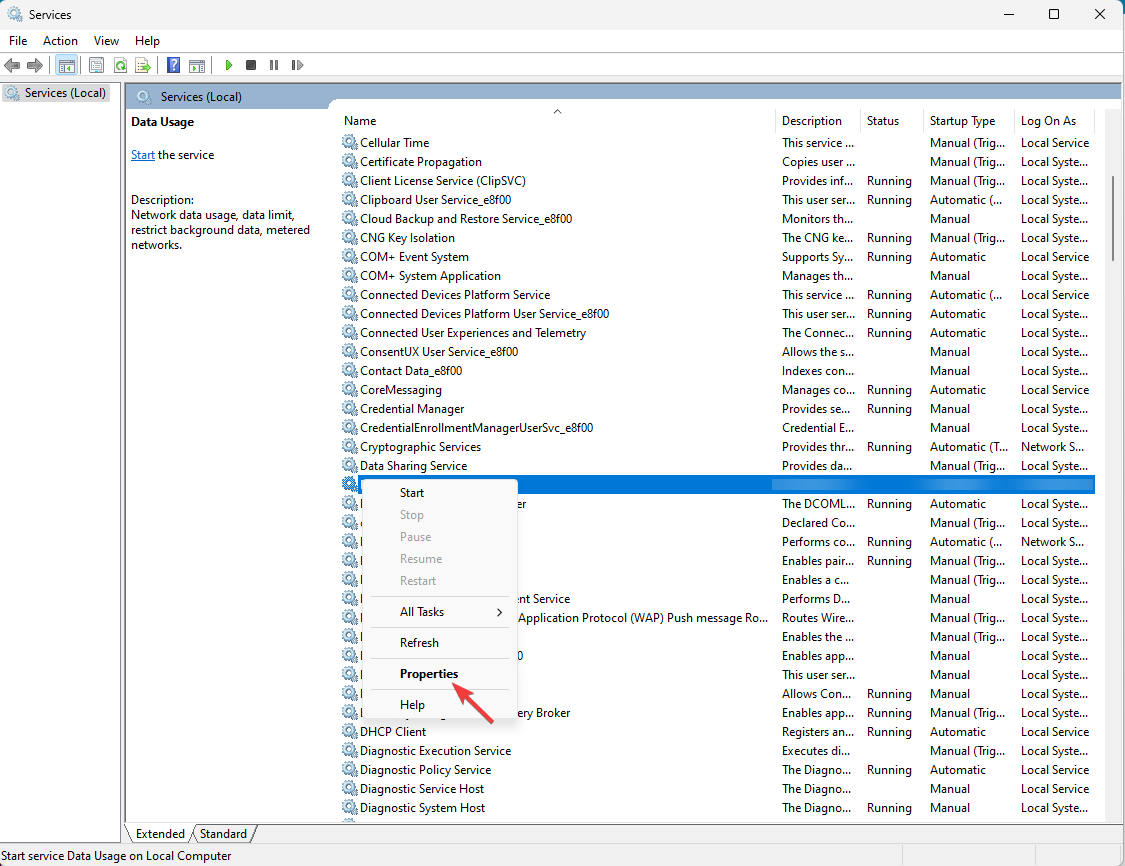
- Locate DtsApo4Service, right-click it, and select Properties from the context menu.
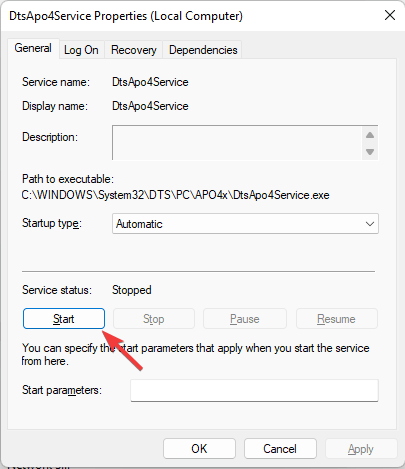
- Under Service status, select Start if the service is stopped.
- However, if it is already running, select Stop, then let the service stop and click Start to restart it.
- Click OK to close the window.
3. Re-enable the playback multi-streaming feature
- Press the Windows key, type dts, select DTS Audio Control, and click Open.
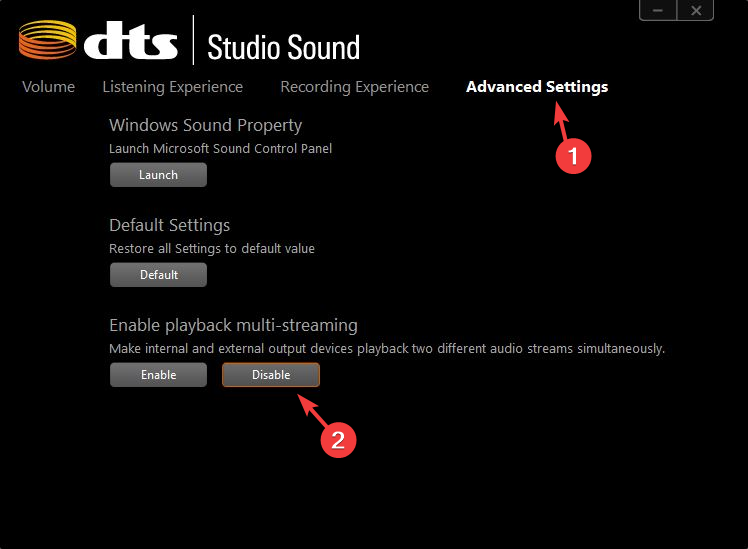
- Go to Advanced Settings.
- Locate Enable playback multi-streaming, and click the Disable button.
- Wait for a while, then click the Enable button to turn on the audio setting.
4. Run SFC & DISM scans
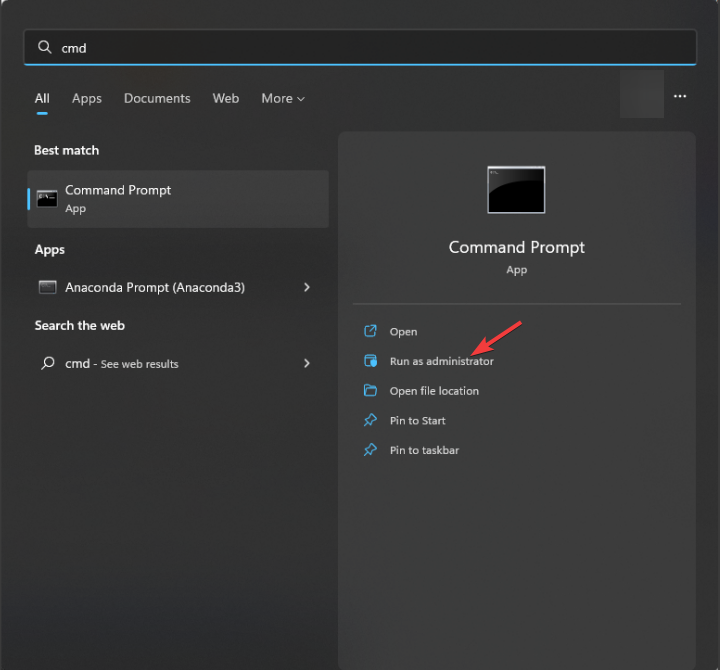
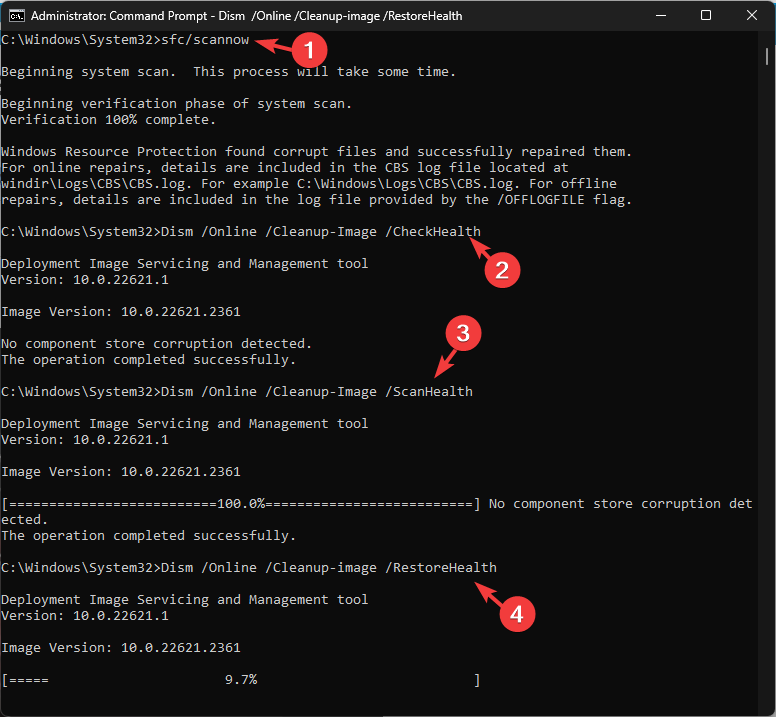
- Press the Windows key, type cmd, and click Run as administrator.
- Copy & paste the following commands to repair the system files integrity & restore Windows OS image files one by one and hit Enter after every command:
sfc/scannow
Dism /Online /Cleanup-Image /CheckHealth
Dism /Online /Cleanup-Image /ScanHealth
Dism /Online /Cleanup-image /RestoreHealth
- Once the commands have been executed successfully, restart your computer to let the changes take effect.
If you want to solve this issue within seconds and prevent other errors from occurring, we suggest a specialized repair tool.
5. Reinstall the DTS Audio processing app
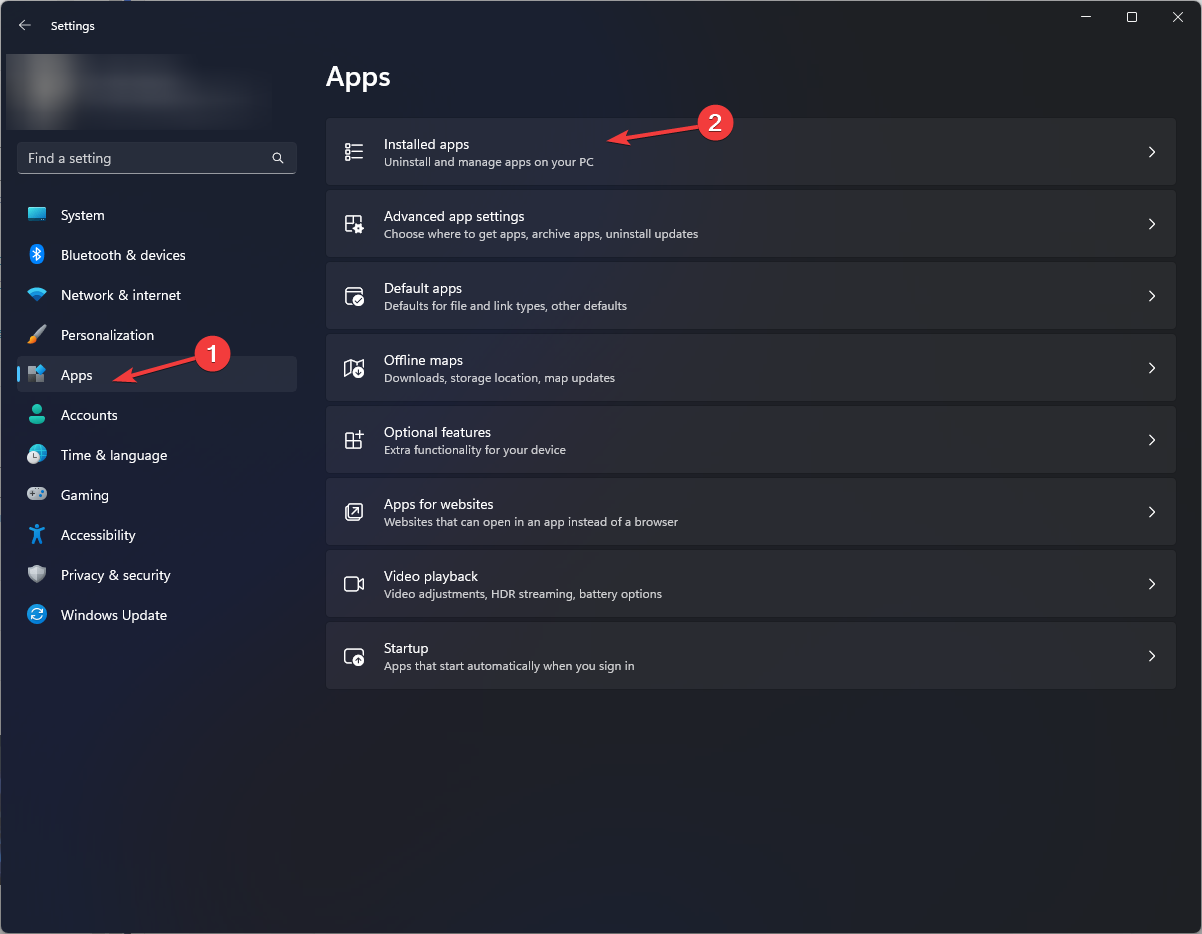
- Press Windows + I to open the Settings app.
- Go to Apps, then Installed apps.
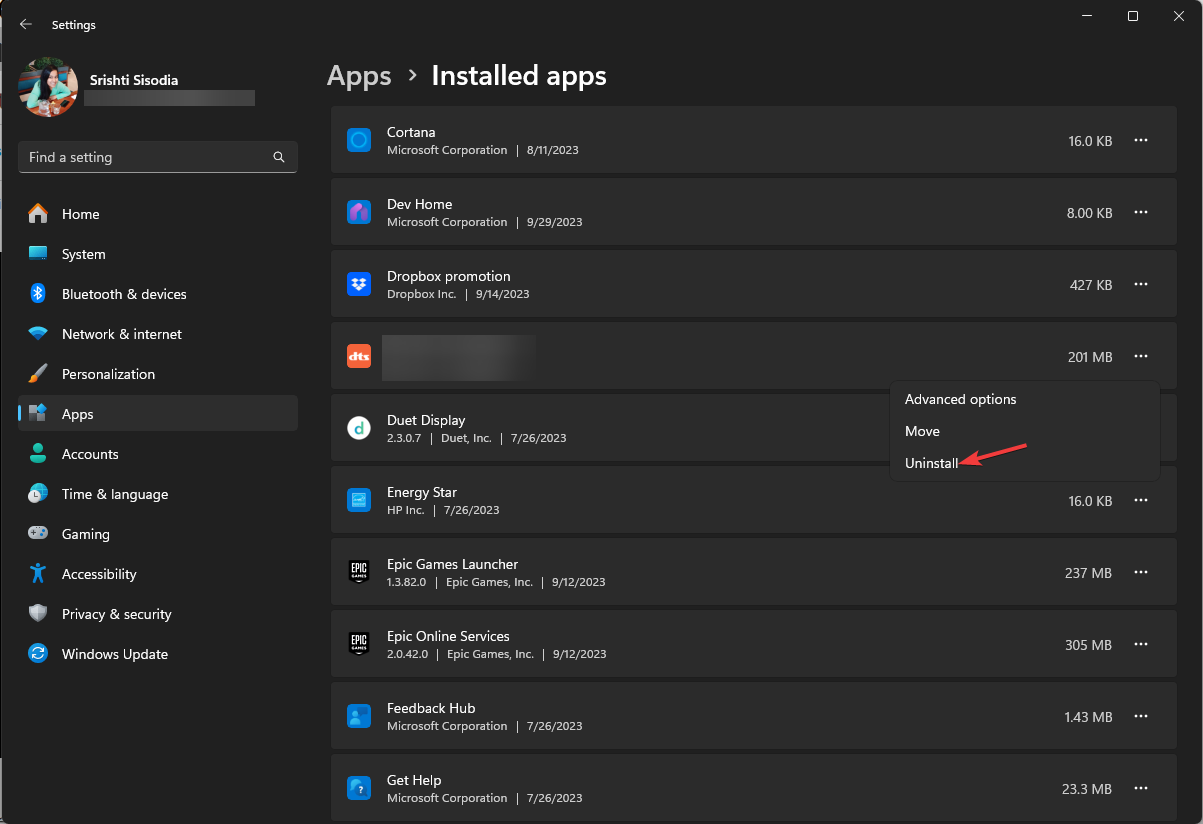
- Locate DTS Audio processing, click the three dots, and select Uninstall.
- Go to this DTS Audio processing app link and select Get in Store app.
- It will launch the Microsoft Store app and click Get to download & install the app.
6. Reinstall the audio driver
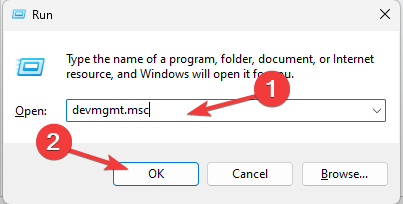
- Press Windows + R to open the Run dialog box.
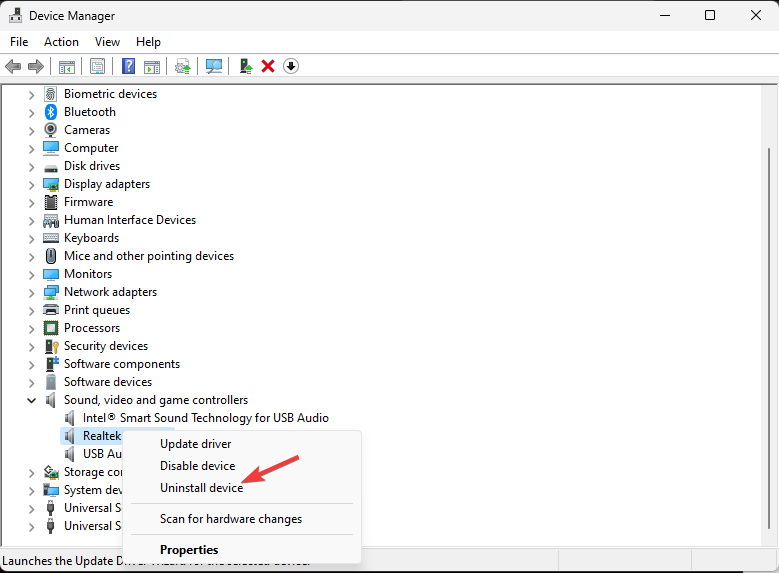
- Type devmgmt.msc and click OK to open the Device Manager.
- Click Sound, Video, and game controllers to expand the section.
- Right-click the audio driver and select Uninstall device from the context menu.
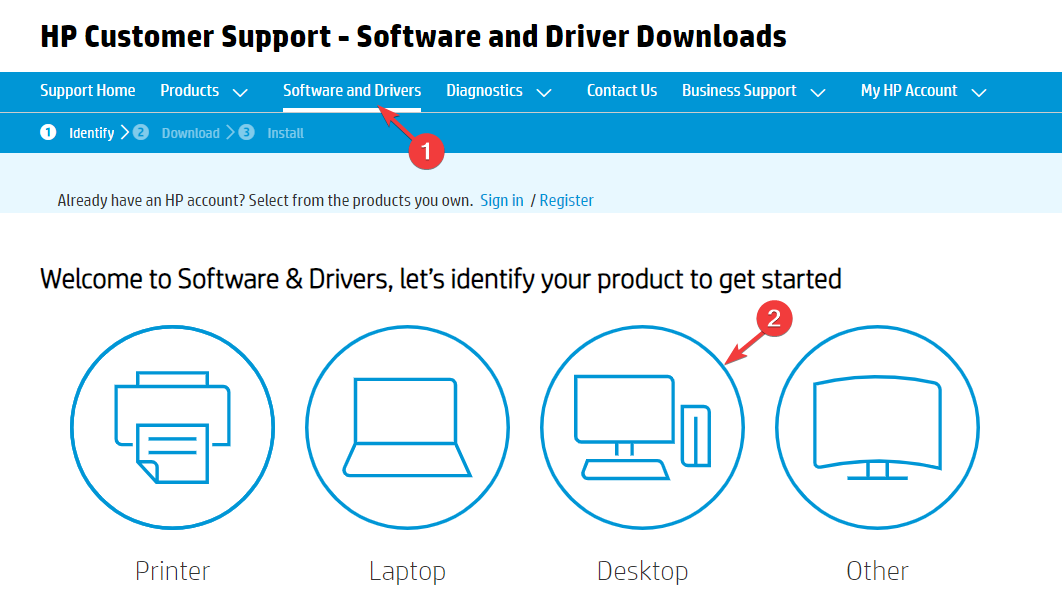
Next, let us visit the device manufacturer’s website to download & install the latest driver; here, we took an example of HP devices.
- Locate Software and Drivers, then select the device from the list.
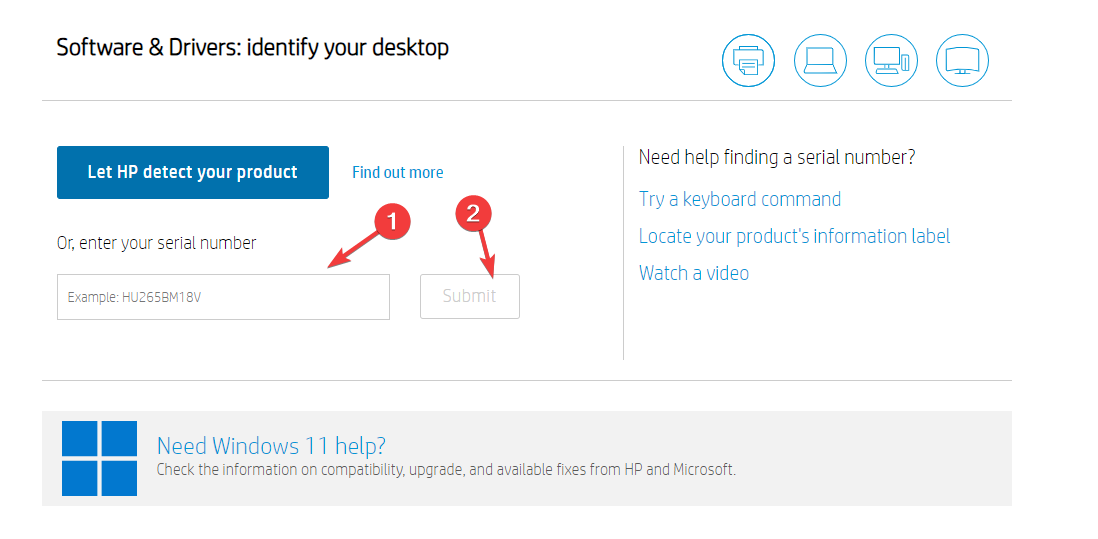
- Enter the device’s serial number and click Submit.
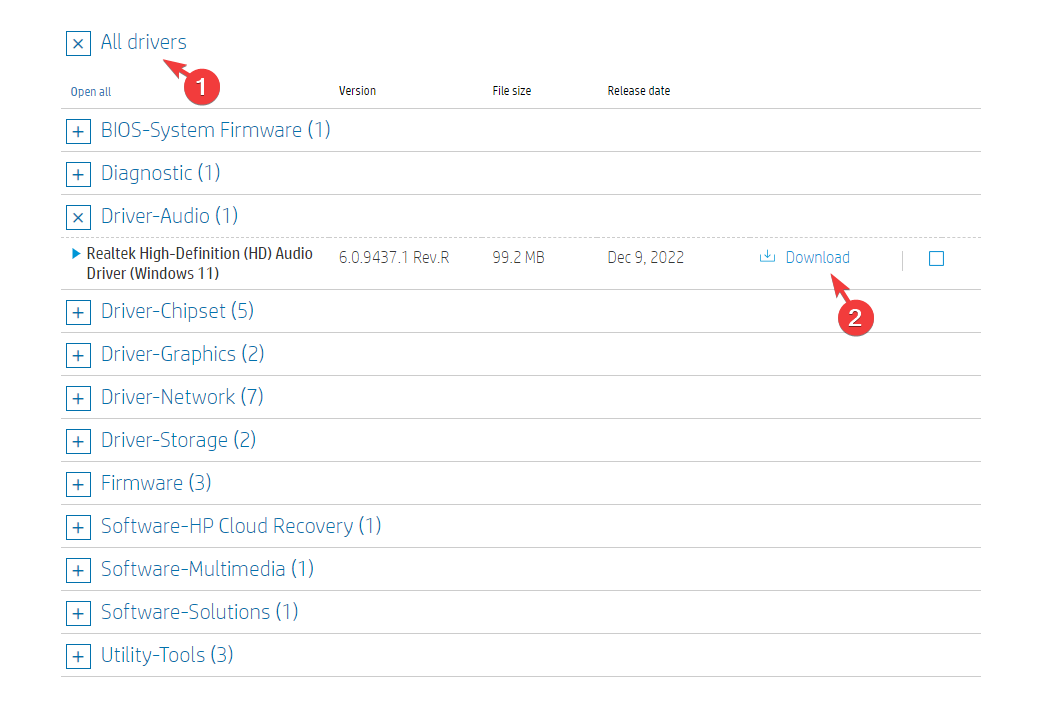
- Select the OS installed on your computer. Click All drivers and locate Driver-Audio; click Download to get the driver.
- Double-click the downloaded file and follow the on-screen instructions to complete the process.
If none of these solutions worked for you and there is no audio service connection, we suggest you contact the DTS support team or your device manufacturer’s support for further assistance.
Did we miss a solution that works for you? Don’t hesitate to mention it in the comments section below. We will happily add it to the list.

User forum
0 messages