Empty Recycle Bin Automatically: How to Do It
Remove files from Recycle Bin and free up space right away
Key notes
- The Recycle Bin stores files on Windows after these are deleted, but we often need to empty the recycle bin to free up disk space.
- Remember, there are manual methods to clear the Recycle Bin, but doing that automatically takes some load off.
- The easiest way is to create a task in Task Scheduler.

You probably know that when you delete something in Windows, it’s not deleted but rather moved to the Recycle Bin. That’s how it was in the initial versions of Windows, and that’s how it will be. But you can automatically empty the Recycle Bin in Windows 10.
Many ask, why do you need to empty the Recycle Bin automatically? The answer is to free up disk space on the PC. So, let’s find out how you can do that within minutes.
Does Recycle Bin delete files after 30 days?
No, the Recycle Bin does not delete files automatically unless it has been configured to do so. The feature to delete files in the Recycle Bin after 30 days is often why you find it empty.
But, you can always recover files deleted from the Recycle Bin, though the process is complex and should be avoided.
How do I make my Recycle Bin empty automatically?
1. Use the Task Scheduler
- Open Start, do a search for Task Scheduler, and press Enter.
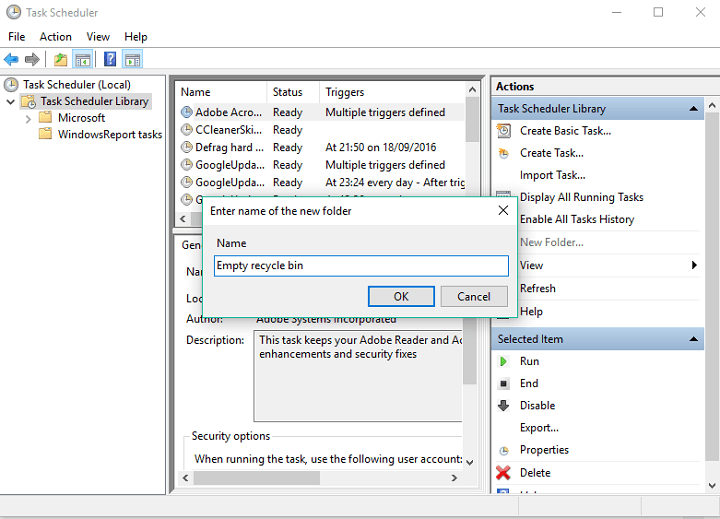
- Right-click Task Scheduler Library and select New Folder.
- Name the folder however you want, but it’s better to name it something descriptive for better management.
- Right-click the newly created folder and select Create task.
- On the General tab, enter a name for the task, such as Empty Windows Recycle Bin. Once again, you can name it however you want, but we assume it’s the most logical name in this case.
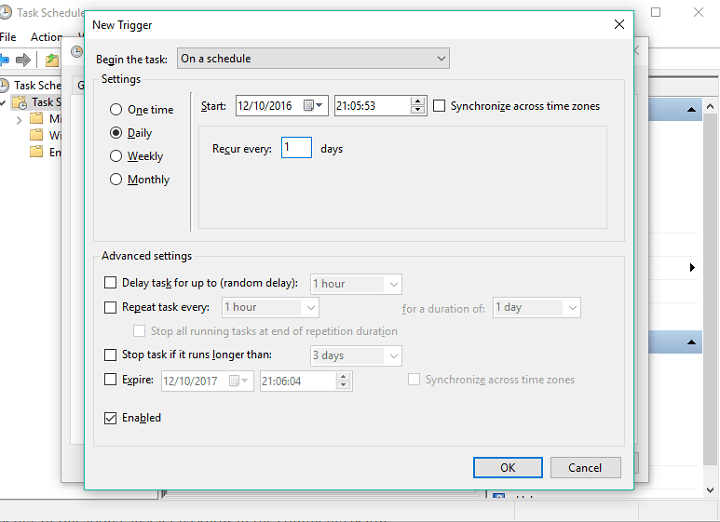
- On the Triggers tab, click New to create an action that will trigger the task.
- Here you can pick a proper trigger action of when you want the task to be performed. You can choose At log on, At startup, ON an event, but we’ll choose On a schedule, and set a specific time of emptying the Recycle Bin.
- Now, on the Actions tab, click New.
- Under Settings, on Programs/script enter cmd.exe.
- In Add arguments, type in the following and click OK:
/c "echo Y|PowerShell.exe -NoProfile -Command Clear-RecycleBin"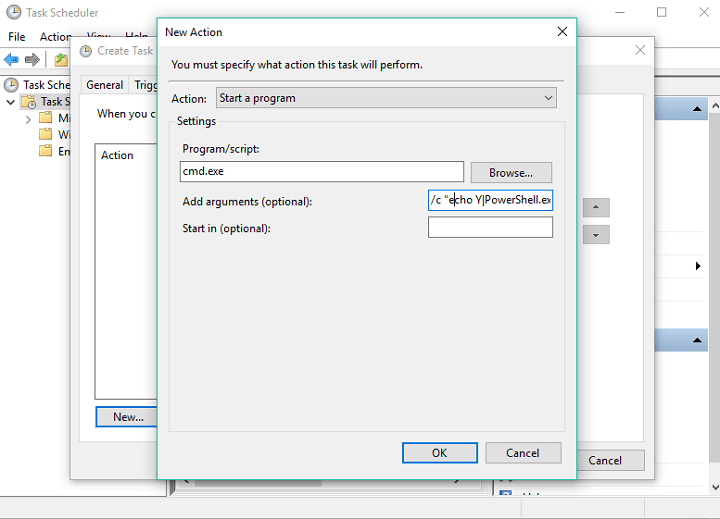
- Click OK to complete the task.
That’s it! After you have created a task, Windows 10 will automatically empty the Recycle Bin on the chosen schedule. Also, do check how to create more tasks in the Task Scheduler.
2. Delete files directly
- Right-click on the Recycle Bin icon, and select Properties.
- Select the Don’t move files to the Recycle Bin. Remove files immediately when deleted option and click OK.

If creating a task sounds like too much trouble, you can set Windows 10 not to move files to the Recycle Bin and automatically delete them. And for those of you who want to stop Recycle Bin from emptying automatically, check for these two aspects and revert them.
You can do so much more with the Recycle Bin, so don’t hesitate to check out what settings you can adjust to customize it even further. And if you are concerned about running low on disk space, check the best tools to clear files in Windows 10.
In case you have any comments or questions, let us know below.
Read our disclosure page to find out how can you help Windows Report sustain the editorial team. Read more


Improve this guide


User forum
0 messages