How to Enable or Disable DLNA on Windows 11
Use the Control Panel for seamless operation
5 min. read
Updated on
Read our disclosure page to find out how can you help Windows Report sustain the editorial team Read more
Key notes
- DLNA is a built-in feature in Windows 11 and can be set up in no time.
- You need a compatible device and a PC to stream content.
- Keep reading to discover the steps to turn on the Windows 11 DLNA client.
DLNA streaming has been out there for a long time and is considered one of the more user-friendly options. And given its compatibility with a wide array of devices and systems, you shouldn’t face issues connecting to one. So, let’s find out how to enable DLNA in Windows 11.
There are two ways for it, using the built-in Windows DLNA (Digital Living Network Alliance) feature or installing a third-party app. While the former works fine and delivers optimal experience, you may try an app for its enhanced feature set. We will list out both options.
What are the Benefits of Using DLNA?
DLNA allows media streaming across devices on the network, given the streaming device is compatible with the standard. Once set up on a smart TV or another system, you can view the list of devices and select the desired input. All of it within minutes!
Besides, DLNA allows media sharing. You can transfer music, pictures, and video files from the dedicated folder in a user account to another user on the same PC, a different computer, and a DLNA-compatible device.
How do I enable the DLNA server on Windows 11?
1. Using Control Panel
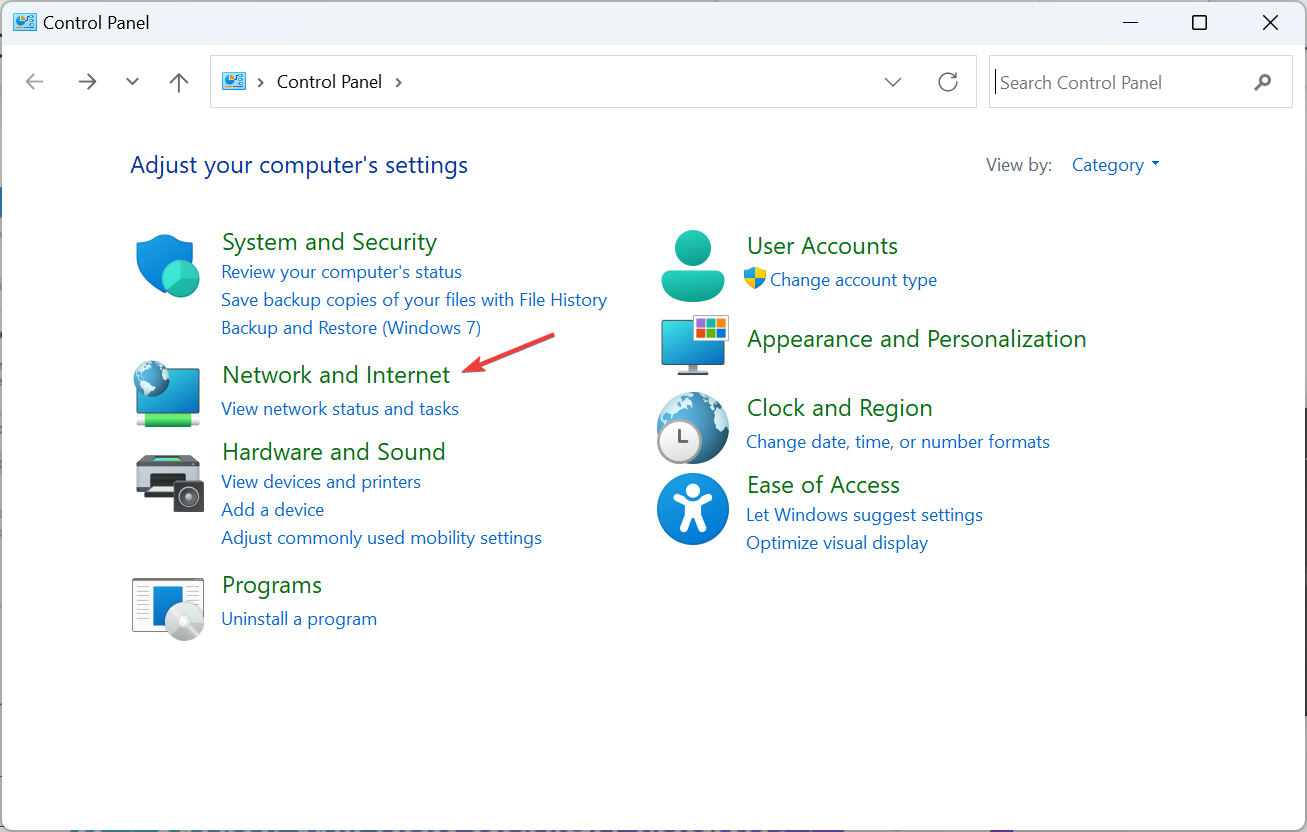
- Press Windows + S to open the Search menu, type Control Panel in the search bar, and click the relevant result.
- Click on Network & Internet.
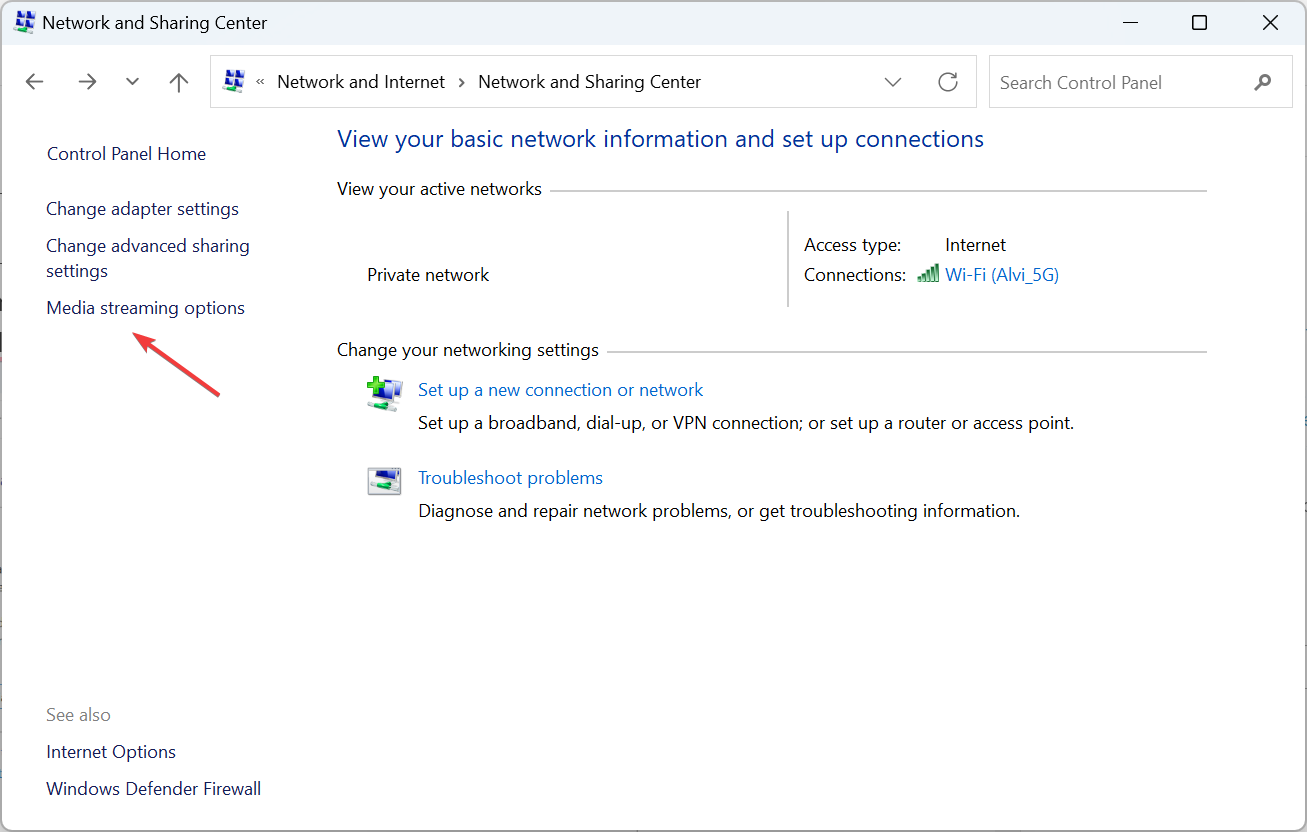
- Click Network and Sharing Center.
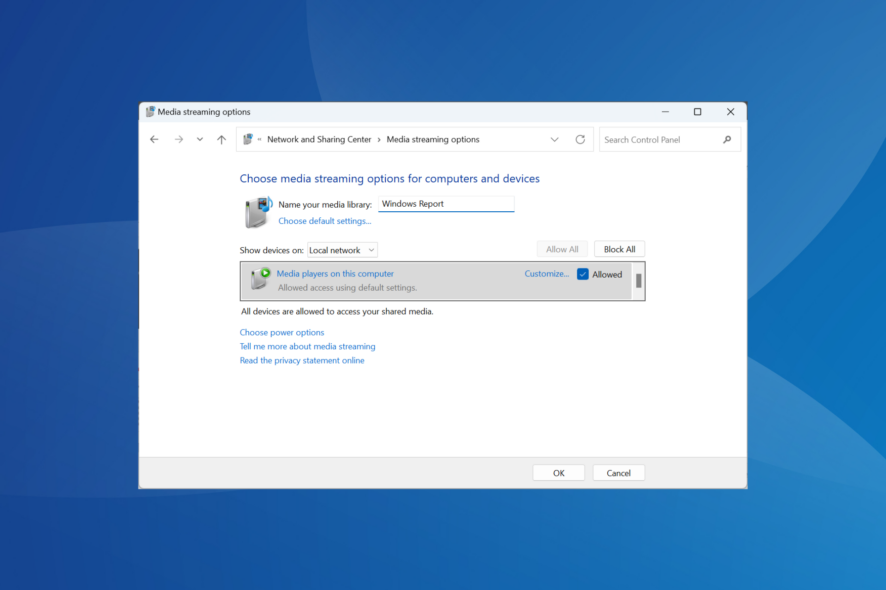
- Now, select Media streaming options from the navigation pane.
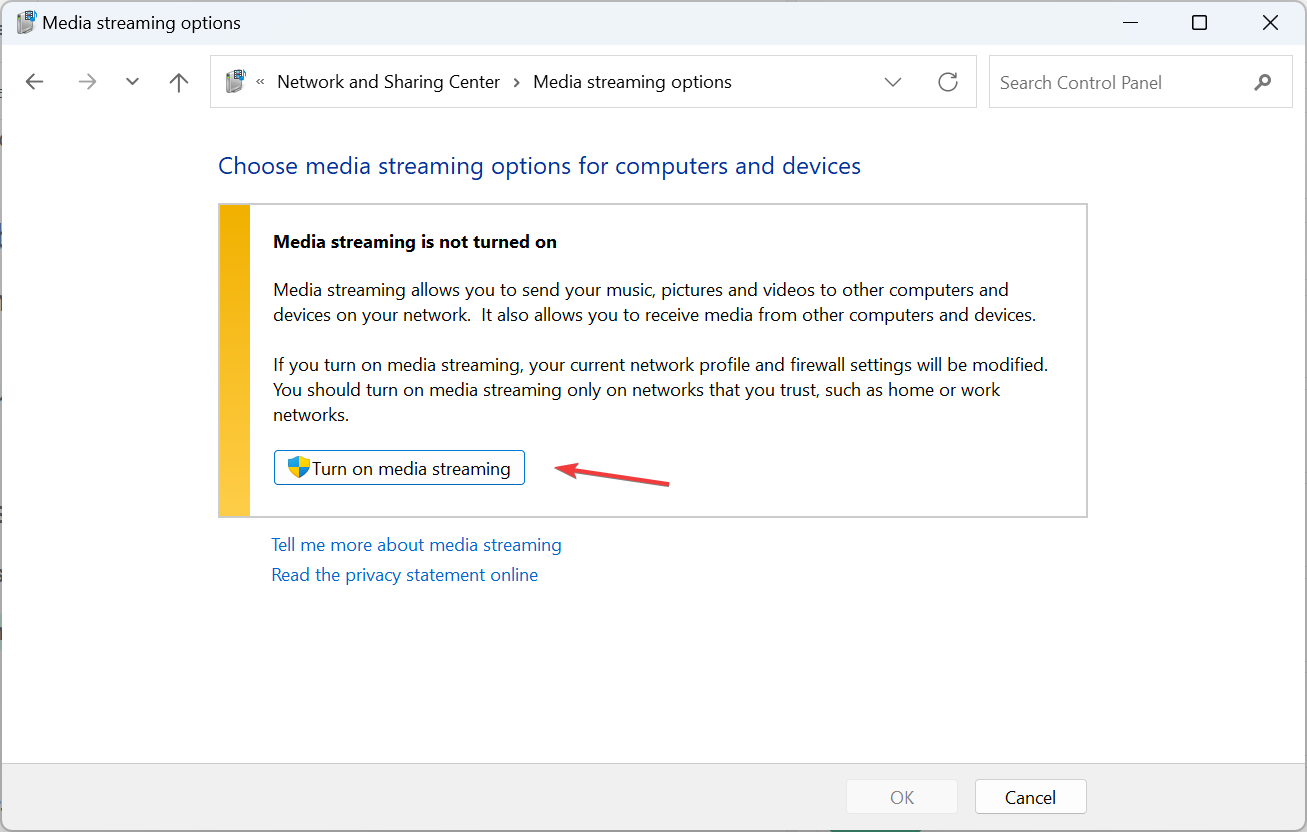
- Click on the Turn on media streaming button.
- After turning on media streaming in Windows 11, change the name of the DLNA media server in the text field if required.
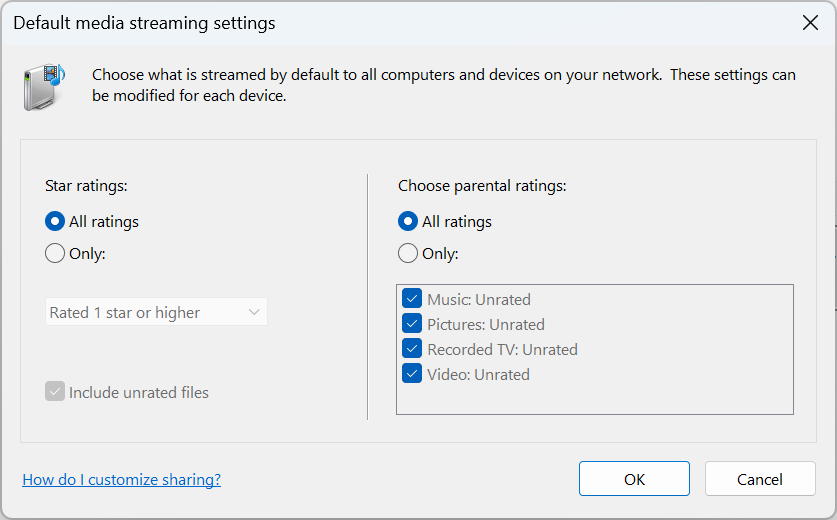
- Click on Choose default settings, and you can configure these for both the local and public network.
- Once done, click OK to save the changes.
That’s it! Though Windows doesn’t have the DLNA client with the same name, Media Streaming is identical and allows DLNA-compatible streaming across devices on the network.
To stream content from your Windows PC, move the concerned file to the current library folder. For instance, if it’s a picture, move it to the Pictures library, videos to the Videos library, and music files to the Music library. Once done, the files will be visible to connected devices.
Remember, you will also need a DLNA-compatible media player on another device, be it VLC, Roku Media Player, Xbox One Media Player, or PS4 Media Player.
2. Via Registry Editor
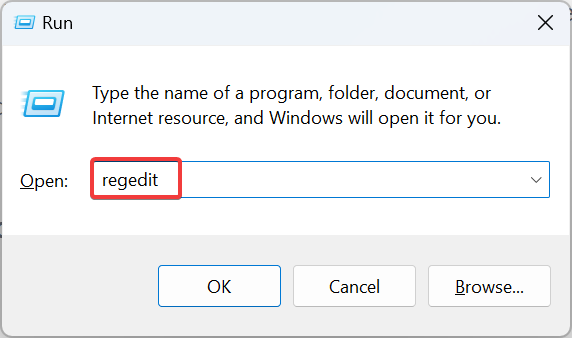
- Press Windows + R to open Run, type regedit in the text field, and hit Enter.
- Click Yes in the UAC prompt.
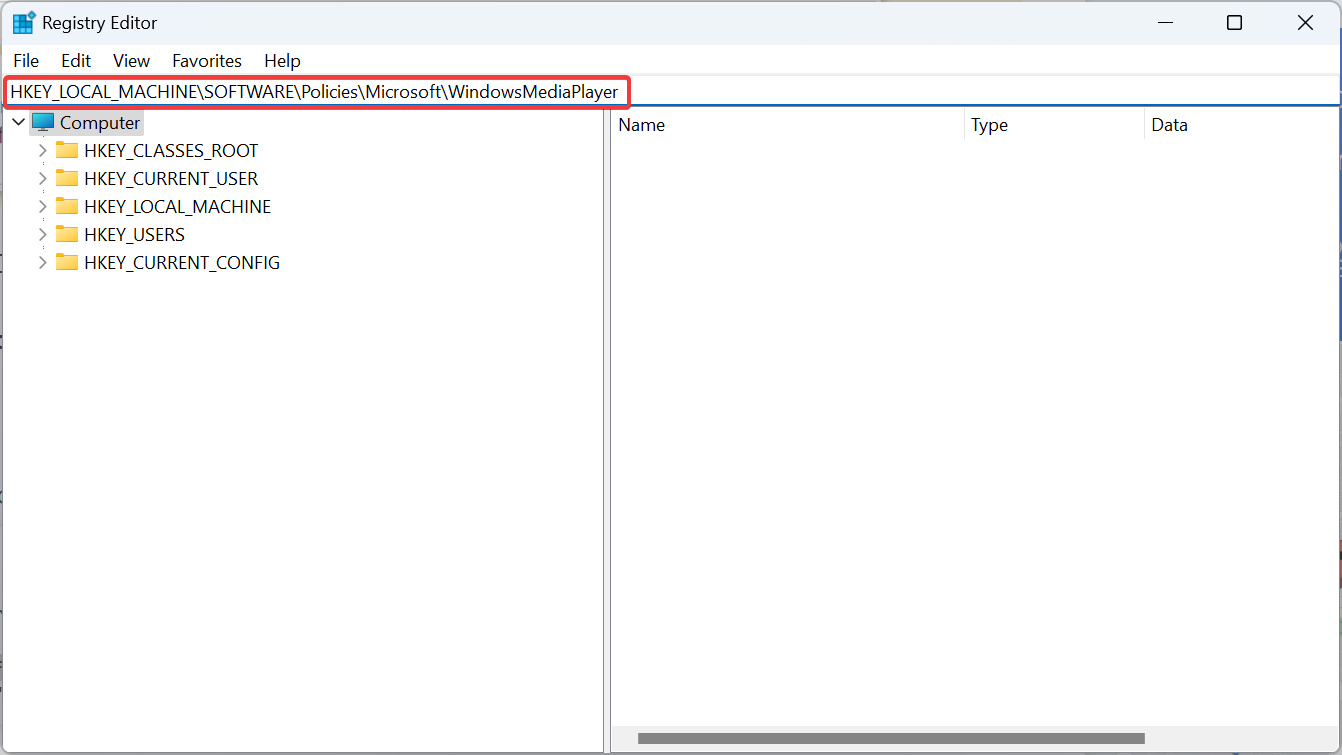
- Navigate the following path or paste it in the address bar and hit Enter:
HKEY_LOCAL_MACHINE\SOFTWARE\Policies\Microsoft\WindowsMediaPlayer - Locate the PreventMediaSharing DWORD, right-click on it, and select Modify. If you can’t find the path and/or key, create it.
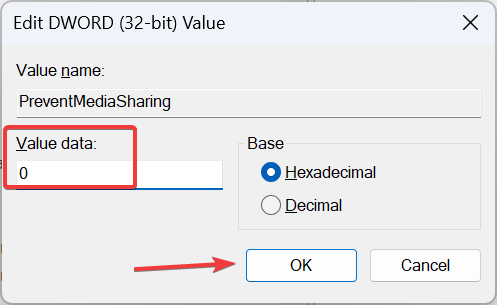
- Enter 0 under Value data and click OK to save the changes.
You can always turn on Media Streaming in Windows 11 via the Registry. The same changes can be made through the Local Group Policy Editor. In case you are using Windows 11 Home, first install gpedit.msc on the PC since the console is not included in the Home edition.
3. With a third-party app
If the built-in DLNA functionality doesn’t meet your requirements, go with a reliable third-party solution. Problems usually arise when a codec is not supported, and you can eliminate this through a player that employs real-time transcoding.
You can try Playon, Ampache, Plex Media Server, or Jellyfin, amongst others. All these are easy to use, and their official website lists the steps to get things running.
How do I turn off DLNA on Windows 11?
- Via Control Panel: To turn off media streaming in Windows 11, open the Control Panel > click on Network and Internet > click on Network and Sharing Center > select Media streaming options from the left pane > click the Block all button.
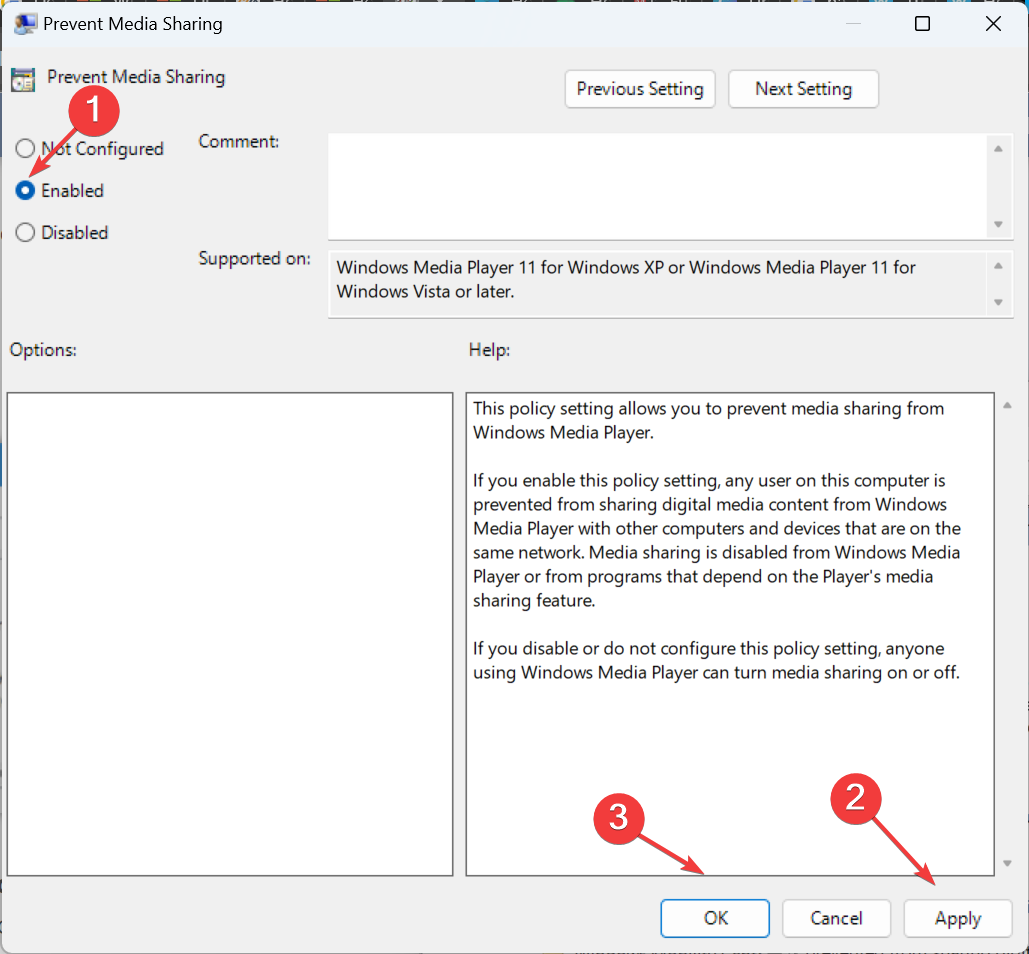
- Via Local Group Policy Editor: To disable DLNA in Windows 11, open Gpedit.msc > select Administrative Templates under Computer Configuration > choose Windows Components > double-click on Windows Media Player > open the Prevent Media Sharing policy on the right > choose Enabled > click Apply and OK to save the changes.
Troubleshooting common issues with DLNA on Windows 11
- File formats are not being recognized by the server: Make sure the file is in a supported format. If not, convert it or use a streaming service compatible with the file type.
- A pop-up window appears when trying to stream files: Make sure the personal folder you are streaming files from is added to the relevant library. You could add folders to libraries via File Explorer or the Windows Media Player.
- Default settings do not allow for file sharing: Re-enable DLNA media streaming or enable Network Discovery in Advanced sharing settings.
If you are still facing problems, find out how to fix things when Media Streaming is not working in Windows.
You now have a fair understanding of DLNA, how to enable it, and the streaming capabilities in Windows 11. Besides, a server software will prove useful in a few cases, but that shouldn’t be your primary approach.
And if you are still running the previous iteration, learn how to set up a DLNA server on Windows 10. The steps are nearly identical to Windows 11.
For any queries or to share your experience with DLNA, drop a comment below.

