How to Configure a DLNA Server on Windows 10
Apply the steps from our quick procedure right away

Windows 10 packs a dozen premium entertainment tools, but only a few people use them because most people don’t even know they exist. Did you know you can quickly turn your Windows 10 PC into a cool DLNA server? You can, and we will show you how to do it.
You don’t need to download and install third-party applications to access this service. Windows 10 does have an integrated DLNA server that you can enable to access this service.
Many streaming devices you plug into your TV, including PlayStation 4, X-Box One, X-Box-360, and ROKU, offer DLNA streaming support. They can stream music and video files over the network from your PC, provided you have a DLNA server set.
Currently, the internet is crammed with software that can do precisely that, but in this guide, we are only going to touch on the built-in DLNA feature in Windows 10.
What is DLNA?
If you have a smartphone or an HDTV, you probably have heard of DLNA or read about it in the manual. If you didn’t get the jargon, fear not; we will break it down for you in the simplest way possible. DLNA, or the Digital Living Network Alliance, is a way for multimedia devices to communicate on the same network. DLNA-compliant devices can stream music and share videos and photos with each other.
DLNA-compatible smartphones can also be used to mirror media content from the handset to an HDTV that is also DLNA-enabled. So, if you have some cool videos on your smartphone that are DLNA enabled and you would like to view them on the big screen, you can either use the DLNA or Wi-Fi Direct feature on your device to do this. When used this way, your smartphone acts as a remote control.
How can I Enable DLNA in Windows 10?
- Open the control panel and search for ‘Media’. You can use the search option or fire up Cortana search for the control panel, and then search for Media. At the top, you will see the ‘Network and Sharing center’ option.

- Click the ‘Media streaming options’ link that is right below the Network and Sharing Center. After that, click ‘Turn on media streaming’ to activate the media streaming server.
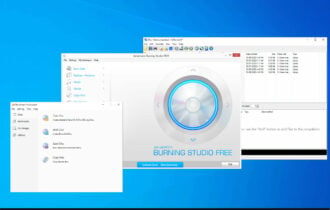
 Customize the streaming service
Although the above control panel does not mention the term DLNA, the media streaming feature in Windows is a DLNA-compliant media server. From here, I may be unable to show you how to add media because I don’t know what type of DLNA-compliant streaming device you have.
However, the entire process is a no-brainer thing, as the Window will show you the connected devices once you turn on the media streaming feature on your DLNA-enabled streaming box.
Once your media streaming device has been connected to your Windows 10 computer, you can launch Windows Media Play to see the available streaming files. The process should not take you more than 5 minutes if you know your media streaming devices in and out.
Remember, you can similarly enable DLNA in Windows 11.
Was the guide helpful? Let us hear about your experience with the inbuilt DLNA server on Windows 10 in the comments section below.
Read our disclosure page to find out how can you help Windows Report sustain the editorial team. Read more


Improve this guide

User forum
3 messages