Setting Mic in Windows 11: How to Activate, Permissions & More
Using Device Manager often gets things on the right track

Today we’ll explain all you need to know about setting up your microphone on your Windows 11 PC. Because of security concerns, the mic may not always be enabled by default and won’t work during calls.
You might need to enable it by making some changes to your PC. Here’s what we suggest:
How do I enable my microphone on Windows 11?
1. Change Privacy Settings to give microphone permissions
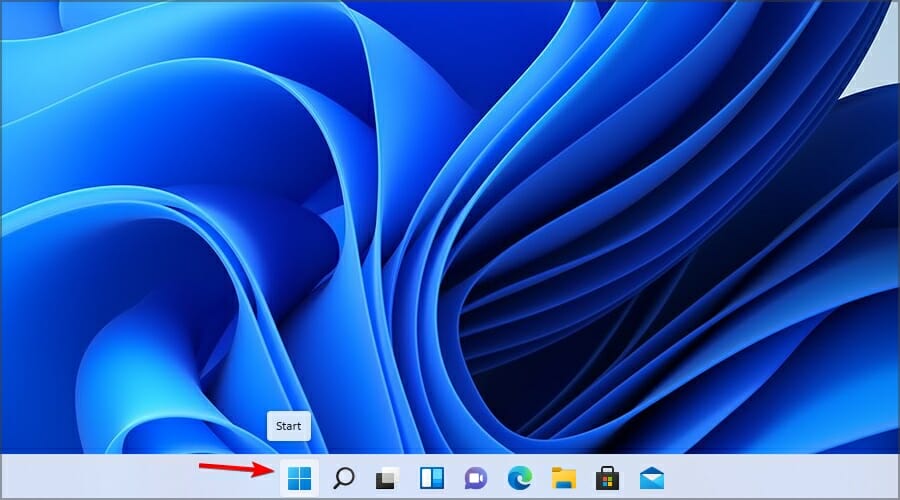
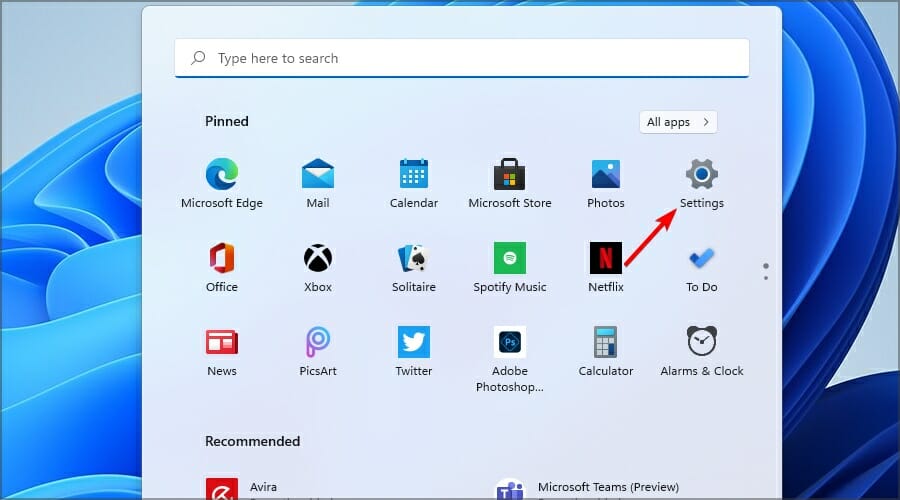
- Click the Start button and select Settings from the menu.

- Select Privacy & security from the left pane. In the right pane, select Microphone.

- Make sure that Microphone access is enabled.

The first thing to do to be able to enable your microphone is to change the privacy settings to access the microphone on Windows 11. This will make it accessible on other apps.
2. Change Sound Settings
- Click the Start button.
- Select Settings from the list of apps.
- In the left pane, make sure that the System is selected in the right pane, and select Sound.

- Select your microphone from the Input section.

- Now click the Allow button in the Audio section to enable your microphone.

Keep in mind that if you disable your microphone from this section, this is the only way to enable it properly once again.
3. Use Device Manager
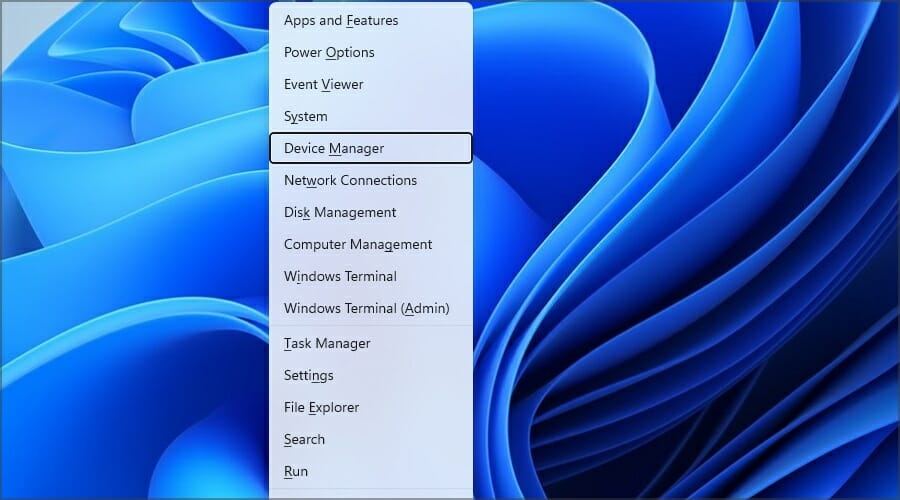
- Press Windows Key + X and choose Device Manager from the list.
- Expand the Audio inputs and outputs section. Locate your disabled microphone, right-click it and choose Enable device from the menu.

Using the Device Manager is one of the simplest ways to enable your microphone in Windows 11, but depending on your settings, it doesn’t always work.
To disable the microphone in Windows 11, follow the same steps, but choose Disable device instead of Enable.
While in Device Manager, we advise you to update your drivers. By doing so, you’ll ensure that your hardware is working correctly. If you want to do so for all your drivers quickly, we suggest using specialized driver updating software.
Why can’t I enable my microphone?
There are numerous factors to consider if you can’t enable your laptop microphone in Windows 11. Below are some of the prominent ones:
- Microphone disabled in Device Manager: If you can’t configure or enable your headset microphone to work on Windows 11, it might be because it is disabled in Device Manager. This can sometimes happen to new devices. You can easily get past this by enabling the device.
- Wrong privacy setting: In some cases, if you have not granted access to your microphone, you might not be able to turn on the microphone in your apps. The way out here is to change the privacy setting
That’s about it for this guide. To deal with microphone issues, the first thing that you should do is to check if your microphone is detected by the PC using some advanced microphone test tools.
Alternatively, check out our post that will give a detailed response to the how do I fix my Discord microphone in Windows 11 question. Few users reported that their microphone is not showing up in Device Manager, but we have a guide that can help with that.
Are you having any issues with your input device? Let us know in the comments section below.
Read our disclosure page to find out how can you help Windows Report sustain the editorial team. Read more


Improve this guide


User forum
1 messages