Epson Workforce ES 400 II Not Printing: How to Fix it
Clear the print queue for seamless printing
3 min. read
Published on
Read our disclosure page to find out how can you help Windows Report sustain the editorial team. Read more

The Epson Workforce ES II 400 is typically a scanner, but you can also print documents from your smartphone.
When your Epson printer is not printing, it could be an issue with the connection, outdated drivers, or low ink.
What can I do if my Epson Workforce es 400 ii is not printing?
1. Check your printer connection
- If it’s a wireless printer, check that the Internet runs OK. Then, disconnect and reconnect the printer to the network, if necessary.
- Also, make sure that the printer is connected to the same network as your device.
- For a USB-connected printer, check that the cables are seated correctly into the ports. Then, change the USB port to see if there’s any change. For a USB-connected printer, check that the cables are seated correctly into the ports. Then, change the USB port to see if there’s any change.
2. Download the drivers from the manufacturer’s website
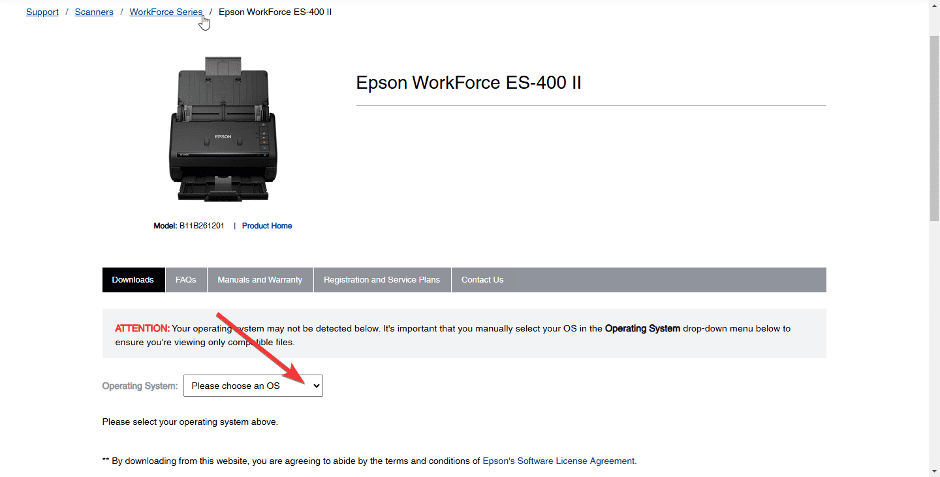
- Navigate to your browser and go to Epson’s official driver download page.
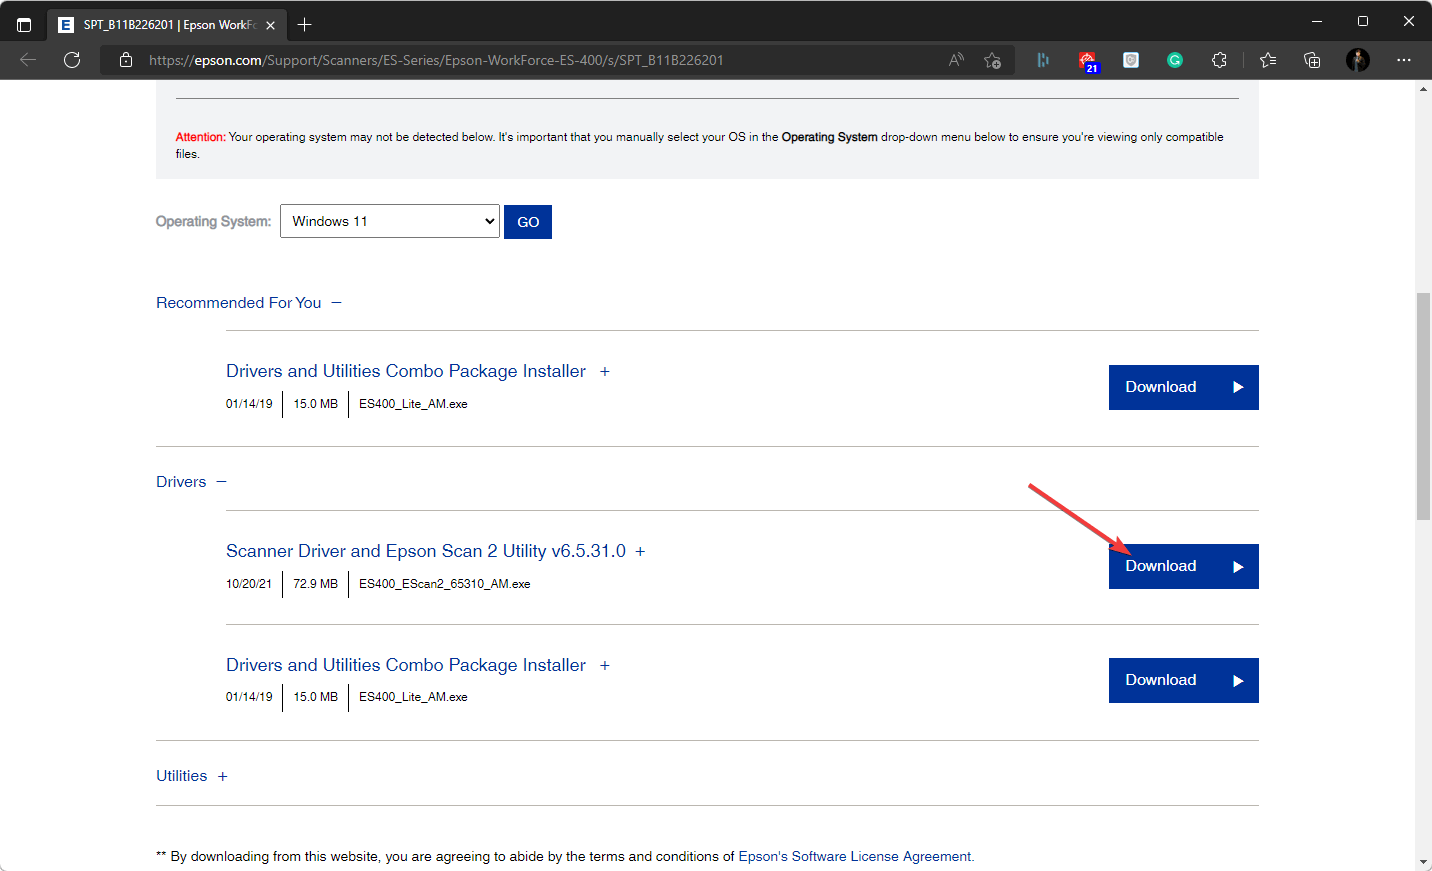
- Select your OS from the Operating System list. In most cases, it detects your Windows version but it can be incorrect so make sure you manually select for Windows 11.
- Now, download the driver.
- Open the installer file and install it on your computer.
- Restart your PC.
If the Epson printer driver download fails, check out our article on how to troubleshoot it.
3. Check ink cartridges
- Press the Windows key and click the Settings app.
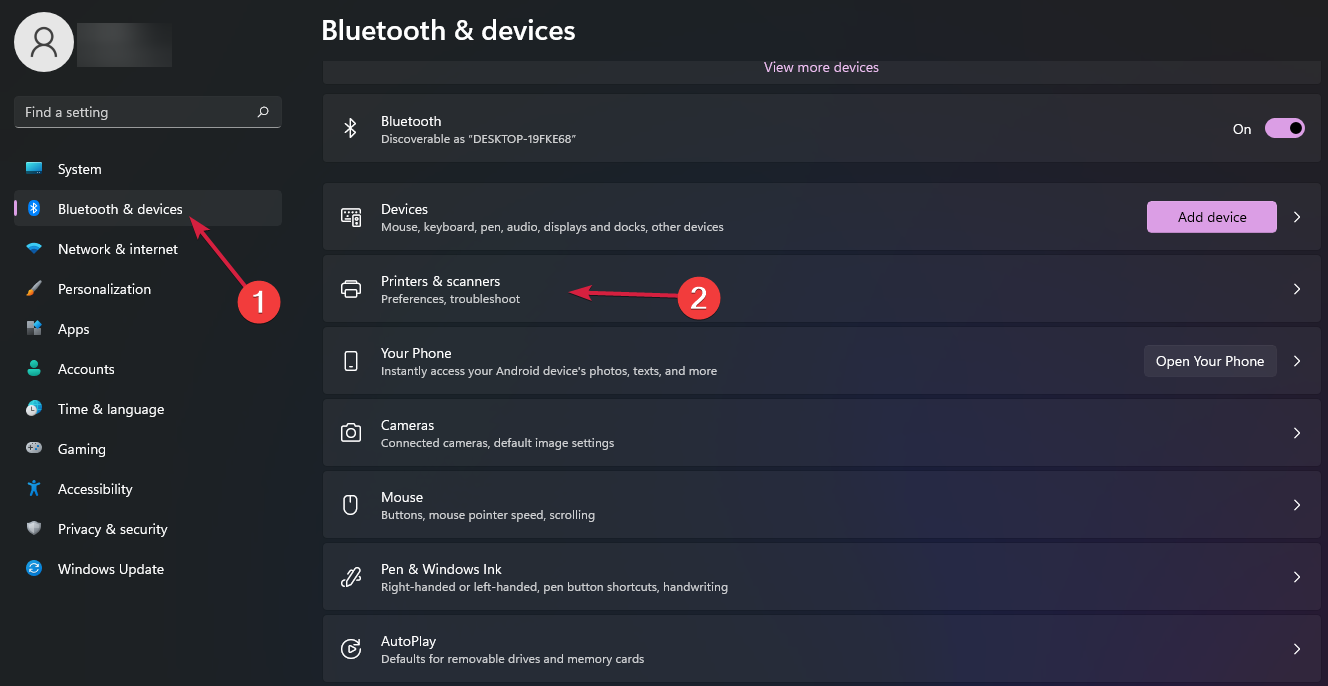
- Click on Bluetooth & devices on the left pane, then select Printers & scanners from the right.
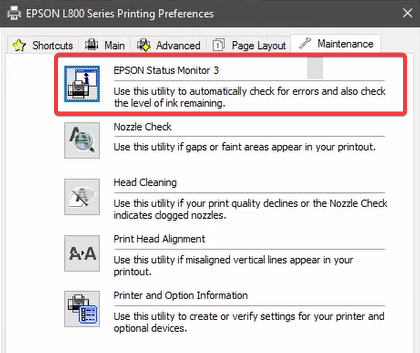
- Right-click on your Epson printer and select Printing Preferences.
- In the Maintenance tab, click on Epson Status Monitor.
4. Cancel all print jobs
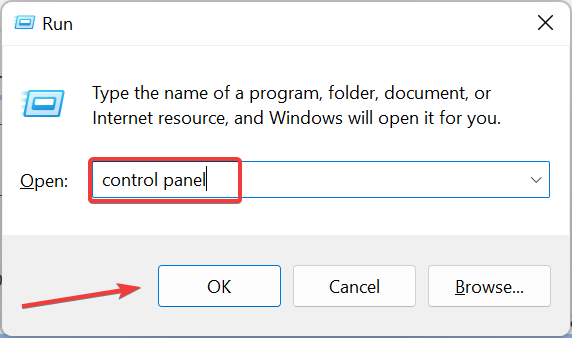
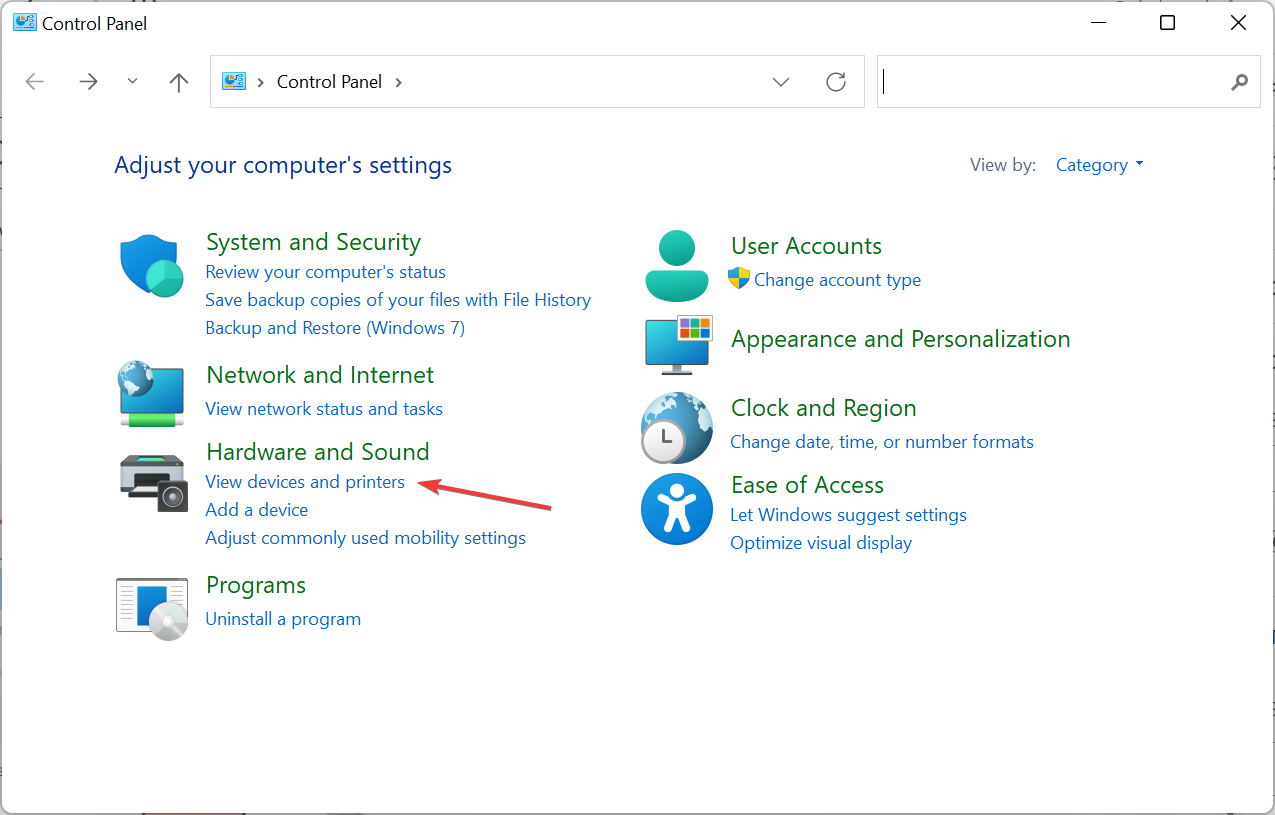
- Press Windows + R to open Run, type Control Panel, and click OK or hit Enter.
- Click on View devices and printers under Hardware and Sound.
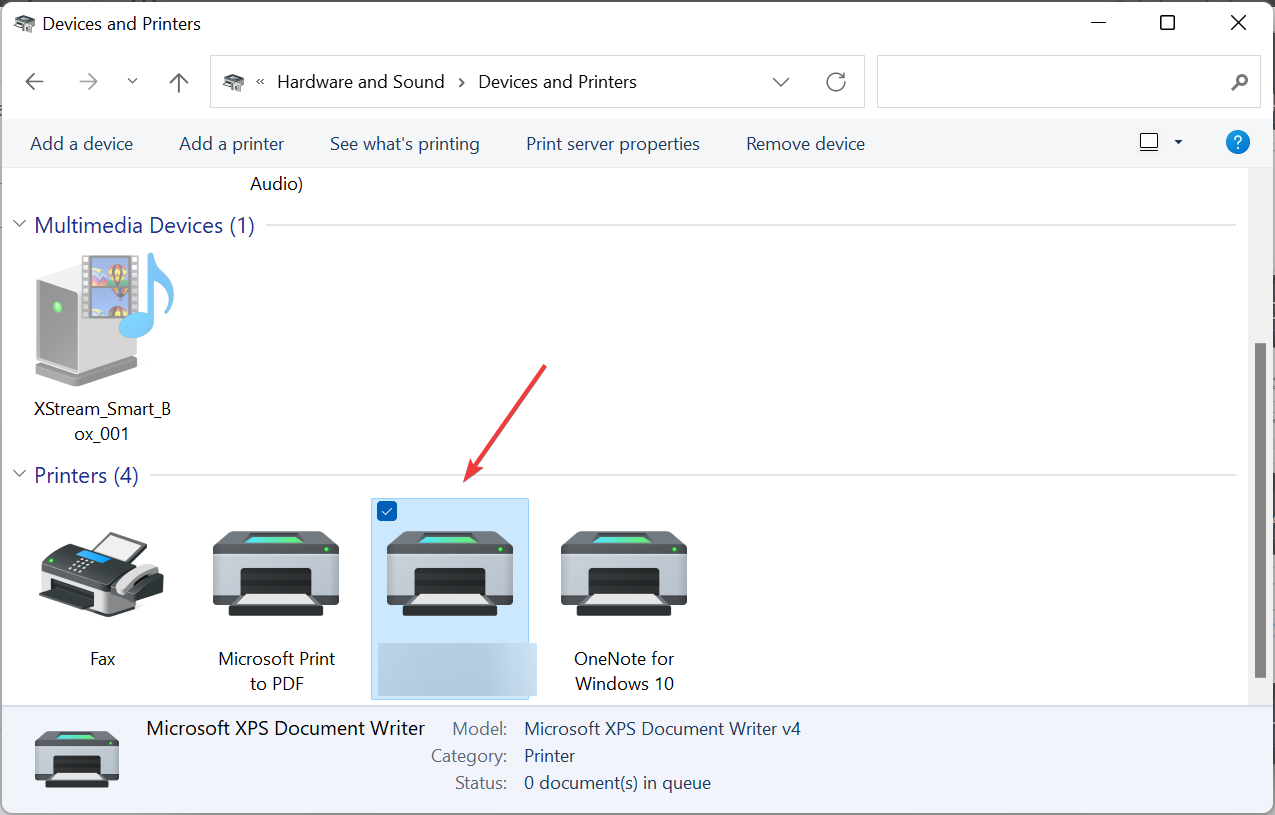
- Now double-click on your Epson Workforce printer.
- Cancel all the print jobs assigned to the printer then try printing again.
Sometimes, unfinished jobs can be left in the print queue, which prevents you from printing further until they are cleared.
5. Remove and re-add the Epson Workforce ES II 400 printer
5.1 Remove printer
- Press the Windows key + I keyboard shortcut to open Settings.
- Click Bluetooth & devices on the left of Settings then select Printers & Scanners to view your added printers.
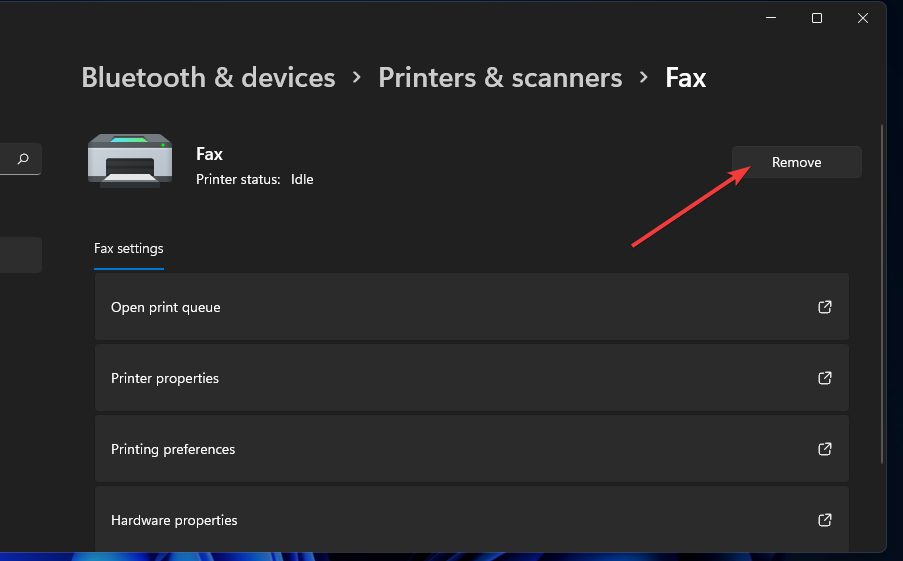
- Double-click the added printer you want to remove to open settings, then press the Remove button.
- Click Yes to confirm you want to remove the printer.
5.2 Rea-dd the printer
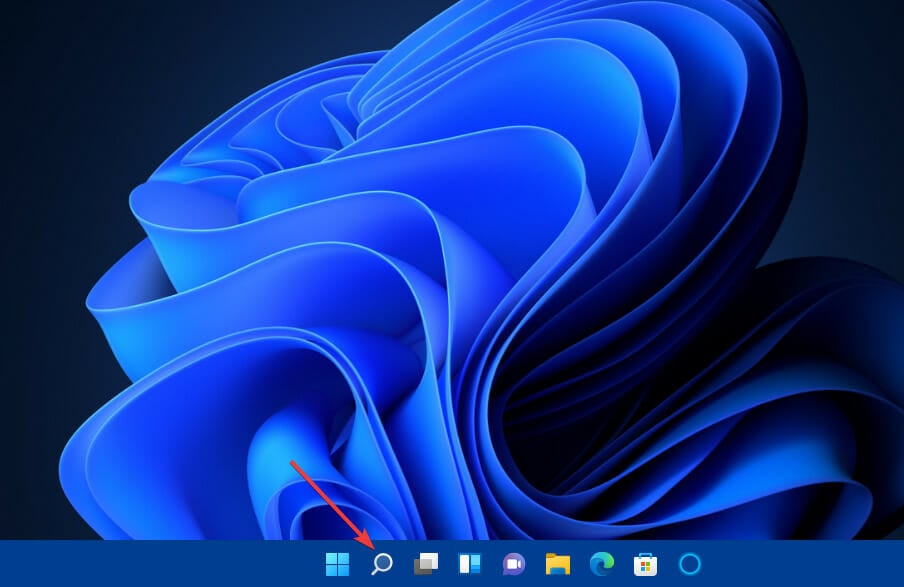
- Click the taskbar’s magnifying glass icon.
- Type Control Panel within the search tool that opens.
- Select Control Panel to open that window.
- Next, select Large Icons on the View by drop-down menu.
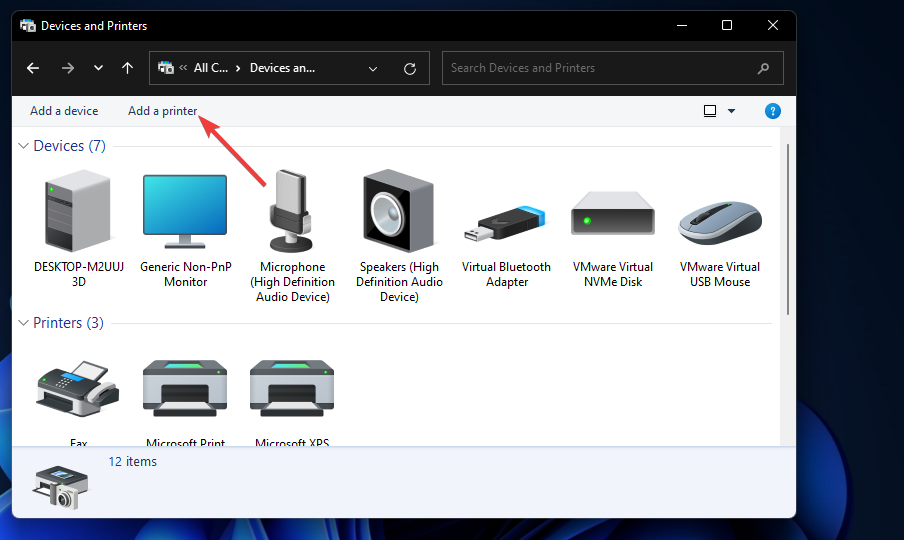
- Click Devices and Printers in the Control Panel.
- Then press the Add a printer button.
- Choose the Epson Workforce ES II 400 printer on the Add a device window, and press the Next button to install it.
- Press the Finish button after the printer has been added and try printing again.
Hopefully, you’ve gotten to printing with these solutions but if the Epson Workforce printer is just not working at all, get in touch with Epson’s customer service and see if there’s a troubleshooting step you may have missed.
Be prepared that the device might be damaged and beyond repair and if so, it may be time for an upgrade. To ensure you’re getting the best deal, we recommend an all-in-one printer.
If you have any other solutions, we’d love to hear about them. Drop them in the comment section below.




User forum
0 messages