4 Quick Ways to Fix Epson Driver Download Failed
Switch off the security checks for a successful install
5 min. read
Published on
Read our disclosure page to find out how can you help Windows Report sustain the editorial team. Read more
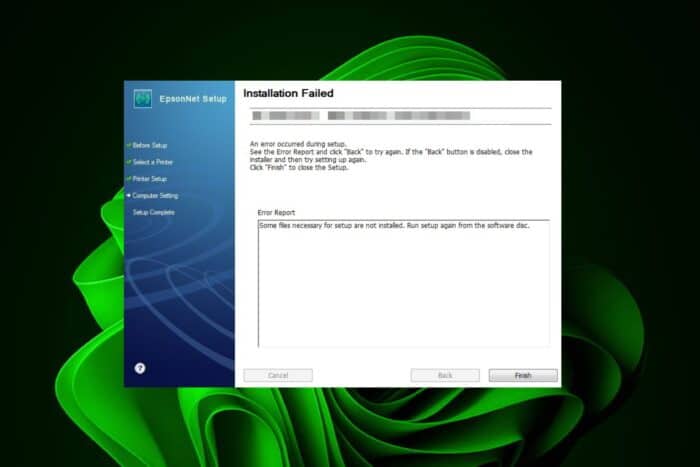
Your printer drivers are responsible for bridging the communication gap between the printer and PC so if you need to update them but keep getting Epson driver download failed, you’ll not be able to print anything.
Usually, driver updates are automatic but you might end up with outdated or wrong drivers. And if you go the manual way and this fails too, it’s probably a network, driver signature or compatibility issues.
What can I do if my Epson driver download has failed?
1. Disable driver signature checks
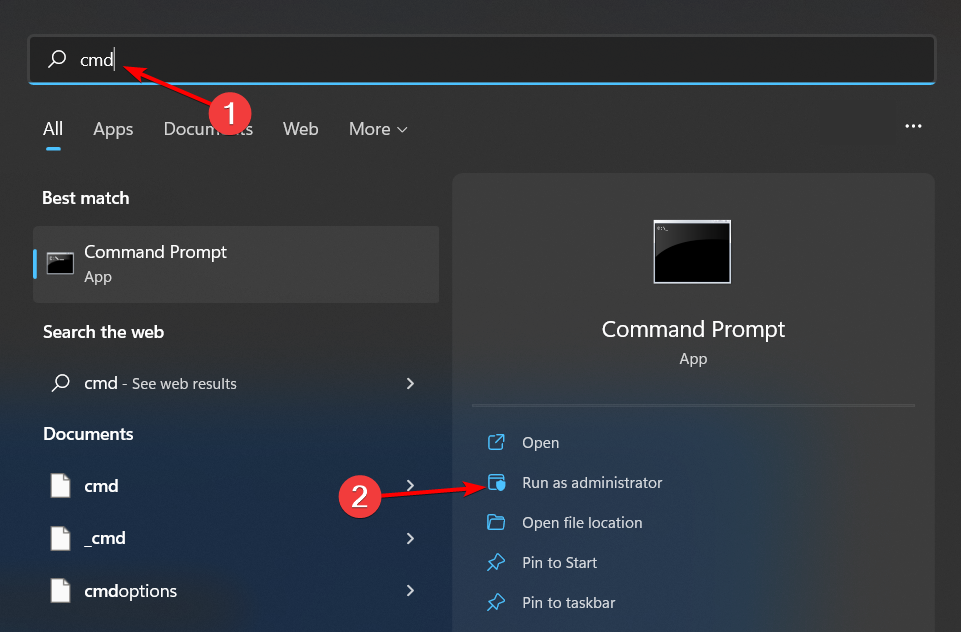
- Press the Windows key, type cmd, and select Run as administrator under Command Prompt.
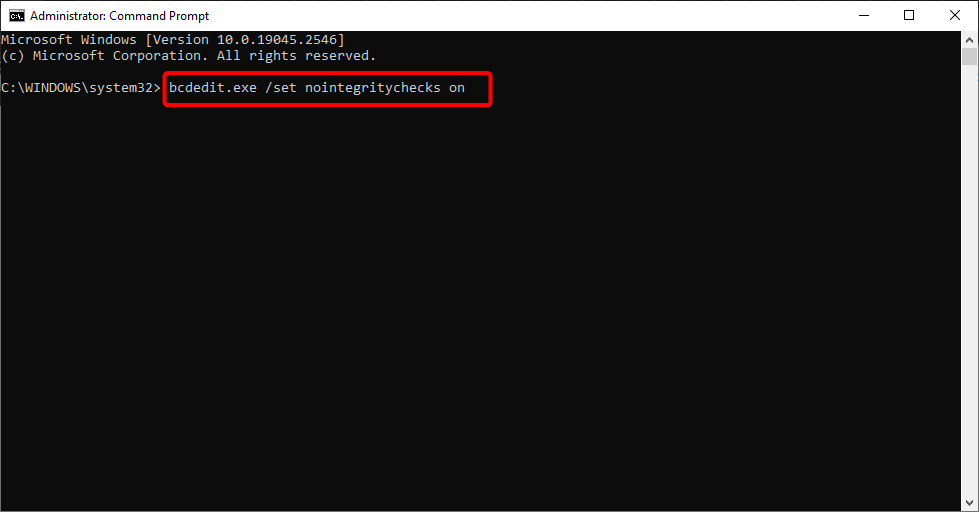
- Type the command below and hit Enter to run it:
bcdedit.exe /set nointegritychecks on - Now, try to download the stubborn driver anew.
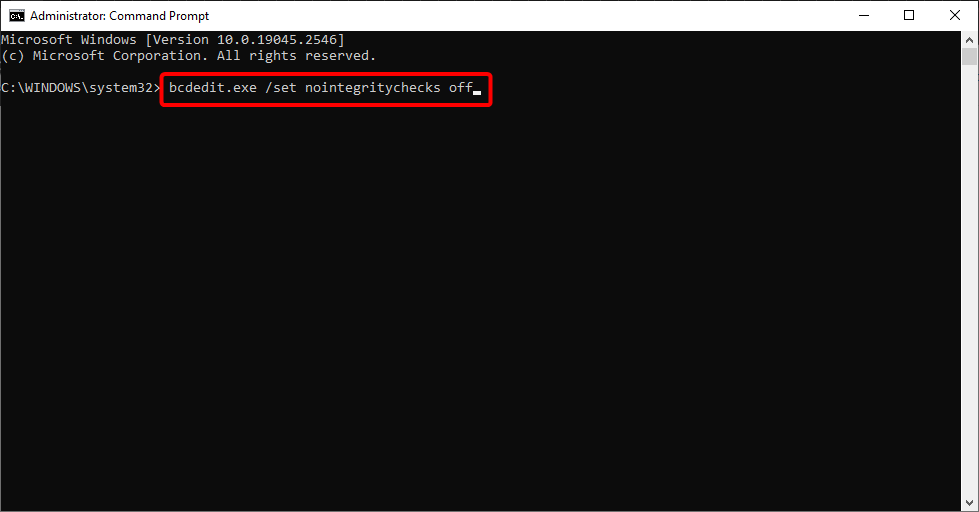
- After downloading and installing the driver, type the command below and hit Enter to restore driver verification:
bcdedit.exe /set nointegritychecks off
Driver signature is an added layer of security to ensure only verified manufacturers can install drivers in your system. However, some custom drivers may bypass these checks and deemed a security risk hence fail to download.
In this case, temporarily disabling this feature can allow you to download and install the Epson driver.
2. Download the driver from official manufacturer
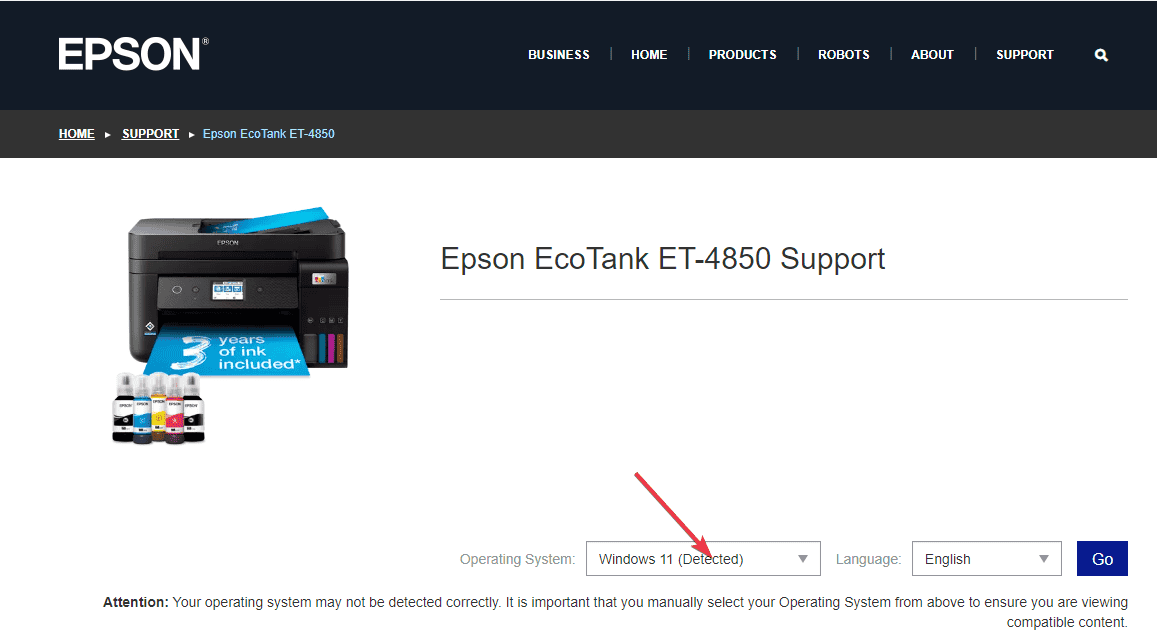
- Navigate to your browser and go to Epson’s official driver download page.
- Select your OS from the Operating System list. In most cases, it detects your Windows version but it can be incorrect so make sure you manually select for your version of Windows.
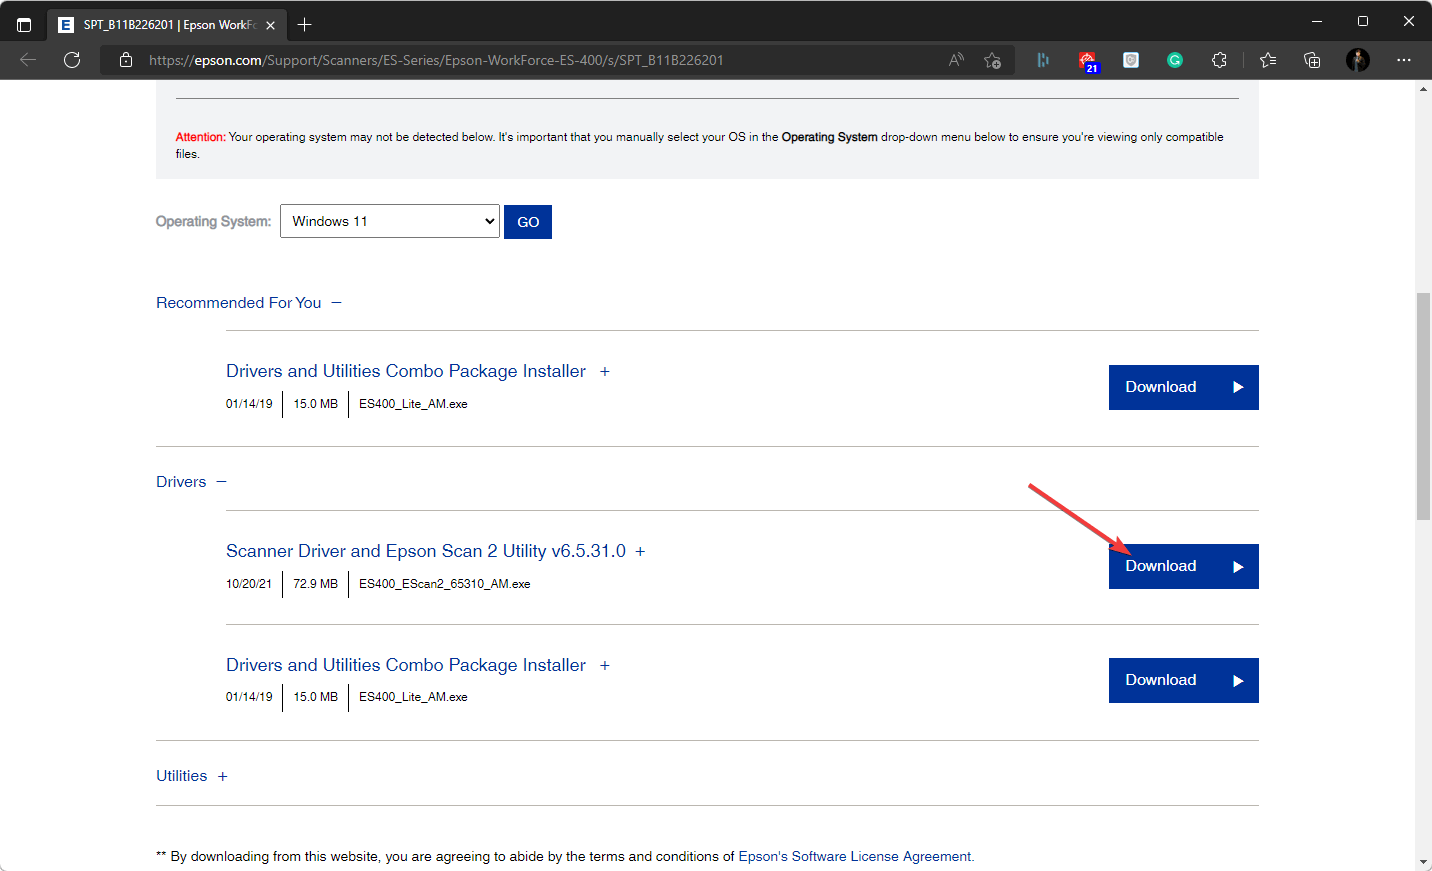
- Now, download the driver.
- Open the installer file and install it on your computer.
- Next, click on the taskbar’s magnifying glass icon.
- Type Control Panel within the search tool that opens and select Control Panel to open that window.
- Next, select Large Icons on the View by drop-down menu.
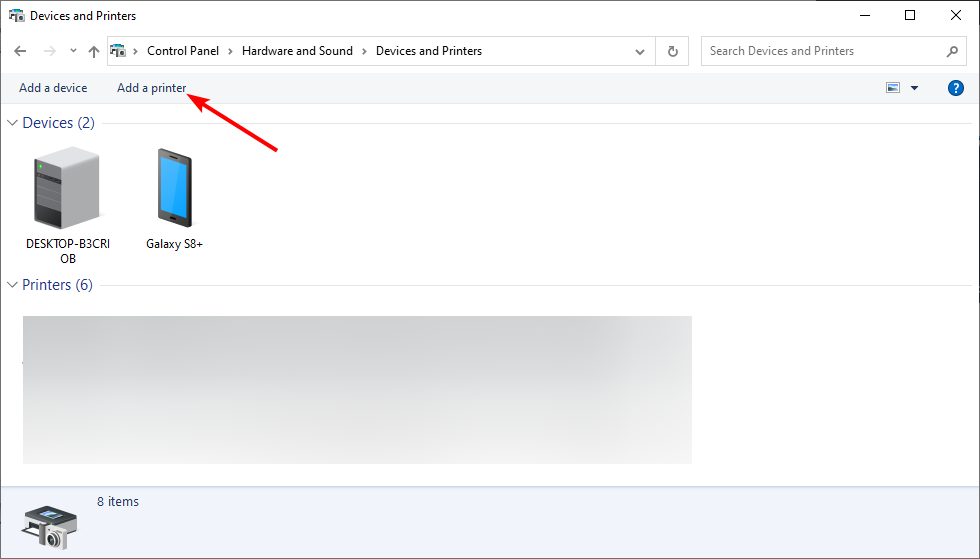
- Click Devices and Printers in the Control Panel.
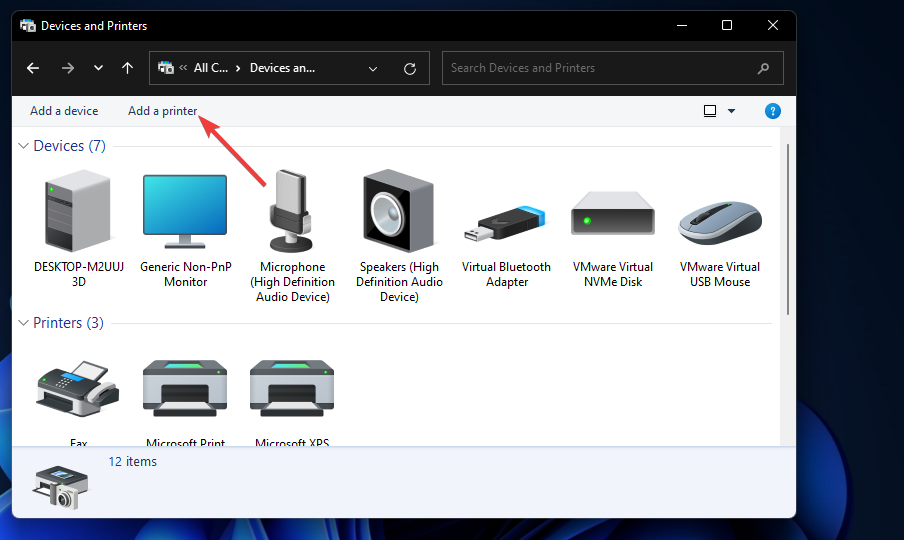
- Then press the Add a printer button.
- Choose your specific Epson printer on the Add a device window, and press the Next button to install it. If not available, you’ll have to add it manually by clicking on the The printer that I want isn’t listed option.
- Press the Next button and follow the on-screen prompts.
- Hit the Finish button after the printer has been added and restart your PC.
At times, your device can go undetected so you have to add it manually. Remember that you need system administrator rights to download some drivers but you can also download drivers without admin rights.
3. Reinstall the driver
- Press the Windows key + R, type control, and select the Control Panel option.
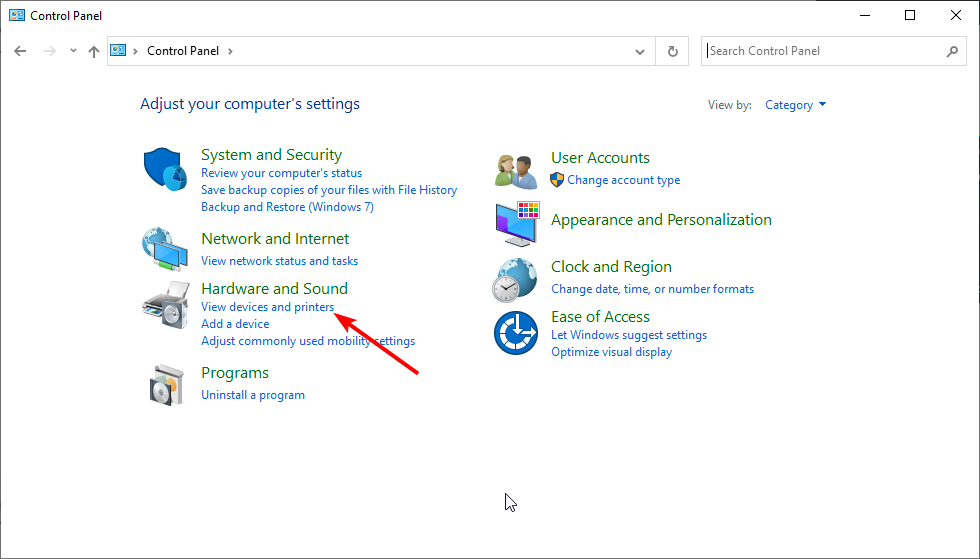
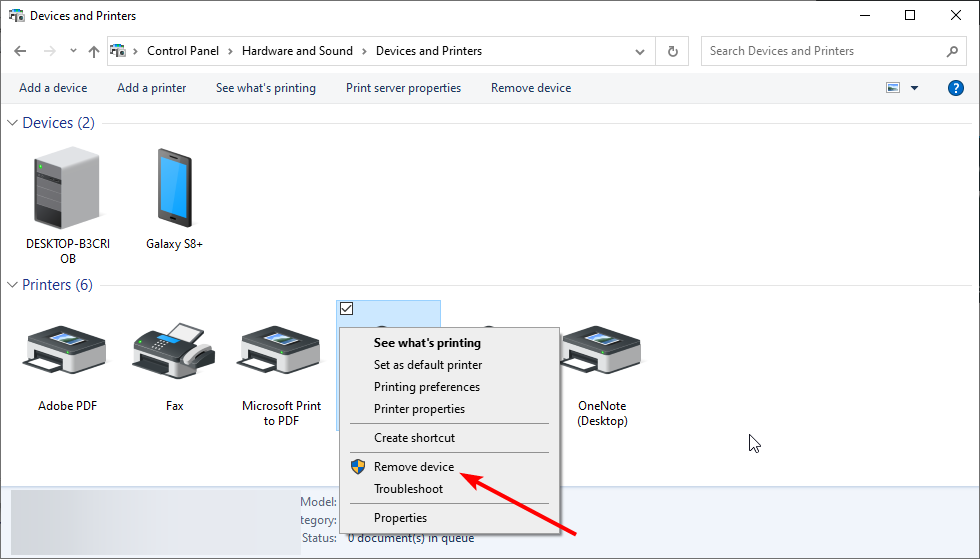
- Click the View devices and Printers option under Hardware and Sound.
- Now, right-click your Epson printer and select Remove device.
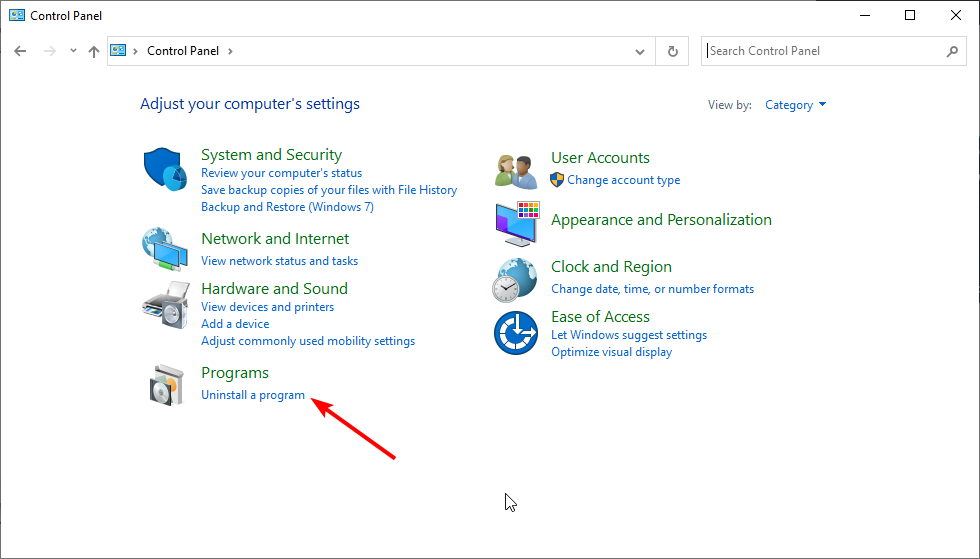
- Next, go back to the Control Panel window and choose to Uninstall a program under the Programs option.
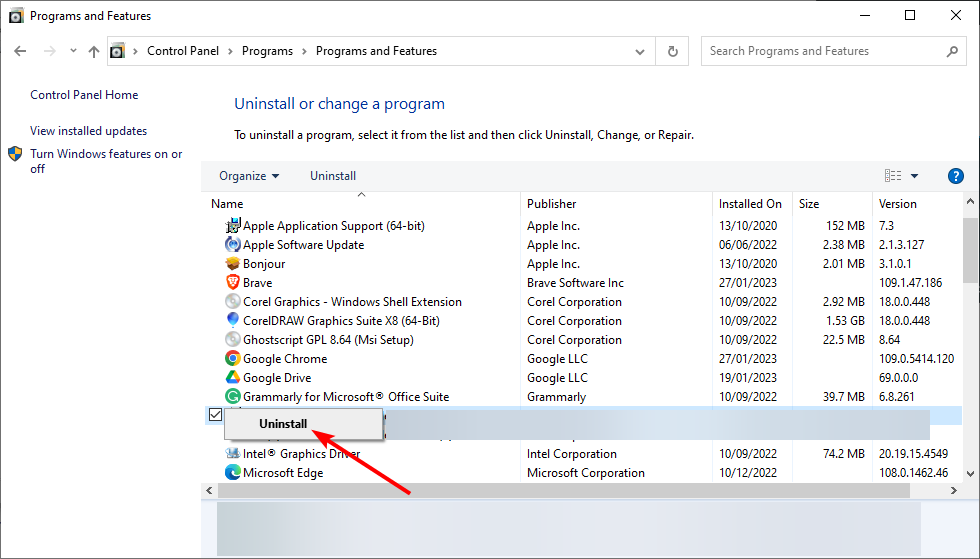
- Right-click all the Epson printer options, select the Uninstall option and follow the onscreen instructions to complete the process.
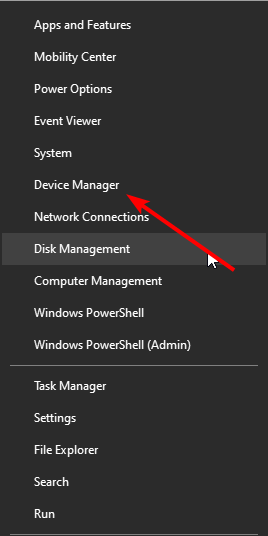
- Now, press the Windows key + X and choose Device Manager.
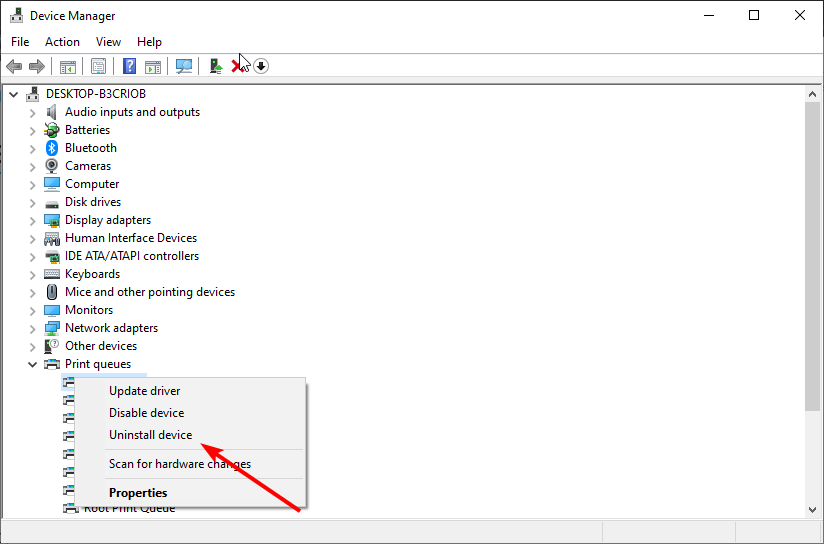
- Expand the Print queue options and right-click your printer.
- Select the Uninstall device option.
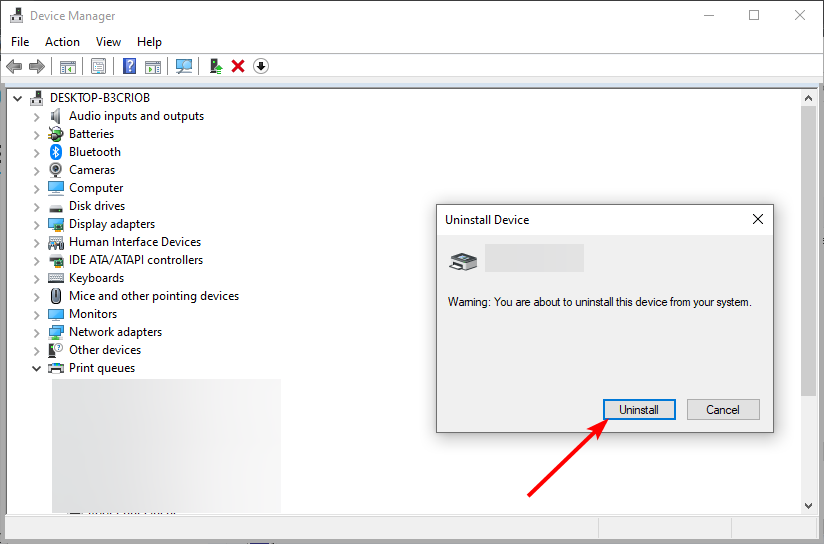
- Check the box for Delete the driver software for this device if it is available, and click the Uninstall button.
- Next, disconnect your PC and printer from the internet and restart them both.
- Now, repeat Steps 1 and 2 above and click the Add a printer option.
- Choose Windows update when prompted for drivers.
- Fill in the Manufacturer’s name appropriately and choose your printer in the Printers pane.
- Now, power your printer and connect to the network via a cable.
- Finally, follow the onscreen instruction to complete the process.
4. Use Epson’s dedicated software updater
- 1. Download the application
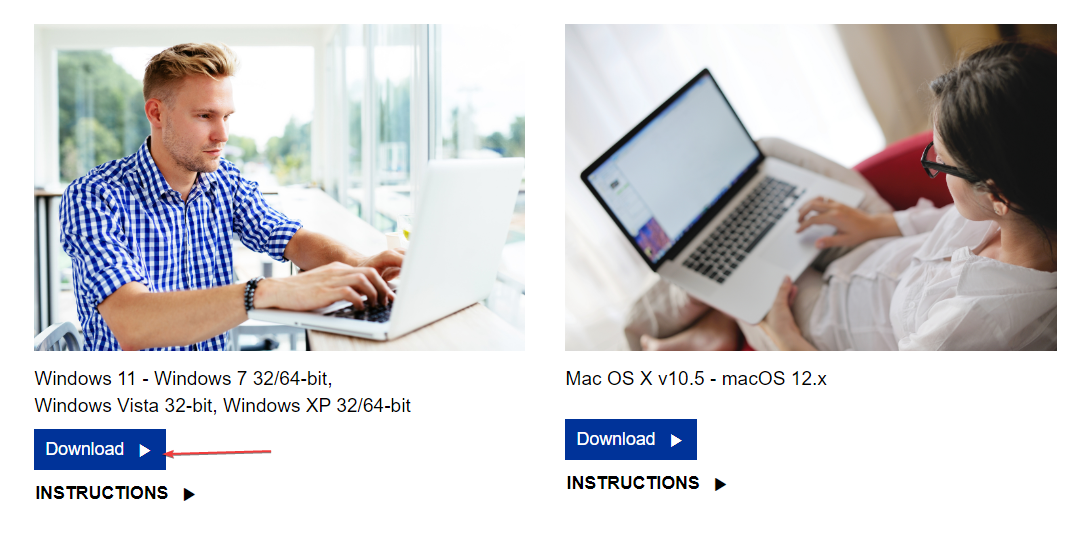
- Visit the Epson official support website, locate the Download button, and click on it.
- This immediately brings up the .exe file and requests you grant permission to download.
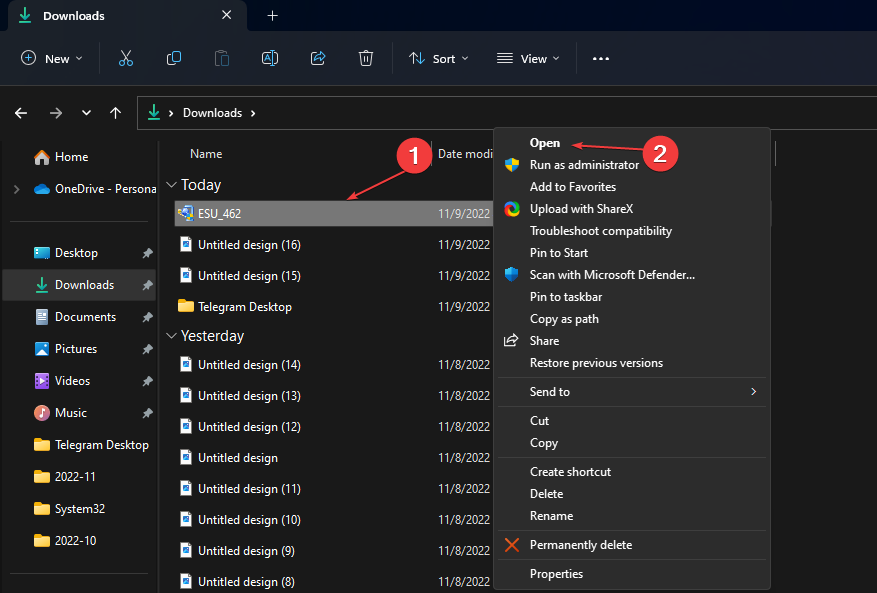
- Open File Explorer by pressing the Windows + E keys. By default, the file should be in the Downloads folder.
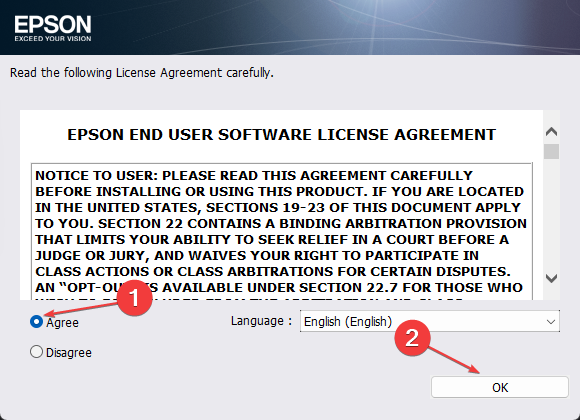
- Launch the .exe file and click Agree on the License Agreement page, then click OK.
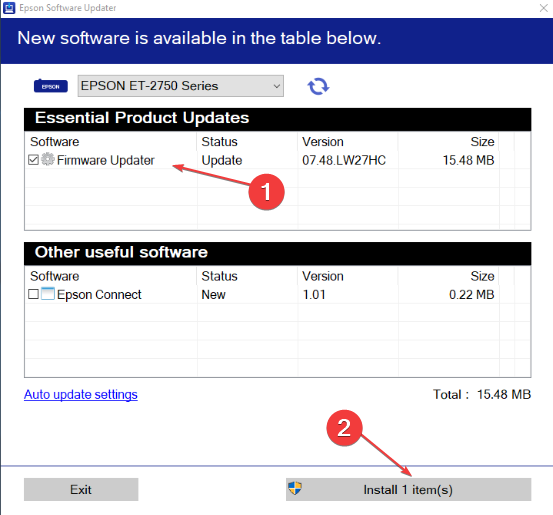
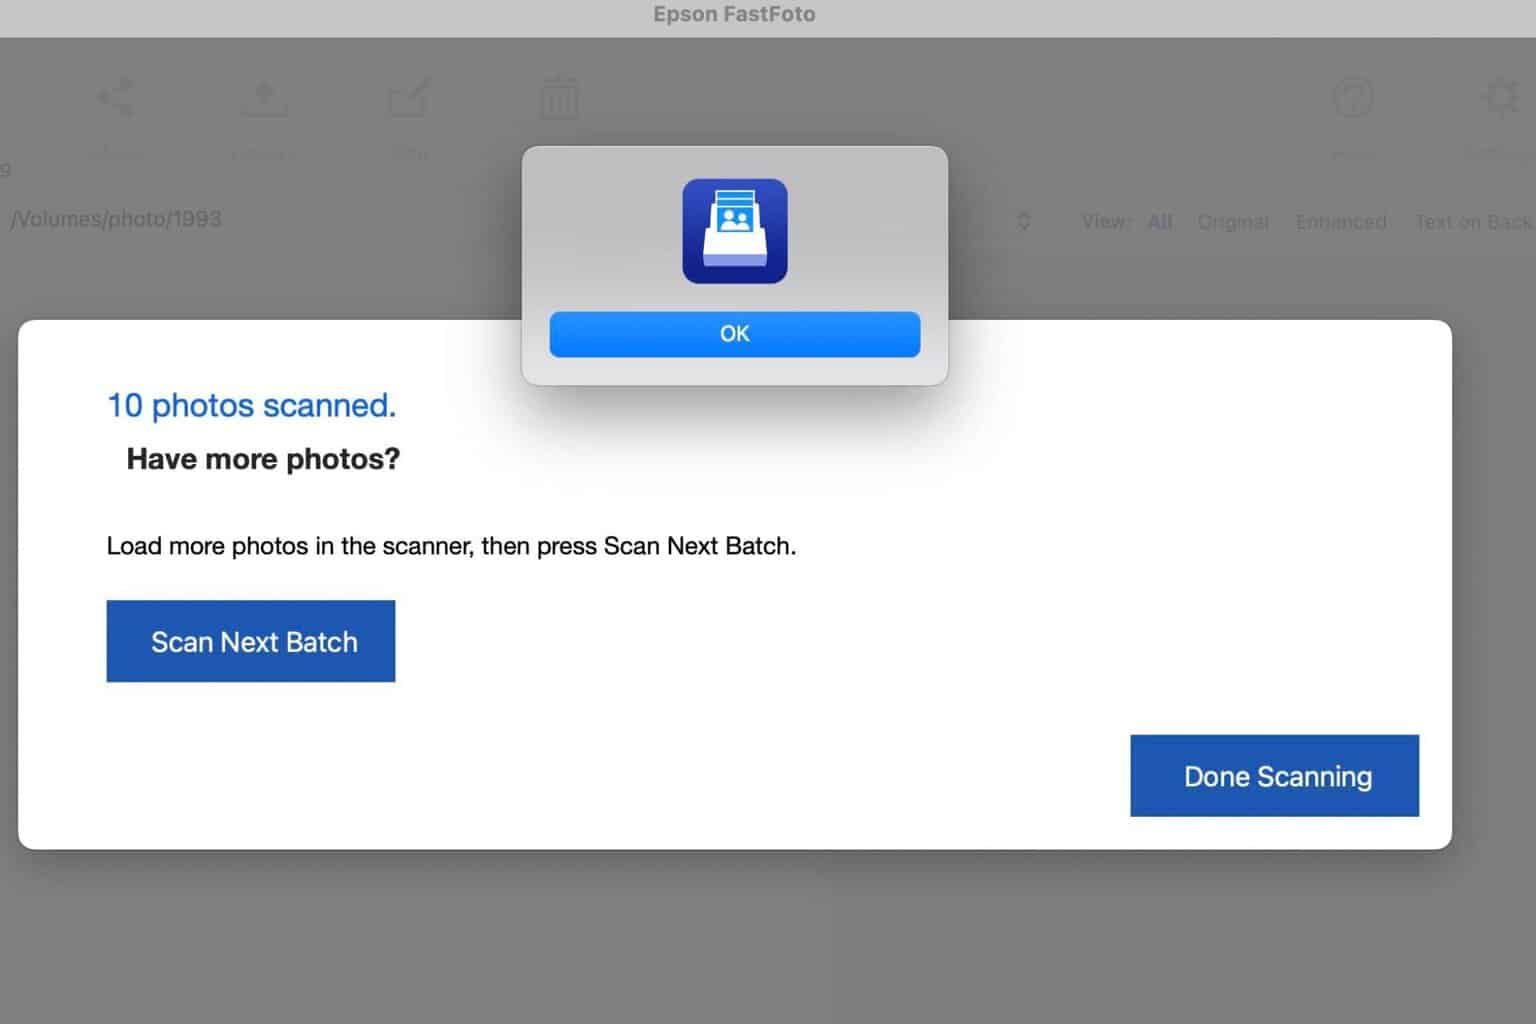
- After the installation, click on your Epson product and wait for driver’s suggestions, then click Install.
If your Epson printer driver still fails to download, you might have to get in touch with Epson support for further assistance.
A printer driver failing to download is not an unusual experience but you can prevent such issues by keeping your printer firmware and operating system updated at all times.
Should you encounter any other issues like Epson not connecting to your wireless network, feel free to check out our detailed article on how to bypass it.
And the issue is not unique to Epson printers. Sometimes, even Canon printers fail to install drivers but we know a few workarounds.
That’s a wrap from us but if you have any other solutions not mentioned here but worked for you, let us know in the comment section below.
User forum
0 messages