Fix: An Error Occurred While Attempting to Create the Directory on Windows 11
Assign yourself administrative privileges to gain access
Key notes
- An error when attempting to create a directory can occur due to insufficient disk space, so try a Disk Cleanup first.
- Running a local account may also play a part, so ensure you have sufficient administrative privileges before installing any programs.
- For this and more solutions to this error, keep reading this article.

When installing programs on your Windows 11 PC and you run into an error occured while attempting to create the directory message, your system files may be corrupt.
There is a chance that installing what you want will work perfectly, but it doesn’t always apply to all cases. If you’re unfortunate enough to end up with this issue, there is a way to get rid of this error.
What is Error 1317: An error occurred while attempting to create the directory on Windows 11?
This is an error that can happen if you are trying to install a program because your system may not have enough disk space to create the directory. Other common causes include:
- The name of the directory is invalid.
- The file directory is corrupt.
- You do not have enough permission to access the location.
- The directory already exists.
How do I fix an error occurred while attempting to create the directory?
Try the following basic workarounds before you attempt any advanced troubleshooting:
- Ensure you’re downloading the program from a legitimate source and verify the existence of the directory.
- Make sure that all of your drivers are up to date.
- Perform a Disk Cleanup to free up some space.
- Ensure you’re using an administrator account, and try running the program in elevated mode.
- Restart your PC in Safe Mode, and reinstall the program after clearing software leftovers and see if it fixes the issue.
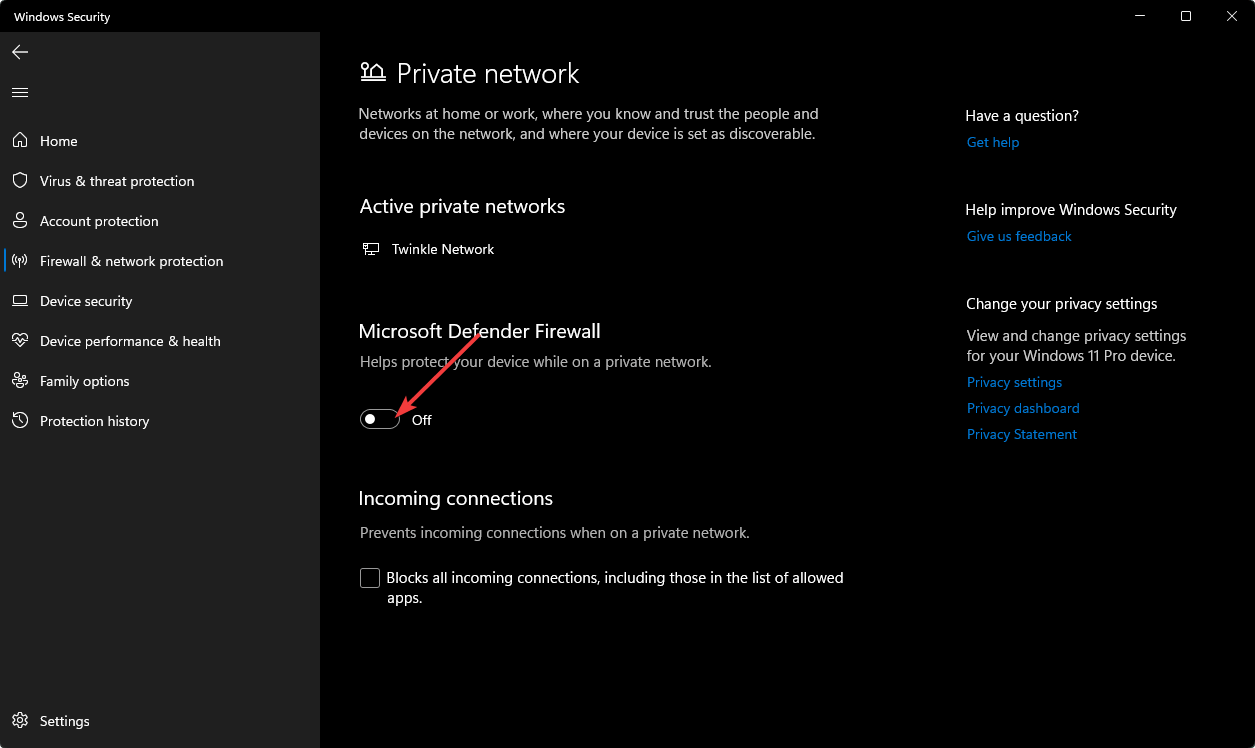
1. Disable your antivirus temporarily
- Hit the Start menu icon, type Windows Security in the search bar, and click Open.

- Click on Firewall & network protection, then select Public network.
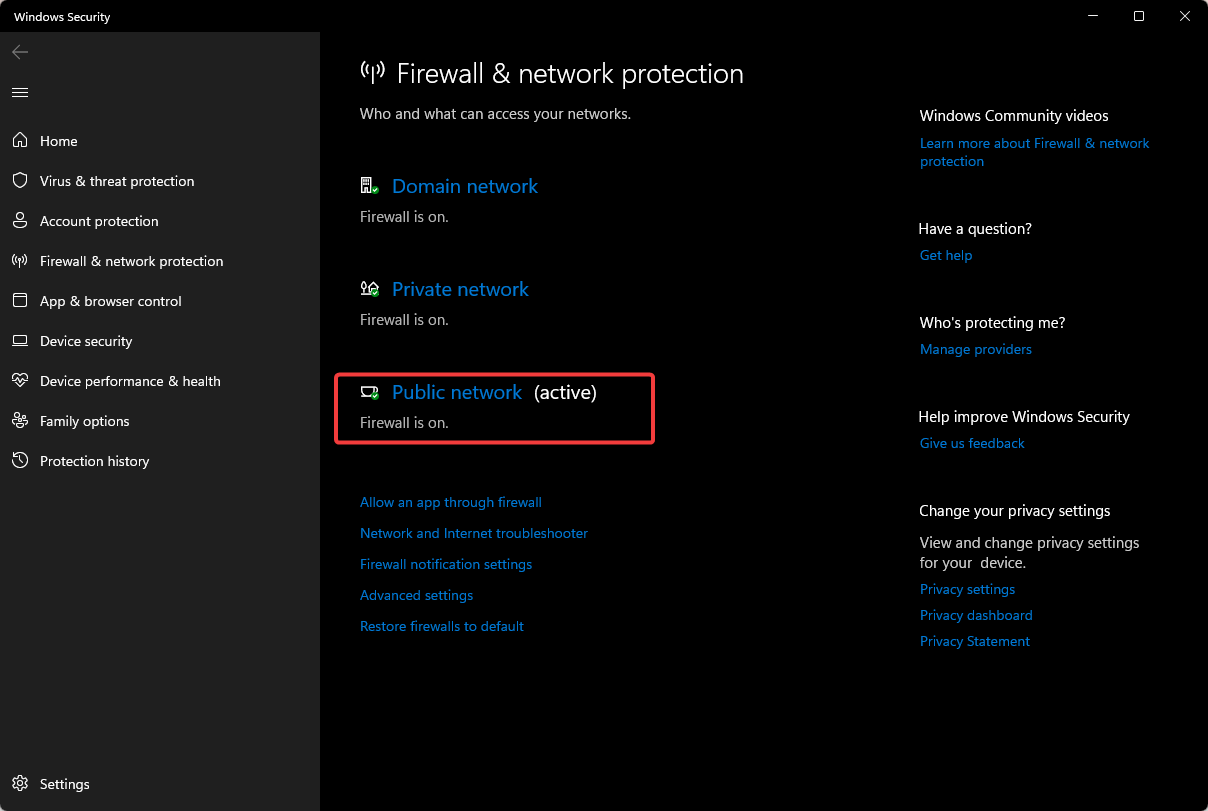
- Locate Microsoft Defender Firewall and toggle the off button.
2. Run the DISM and SFC scans
- Hit the Start Menu icon, type cmd in the search bar, and click Run as administrator.

- Type the following commands and press Enter after each one:
DISM.exe /Online /Cleanup-Image /Restorehealthsfc /scannow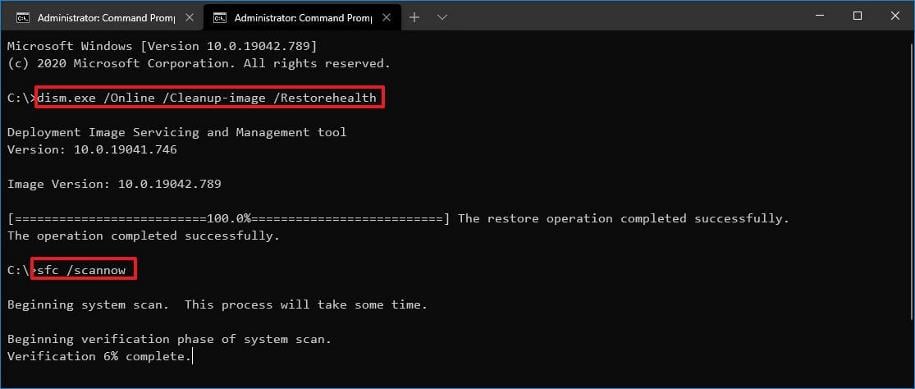
You can always rely on specialized repair tools to do this for you. This software will scan and then replace any broken system files with just a few clicks.
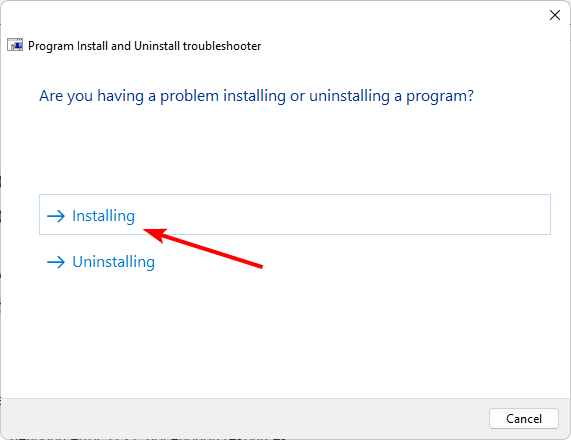
3. Run the Program Install and Uninstall troubleshooter
- Download the Program Install and Uninstall troubleshooter and install it.
- Open it and click on Next.
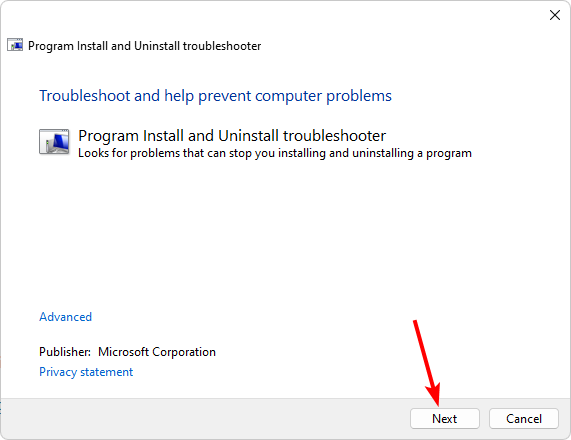
- You’ll be asked whether you have a problem installing or uninstalling a program. Select one option.
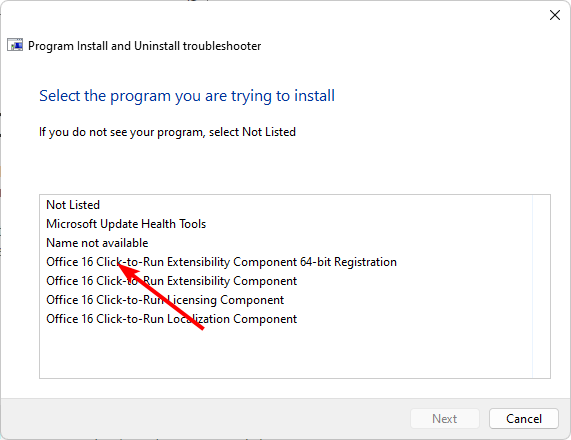
- Next, you’ll be asked to select the program that is not installing. Pick the problematic program from the list.
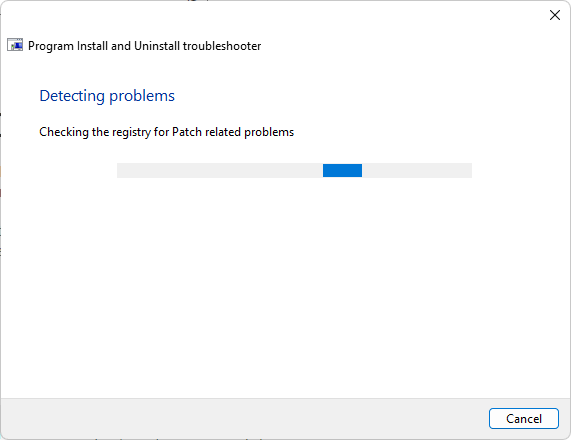
- The troubleshooter will start scanning for problems.
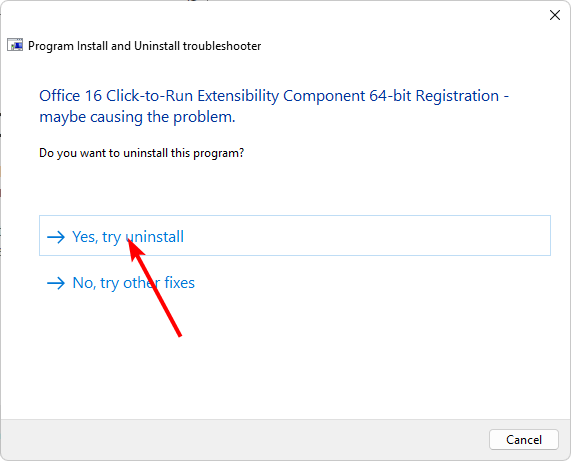
- Once it completes, you’ll be presented with two options. Pick either and wait for the troubleshooter to recommend fixes.
4. Adjust folder permissions
- Right-click the folder you want to make changes to and select Properties.

- Click the Security tab at the top.
- Now, select your user account under the Group or user names section.
- Next, click the Edit button.
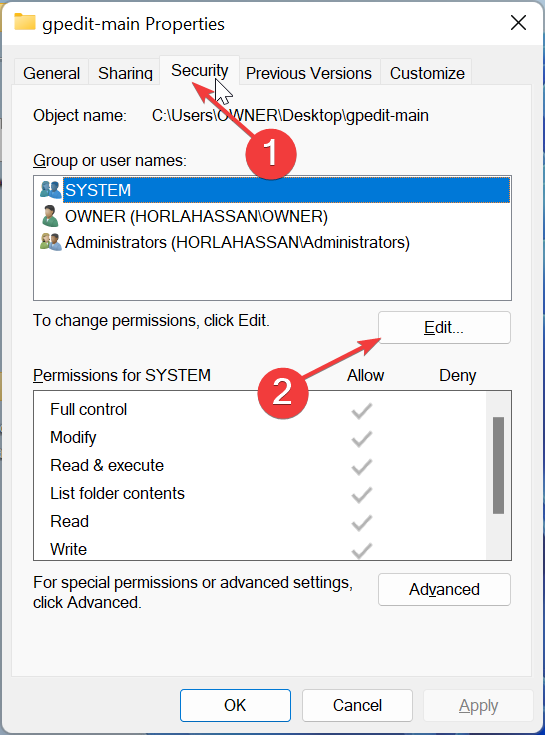
- Select your user account again under the Group or user names section.
- Check the Allow box for all the entries there.
- Finally, click the Apply button, followed by OK.

Allowing permissions can also help address similar issues like the installer unable to create a temporary directory.
5. Disable controlled folder access
- Hit the Windows key, type Windows Security in the search bar, and click Open.
- Navigate to Virus & threat protection.

- Scroll down and select Manage ransomware protection.

- Locate the Controlled folder access option and toggle it off.

Controlled folder access is a feature that protects your files from malware. It does this by monitoring the folders where apps can write files and create new ones. You can disable it temporarily and install the problematic app, then switch it back on for the safety of your system.
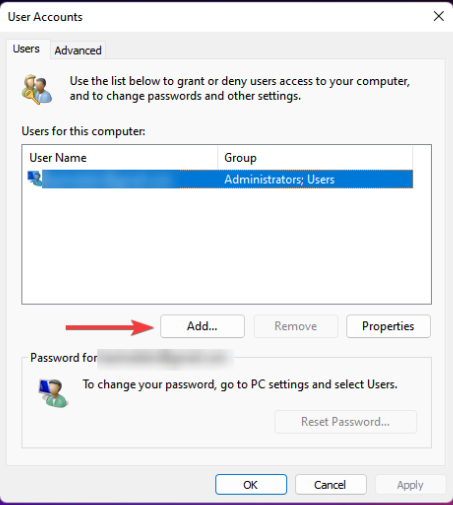
6. Create a new user profile
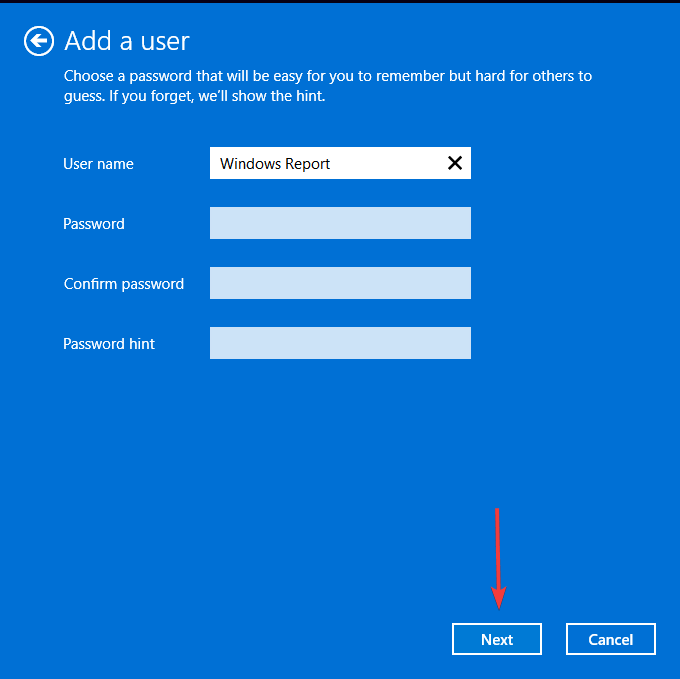
- Press Windows + R to launch the Run console, enter netplwiz in the text field, and click OK.
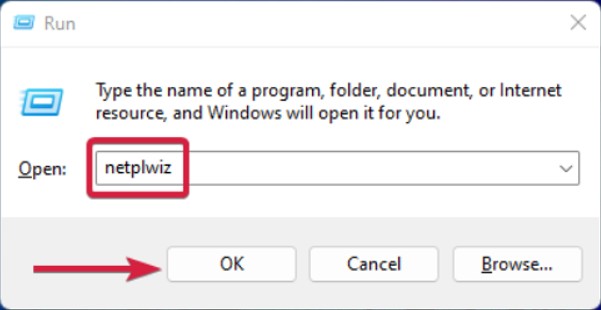
- Click Add in the User Accounts window.
- Select Sign in without a Microsoft account (not recommended).
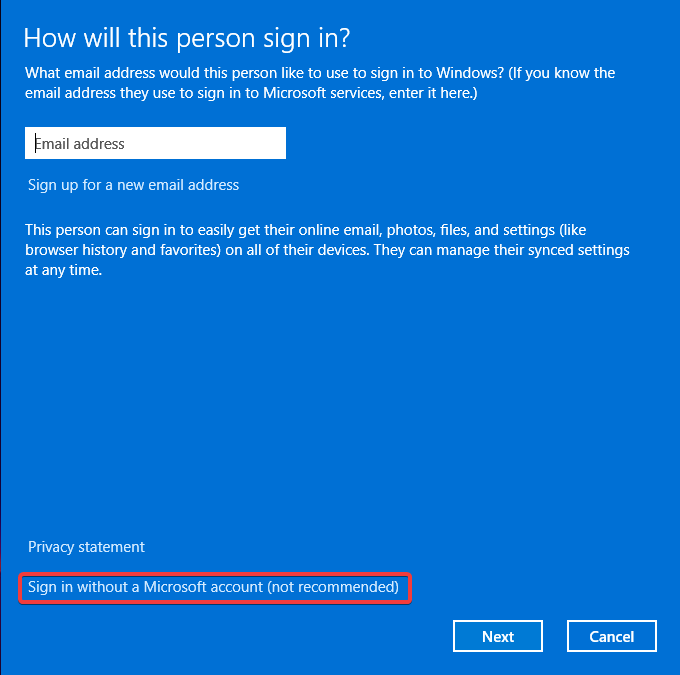
- Click on Local account button.

- Enter a username and password (optional) for the new user account, and a hint, in case you set a password. Once done, click on Next.
- Click on Finish to create the Local account.
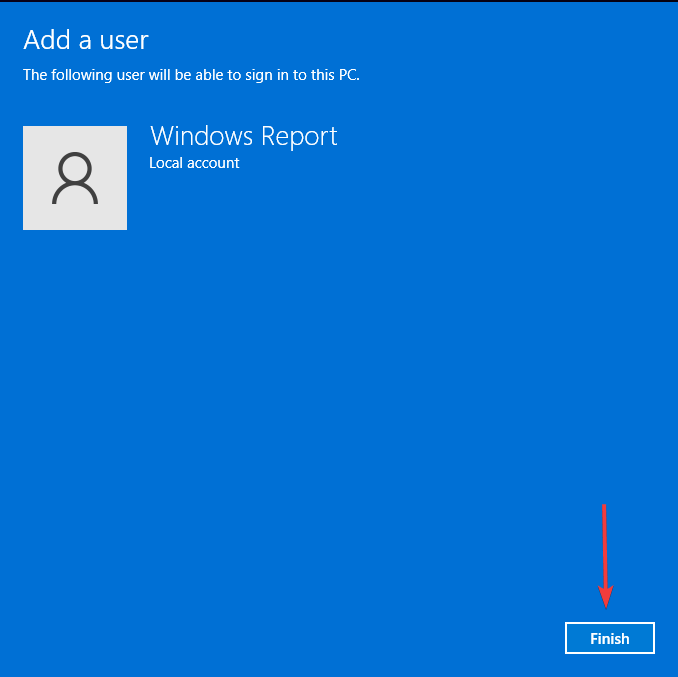
If the error 1317: An error occurred while attempting to create the directory goes away in this new user profile, your previous one may have been corrupted. You can take the necessary steps to repair the user profile or copy it to the new user account.
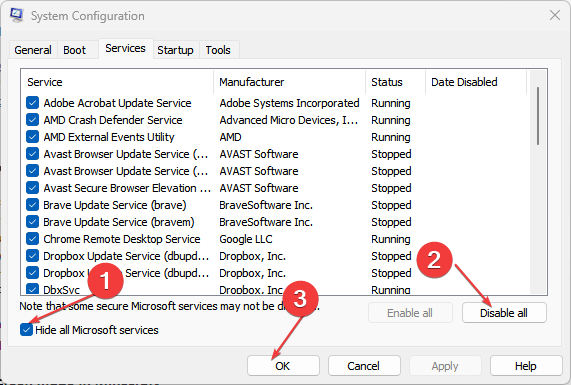
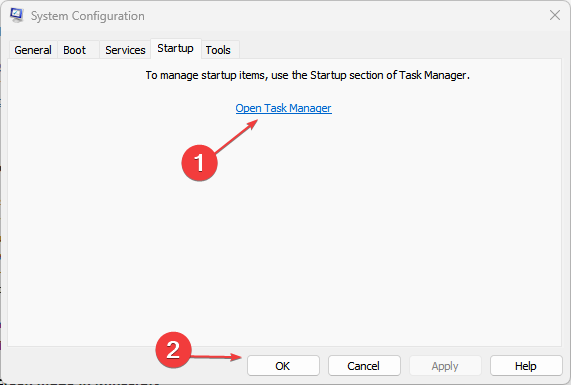
7. Perform clean boot
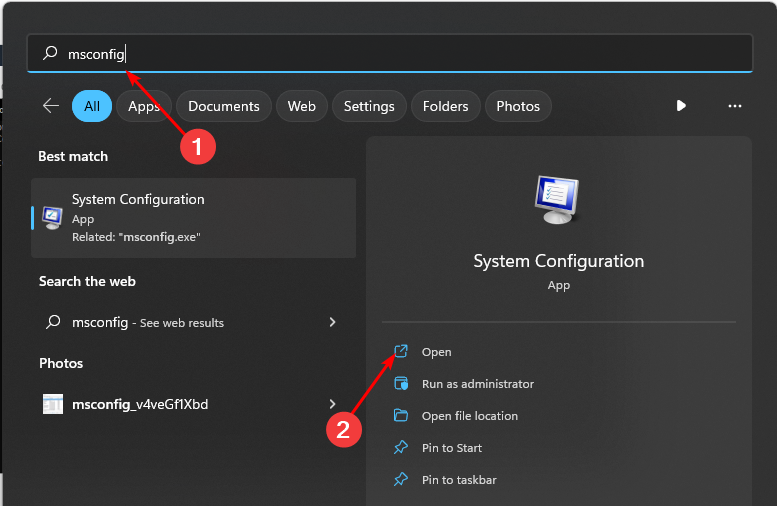
- Hit the Windows key, type msconfig, and open System Configuration.
- Switch to the Services tab and select Hide all Microsoft services.
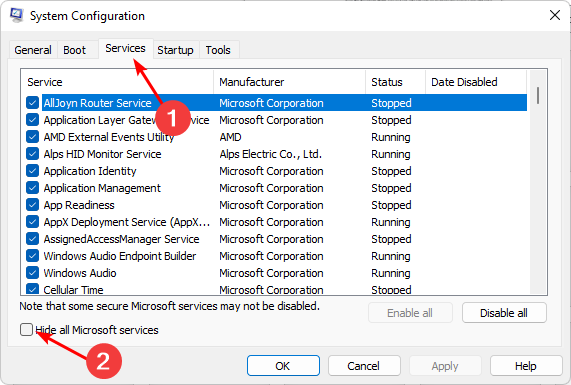
- Click on the Disable all button, then hit the Apply button to save the changes.
- Go back and click on the Startup tab, select Open Task Manager then click OK.
- In the Startup tab of the Task Manager, Disable all the Enabled startup items.
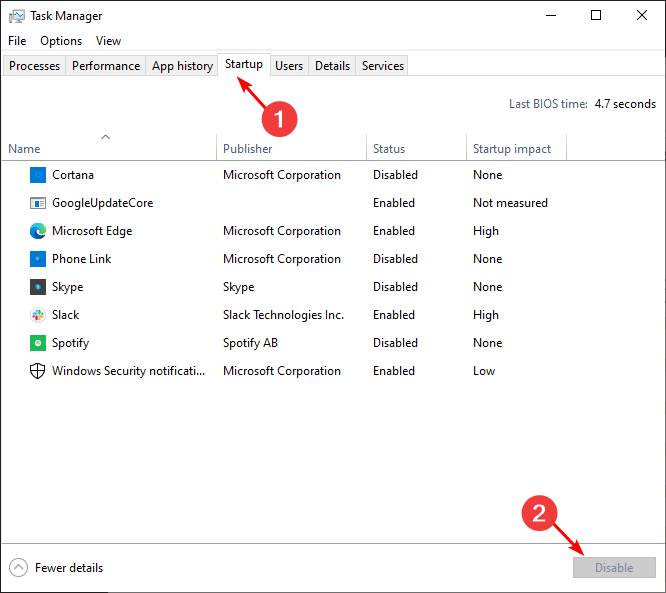
- Close Task Manager and restart your PC.
In summary, access denied errors like this are mostly due to a lack of proper maintenance of your PC. Over time, the registry becomes bloated with unnecessary entries, which affect its performance.
Cleaning out your registry regularly can help optimize your PC and minimize the occurrence of such issues.
Similarly, domain users may also be locked out with the error occurred attempting to join the domain, so check out our article on how to bypass it.
If you’ve come across a similar problem, we’d love to hear your alternative fixes if available. Drop us a comment down below.
Read our disclosure page to find out how can you help Windows Report sustain the editorial team. Read more


Improve this guide

User forum
0 messages