Fde.dll Failed to Load: Best Ways to Fix It
If fde.dll is missing, you'll need to repair system files
Key notes
- Fde.dll is a core Windows DLL file, and if this file is missing, certain features won’t work.
- Repairing this file is simple and you can do it with few commands.
DLL files, such as fde.dll are essential if you want to keep your operating system running smoothly. If you have missing DLL files on Windows 10, you will experience various issues.
In case your DLL files are missing, certain features might not work properly, or applications won’t be able to start at all, so it’s paramount that you fix the missing files as soon as possible.
Before we start fixing issues with the missing fde.dll file, let’s first see what it is and what it does on your PC.
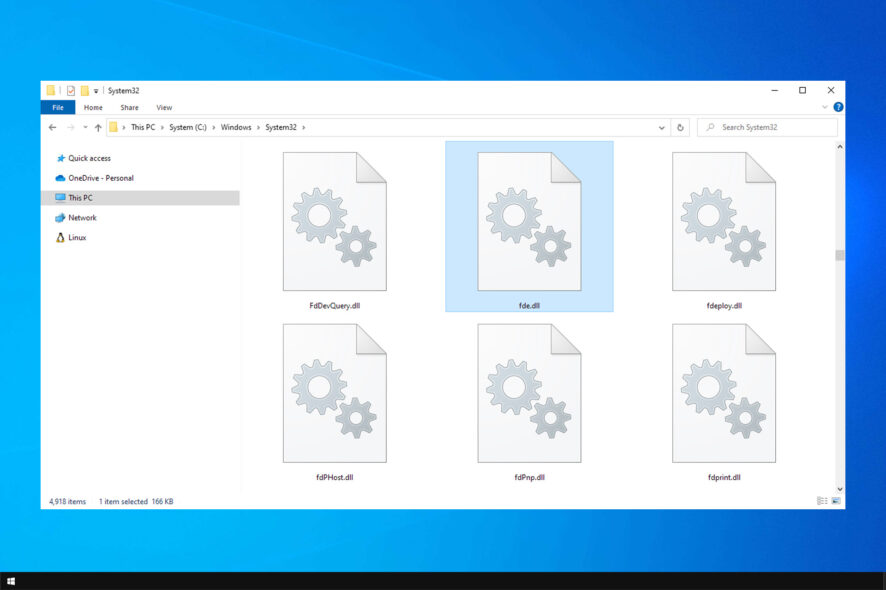
What is fde.dll?
Fde.dll is one of many system files available on Windows. It’s associated with the Folder Redirection Snapin Extension process.
As such, it’s a crucial file on your operating system, and if it’s damaged or missing, you may experience various issues.
What can I do if fde.dll failed to load?
1. Use a dedicated DLL fixer
The loss or corruption of DLL files can pose a major problem on your PC, preventing applications and features from working properly.
To fix this issue, it’s advised to download the missing DLL file, but doing so from unverified third-party sources can jeopardize the security of your system.
Instead of doing that, we suggest using DLL repair software. These tools are designed to effortlessly resolve 100% of Windows DLL issues with ease with just a couple of clicks.
2. Repair your system files
 NOTE
NOTE
Adjust Group Policy Settings
- Press Windows key + R and enter gpedit.msc. Click OK.
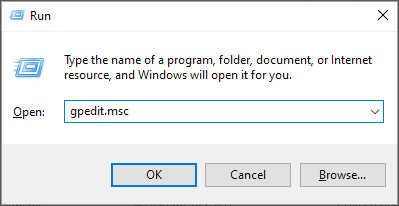
- Once it opens, navigate to the following path:
Group Policy\Computer Configuration\Administrative Templates\Windows Components\Windows Update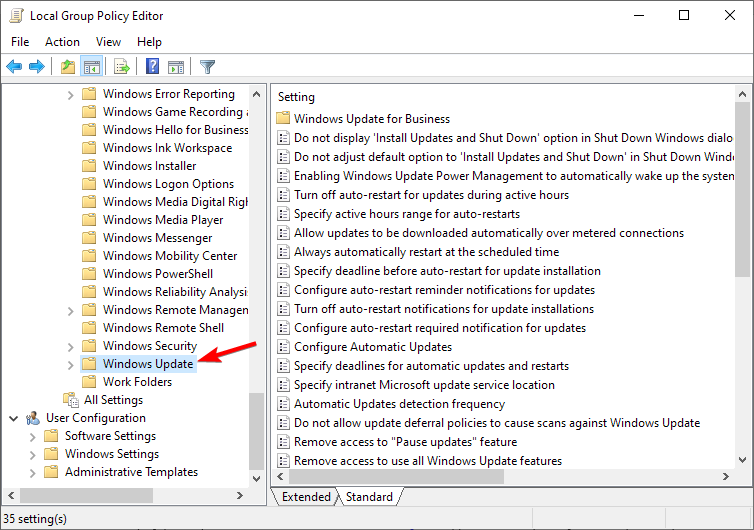
- Locate the following settings and enable them:
- Enable client-side targeting
- Allow Automatic Updates immediate installation
- Automatic updates for Windows Update (from WSUS)
Make sure that necessary tasks and services are running
- Press Windows key + X and choose Windows PowerShell (Admin).
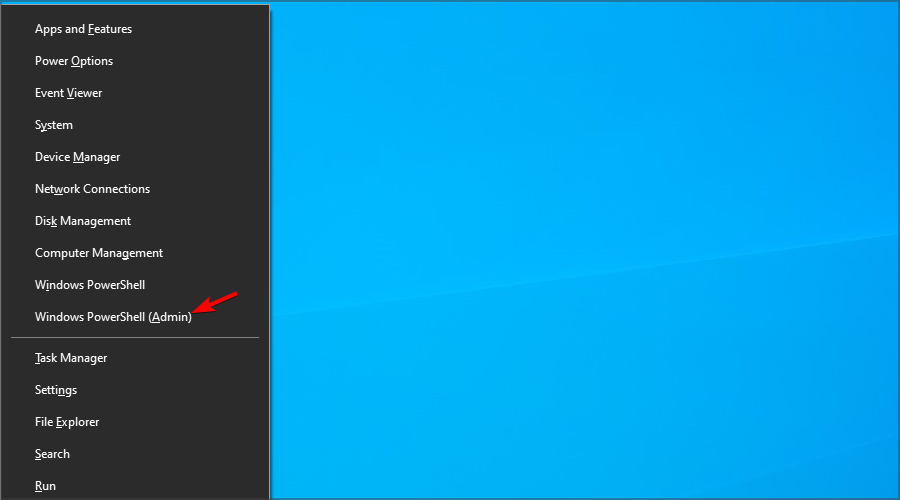
- Enter the following commands:
net start wuauserv
schtasks.exe /Run /TN "\Microsoft\Windows\Servicing\StartComponentCleanup"
These steps aren’t mandatory if you want to fix the fde.dll file, but they will ensure that the following commands will work.
Run DISM and SFC scans
- Open Windows PowerShell or Command Prompt as administrator.
- The following commands might take a bit to complete, so don’t interrupt them. Run the following commands one by one:
Dism /Online /Cleanup-Image /ScanHealth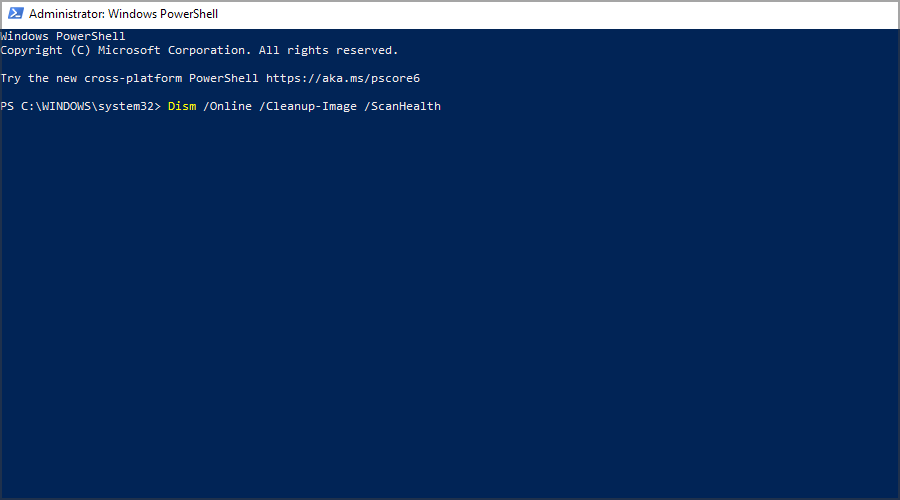
DISM /Online /Cleanup-Image /RestoreHealth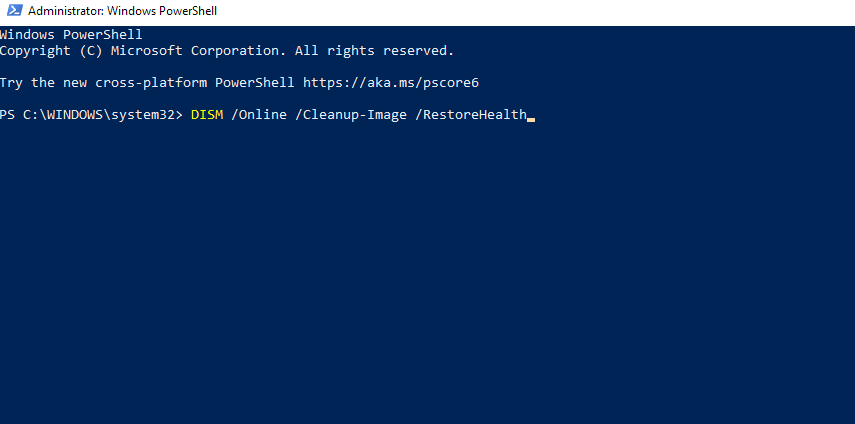
sfc /scannow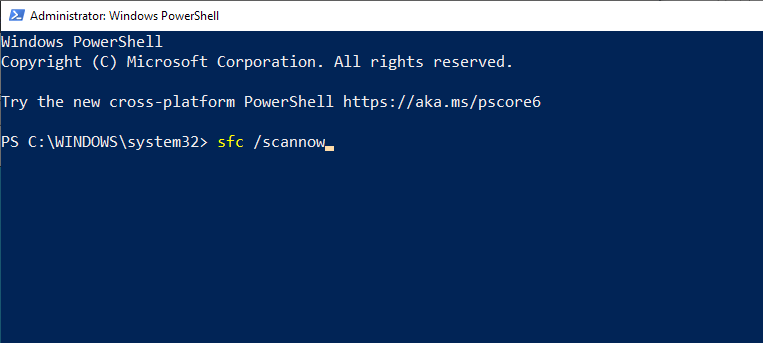
Once the scan is finished, check if the problem is resolved. Keep in mind that not all steps are mandatory, except for the DISM and SFC scan.
As you can see, fixing issues with fde.dll is pretty simple. Although these steps are for Windows 10, you can use them to repair missing DLL files on Windows 11 as well.
In most cases, a system scan will help you restore the necessary files without too much hassle. If you’re looking for a more straightforward solution, there is always specialized software you can use.
Have you ever had issues with fde.dll and how did you fix them? Let us know in the comments section.
Read our disclosure page to find out how can you help Windows Report sustain the editorial team. Read more


Improve this guide


User forum
0 messages