GarageBand for Windows 10: How to Download it & is it Safe?
GarageBand isn't available on Windows
GarageBand is a macOS exclusive and it’s not available on Windows, but that doesn’t mean that you can’t run GarageBand on Windows, with a bit of tinkering.
How can I download GarageBand in Windows 10?
1. Download the necessary components
- Download macOS Monterey and extract the ISO file.

- Next, download and install VMWare Workstation.
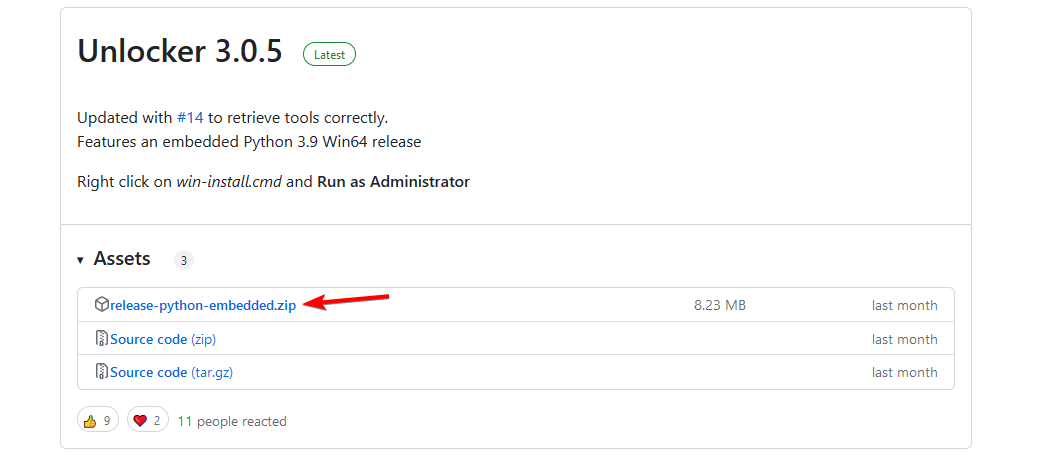
- Lastly, download VMware Unlocker.
 NOTE
NOTE
2. Run the Unlocker
- Locate the VMWare Unlocker archive, and open it.
- Extract it to the desired location. The best option is on the same drive where VMware is installed.
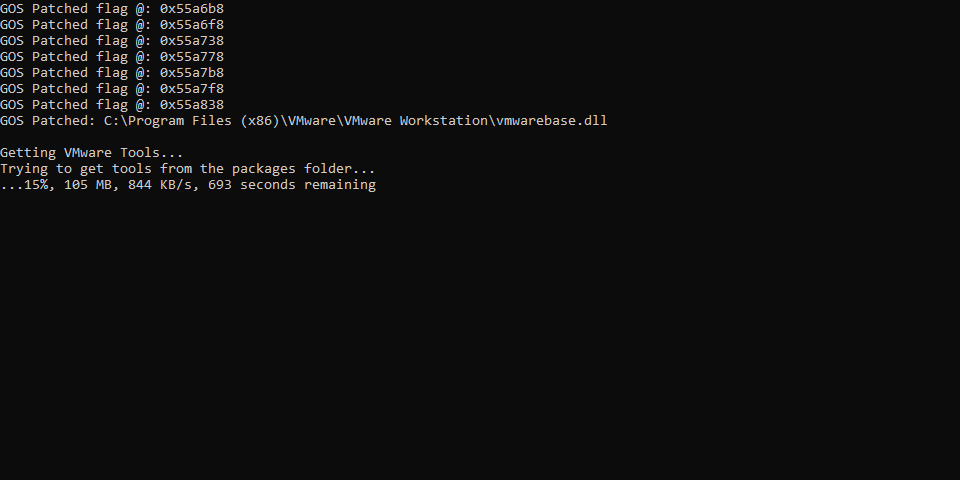
- Locate the win-install file in the extract location. Right-click it and choose Run as administrator.
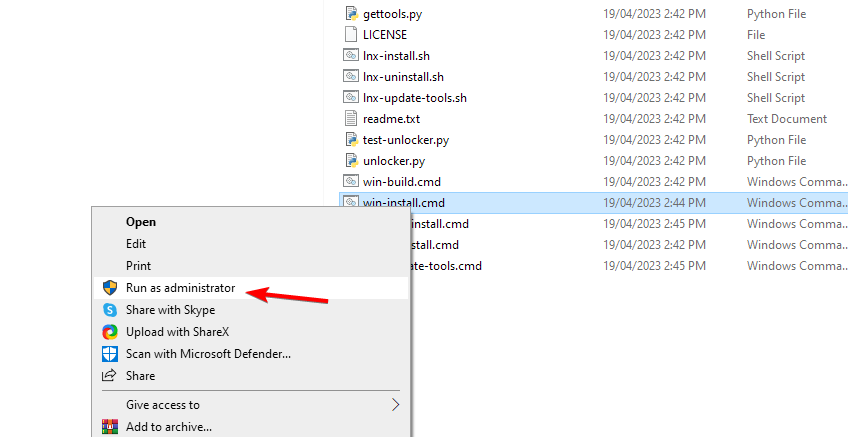
- Wait for the process to finish.
3. Create a new virtual machine
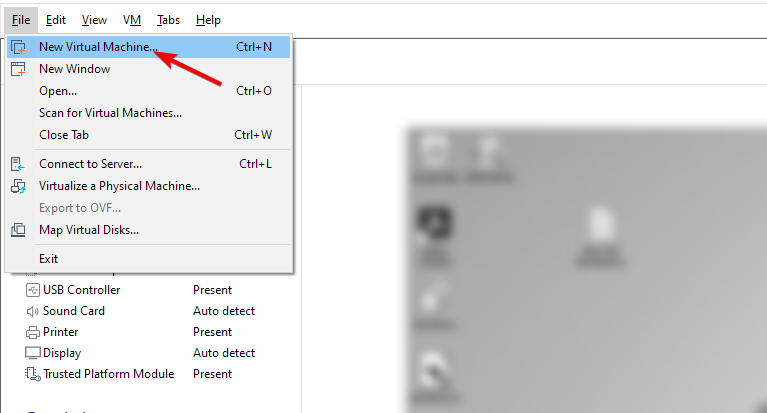
- Open VMWare Workstation.
- Open the File menu and choose New Virtual Machine.
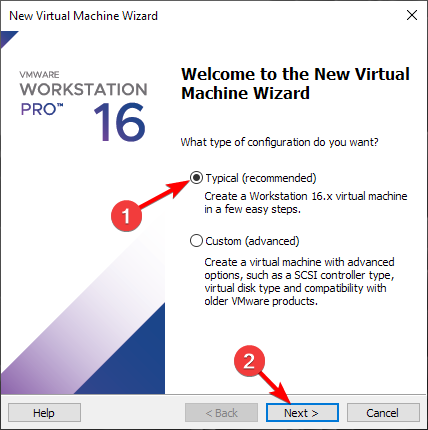
- Select Typical (recommended) and then click Next.
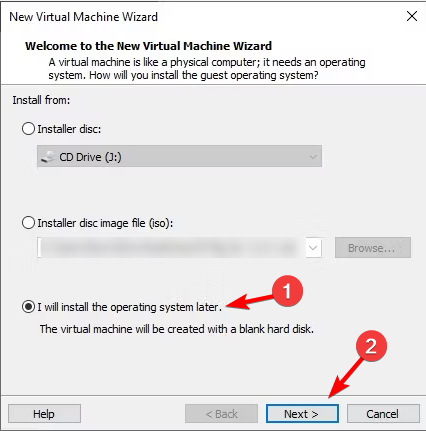
- Next, choose I will install the operating system later and go to Next.
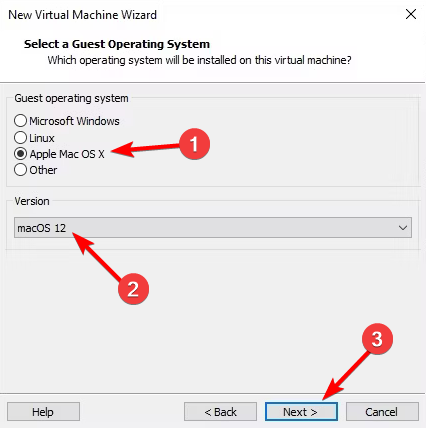
- Set the Guest operating system to Apple Mac OS X and Version to macOS 12. Lastly, press Next.
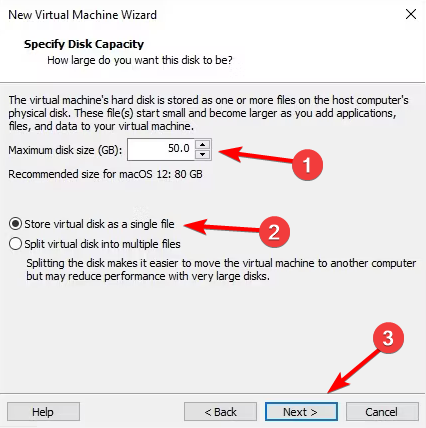
- Set the Maximum disk size to 50GB or more. Select Store virtual disk as a single file and click Next.
After doing that, we need to go and adjust the virtual machine settings.
4. Change the VM settings
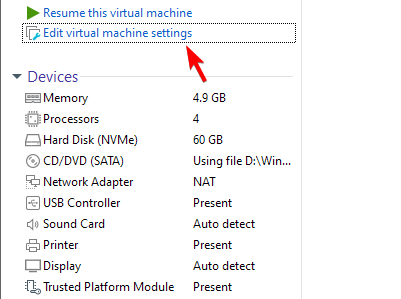
- Locate the newly created VM and click on Edit virtual machine settings.
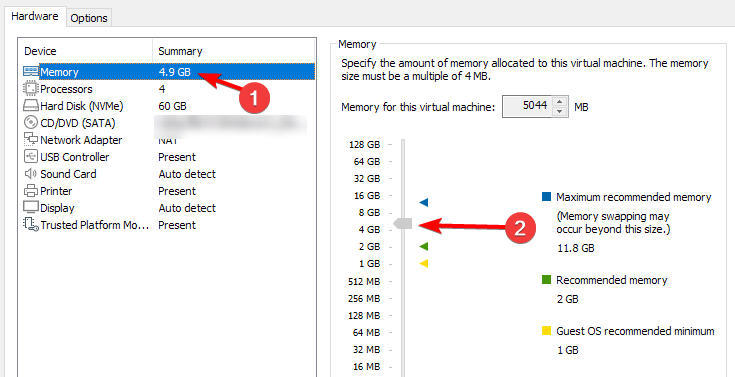
- Go to Memory and raise it to 4 or more GB.
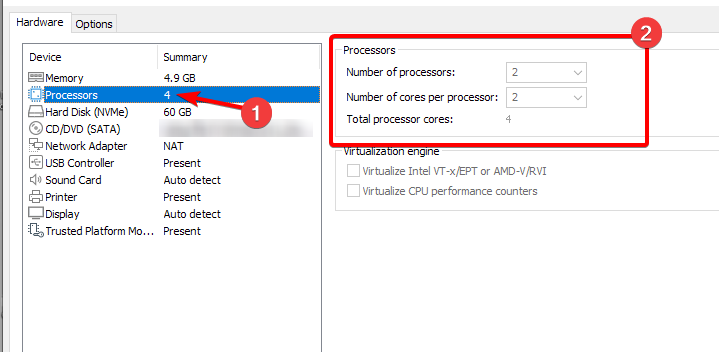
- Next, go to Processors and set them to 2 or more.
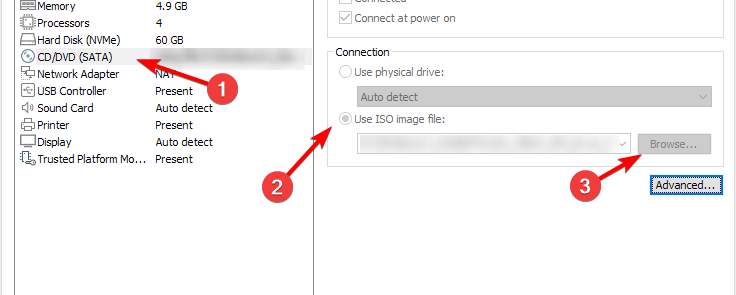
- Lastly, go to CD/DVD (SATA) and select Use ISO image file. Click Browse and select the macOS ISO file that you downloaded.
5. Edit the VMX file
- Before closing the VMWare, look at the Virtual Machine Details section.
- Locate the Configuration file path and navigate to it.

- Close VMWare completely.
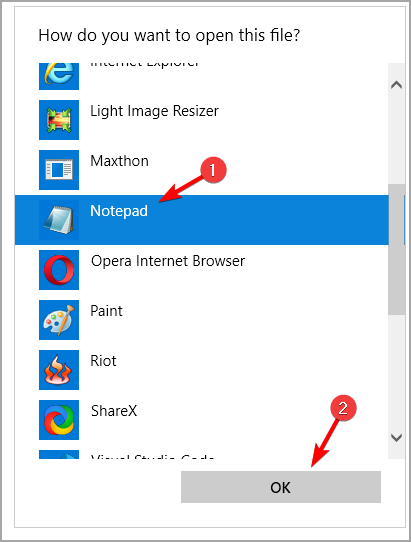
- Locate the macOS Monterey.vmx file, right-click it, and choose Open with. Select Notepad.
- Go to the bottom of the file and add the following code depending on your PC. Once you add the code, save the file.
For Intel
smbios.reflectHost = "TRUE"
hw.model = "MacBookPro14,3"
board-id = "Mac-551B86E5744E2388"
smc.version = "0"
For AMD
cpuid.0.eax = “0000:0000:0000:0000:0000:0000:0000:1011”
cpuid.0.ebx = “0111:0101:0110:1110:0110:0101:0100:0111”
cpuid.0.ecx = “0110:1100:0110:0101:0111:0100:0110:1110”
cpuid.0.edx = “0100:1001:0110:0101:0110:1110:0110:1001”
cpuid.1.eax = “0000:0000:0000:0001:0000:0110:0111:0001”
cpuid.1.ebx = “0000:0010:0000:0001:0000:1000:0000:0000”
cpuid.1.ecx = “1000:0010:1001:1000:0010:0010:0000:0011”
cpuid.1.edx = “0000:0111:1000:1011:1111:1011:1111:1111”
6. Install macOS
- Open VMWare and start the virtual machine.
- Select the setup language.
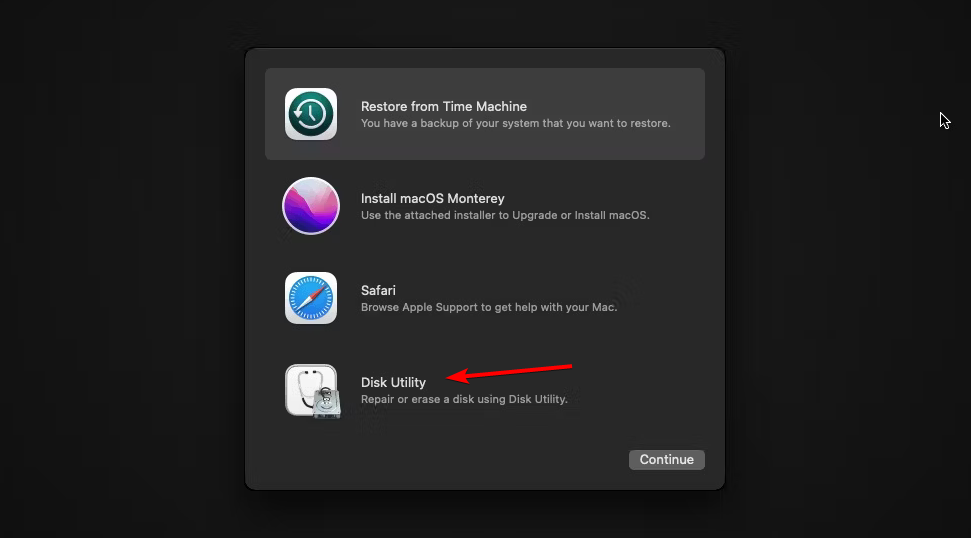
- Next, choose Disk Utility.
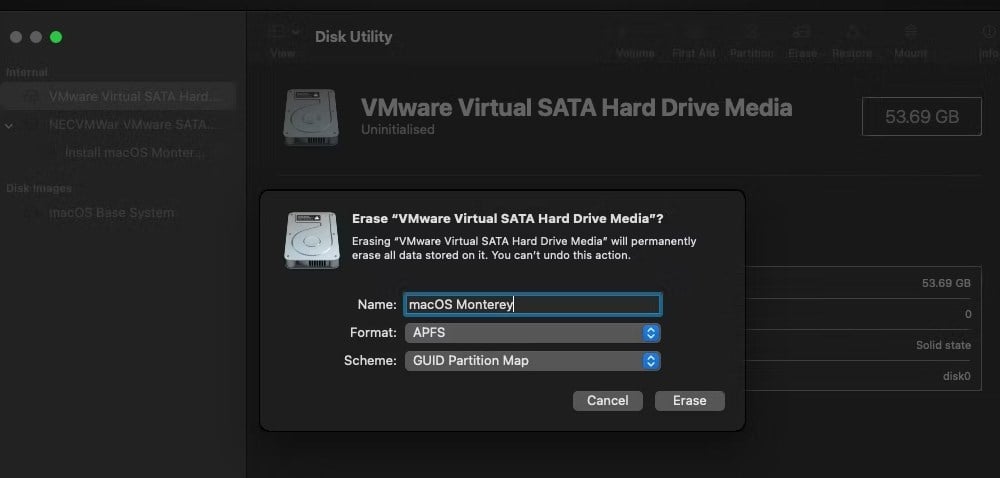
- Select VMware Virtual SATA Hard Drive Media and choose Erase.
- Set a new name for your drive, Format to APFS, and Scheme to GUID Partition Map. Click on Erase again.
- Exit Disk Utility and select Install macOS Monterey.
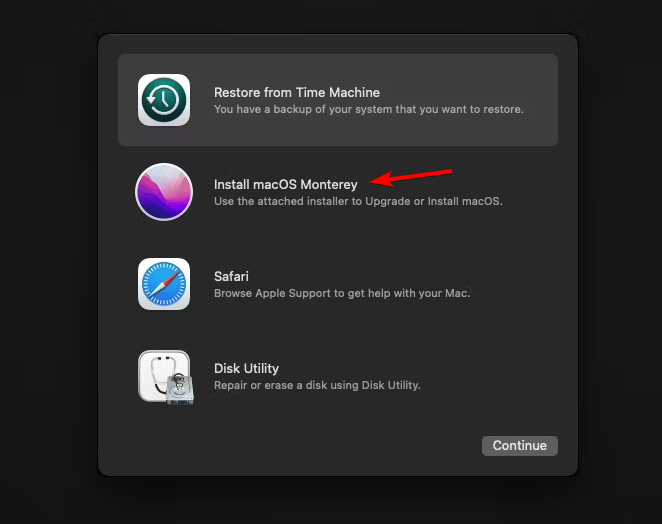
- Select the desired drive and click on Continue.

- Follow the instructions on the screen to complete the setup.
Once the macOS is installed, you’ll be able to access GarageBand from the virtual machine.
Is GarageBand for PC safe?
Garage Band app for Windows doesn’t exist, so downloading it from third-party websites isn’t safe since they are fake and potentially malware-infested.
What is PC equivalent of GarageBand?
If you need a GarageBand alternative for Windows you can use one of many available music production software. For users who prefer a native Windows setup without using a virtual machine, exploring a GarageBand alternative for PC is a safer and faster way to start producing music directly on your computer.
Do you know a different way to run GarageBand on Windows 10 except for using virtual machine software? More advanced users can try to dual boot Windows 11 and macOS to do so.
Read our disclosure page to find out how can you help Windows Report sustain the editorial team. Read more


Improve this guide


User forum
0 messages