Google Indic Keyboard for Windows 11: How to Download & Install
Everything you need to download the multi-lingual keyboard

Today we’ll tell you all you need to know to install the Google Indic Keyboard on your Windows 11 PC.
The app isn’t in the Microsoft Store, you’ll have to use an Android Emulator for it. To simplify the process, we will walk you through the steps in the next section of this guide.
How do I install Google Indic Keyboard on Windows 11?
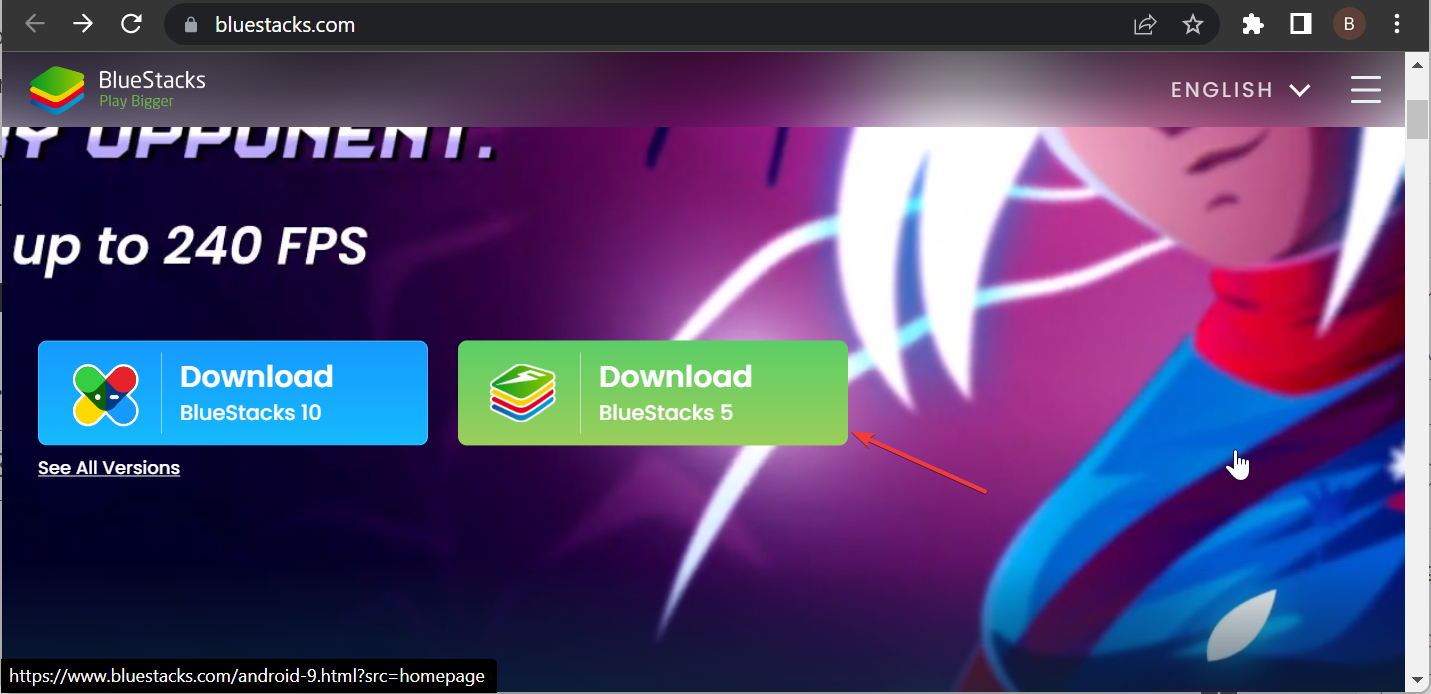
1. Download Bluestacks 5
- Visit the official Bluestacks website and click the Download Bluestacks 5 button.
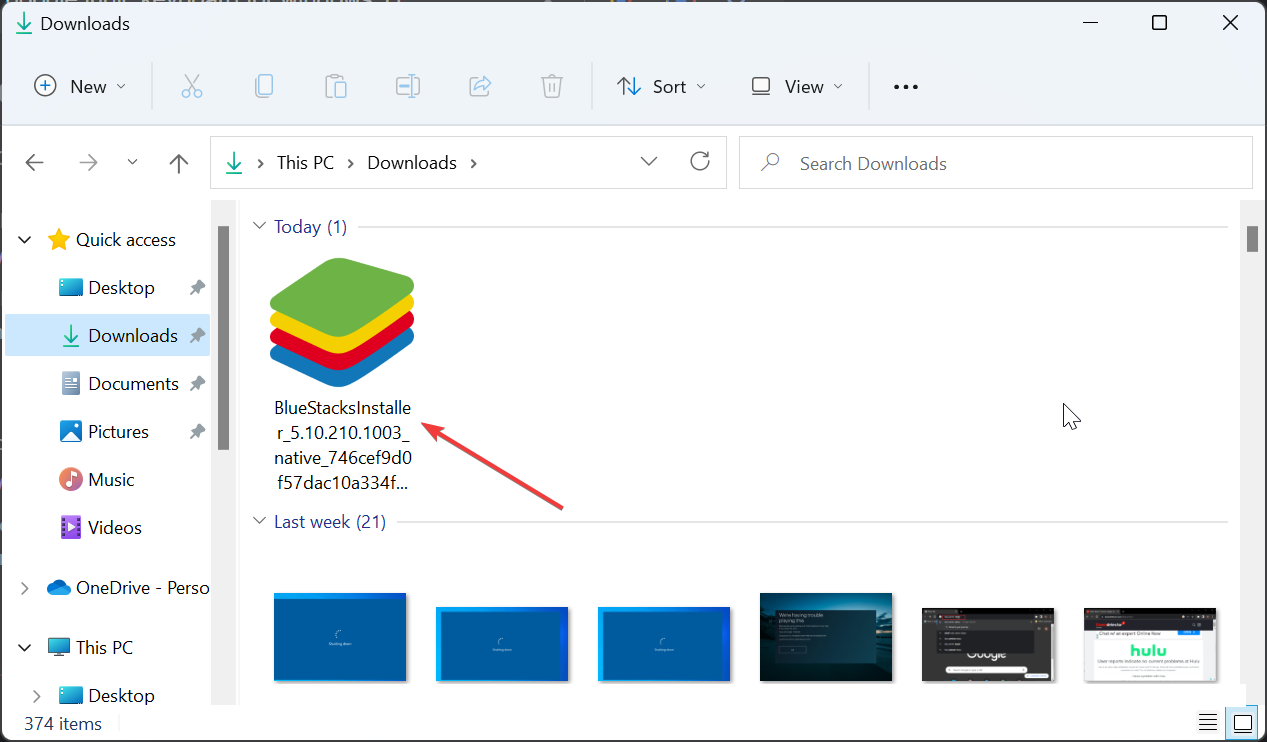
- Wait for the installer to finish downloading and go to the download location.
- Now, double-click the BlueStacksinstaller.exe file to launch it.
- Next, click the Install now button and wait for the installation process to complete.
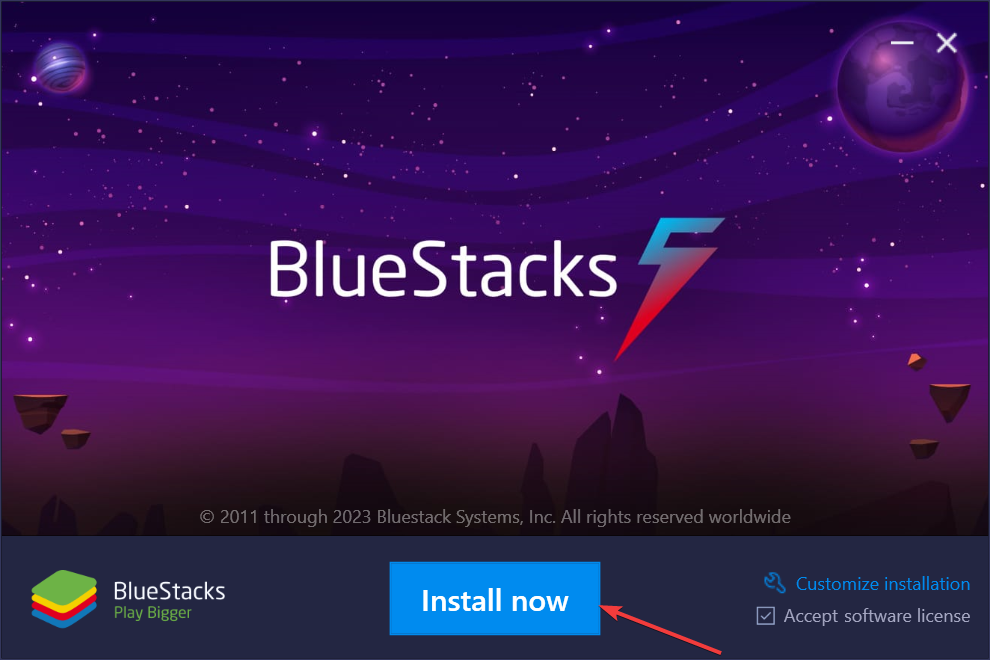
- Finally, the BlueStacks app will launch automatically when the installation is complete.
2. Download Google Indic Keyboard
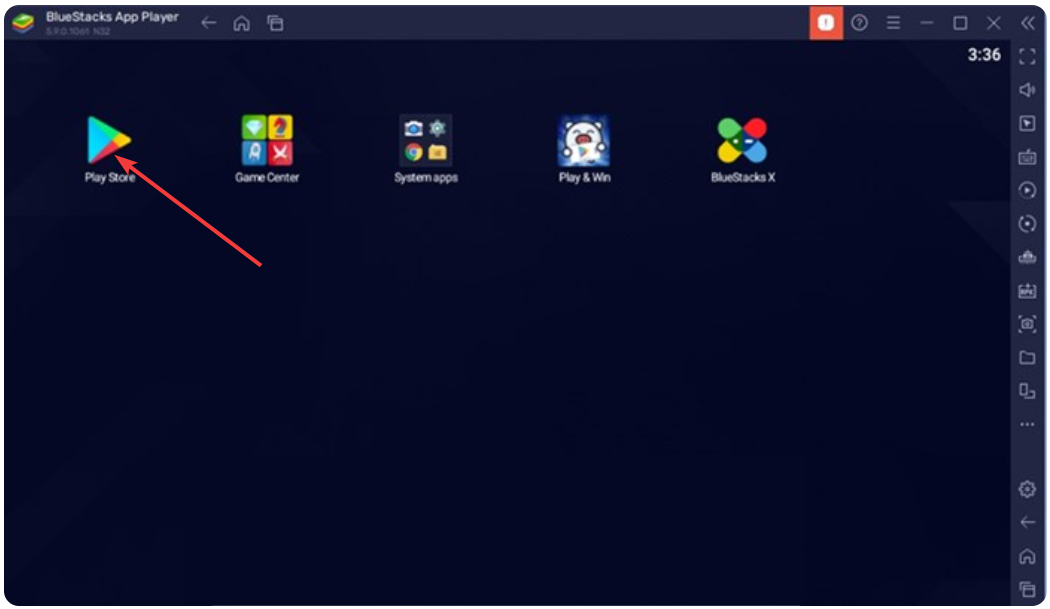
- Launch the BlueStacks app.
- Click the Play Store icon on the home screen.
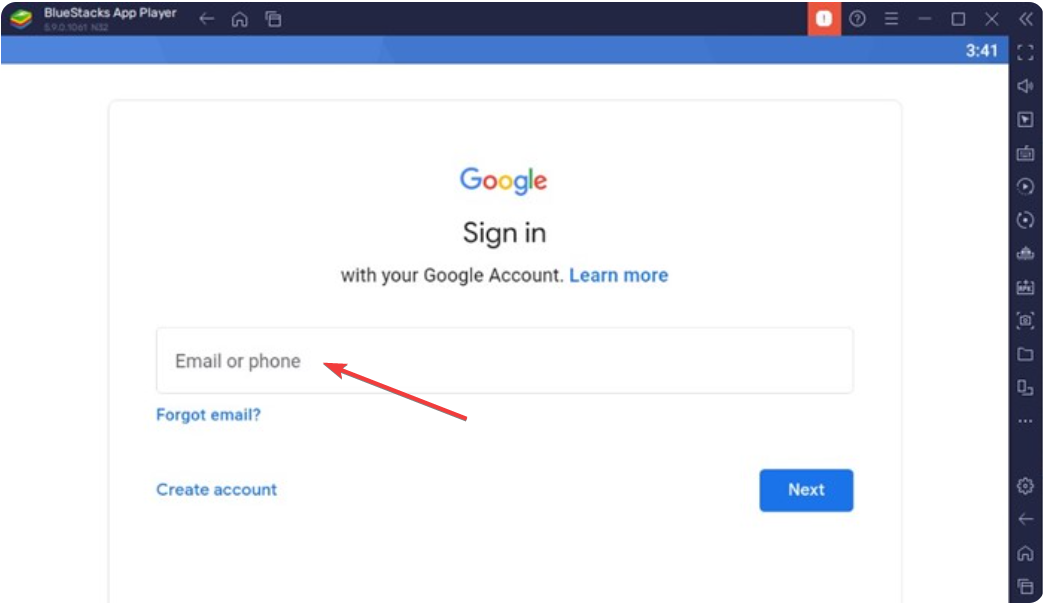
- Next, log into your Google account.
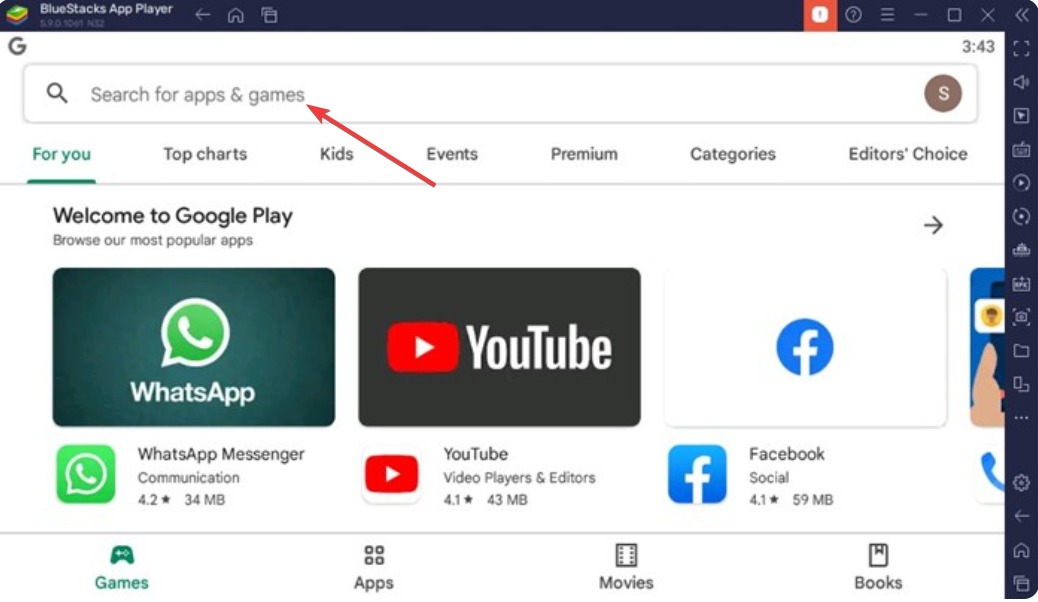
- Now, search for Google Indic Keyboard.
- Click the Install button and wait for the process to complete.
- Finally, double-click on the app and start typing in your preferred language.
With the steps above, you have successfully installed the Google Indic Keyboard on Windows 11. Note that you can only use the app on your Android emulator, so you should not remove BlueStack or any other emulator you use.
If you want to download Google Input Tools on your PC, check our detailed guide to do it effortlessly.
Feel free to let us know in the comments below if you encounter any problems downloading the app.
Read our disclosure page to find out how can you help Windows Report sustain the editorial team. Read more


Improve this guide


User forum
0 messages