How to Fix Gpedit.msc Access Denied on Windows 11
The key to a lockout lies in a new user profile
![]() 5 min. read
5 min. read
![]() Published on
Published on
Share this article
Improve this guide
Read our disclosure page to find out how can you help Windows Report sustain the editorial team. Read more

Usually, accessing the Group Policy Editor is as easy as running the gpedit.msc command but if you get an access denied message, you’ll be unable to adjust any policies that may be critical to the running of your system.
When gpedit.msc access is denied, it can be because you lack sufficient administrative permissions or your UAC security settings are too high.
It is also possible that your antivirus software is blocking access or your Windows edition does not include the feature. You can get away with it as you can install gpedit.msc on some Windows editions.
However, if you’re on the right edition and gpedit.msc is missing from your Windows 11, we have a way to get it back.
How do I fix group policy access denied?
1. Delete rename the machine file
- Hit the Windows + E keys to open File Explorer.
- Paste the path below in the address bar:
C:\Windows\System32\GroupPolicy\ - If you can’t find the folder, you’ll need to unhide hidden items.
- Click on View>Show>Hidden, and ensure the tick is not there.

- Now, locate Machine file and rename or delete it. A safer option would be to move it to your desktop because you might want to restore this file if any new issues occur.


2. Restart the Group Policy client
- Press the Windows key + R, type services.msc, and click OK.

- Double-click the Group Policy Client to open its properties.

- Now, set its Startup type to Automatic and click on the Start button.
- Click the Apply button and OK to save changes.
- Finally, launch Command Prompt as admin, type the command below, and hit Enter:
netsh winsock reset


3. Re-enable Group Policy and run as admin
- Press Windows + S to open the Search menu, enter Notepad in the text field, and click on the relevant result.

- Copy this batch file code by selecting the text and pressing the Ctrl + C hotkey:
@echo offpushd "%~dp0"dir /b %SystemRoot%\servicing\Packages\Microsoft-Windows-GroupPolicy-ClientExtensions-Package~3*.mum >List.txtdir /b %SystemRoot%\servicing\Packages\Microsoft-Windows-GroupPolicy-ClientTools-Package~3*.mum >>List.txtfor /f %%i in ('findstr /i . List.txt 2^>nul') do dism /online /norestart /add-package:"%SystemRoot%\servicing\Packages\%%i"pause - Press the Ctrl + V keyboard shortcut to paste the copied batch file code into Notepad.

- Click on the File menu in the Notepad, and select the Save As option.

- Head to the desired location, enter Group Policy Editor.bat as the File name, choose All files from the Save as type dropdown menu, and click on Save.

- Thereafter, right-click the Group Policy Editor batch file and then select Run as administrator.


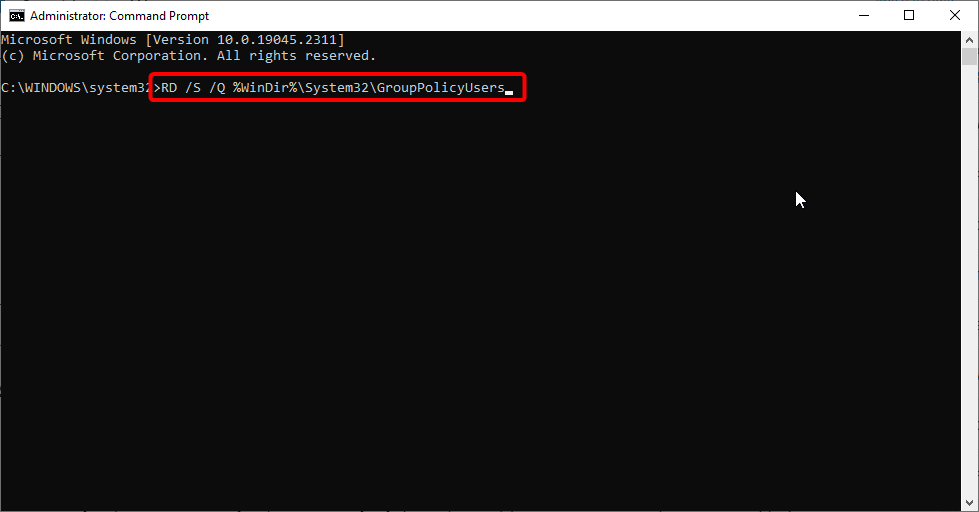
4. Force update Group Policy
- Left-click the Start button, type Command Prompt, then click Run as administrator.
- Click Yes on the User Account Control (UAC) prompt.
- Type in the following commands and press Enter after each one:
RD /S /Q "%WinDir%\System32\GroupPolicyUsers" && RD /S /Q"%WinDir%\System32\GroupPolicy"gpupdate /force - Restart your PC.
You can also try resetting Group policy settings. However, keep in mind that this will affect any customized settings as they will revert to default settings.
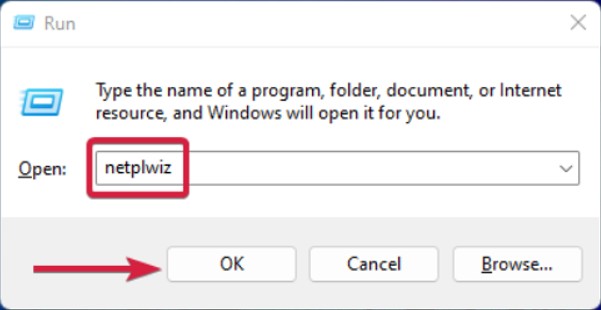
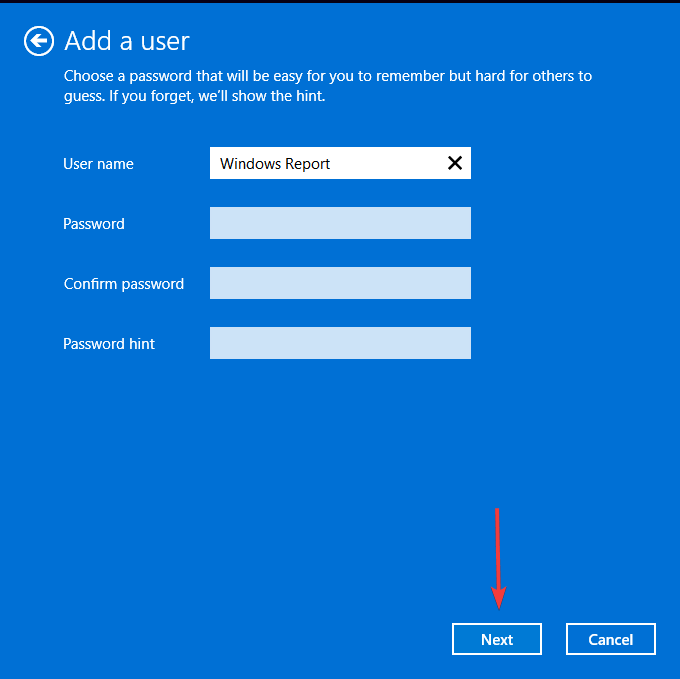
4. Create a new user profile
- Press Windows + R to launch the Run console, enter netplwiz in the text field, and click OK.

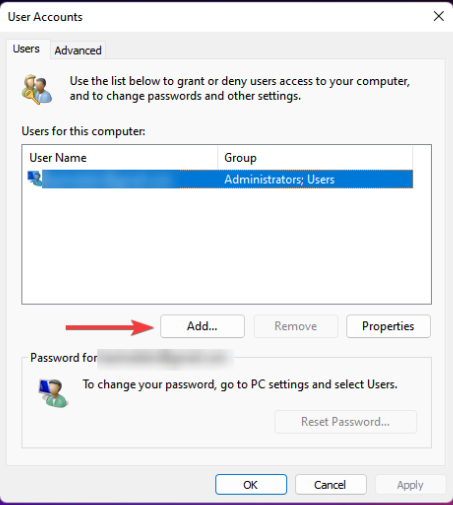
- Click Add in the User Accounts window.

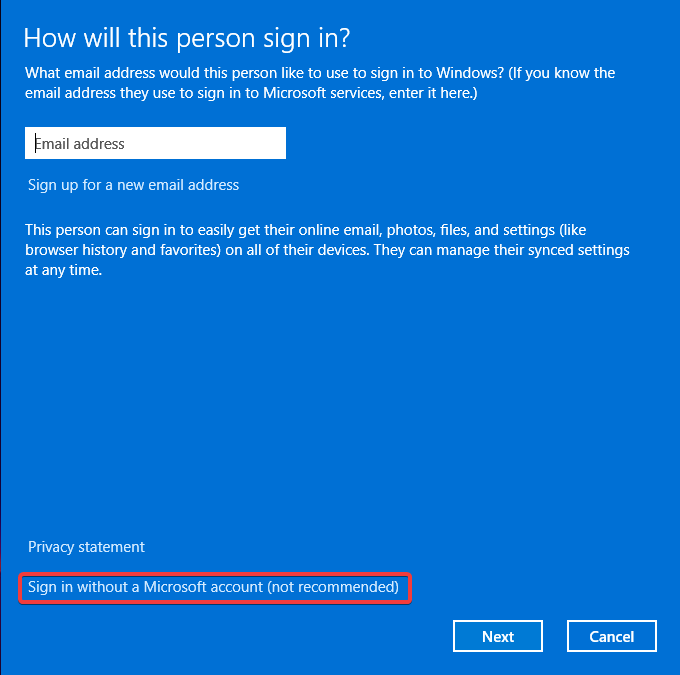
- Select Sign in without a Microsoft account (not recommended).

- Click on Local account button.

- Enter a username and password (optional) for the new user account, and a hint, in case you set a password. Once done, click on Next.

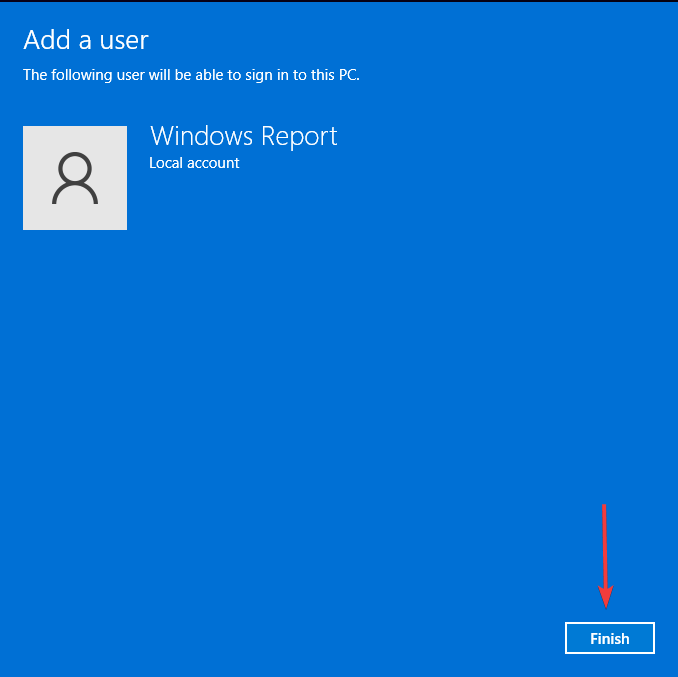
- Click on Finish to create the Local account.


If access is regained with a new profile, you can conclude that the previous one was corrupt and proceed to repair your profile.
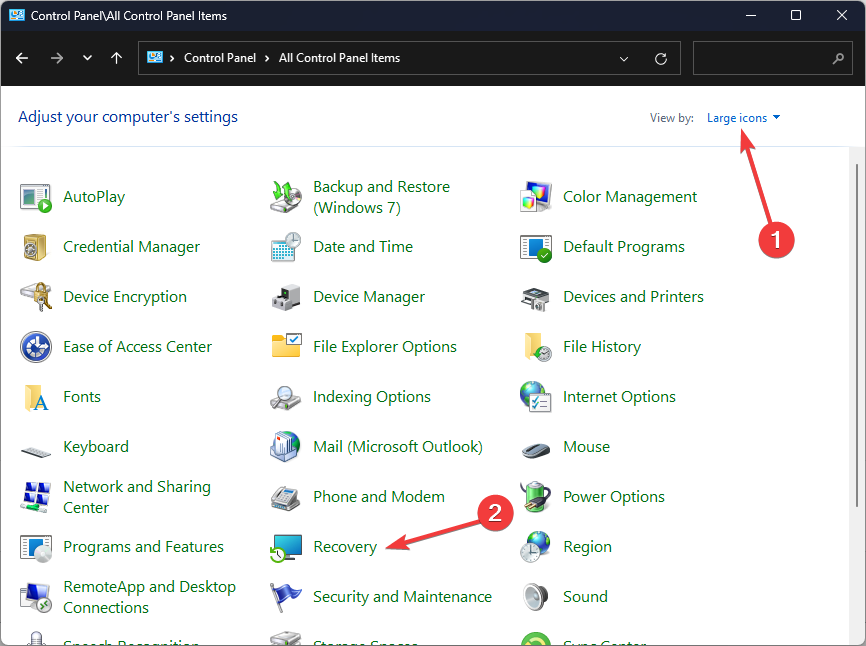
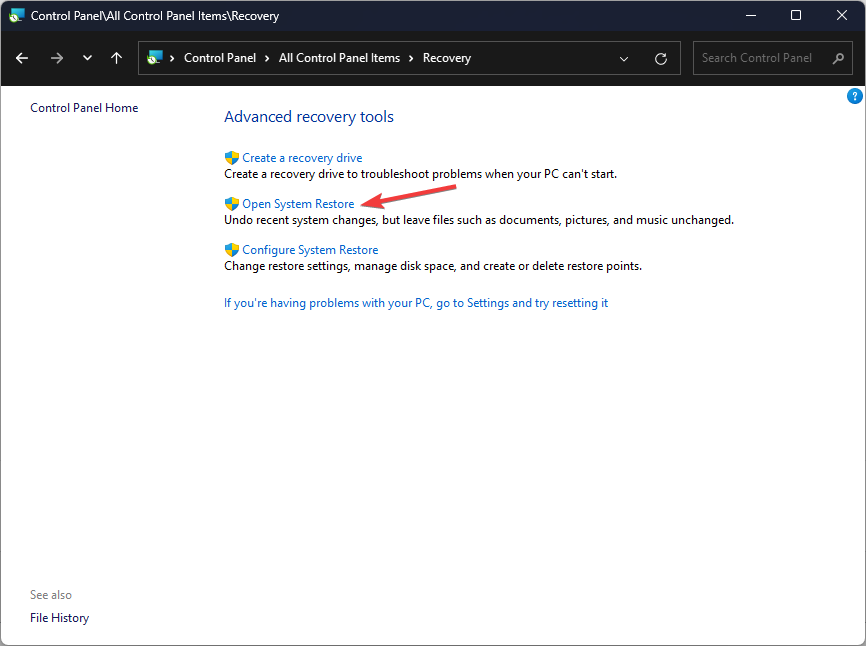
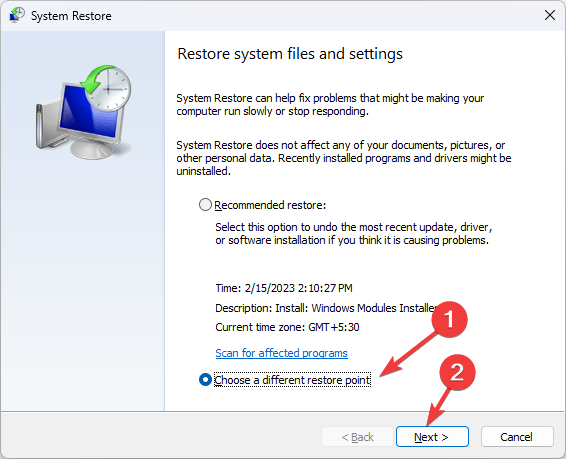
5. Perform a System Restore
- Press the Windows key, type Control Panel, and click Open.

- Select Large icons as View by and click Recovery.

- Click Open System Restore.
- Select Choose a different restore point and click Next.

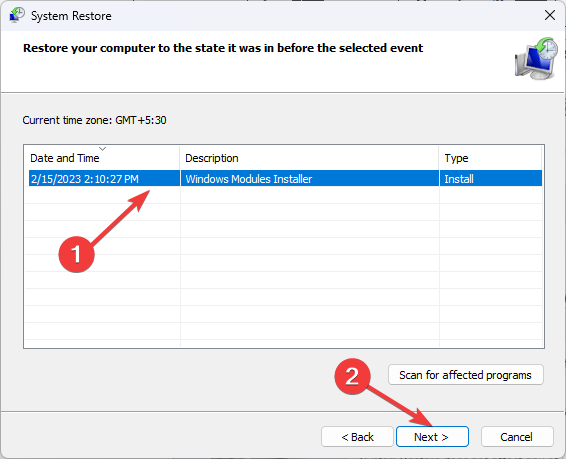
- Now select the restore point and click Next.
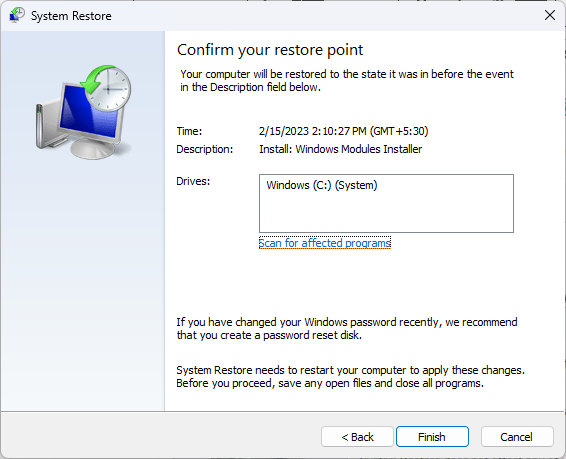
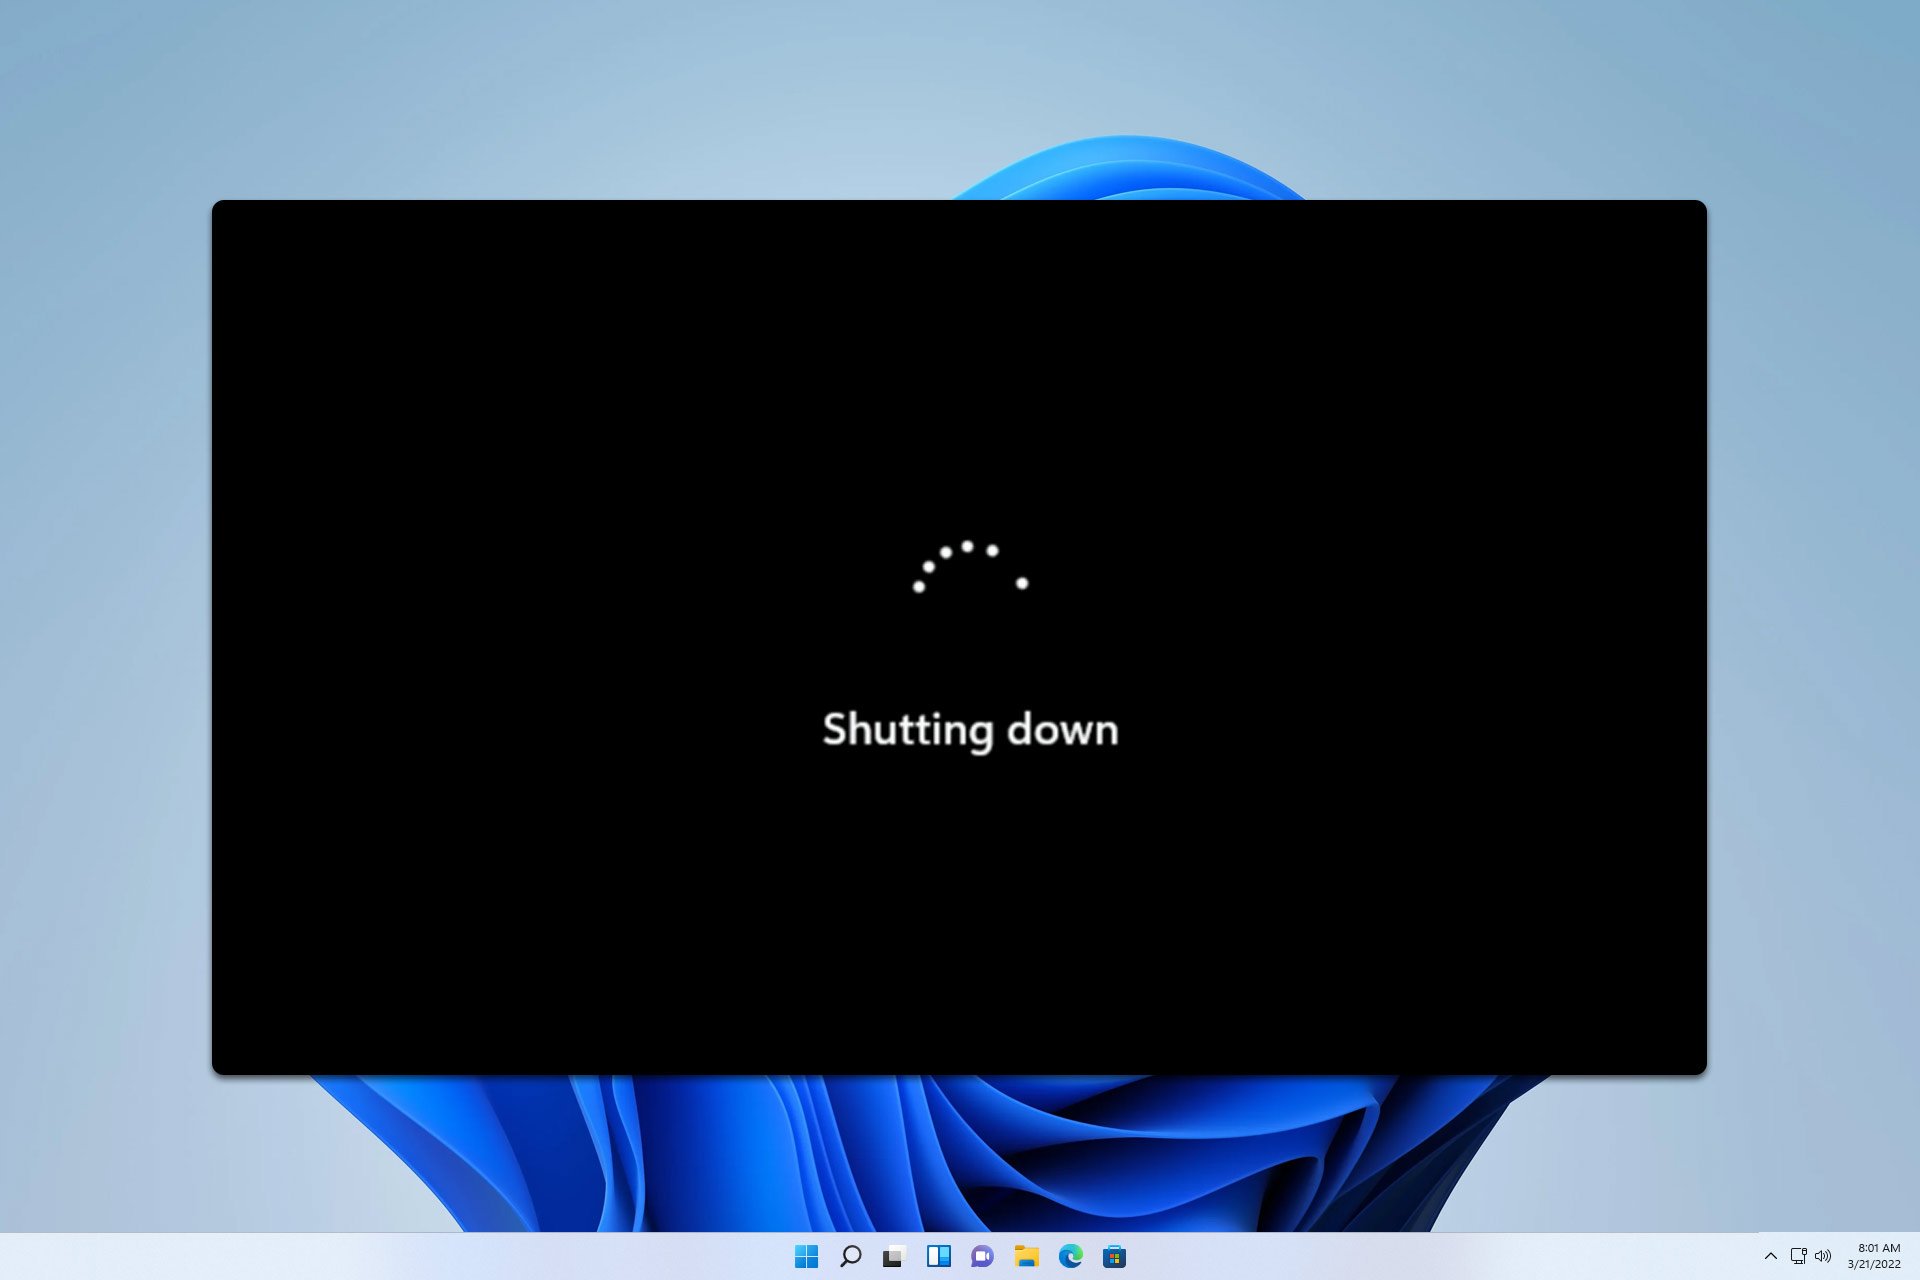
- Click Finish to restore the previous settings, and Windows will restart.

Other worthy solutions you can try include disabling the UAC and running the system file checker scan to ensure there are no corrupt critical system files.
Also take note that in some organizations, some functions have been restricted to select users so you might want to get in touch with your IT administrator and check whether your account has the requisite permissions.
That’s a wrap from us but if we’d like to get some feedback from you. Have you experienced a gpedit.msc access denied lockout message before? What would you say is your go-to solution in this case? Let us know in the comment section below.


User forum
0 messages