How to Fix Gpedit.msc Not Found in Windows 11 - 5 Tested Ways
Everything you need to use GPE on your version of Windows 11

Dealing with gpedit.msc missing? You’re not alone, and you’re not doing anything wrong. Gpedit.msc (Group Policy Editor) is a powerful Windows tool used to control advanced system settings like updates, user permissions, and security restrictions.
But on Windows 11 Home, it’s missing by design. Try to launch it (Win + R > gpedit.msc), and you’ll likely get the error: “Windows cannot find ‘gpedit.msc’. Make sure you typed the name correctly…”
The good news? You can still enable it manually, without having to upgrade. Check the methods below to see how.
How to fix gpedit missing in Windows 11
1. Enable Group Policy Editor with a batch file
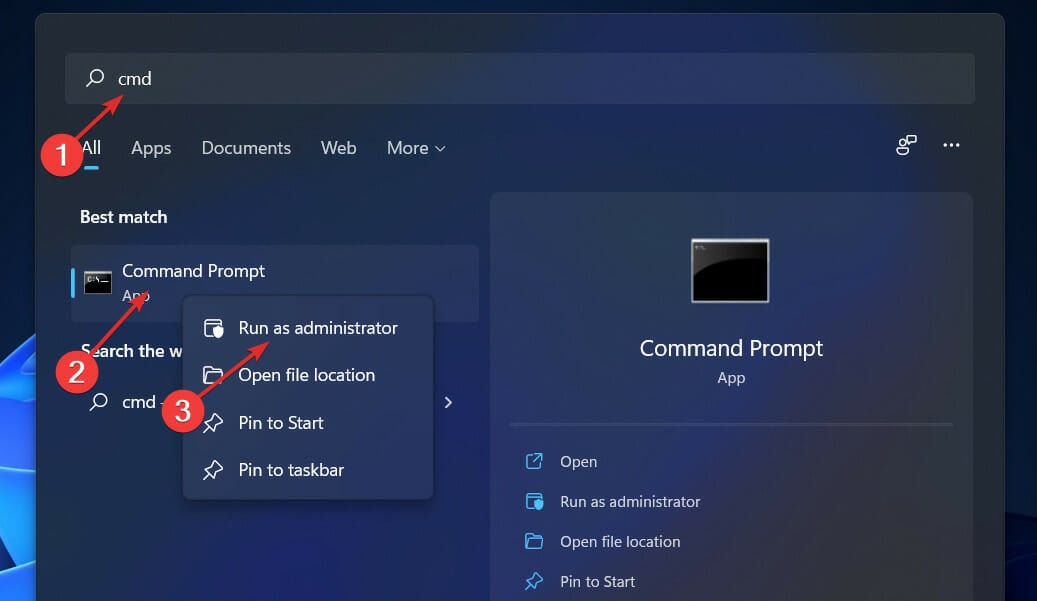
- Press the Windows + S key to open the Search bar, then type cmd and right-click on the most relevant result to run it as an administrator.
- Now type or paste in the following commands and press Enter after each:
FOR %F IN ("%SystemRoot%\servicing\Packages\Microsoft-Windows-GroupPolicy-ClientTools-Package~*.mum") DO ( DISM /Online /NoRestart /Add-Package:"%F" )
FOR %F IN ("%SystemRoot%\servicing\Packages\Microsoft-Windows-GroupPolicy-ClientExtensions-Package~*.mum") DO (
DISM /Online /NoRestart /Add-Package:"%F")
Once the processes are complete and reach 100 percent, you can close the Command Prompt window and try to open Gpedit.msc again.
A Command Prompt window will appear at this point. Wait until it says 100 percent before continuing. Before you close that window, be sure that this operation was accomplished correctly.
A simpler and safer way to restore missing Windows files is with the help of specialized software.

With Fortect, you don’t need to configure anything manually. It automatically sets a restore point and then repairs system issues, so you can fix problems confidently without fear of losing data.
This is how you can restore your system with Fortect:
- Install and launch Fortect.
- Create a restore point automatically.
- Scan your PC for errors and stability issues.
- Press Start Repair and restart your device.
Disclaimer: In order to perform some operations, this software must be updated to the premium plan.
2. Enable Group Policy Editor via the Command Prompt
- Press the Windows + S key to open the Search bar, then type cmd and right-click on the most relevant result to run it as an administrator.
- Now type or paste in the following commands and press Enter after each:
FOR %F IN ("%SystemRoot%\servicing\Packages\Microsoft-Windows-GroupPolicy-ClientTools-Package~*.mum") DO ( DISM /Online /NoRestart /Add-Package:"%F" )
FOR %F IN ("%SystemRoot%\servicing\Packages\Microsoft-Windows-GroupPolicy-ClientExtensions-Package~*.mum") DO (
DISM /Online /NoRestart /Add-Package:"%F")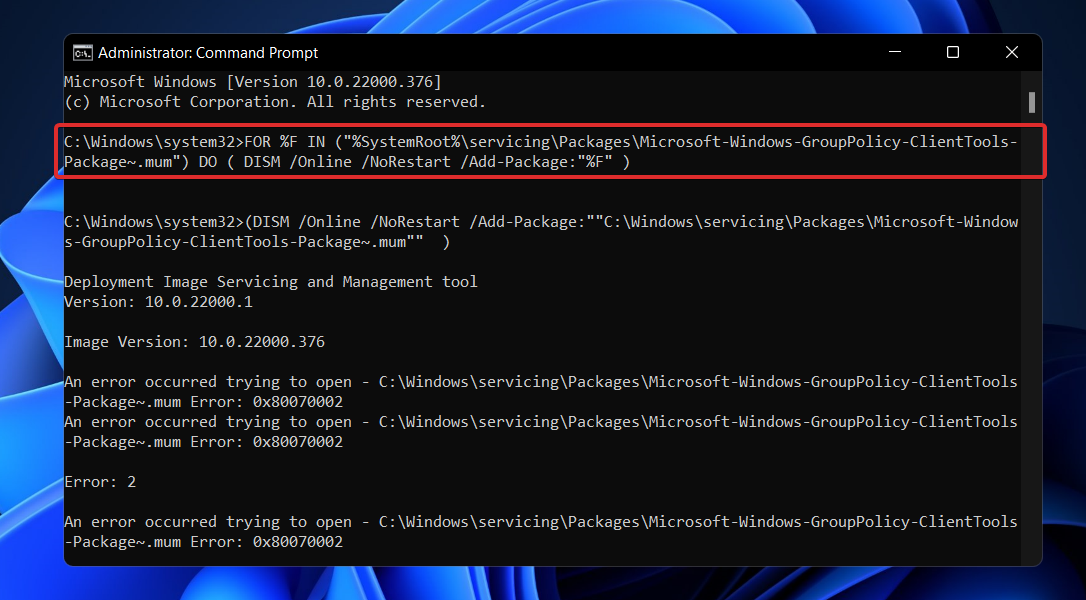
Once the processes are complete and reach 100 percent, you can close the Command Prompt window and try to open Gpedit.msc again.
3. Download gpedit-main zip file
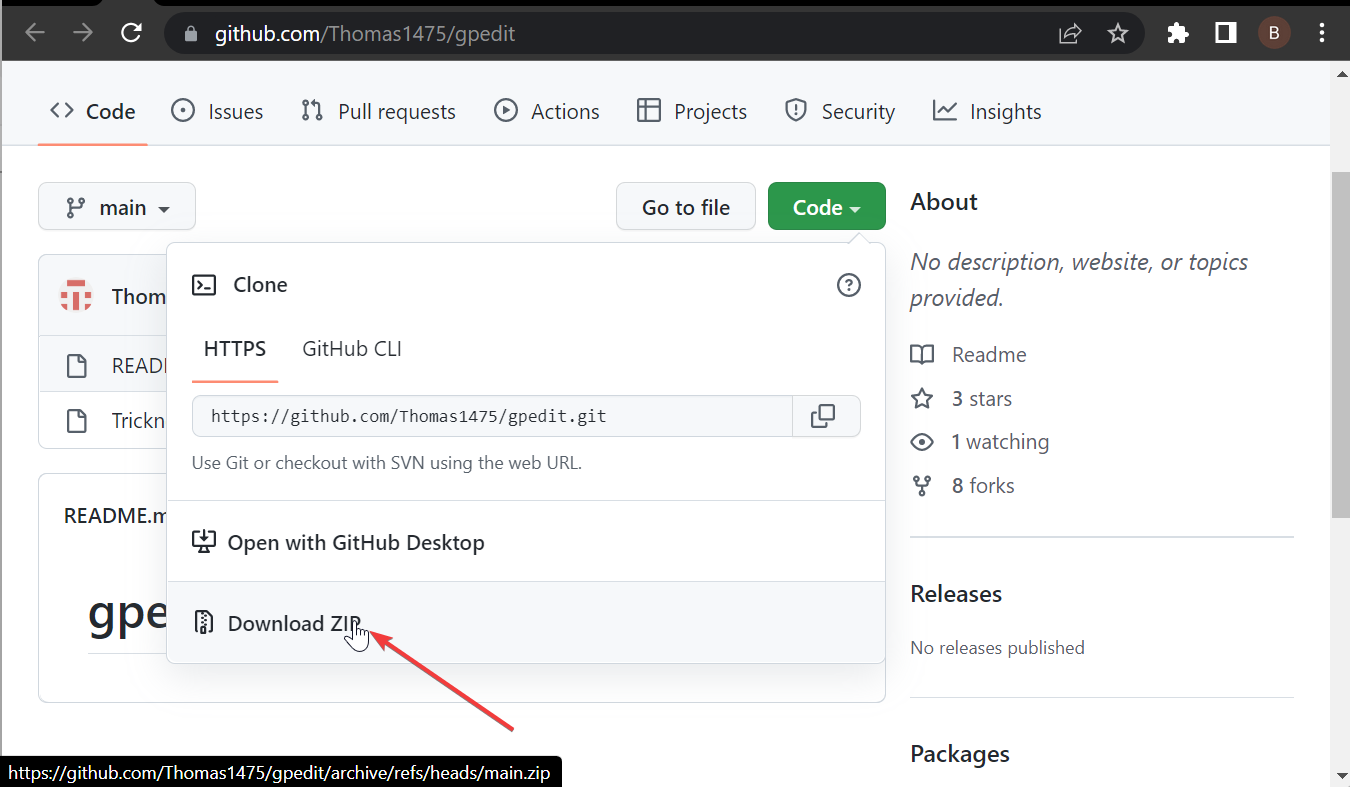
- Go to the Gpedit-main Github page to download the zip.
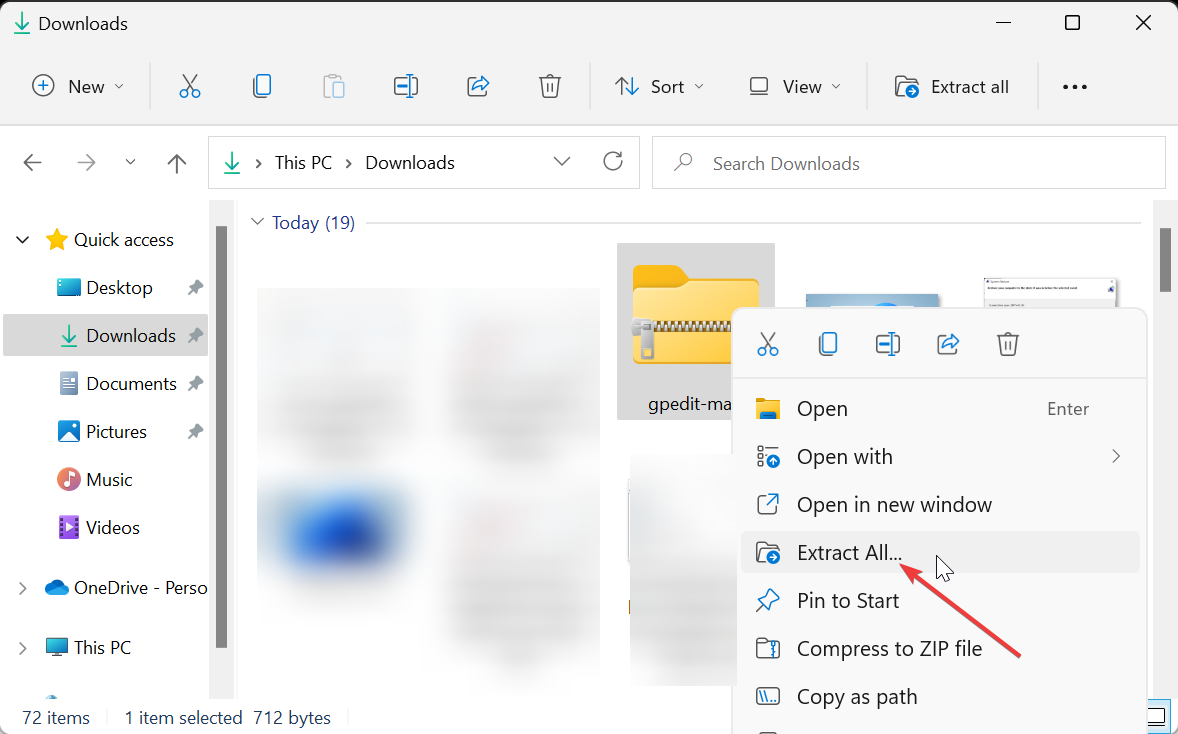
- Right-click the zip folder and select the Extract All… option. Choose a location to extract the files to complete the process.
- Now, open the extracted folder, right-click on the .bat file there, and select Run as administrator.
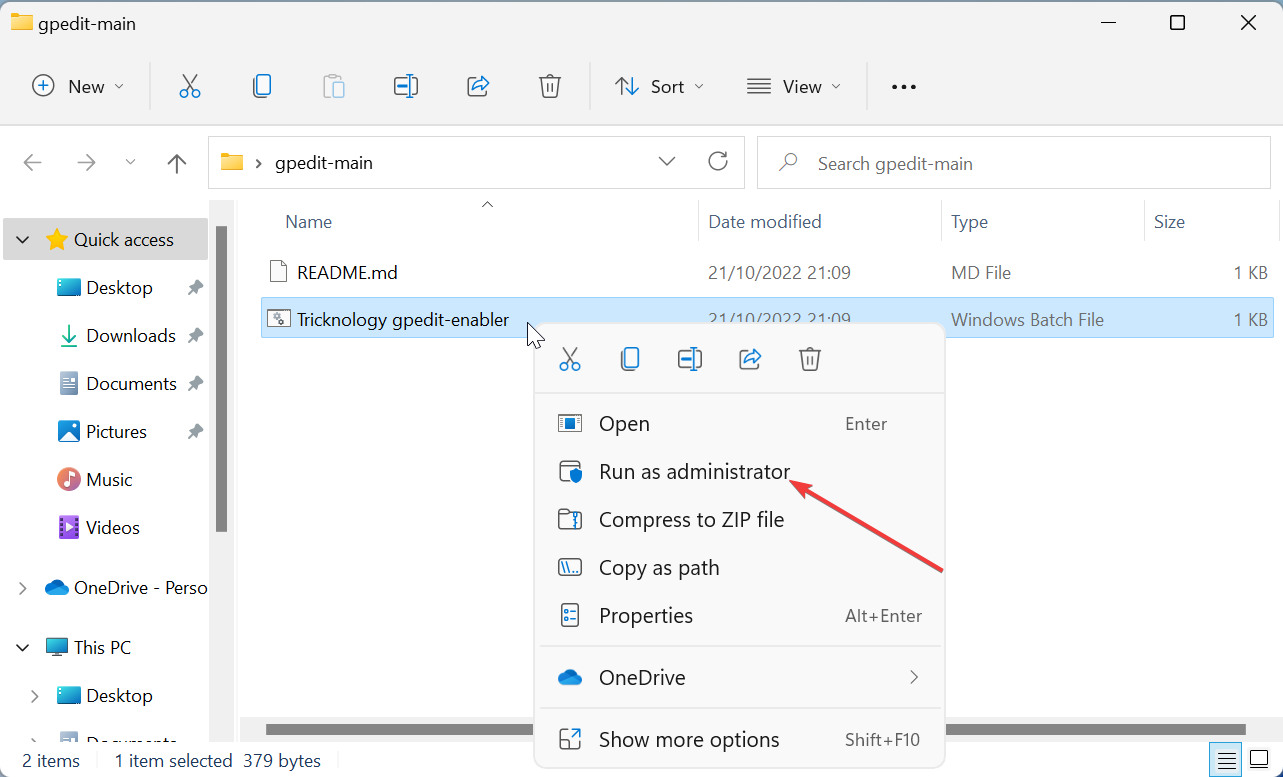
- Wait for Command Prompt to open and install the needed extensions. Close CMD once it shows The operation completed successfully message.
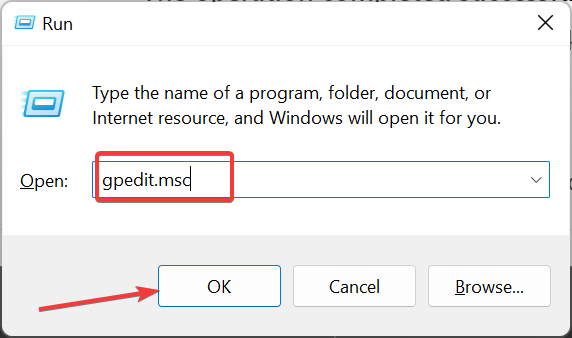
- Finally, you now press the Windows key + R, type gpedit.msc, and click OK to access the Group Policy Editor.
Another way around the Gpedit.msc not found on Windows 11 is to download the .bat file as shown above. This method also works on Windows 11 Home Edition, so be sure to try it.
4. Update Windows
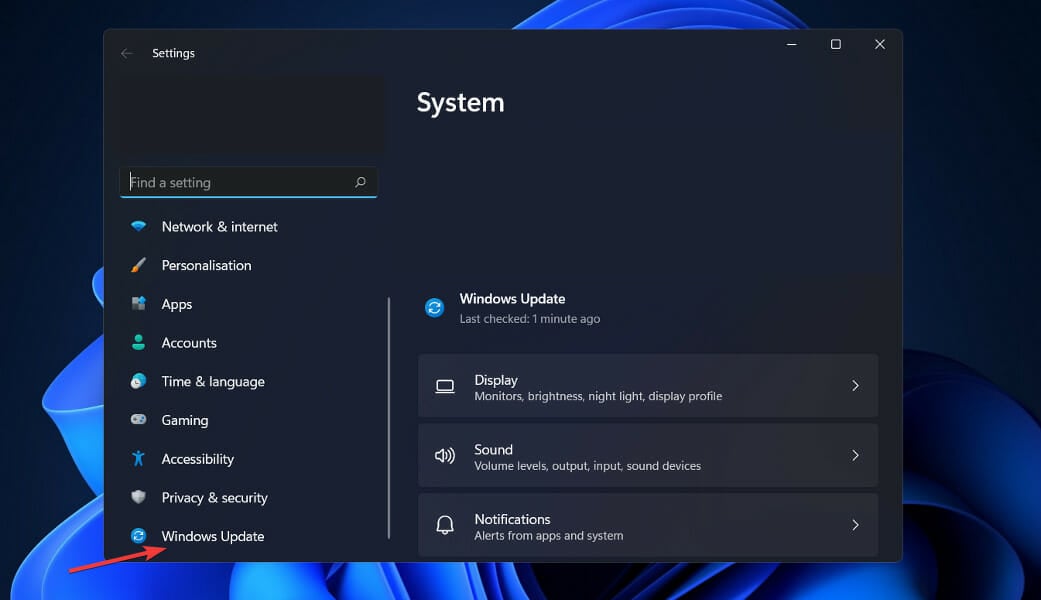
- Press the Windows key + I and click on Windows Update from the left side menu.
- Click on Check for updates.
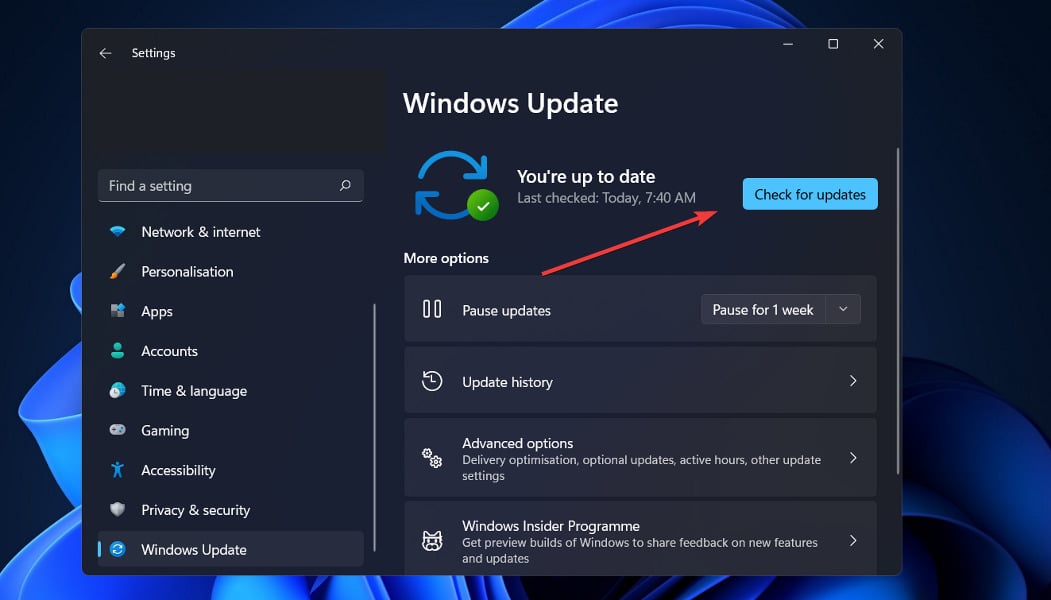
If you’re using an earlier version of Windows, this could be a contributing factor to the error, which can be fixed by updating the operating system. They should probably fix this error in a subsequent software release.
5. Use the Microsoft Management Console
- Press Win + R to open the Run dialog.
- Type mmc and press Enter.

- In the Microsoft Management Console, click File at the top-left.
- Select Add/Remove Snap-in from the dropdown.

- Scroll down and select Group Policy Object Editor and click on it.
- In the new window, choose Local Computer and click Finish.

- Click OK to return to the console.
- Go to File and choose Save As, name the file and save it to a preferred location.

- When you want to open to Group Policy Editor, just double-click the saved file
That’s about it on the Gpedit.msc not found on Windows 11 issue and how to download it.
Alternatively, you can learn how to edit the Group Policy in Windows 10 and use the same procedures in Windows 11, as they are similar.
You can also use gpedit.msc on Server 2019, and we have a great guide on how to do it.
Let us know in the comments section below which solution worked best for you as well as how often you use Group Policy Editor.
Read our disclosure page to find out how can you help Windows Report sustain the editorial team. Read more


Improve this guide


User forum
13 messages