Is your GPU Artifacting? Here's how We Fixed Ours
Simple and tested solutions to fix the GPU artifacting
4 min. read
Updated on
Read our disclosure page to find out how can you help Windows Report sustain the editorial team Read more
Key notes
- When you experience static or distorted images on your screen, it is regarded as GPU artifacting.
- You can try to resolve this issue by either updating your graphics drivers or adjusting the in-app graphics settings.
- In the worst cases, you may have to replace your graphics card.
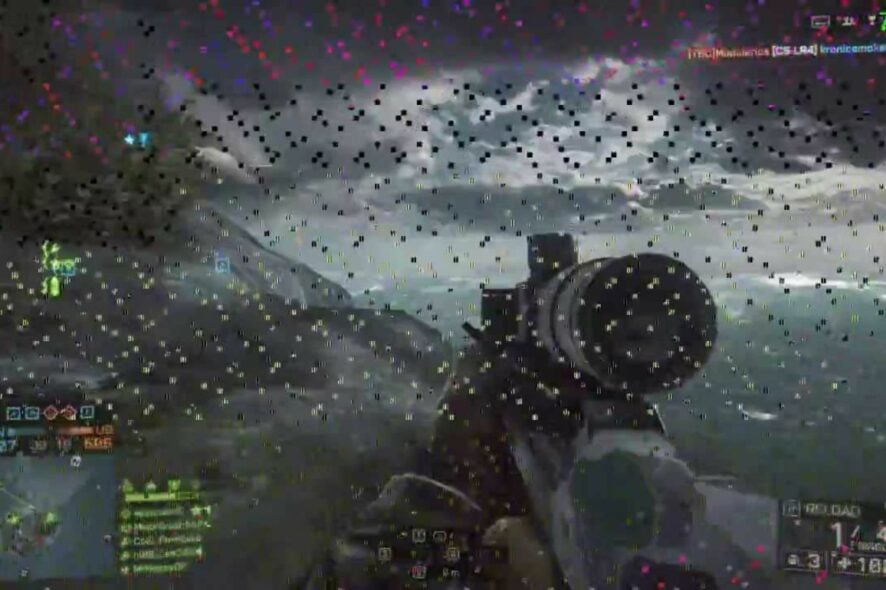
Some of our readers have recently complained that they are experiencing static and distortions on their Windows PC screen, which are symptoms of GPU artifacting issues.
If you are experiencing similar issues and are wondering what it is and how they can be fixed, worry less, as this article is just for you.
What is GPU artifacting?
GPU artifacts or artifacting are the terms used when referring to artifacts caused by the graphics card or GPU.
When processing or transmitting digital data, you might suddenly notice random lines or symbols appearing on the screen/display. This is an error known as a visual artifact. It can occur in both digital photos and videos as well.
Moreover, screen flashes, odd textures, distorted colors, and haphazard lighting in video games may accompany GPU artifacting. Some other scenarios are a display of static noise, screen flickering, and blackout of the display.
These GPU artifacts can be triggered if you watch or play a lot of 3D Content, such as games or videos, under certain limited circumstances.
How can I fix GPU artifacting?
Before anything, you should consider performing the following checks as they may help prevent the error next time:
- Check for physical damage on PCB.
- Launch the Task Manager and see if your screen flickers on the Task Manager window. If it does, the problem is likely due to your display driver.
- Check if your PC is overheating. You can check how to reduce your PC’s high temperature.
- Ensure your power supply can produce enough power to handle your GPU.
- Check your graphics (system and application) settings, as it may push the GPU to its maximum performance.
- Ensure that you are using a compatible GPU for your CPU.
- If you are using any overclocking tools, disable them and see if this changes the situation.
Having confirmed the above checks, you can explore the advanced solutions below to know how to fix the issue.
1. Update the graphics driver
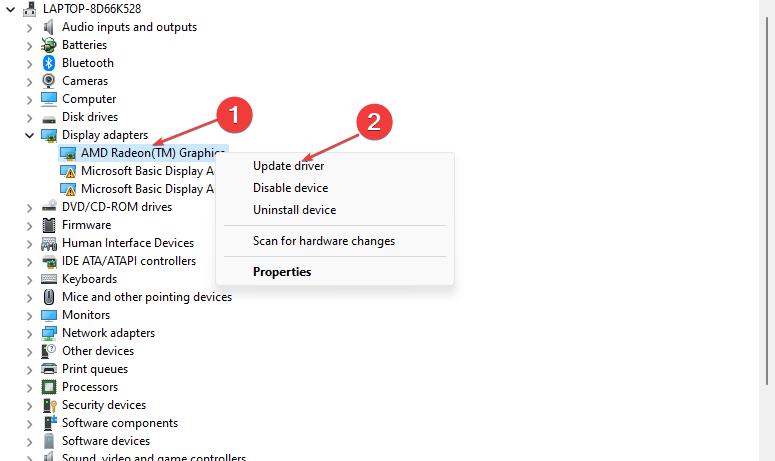
- Right-click the Start icon, then select Device Manager from the options.
- Expand Display adapters, then right-click your graphics card driver to choose Update driver.
- Finally, click on the Search automatically for drivers option.
- Follow the on-screen instructions to complete updating the driver and restart your PC.
Alternatively, depending on your GPU, you can visit Nvidia’s official website or AMD to download the latest graphics driver for your device.
- Download and install the Outbyte Driver Updater app.
- Launch the software and wait for the app to detect all incompatible drivers.
- Now, it will show you a list of all faulty drivers to select the ones to Update or Ignore.
- Click on Update & Apply Selected to download and install the newest versions.
- Restart your PC to ensure the applied changes.

OutByte
Keep your GPU in a flawless state without worrying about possible driver issues.2. Underclock the CPU speed via BIOS
- Restart your PC.
- Once the first screen comes on, press the F10, F12, F4, or F8 key repeatedly until the BIOS screen is displayed. (For PCs built earlier than 2006, press the F1 key repeatedly during the booting process to get into BIOS).
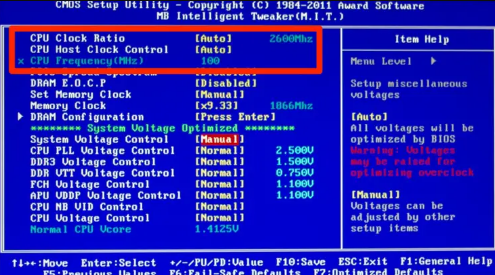
- Navigate to the overclock settings and reduce the CPU speed.
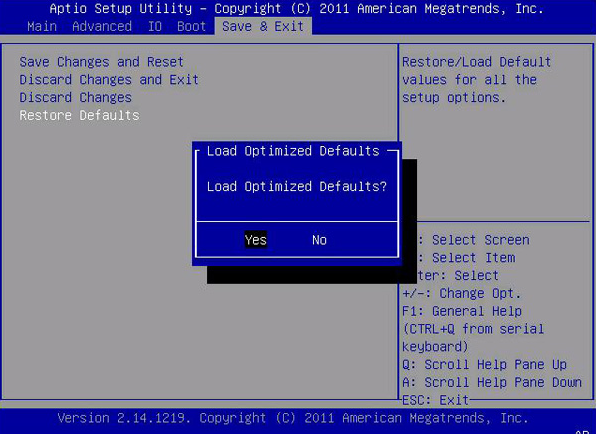
- If you do not know the original overclock values, choose the option to reset your BIOS to default settings.
- Save the changes.
Before trying to reduce your overclocking speed, you should consider using reliable overclocking stress test software.
3. Run programs in Compatibility mode
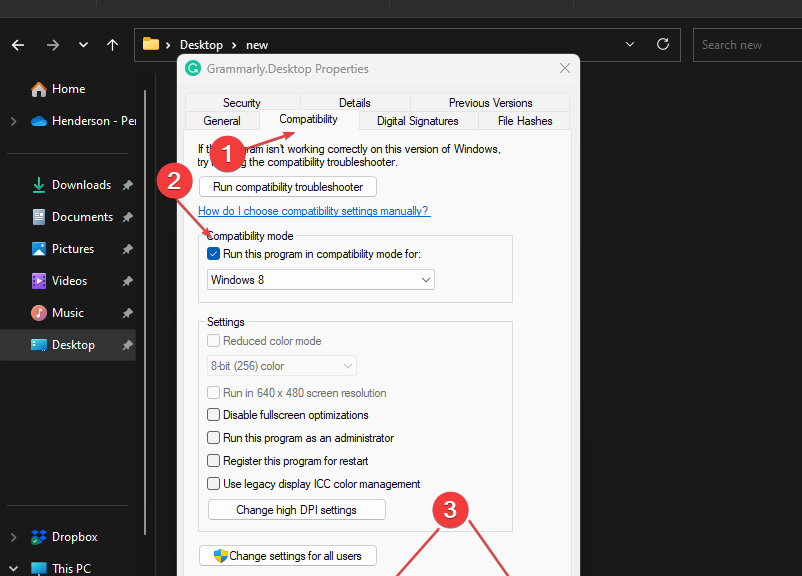
- Right-click the app’s icon and click on Properties.
- Select the Compatibility tab, check the box for Run this program in compatibility mode, and select a lower OS from the drop-down menu.
- Then click Apply and OK before closing the window.
Should you want to check how to run apps like Valorant in Compatibility mode, kindly follow our guide for the fixes.
4. Replace your graphics card
Sometimes if you’re experiencing GPU artifacting, it might be because of a malfunctioning VRAM.
If that’s the case, you’re left with little option than to replace your graphics card.
If none of the above solutions works, your last resort is to lower the temperature of your graphics card by changing the thermal paste on the GPU if that is an available option. Doing so might solve the problem.
Another thing you may try is to adjust the graphics settings to lower values and see if that fixes the problem.
And that’s it on how to fix the issue with GPU artifacting. Make sure you work your way through any of the above methods to know what works best for you.
Similarly, if you’re getting vertical and horizontal lines on your screen, check our detailed guide to fix the issue quickly.
If you have any questions or suggestions on how to fix the GPU artifacting issues, please do not hesitate to use the comments section below.

