FIX: We need your help to finish adding a feature

Are you getting the ‘We need your help to finish adding a feature’ pop-up? There’s no need to panic! Windows Report will you to fix the error.
The error is reported to occur after upgrading to Windows 10 or installing a new Windows 10 version. The reason for this error is related to Windows 10 installation and its auto optional feature. Hence, we have the put together the best workarounds to fix this error problem.
How to fix ‘We need your help to finish adding a feature’ alert
- Turn off optional feature
- Perform SFC and DISM check
- Run System Restore in safe mode
- Roll back Windows
- Reset Windows Updates components
- Perform an in-place upgrade
Solution 1: Turn off optional feature
You can use the turn-off optional feature in control panel. Here’s how to do this:
- Press the Windows + X, and F keys on keyboard to open “Programs and features” window
- On the left pane of Programs and Features, click on Turn Windows Features on or off menu.

- In Windows Features window, check (On) or clear (Off) the feature you want.
- Once you are done, click “OK” to apply this change, and then restart your PC.
Alternatively, you can uninstall optional features using “Settings” on your Windows 10 PC, here’s how to do this:
- Press the Windows key, type ‘settings’, and then hit enter
- In the settings window, click ‘system’.
- On “App & Feature tab, click the ‘manage optional features’ menu.
- Select the feature you want, and you’ll see a button to either uninstall or manage; this redirects you to the settings page where the feature is located.
However, if the ‘we need your help to finish adding a feature’ error message still occurs, you may proceed to the solution.
Solution 2: Perform SFC and DISM check
Sometimes we need your help to finish adding a feature error message that can appear due to corrupt system files. If that’s the case, we recommend performing an SFC scan and repairing your files. To do that, you need to follow these steps:
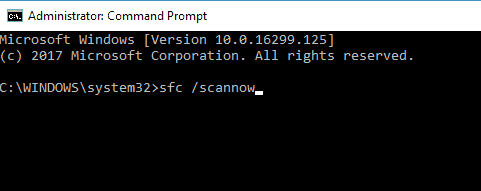
- Press Windows+Q and type cmd.
- From the search results, right-click Command Prompt and choose “Run as Administrator”.

- A new cmd window appears. Type sfc /scannow and hit the ‘Enter’ key.
- Wait until scan and repair process is finished.
Due to malware infections, some of the system files can get corrupted or quarantined. For that reason, DISM (Deployment Image Servicing and Management) can be used to scan and resolve this issue by repairing broken files.
Here’s how to run DISM in Windows:
- Press Windows key + X and run Command Prompt (Admin).
- Copy and paste the following command on the command line:
- exe /Online /Cleanup-image /Restorehealth

- exe /Online /Cleanup-image /Restorehealth
- In case the DISM can’t obtain files online, try using your installation USB or DVD. Insert media and type following command:
- exe /Online /Cleanup-Image /RestoreHealth /Source:C:RepairSourceWindows /LimitAccess
- Be sure to replace ”C:RepairSourceWindows” path of your DVD or USB.
Make sure that you replace the repair source path with your own. Alternatively, we strongly suggest you specialized PC repairing tools to detect the system issues responsible for this recurring error message.
Solution 3: Run System Restore in safe mode
Safe mode is a diagnostics mode in Windows that starts your PC in a basic state, with only basic files and drivers running. However, you can restore your system to a state before you started experiencing the error problem. Here’s how to do this:
- Shut down your PC and turn it on again.
- Navigate to the “Run in Safe Mode” option and hit “Enter”.
- Go to Start > Type “system restore” and then hit “Enter”.
- Follow the prompts to revert back to a certain restore point.
- Wait for the process to complete, and then reboot.
Note: identify the restore point date before the error message display. Also, System restore does not affect any of your files, documents, and personal data.
Solution 4: Roll back Windows
Sometimes, a recent upgrade from Windows 7/8/8.1 to Windows 10 might cause the error problem. Hence, you may consider downgrading your Windows OS back to its previous OS.
Also, you have to run your PC in “Safe Mode” in order to downgrade so as to make the process easier. Here is how to do this:
- Go to Start > type ‘settings’ > launch Settings.
- Go to the Update & Security menu.

- Select the Recovery tab.
- Click the button “Get started under the option Go back to Windows 7/8/8.1.
- Follow the prompts to finish the downgrade processes.
Note: An intact Windows.old file (stored in C:Windows.old) is the important precondition for the downgrade.
Solution 5: Reset Windows Updates components
Disclaimer: this solution contains steps that are part of modifying the registry. Please note that serious problems may occur if you do this incorrectly. Hence, follow these steps correctly, and carefully.
So, you should back up the registry before you modify it; this enables you to restore the registry in case a problem occurs.
Here’s how to manually reset the Windows Updates Components:
- Right click Start
- Select Command Prompt (Admin)
- Click Yes when asked for permissions
- Stop the BITS, Cryptographic, MSI Installer, and Windows Update Services by typing the following commands at a command prompt:
- net stop wuauserv
- net stop cryptSvc
- net stop bits
- net stop msiserver
(Press Enter after each command you type)
- Rename the SoftwareDistribution and Catroot2 folder by typing the commands below in the Command Prompt then press Enter after each command you type:
- Ren C:WindowssoftwareDistribution SoftwareDistribution.old
- Ren C:WindowsSystem32catroot2 Catroot2.old
- Restart the BITS, Cryptographic, MSI Installer, and Windows Update Services by typing the following commands in Command prompt:
- net stop wuauserv
- net stop cryptSvc
- net stop bits
- net stop msiserver
- Type Exit in the Command Prompt to close it
After trying out the steps above, you can run Windows Updates, and then follow the prompts to complete Windows Update process.
Meanwhile, some Windows users reported getting “Access Denied” prompts when trying the step above. Here’s what to do if your access is denied:
- Log in first as administrator or use administrator user account
- Stop the windows Update service and try to rename SoftwareDistribution folder
- Right click Start
- Select Run
- Type services.msc and press OK or enter
- Scroll down and locate Windows Update service
- Right click and select Properties
- Stop the service
- Follow the steps again to reset Windows Update Components
After you complete the process, go to “Services” window again, now start the Windows Update service, and then restart the computer.
Note: We highly recommend that you check the “Give me updates” menu for other Microsoft products when using the Windows update option. Windows Updates downloads and installs updates required to run Windows efficiently.
Solution 6: Perform an in-place upgrade
Microsoft constantly releases patches that fix a plethora of Windows issues. So, you might want to consider updating your Windows 10 PC by performing an in-place upgrade. Meanwhile, an in-place upgrade will force Windows 10 to update to the latest version. To do that, do the following:
- Download Media Creation Tool and run it on your PC.
- Select Upgrade this PC now.
- Wait while the application prepares your system.
- Now select Download and install updates (recommended) and click Next.
- Follow the instructions on the screen until you get to Ready to install screen. Now select Change what to keep.
- Select “Keep personal files and apps” and click Next.
- Follow the instructions on the screen to complete the setup.
Once the process is finished, you’ll have the latest version of Windows installed, and all your files and apps will be preserved.
That should wrap it up. We need your help to finish adding a feature error that should be resolved if you followed any of these workarounds carefully. In case you have some questions or additional workarounds, please be sure to inform us in the comments section.
Read our disclosure page to find out how can you help Windows Report sustain the editorial team. Read more


Improve this guide


User forum
0 messages