How to Check Your Graphics Card on Windows 11
Find you graphics card in just a few steps
2 min. read
Updated on
Read our disclosure page to find out how can you help Windows Report sustain the editorial team. Read more
In this guide, we will show you 5 ways to check your graphics card on Windows 11. This will help you figure out.
With this info, you’ll know what graphics drivers to use, whether to run certain games or apps, and troubleshoot graphics-related errors.
Sounds good? Here’s how to do it.
How can I check the graphics card in Windows 11?
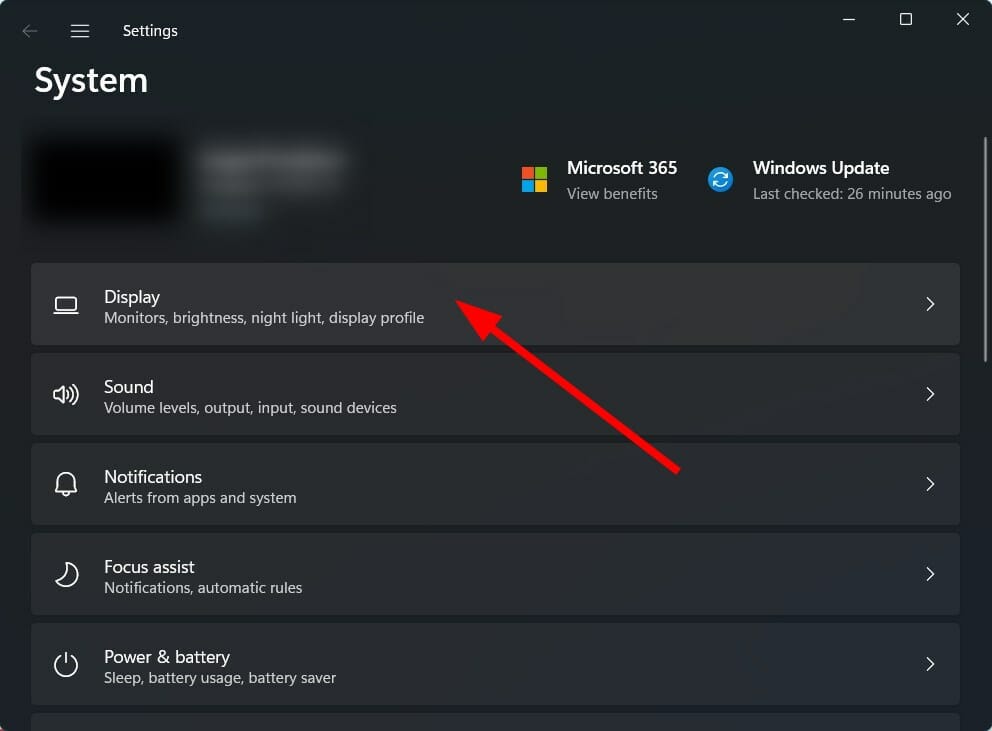
1. Press the Win + I buttons to open Windows Settings.
2. Select Display on the right side.
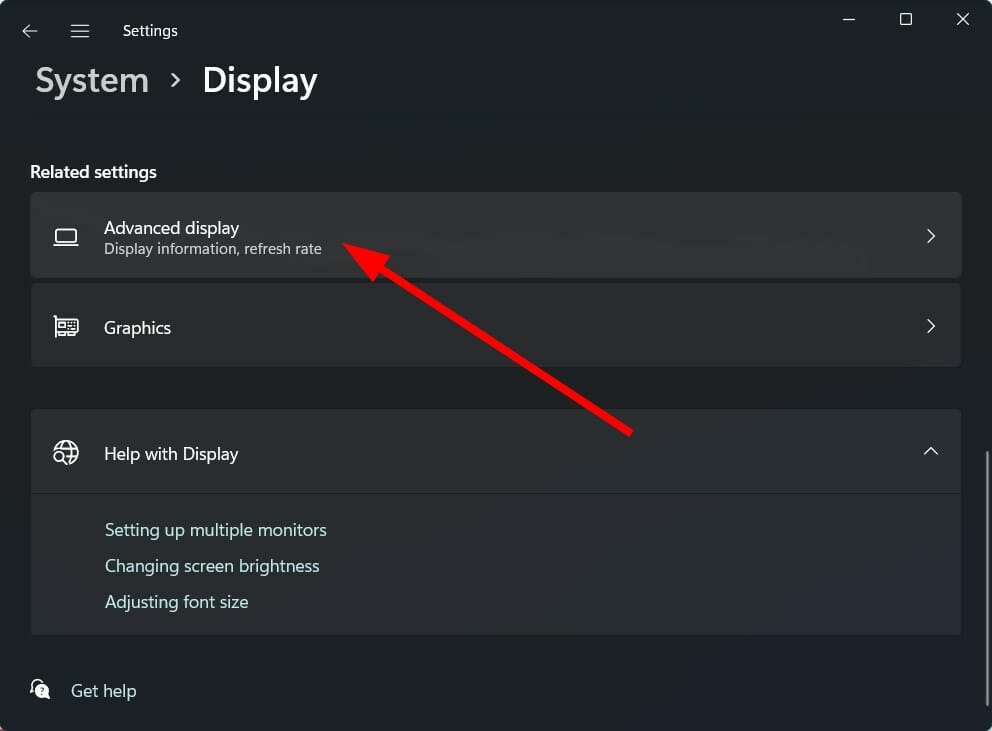
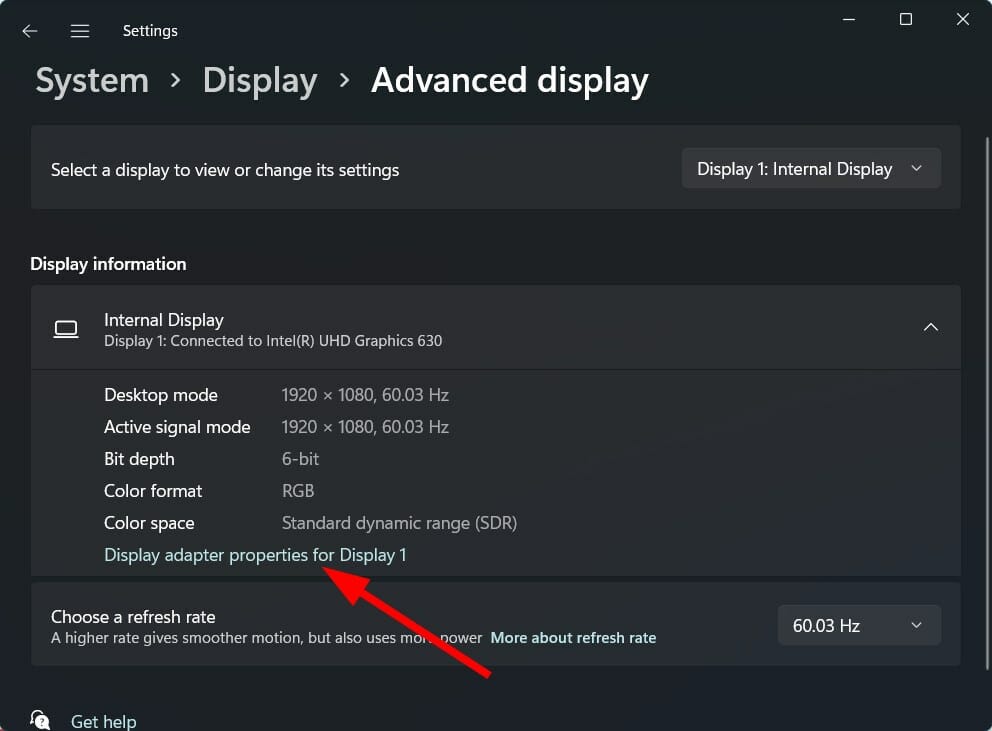
3. Scroll down and click on Advanced display.
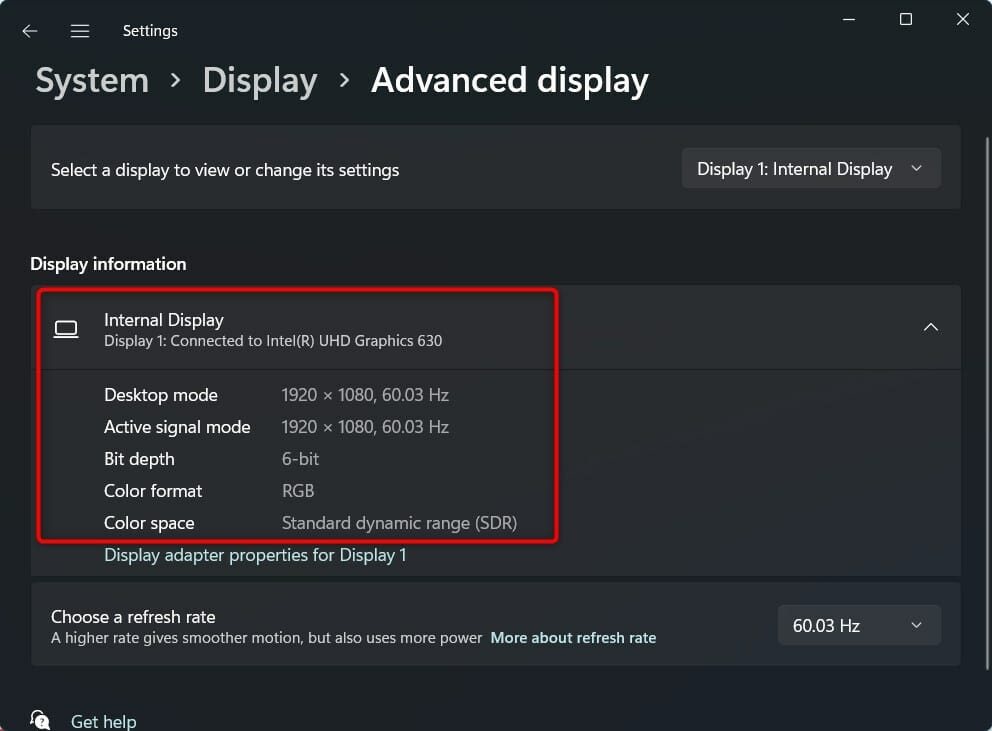
4. Here, you will see all information including the graphics card model and manufacturer’s name listed for your internal graphics card.
5. Click on Display adapter properties for Display 1 to find information about the graphics card installed on your PC.
Check the graphics card using Windows Settings
You can quickly check your graphics card using Windows Settings. Under the Display Settings, you can find out all the available information about your graphics card.
Using System Information Tool
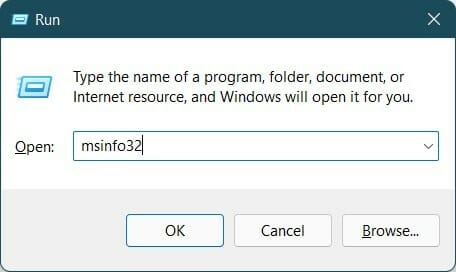
- Press the Win + R buttons to open the Run dialogue.
- Execute the below command:
msinfo32 - Expand the Components section.
- Select Display from the list.
- Here you will all information about the graphics card on your Windows 11 PC.
Using DirectX Diagnostic Tool
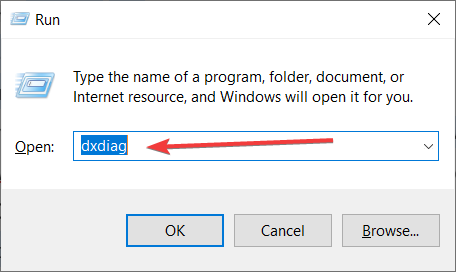
- Press the Win + R buttons to open the Run dialogue.
- Type the below command and hit Enter:
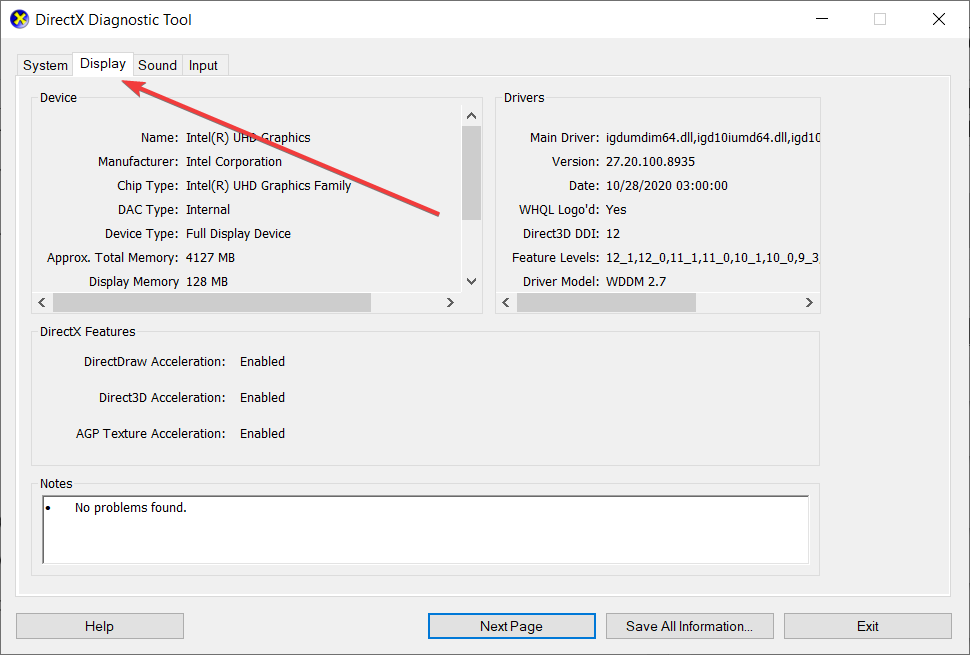
dxdiag - Switch to the Display tab.
- Here you can find all information related to your graphics card installed on your Windows 11 PC.
Using Device Manager
- Open the Start menu.
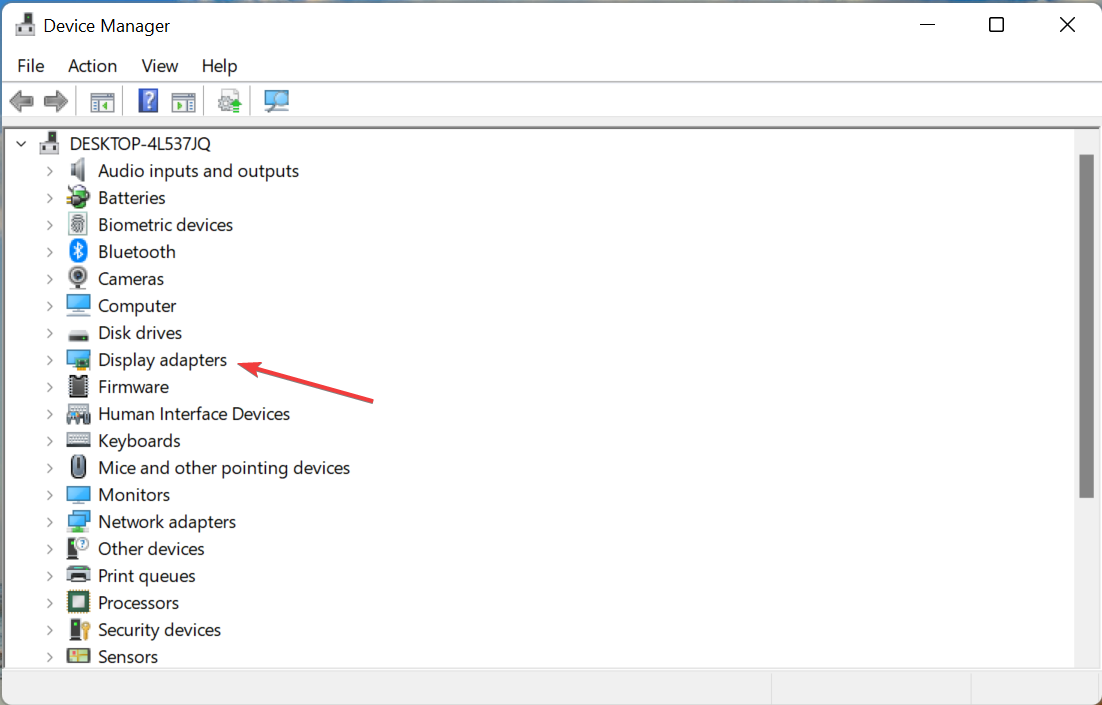
- Search for Device Manager and open it.
- Expand the Display adapters option.
- Your graphics card will be listed.
- To know more about it, double-click on the desired GPU to view detailed info in a separate window.
Using Task Manager
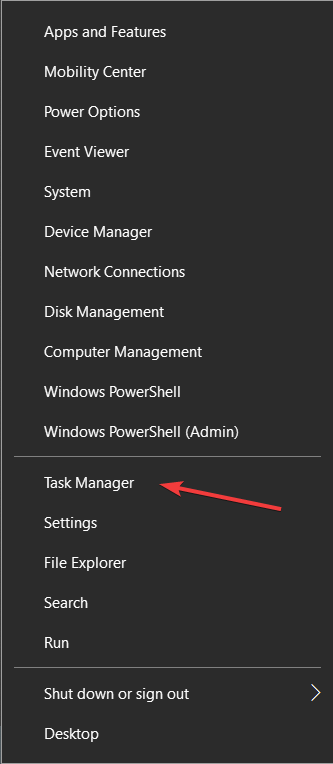
- Right-click on the Start menu.
- Select Task Manager from the list.
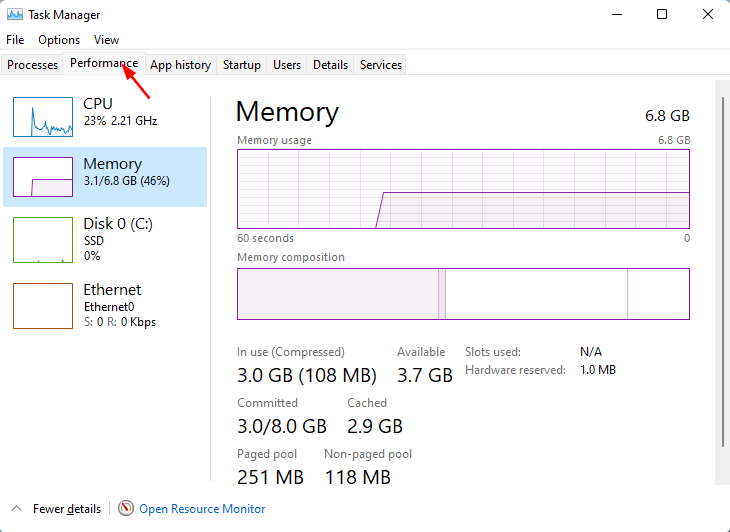
- Click on the Performance tab.
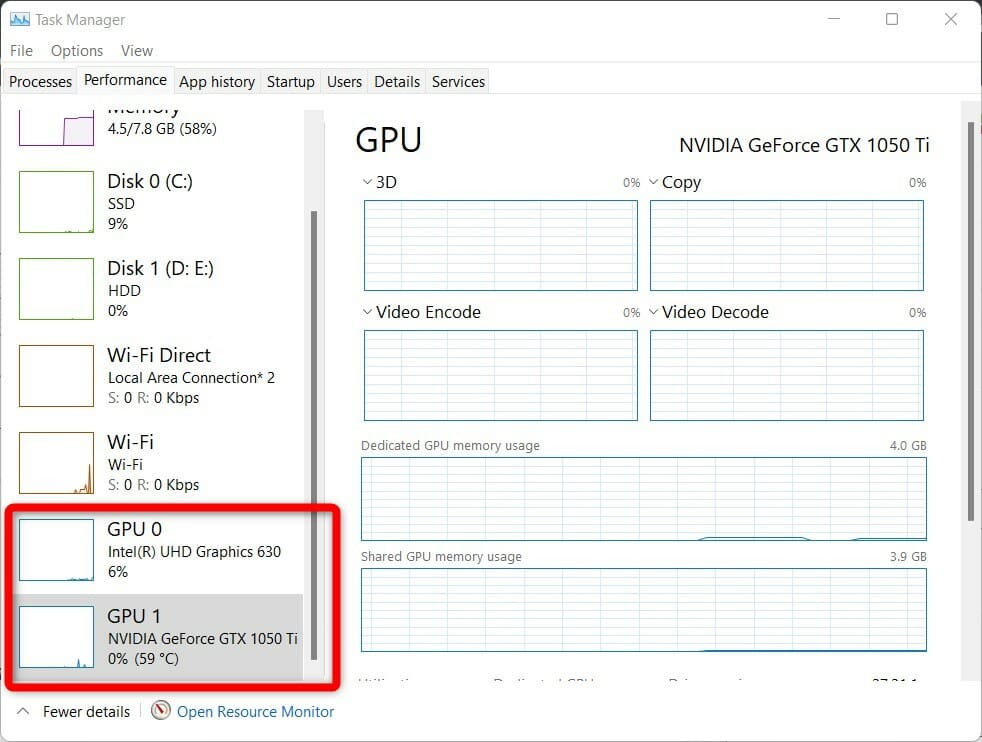
- Details about all the GPUs, i.e., the integrated and the dedicated graphics card will be listed.
- Both will be listed under GPU 0 and GPU 1 in the sidebar.
- Click on the one that you want information for.
If you’re on an earlier version of Windows, we also have a similar article on how to check your graphics card in Windows 10. You can also check out the official box packaging where you received your laptop. The graphics card name would definitely be mentioned on it.
It is very important that you have the exact information about the graphics card installed on your computer. This will help you quickly locate the necessary drivers for it, in case things go south.
We also have a guide on how to check the GPU BIOS version, so don’t miss it if you want to learn more.
Let us know in the comments section below which one of the above-mentioned methods is your go-to way of checking graphics card information on your Windows 11 PC.



User forum
0 messages