How to create and use shared lists in Microsoft To-Do
![]() 2 min. read
2 min. read
![]() Published on
Published on
Share this article
Improve this guide
Read our disclosure page to find out how can you help Windows Report sustain the editorial team. Read more

Microsoft To-Do has support for shared lists, which allow multiple users to collaborate on tasks. The sharing procedure is quite straightforward, as To-Do uses simple links to grant access to lists.
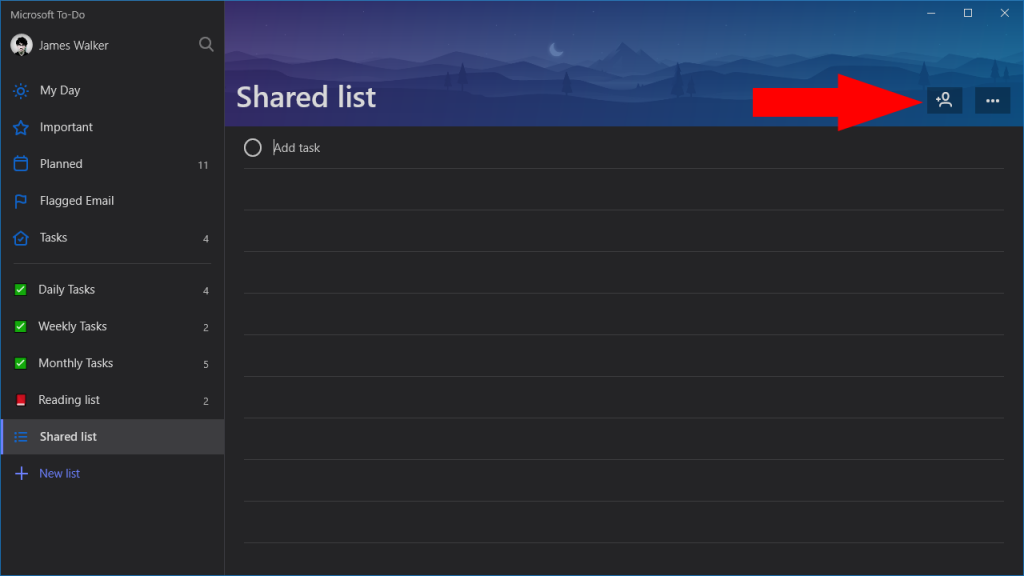
You can convert any existing To-Do list into a shared list. Select the list you want to share and click the person icon in the bottom-right of the list header. This will display the “List sharing” popup.
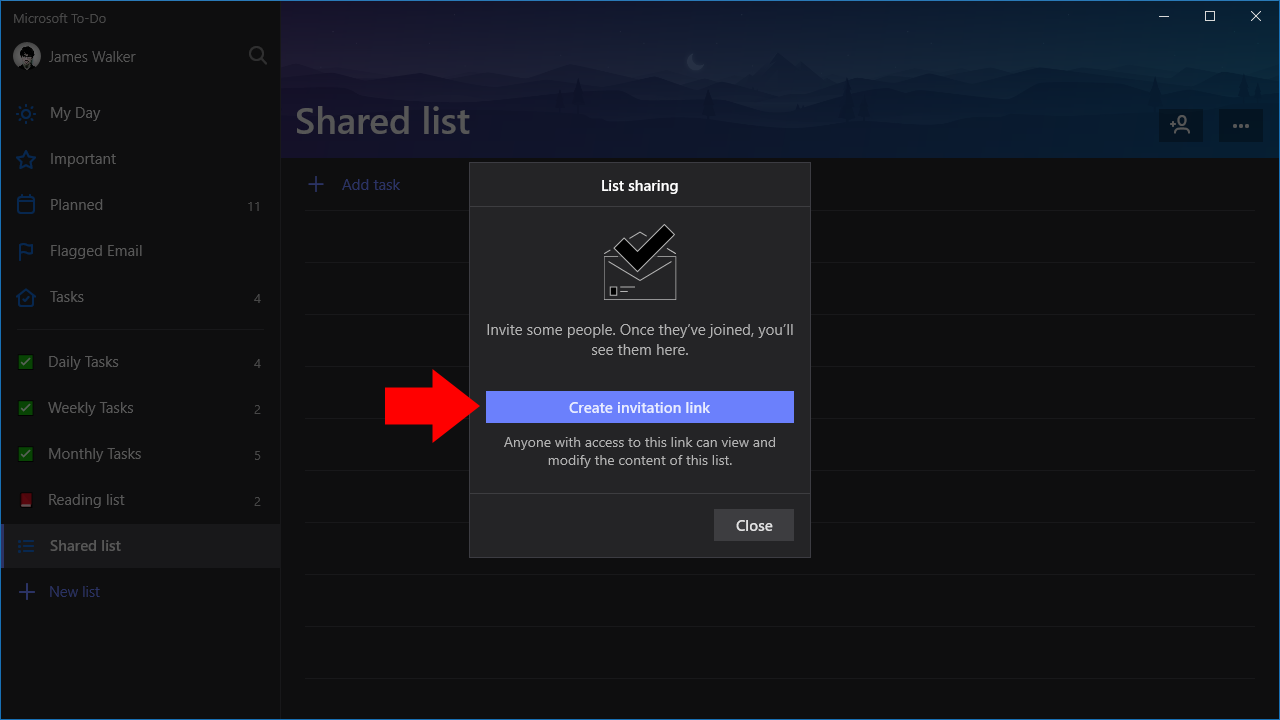
Click the blue “Create invitation link” button to generate a link for your list. You can now send this link to the people you’d like to share the list with. Anybody with access to the link will be able to view and edit the items within your list. They’ll need to login to To-Do with their Microsoft account credentials, so To-Do can track usage and display usernames.
Once a person has joined the list, you’ll see their name in the “List sharing” popup. They’ll be able to add, edit and view tasks, so you can work collaboratively within To-Do. To-Do also supports assigning tasks to the users in the list, so you can keep track of who’s working on each item.
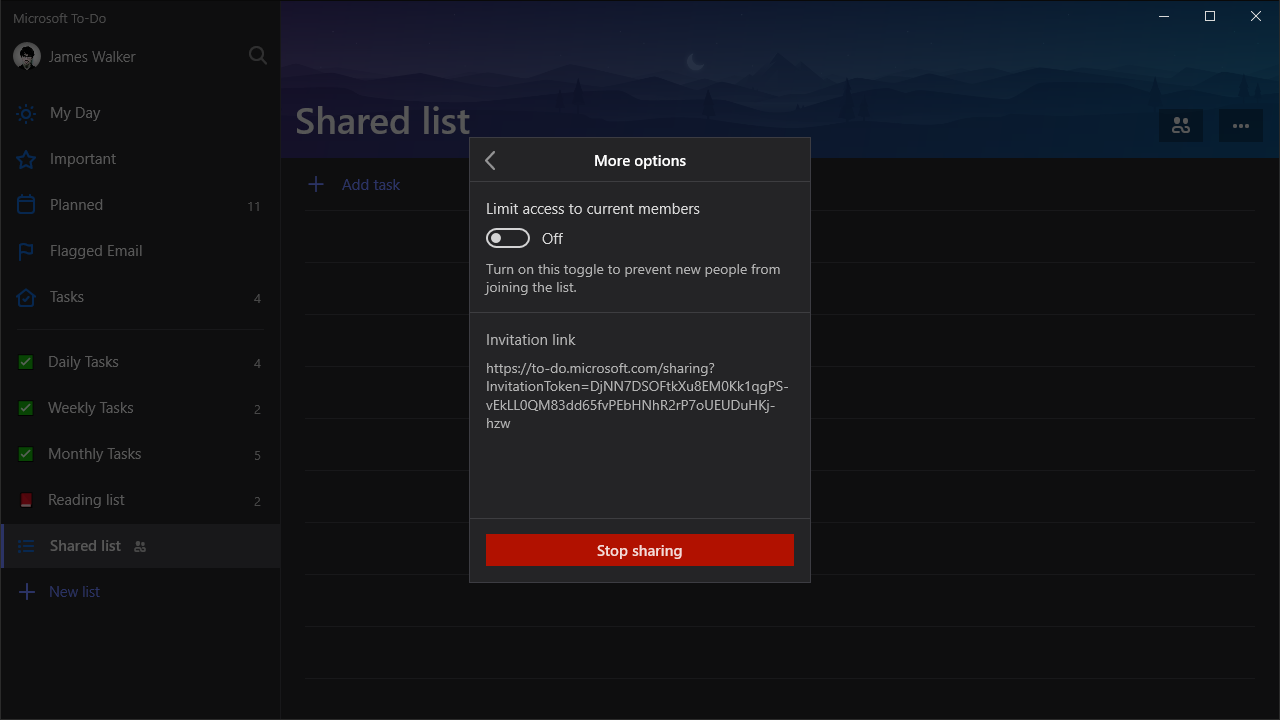
To stop sharing a list, return to the “List sharing” popup and click the “More options” button at the bottom of the screen. Here, you can access the invitation link and optionally disable it to prevent new people from joining. At the bottom of the page you’ll find a “Stop sharing” button. Click it to revoke access from all third-party users, converting the list back to a regular To-Do list in your account.


User forum
0 messages