How to Make a Slideshow With Music on Windows 10
Put the built-in tools to good use or better still, go for a pro program!
Key notes
- Creating a slideshow with your favorite pics and background music doesn’t need to be too complicated.
- To help you achieve this without too much hassle, there are some great applications you can use.
- You can play it safe with the built-in app, try powerful and versatile software, or use an online tool.

Slideshows are a great way to organize pictures on a Windows 11 or 10 computer.
At times, Windows users may face some kind of hardware limitation or system update and they need a way to store their files so they don’t get accidentally deleted or lost.
Plus, it makes cataloging photos and showing them off much easier than having to manually show people by scrolling through them one by one.
Slideshows are also a great way to pool together photos from different sources (camera, phone, USB drive) into one easy-to-enjoy format.
Fortunately, there are useful third-party apps that you can use to create these slideshows without having to be forced to use something like PowerPoint. These third-party apps are more advanced:
- Canva – Vast premade templates and ready-to-use images and effects
- IceCream Slideshow Maker – Intuitive interface with editing tools and audio sets
- Magix Photostory Deluxe – Advanced slideshow creation with a handful of editing tools
The app is fine for business presentations, but PowerPoint lacks many useful features that other apps use. Windows 11 comes with a useful app built right in.
How can I make a slideshow on Windows 11 and 10?
Aside from third-party apps, the Photos app got a robust facelift for Windows 11. Compared to the Windows 10 iteration, the Photo app is wildly different with innovative features that give it a huge leg up.
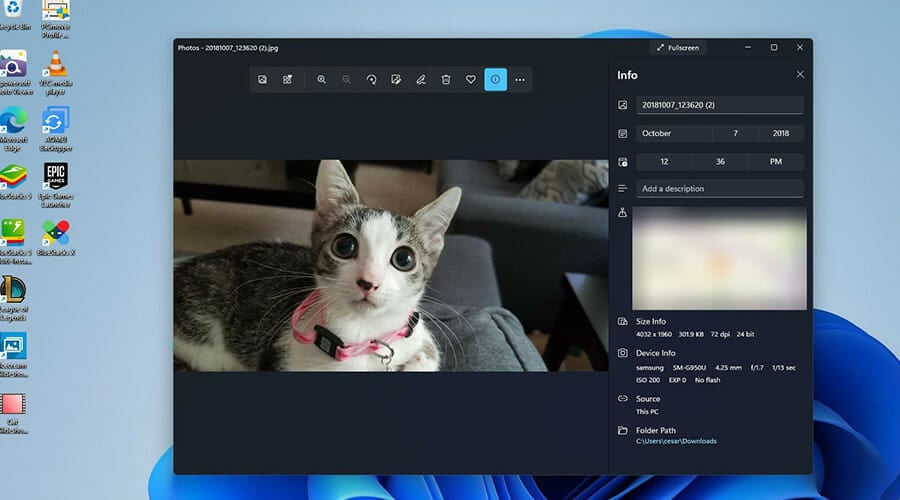
On the new Photos apps, image details can be easily viewed with the Information icon, which appears on the top of the image.
This will open the right pane that details when the picture was taken, its size, and resolution. Plus, it has great editing and organization capabilities thanks to its facial recognition technology.
As stated earlier, other third-party apps bring their unique style to the table.
This guide will detail how to create a slideshow on Windows 11 via the Photos app as well as other popular third-party apps, like Ice Cream Slideshow Maker.
It’s important to point out that creating a slideshow with music is more akin to creating a video. It isn’t as simple as simply clicking the menu button and selecting slideshow.
That being said, let’s go over the methods you have to make a slideshow with music on Windows 10 and 11.
1. How to create a slideshow with music via the Photos app
- Click on the magnifying glass icon to bring up the search bar.

- Type in Photo and click on the first entry to open the Photos app.

- In the Photos app, click the Video Editor tab on top.

- In this new tab, click on the New video project button in the middle.

- In this new window, name the slideshow. Then click OK.

- Click the Add button in the Project library.

- A drop-down menu appears asking you which source you want to use. This guide will select From this PC.

- Select the images you want to use.

- Highlight the images in the Project library.

- Drag them down to the Storyboard section.

- You can modify how long each photo stays on the screen by clicking on the number and changing the time.

- To add music, click on Custom audio on the top.

- In this new window, click the Add audio file button at the top.

- Select the song or audio file you want to add.

- You can edit how long you want the audio file to last in the slideshow by sliding the tab at the bottom.

- Once you’ve decided how long you want the audio to last, click Done.

- You can test the slideshow by clicking the Play button in the test video in the corner.

- Once done, click Finish video in the upper right-hand corner.

- A small window will appear. Click the drop-down menu underneath Video quality to select the slideshow’s resolution.

- Select the Export button.

- Name the slideshow you created and then click Export.

- The slideshow then immediately open to allow you see and hear the whole thing in action.

1. Go to the Presentations category of Canva and click on Browse templates.

2. If you don’t have a Canva account, this is the moment you should create one for free. If you already have one, log in to it.
3. Next, select a presentation style and theme from the left and pick a template from the hundreds of free ones from the right pane. There are also a lot more available if you decide to pay for the Pro plan.

4. Once you’ve selected a template, hit the Customize this template button. By default, the presentation will have a 1920 x 1080 resolution but if you start a trial for Canva Pro you will be able to set any dimensions you want for 30 days.

5. You will get into the edit mode and you will be able to change everything on the page, including images and text.

6. To add your own photos, click on the Uploads button, then hit the Upload media button.

7. Now, click the Plus sign to add a new page, select the new blank page and choose the photo you want to add from the Uploads.

8. Now, the photo was added and you can move it around or stretch it with your mouse, add more photos on the same page etc.

9. Assuming you’ve added all your photos into the presentation, click on Music from the left pane to add a nice melodic background for your photos. There are plenty of free options on the list.

10. The audio track will be added automatically from the start and it will play for the duration of the presentation. You can change its volume and even add fade in and out audio effects.

11. After you’ve finished, or anytime during your work, you can hit the Present button, select the presentation type and click the Present button to see how your slideshow looks like.

12. The last step, after you make sure everything is OK, hit the Share button from the top-right corner and click the Download button to save your presentation on your drive.

2. How to make a slideshow with music on Canva
A great tool to create a slideshow with music is Canva. It is available both in a web version and as a PC application. Canva is a free and easy to use app with which you can create your perfect presentations.
As you will discover, you have plenty of sharing options right from the web app. You can post it on your social media, get the link and send it over any communication platform, and more.
3. How to make a slideshow with music using Promo
- Promo is a web-based service, so go to the website via web browser.

- Click on the Try for Free! Button.

- Sign up by creating your credentials.

- After signing in, click on the Upload button to the far right.

- Click on Photos.

- Add the pictures you want to include in your slideshow.

- Click on the picture to be included in the project. They will be highlighted blue.

- Then click the ADD TO PROJECT button.

- Next, you will be taken to the slideshow’s project page where you can customize the slideshow.
- To add music, click the Music tab on the left.

- Click Uploads at the top.

- You can either drag the files to the page or click on it to upload music tracks.

- Clicking it will bring up the File Explorer. Select the music file you want to add.

- It will take a few seconds to upload. If it states Selected on the file, it has already been added to the slideshow.

- You can edit the length of the song by clicking on the pencil icon in the file. You can change the volume, trim it, or add a fade-out.

- Once you’re done trimming the song, click Trim Music.

- Going back to the Editor, you can add text and change its font.

- You can add text by double clicking on the blue bar above the timeline and then type in what you want.

- Click Done when finished.

- When done, click on the Save & Preview button to the left.

- After some time, the video will be made ready to preview.

- Watch the video to see if there are any changes to be made.
- After it finishes, select the Publish button at the end.

Is there a difference when you create a slideshow with music on Windows 10?
Although Windows 11 is clearly more advanced than the old Windows 10, its core remained the same and most of the apps will run in both OSes.
That is why all the solutions and software presented above will work seamlessly on Windows 10 as well.
The Photos app is still identical and all the menus, as we presented in this guide are the same in both Windows 11 and the older system.
Icecream Slideshow Maker is a great tool and will also work on Windows 10. As for the online slideshow makers, using them in a browser makes them compatible with any system or device.
Other ways to enhance your Windows experience
As briefly touched upon in the guide, Windows 11 has a plethora of third-party apps that make photo management much more streamlined thanks to various features.
For instance, ACDSEE Photo Studio Ultimate 2022 has tons of awesome features like Media Mode which gives you access to a giant photo database, and People Mode, which allows you to categorize images by whoever is in it.
Venturing outside of photography, it’s recommended that you get yourself a migration tool. It’s an app that transfers important filers, computer settings, and even other apps to another machine.
At first, it may not seem useful, but if you ever want to the settings and files of your old computer without having to move everything one by one, it’s a great tool.
A great one is thanks to its simple user interface and the ability to restore the original system to a new PC, just the way it was.
So, this was our complete guide on how to create a slideshow with music on Windows 11 and 10 by using free, paid, and online apps.
However, for a great slideshow, you need great pictures so you might be interested in our list including the best photo editing software.
If you have any suggestions or questions, don’t hesitate to write them in the comments section below.
Read our disclosure page to find out how can you help Windows Report sustain the editorial team. Read more


Improve this guide


User forum
0 messages