How to Improve Sound Quality on Windows 11: 6 Must-try Tips
Misconfiguration of the audio devices may affect sound quality
6 min. read
Updated on
Read our disclosure page to find out how can you help Windows Report sustain the editorial team Read more
Key notes
- In this article, you'll find some simplified step-by-step guide on improving sound quality on Windows 11 PC.
- You should know that sound quality is limited by the sound equipment you're using.
- However, you can use some sound-boosting apps that improve the audio quality significantly.
Some of our readers have recently complained about some Windows 11 audio issues of which how to improve sound quality on Windows 11 PC is one of the major concerns.
If you’re experiencing similar problems, you don’t have to worry as this article will provide you with simplified steps on how to improve sound quality on Windows 11.
What is the best audio format for sound quality on Windows 11?
If you’re looking for the best digital audio format for audio listening, that would be the WAVE or WAV format.
It is an uncompressed format that captures all the sound frequencies and allows high bit rates, but one song can occupy tens to hundreds of megabytes.
In contrast, MP3, for instance, is a highly compressed format designed for portability and low space allocation and doesn’t preserve all the frequencies.
If you’re asking for sound technologies, at present, two popular sound formats also allow the spatiality of sound: Dolby Access and DTS Sound Unbound.
We highlighted the two apps so you can download them from Microsoft Store. However, you should keep in mind that the quality of the sound depends on the output quality of your sound card and the performance of the onboard or connected speakers.
How can I improve sound quality on Windows 11?
Before engaging in any troubleshooting or settings tweaks, users should ensure they perform the following:
- Check to make sure that your sound devices are properly connected. Make sure its cable connection isn’t loose.
- Try plugging USB sound devices into alternative USB ports on your desktop or laptop.
- You can also run Windows audio troubleshooter to scan and repair your audio devices.
- You should also check and test your microphone to ensure it is working.
Having confirmed the above checks, if the problem persists, you can explore the advanced solutions provided in this article as suit:
1. Enable the Audio Enhancement feature
- Press Windows key + I to open Settings.
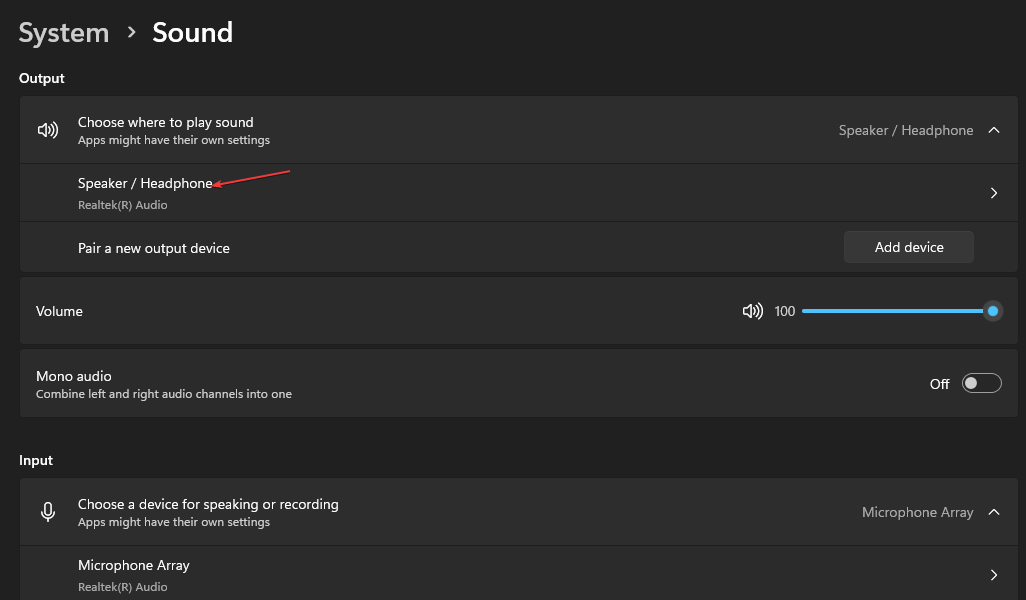
- Go to Sound from the System tab.
- In the Output section, click on your audio device (speaker or headphones).
- In the drop-down menu, scroll down to the Output settings section, then toggle the switch for Enhance audio and set it to On.
You should be able to notice some immediate changes in the quality of your audio if you are currently playing one.
2. Configure the Audio Quality of your Input Device (Mic)
- Press Windows key + I to open Settings.
- Go to Sound under the System tab.
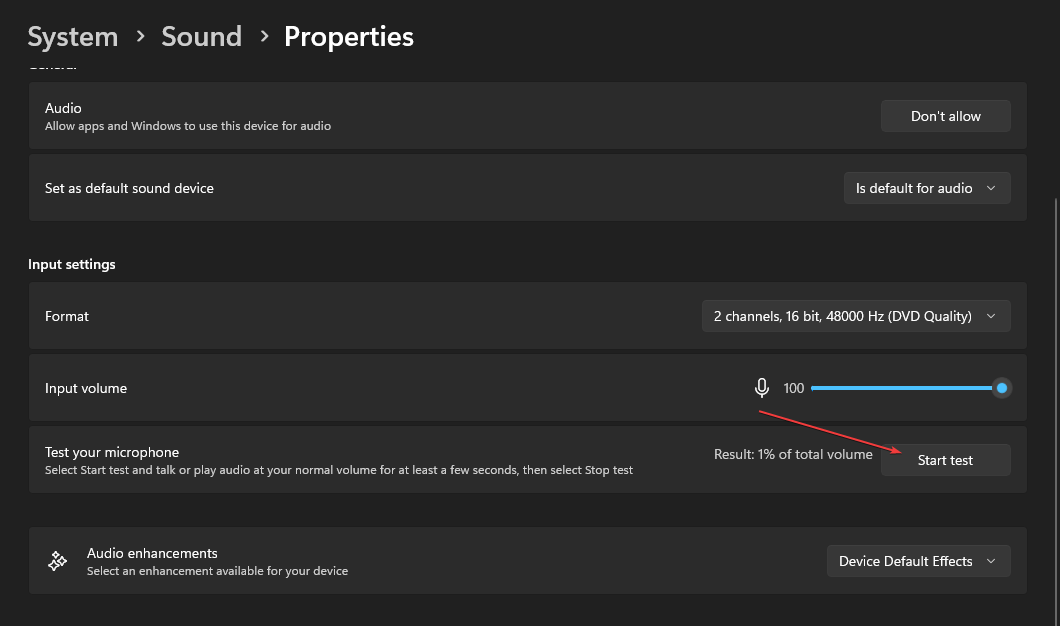
- Scroll down to the Input section, and click on your input device (here, you can adjust the input volume, change format quality, and test your microphone).
- Click on Start test and then talk at your normal volume for a few seconds.
- Click on Stop test to view the result.
- Next, click on your Microphone to open its properties.
- Scroll down and toggle the switch for Enhance audio and set it to On.
Now that you can hear the playback through your headphones, you can chat normally. Uncheck Listen to this device if you’re okay with the outcome, then click Apply to save the changes.
3. Use third-party audio boosters
As we mentioned at the start of this article, the sound quality is limited by the sound equipment you’re using.
However, we have a list of sound-enhancing software that can boost the quality of sound on your devices. You can take a look at our selection and test the apps.
On the other hand, there is a sleek program you can try to get a skyrocket sound improvement and change the sound quality on your Windows 11 device.
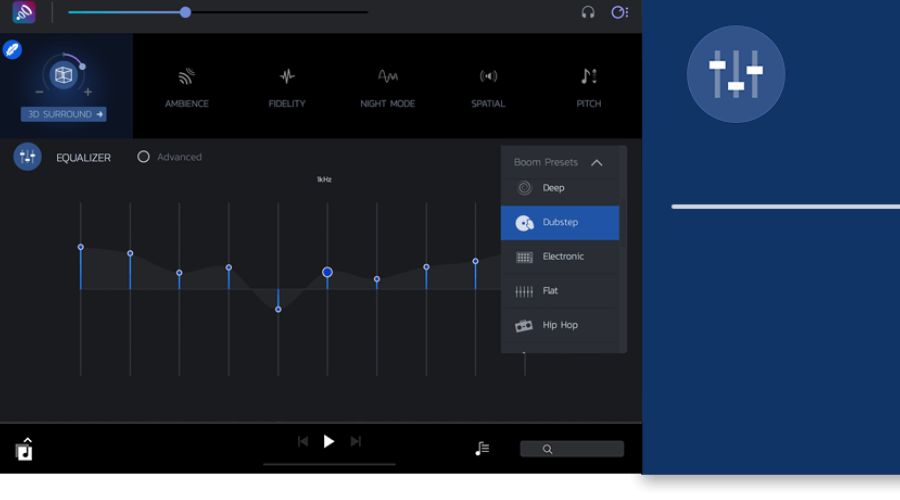
Boom3D is an audio 3D surround software used by professionals or regular users that needs to boost their sound regardless of the device, headphones, or any equipment you use.
It comes with 31-band equalizer presets, volume booster, or cinematic full sound that can immerse you into the movies or songs you love the most.

Boom3D
Consider this refined sound enhancement tool to finally get that stunning sound experience.4. Restart Windows Audio services
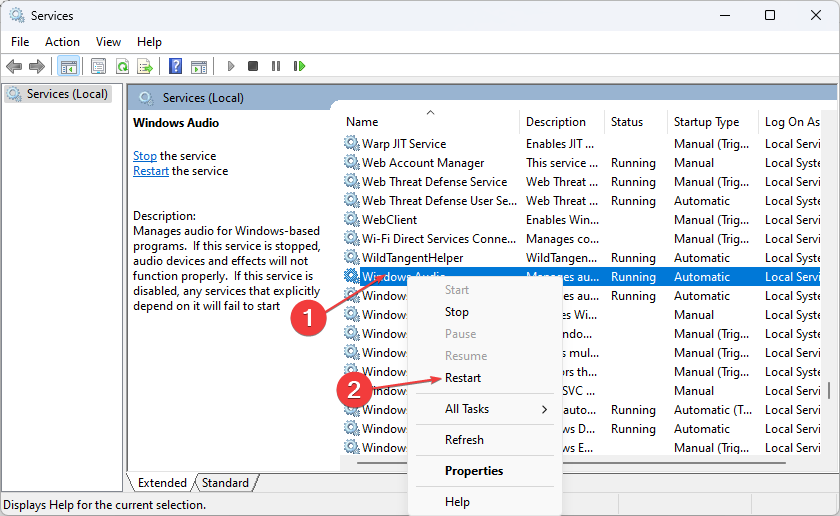
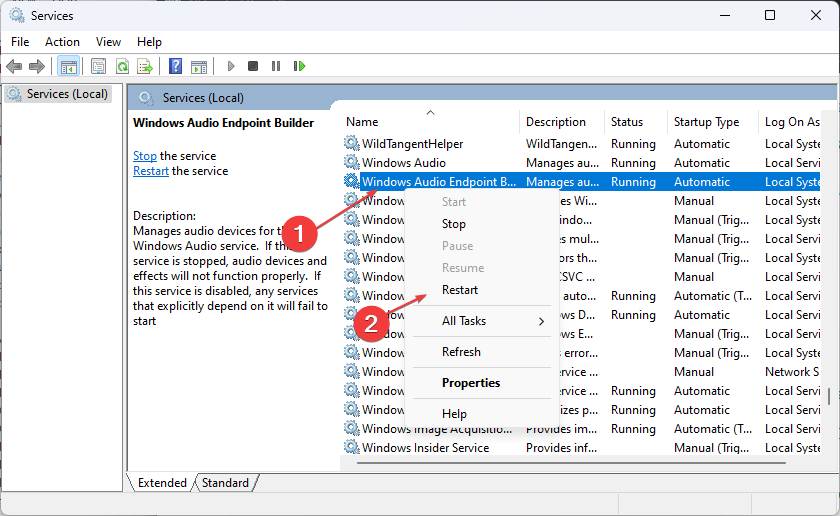
- Right-click the Start button in the bottom left corner of the screen and select Run. Type services.msc and then hit Enter on your keyboard.
- Locate the Windows Audio entry by scrolling down. Then, right-click it and choose Restart.
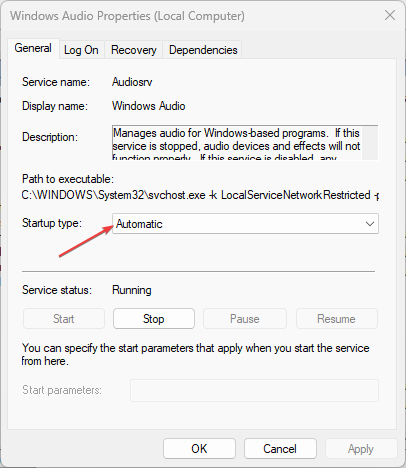
- Right-click it again and choose Properties from the drop-down menu.
- Next, click the Startup Type menu and change the entry to Automatic.
- To finish, click Apply and then OK.
- Now, go to Windows Audio Endpoint Builder and repeat the process.
Restarting your Windows Audio Services should help to improve the quality of your audio. But if the problem persists, try the next fix.
5. Tweak the Audio Settings in Control Panel
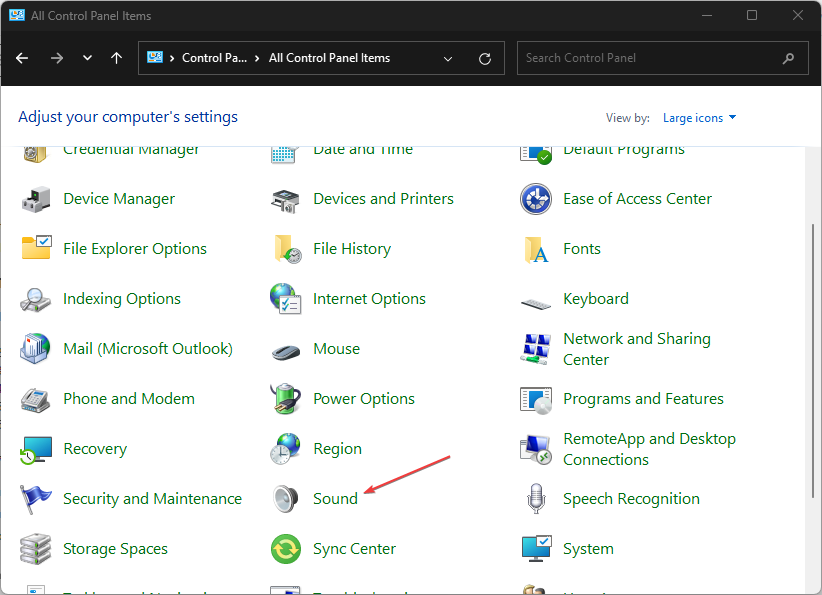
- Open the Windows Control Panel and click on Sound. (Make sure you select Large icons as the View By option.)
- Right-click the Speakers selection in the Playback tab and click on Enable.
- Right-click it again and select Set as Communications Device.
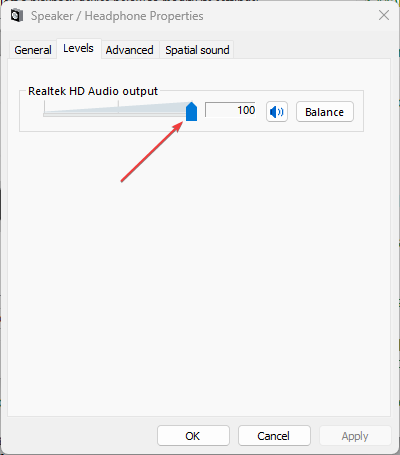
- Select Properties by right-clicking on Speakers one more time.
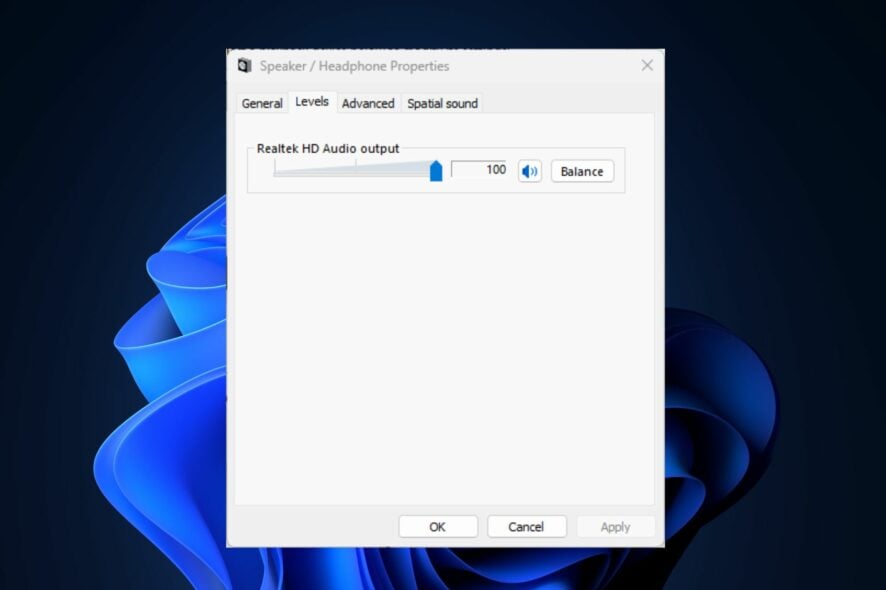
- Drag the slider to the highest value on the Levels tab.
- Next, go to Advanced and check off the box next to Allow applications to take exclusive control of this device.
- You can now restart your computer and check if your audio works.
Your PC’s sound quality should be improved on Windows 11 after following the above steps. However, you can explore our detailed guide on how to fix your PC sound volume if it is too low for additional information on how to improve sound quality on Windows 11.
6. Reinstall your Audio Drivers
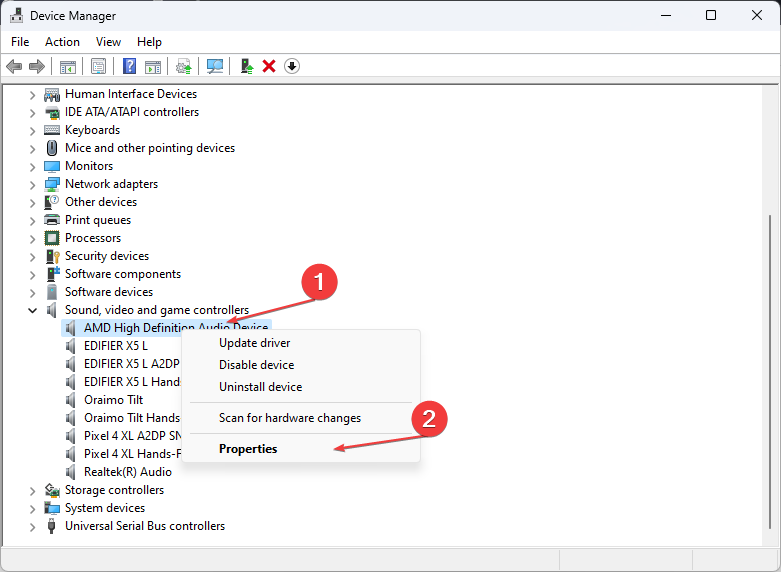
- Press the Windows + X keys to open a shortcut menu and select Device Manager from the menu.
- Expand the controllers for Sound, video, and game. Right-click your PC’s audio drivers and click on Properties.
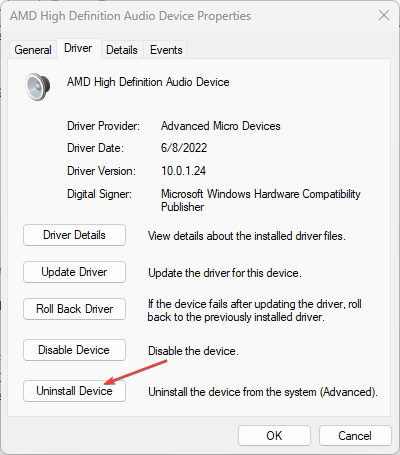
- In the new window, select Driver and click on Uninstall Device to uninstall the drivers.
- Restart your computer, and Windows 11 will automatically reinstall the driver.
The outdated sound drivers may be the reason behind the poor sound quality on Windows 11. You should install any suggested updates after enabling the Windows driver updater to look for the driver, then restart your computer.
If you want an easier and more efficient method, you can try dedicated software to proceed with this action automatically.
- Download and install Outbyte Driver Updater.
- Launch the software.
- Wait for the app to detect all faulty drivers.
- Now, it will show you all the malfunctioning drivers listed to select the ones to Update or Ignore.
- Click on Update & Apply Selected to download and install the newest versions.
- Restart your PC to ensure the applied changes.

Outbyte Driver Updater
Secure your Windows PC with Outbyte from various errors caused by problematic drivers.And that’s how to improve sound quality on Windows 11 PC. You can also explore our detailed solutions provided on how to improve sound quality on Windows 10 PC, hopefully, you’ll find additional information which may be useful for you.
If you have further questions or suggestions on improving sound quality on Windows 11 PC, please do not hesitate to use the comments section below.


