Hswultpep.sys BSoD Error: 5 Ways to Fix It
Explore the troubleshooting steps to fix the Blue Screen of Death error
Key notes
- The error occurs if you have a faulty driver, malware infection, or hardware issues.
- To fix it, you can run an SFC scan, update/reinstall the driver, or run a deep scan using an antivirus tool.
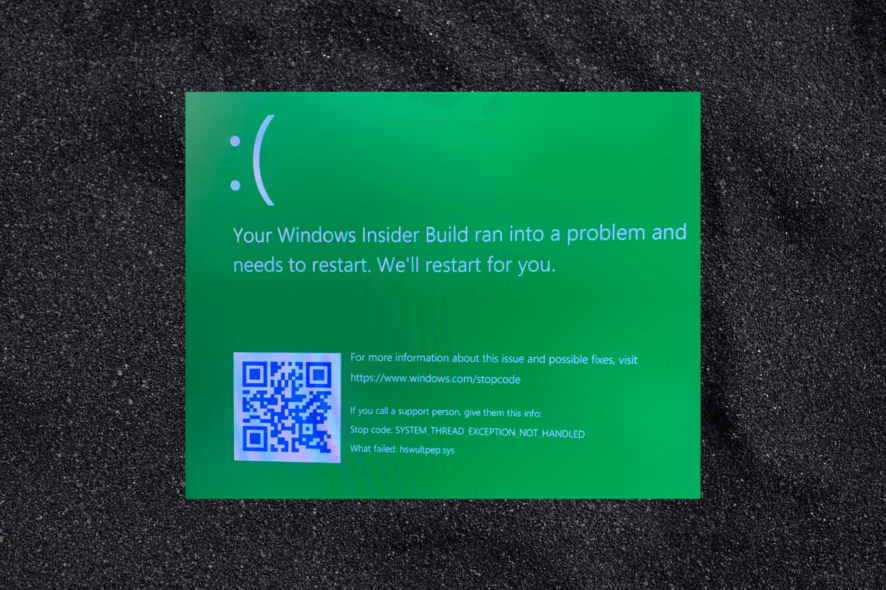
If you are a Windows user, you may encounter various issues while using your PC. One such common problem is hswultpep.sys BSoD error can be caused by faulty or outdated driver-related Intel Wireless Bluetooth software.
What causes the hswultpep.sys BSoD error on Windows?
There could be various reasons for this blue screen error; some of the common ones are mentioned here:
- Faulty or outdated driver – If the hswultpep.sys driver becomes corrupted or obsolete; it can cause instability & result in a blue screen error. Try updating the drivers to fix the problem.
- Drivers or software interference – The hswultpep.sys driver can conflict with other drivers or software installed on the computer, resulting in the BSoD error.
- Malware infections – Malware or viruses can corrupt system files, which could cause this issue. You can run SFC scan to repair system files.
- Hardware issues – If there are the hardware issues, including a faulty Wi-Fi or Bluetooth adapter, they could cause the BSoD error.
Now that you know the causes of the issue, let us check out the solutions to fix the problem.
How can I fix the hswultpep.sys BSoD error on Windows?
Before engaging in advanced troubleshooting steps, you should consider performing the following checks:
- Try restarting your computer.
- Run a malware scan using an antivirus tool.
- Make sure there are no pending Windows updates.
- Uninstall the recently installed apps.
If these minor tweaks don’t work for you, move to the detailed solutions.
1. Run the computer in Safe mode
1.1 If you can access the Settings app
- Press Windows + I to open the Settings app.
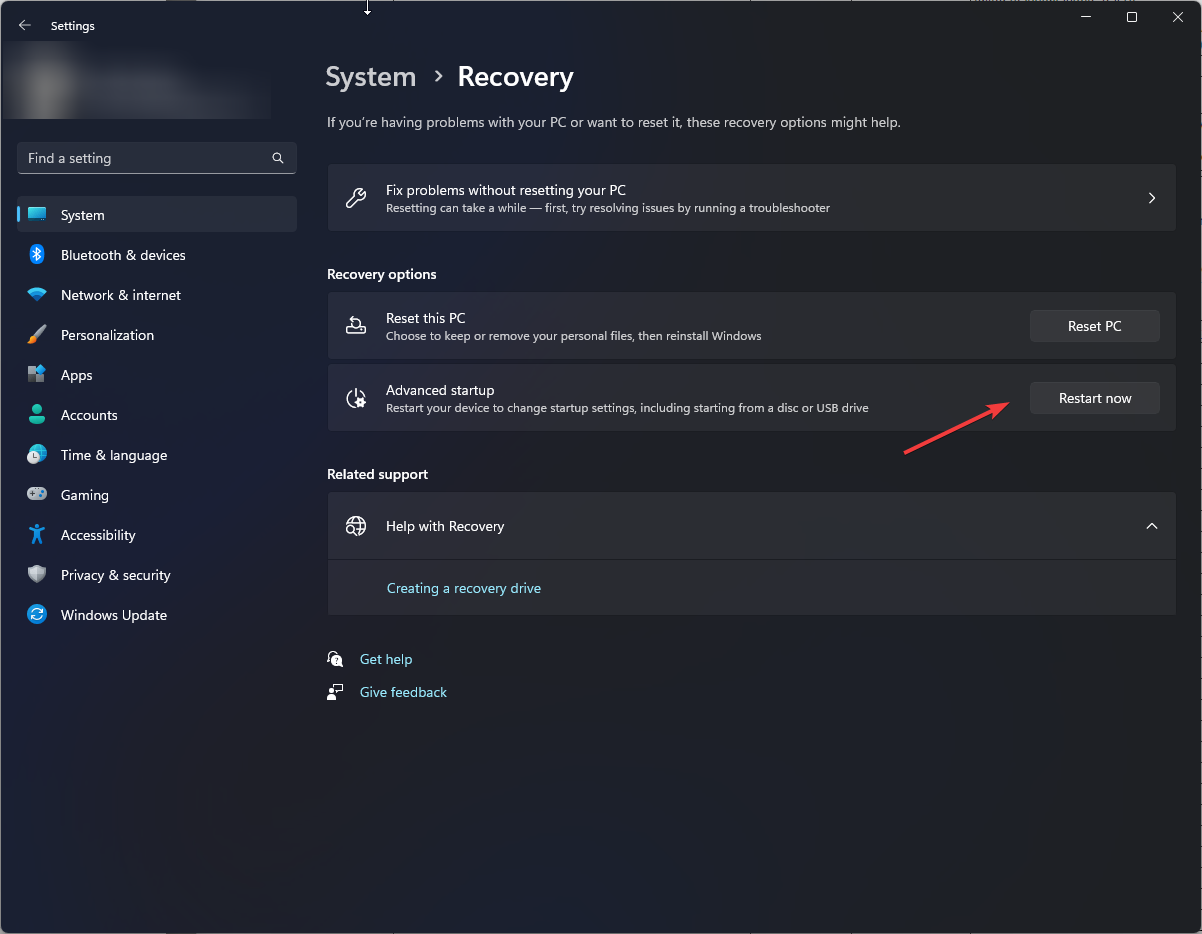
- Go to System, then click Recovery.
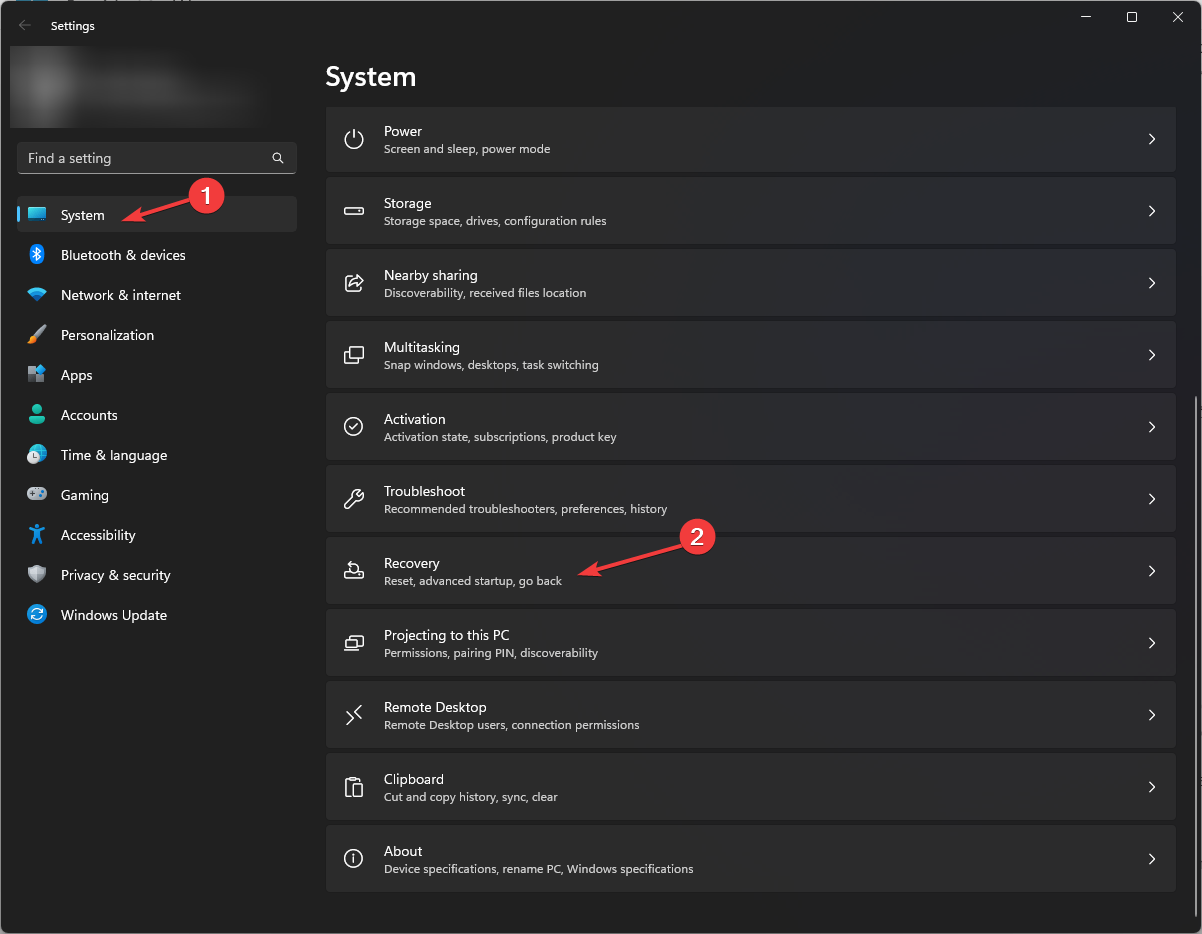
- Under Recovery options, click Advanced startup and then Restart now.
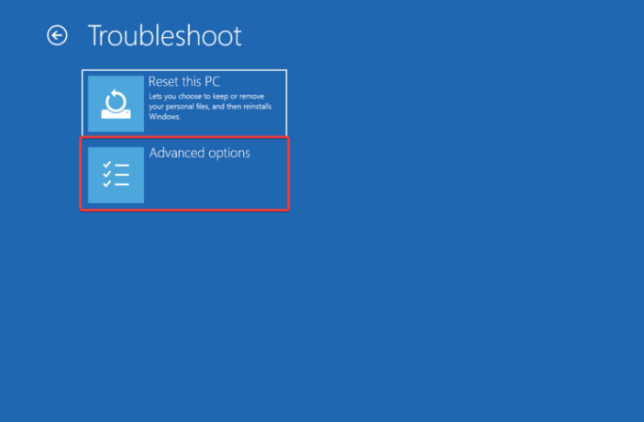
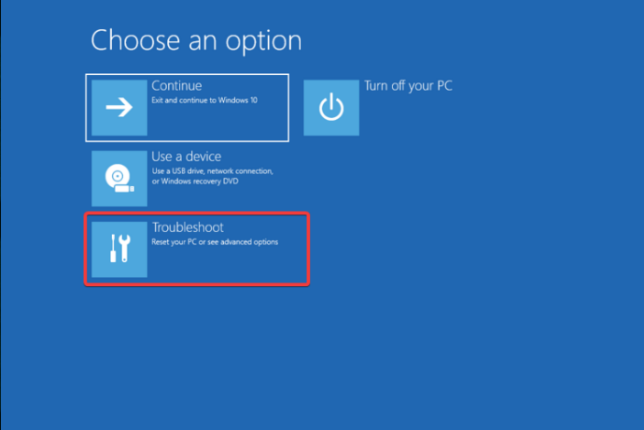
- On the Choose an option screen, click Troubleshoot.

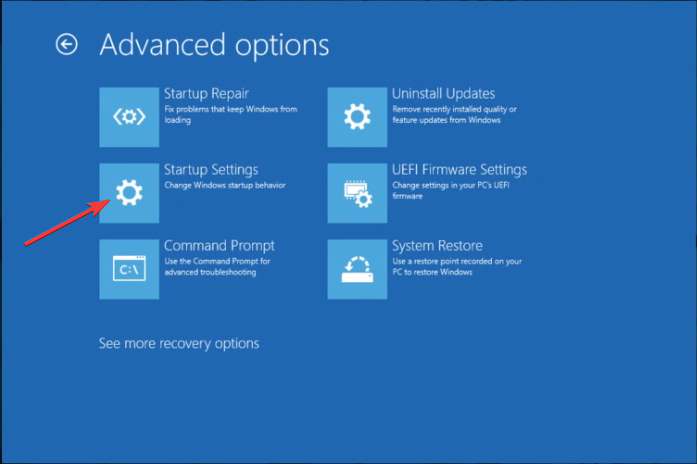
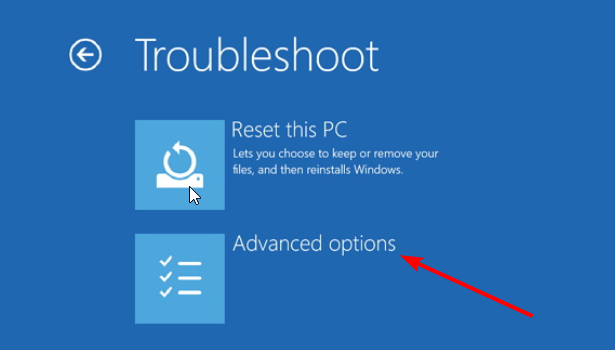
- Select Advanced options.
- On the Advanced options page, select Startup Settings.
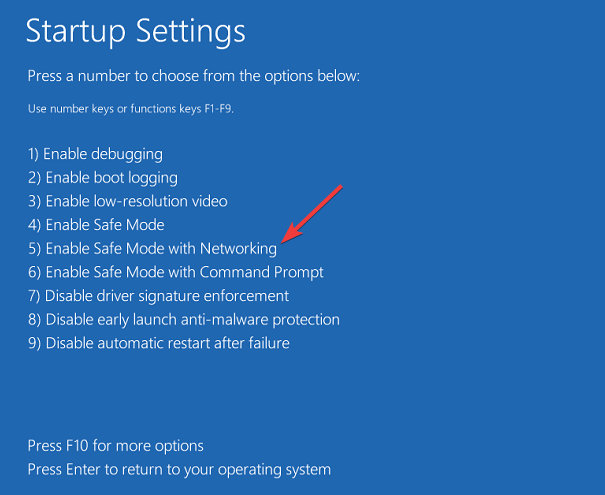
- Press the key relevant to select Enable Safe Mode with Networking and click Restart.
1.2 If your computer doesn’t boot up
- Press and hold the Power button on your machine for a few seconds to turn it off.
- Press the Power button again to boot it.
- As you see the manufacturer’s logo, press the Power button for 10 seconds again to enter Windows Recovery Environment.
- On the Choose an option page, click Troubleshoot.
- Select Advanced options.
- Choose Startup Settings.

- Press the key relevant to select Enable Safe Mode with Networking and click Restart.

Once you are in Safe mode, follow the steps mentioned below.
2 Update or rollback the driver
2.1 Update the driver
- Press Windows + R to open the Run dialog box.
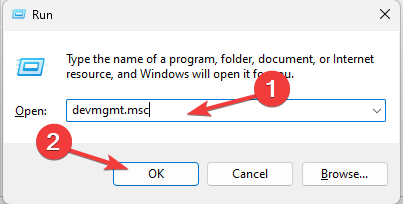
- Type devmgmt.msc and click OK to open Device Manager.
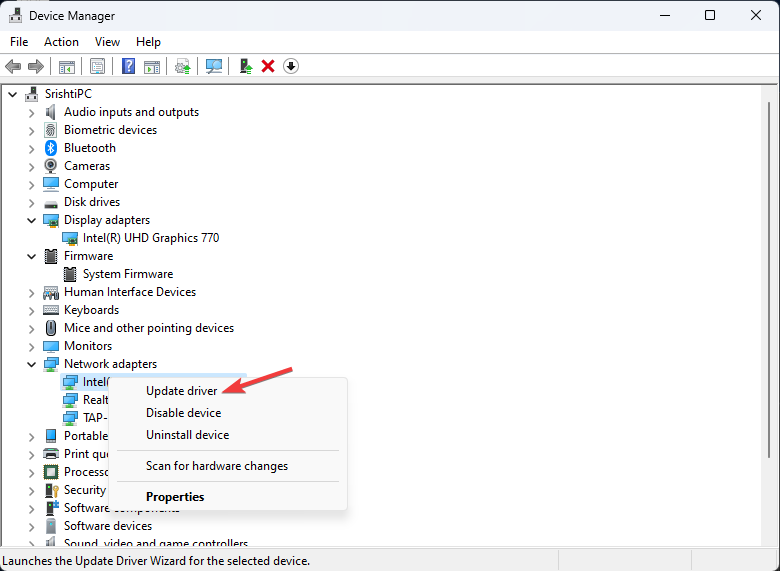
- Locate and expand the Network adapters (assuming the Bluetooth driver is causing the problem).
- Now right-click the Wi-Fi driver and select Update driver.
- Click Search automatically for drivers.
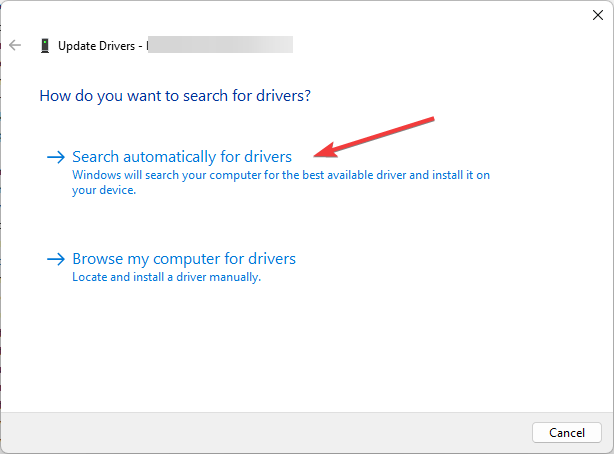
- Follow the onscreen instructions to complete the process.
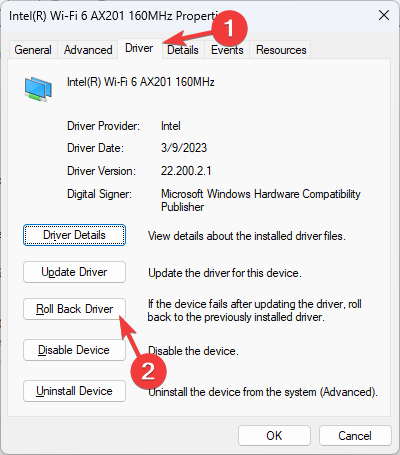
- If this doesn’t work for you, right-click the Wi-Fi driver and choose Properties.
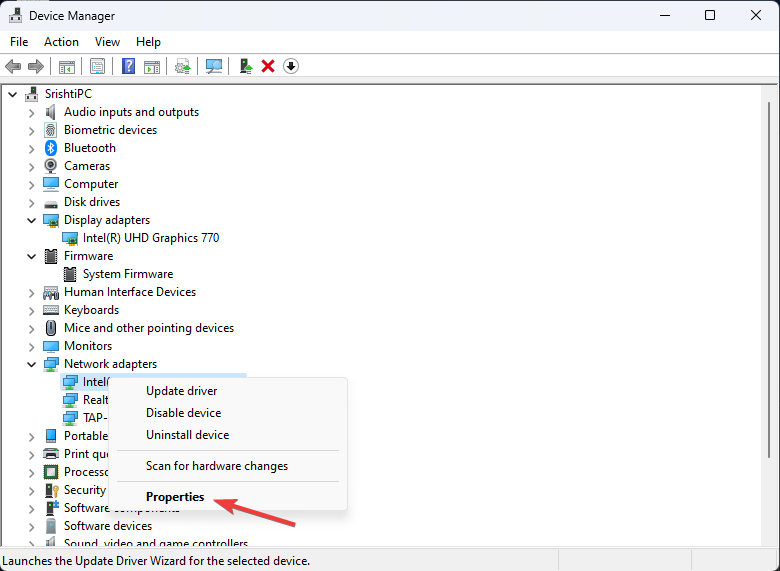
- Go to the Driver tab, and select the Roll Back Driver button.
- Select the reason for the rollback and click Yes to continue.
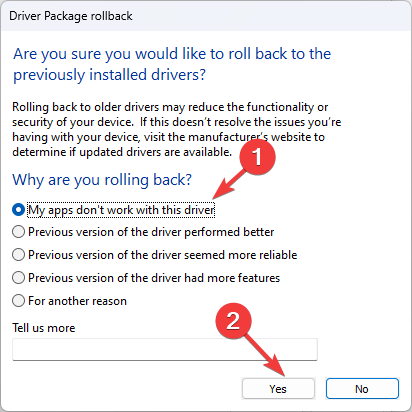
Windows will automatically roll back to the last version of the driver.
In addition, you have an alternative way to update old drivers from your PC efficiently. More exactly, we suggest you utilize tailored software for repairing or updating drivers entirely automatically.
3. Run DISM & SFC scans
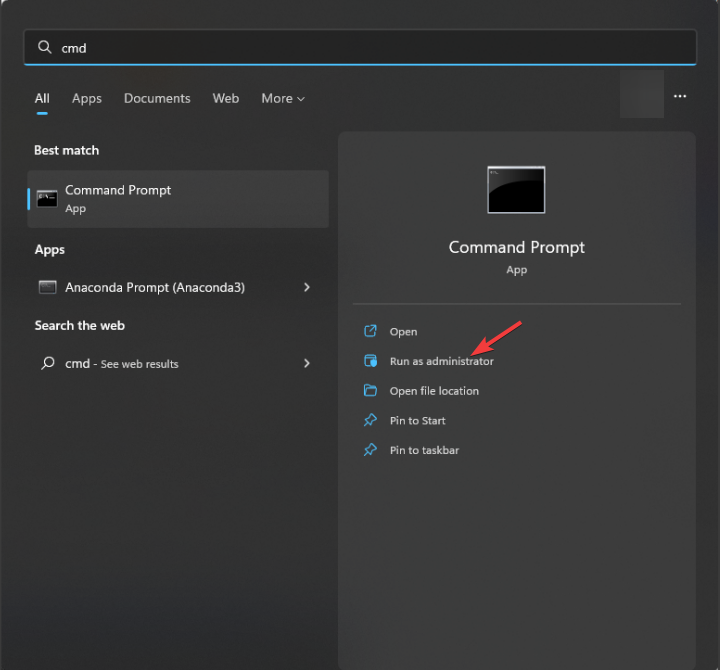
- Press the Windows key, type cmd, and click Run as administrator.
- Copy & paste the following command to repair the Windows OS image and hit Enter:
Dism /Online /Cleanup-Image /RestoreHealth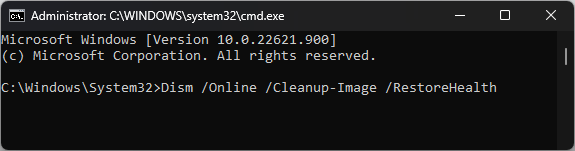
- Wait for the scan to complete, then type the following command to repair the system files and press Enter:
sfc/scannow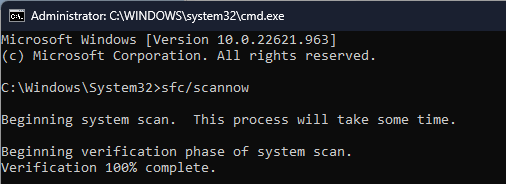
- Windows will take time to scan and replace the corrupt files, then reboot your computer to let the changes take effect.
4. Uninstall the recent Windows update
- Press the Windows + R to open the Run box.
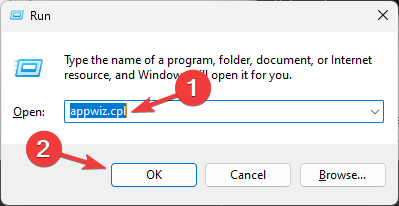
- Type appwiz.cpl and click OK to open Programs & Features.
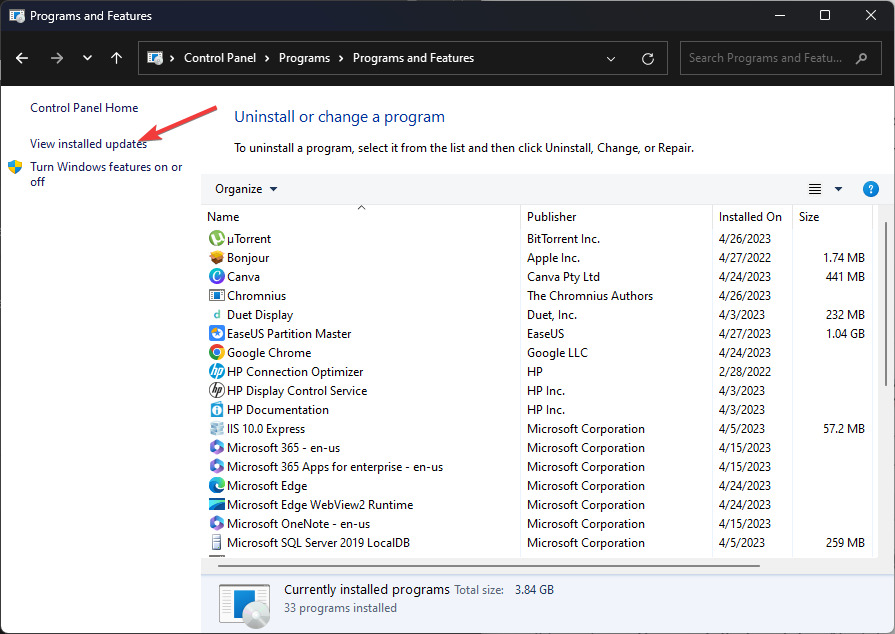
- Click View installed updates.
- Locate the update and click Uninstall.
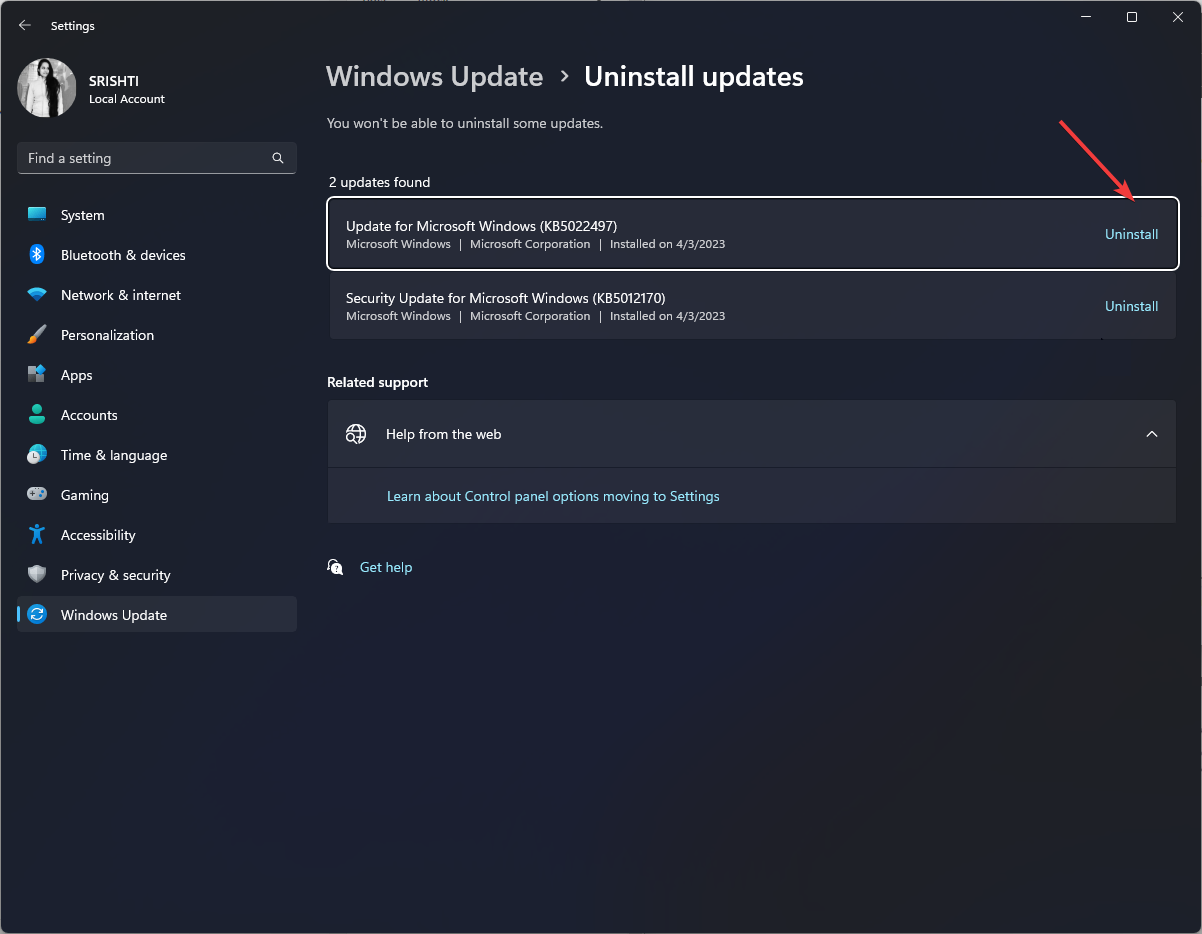
- Follow the onscreen instructions to complete.
5. Restore your system to a previous point in time
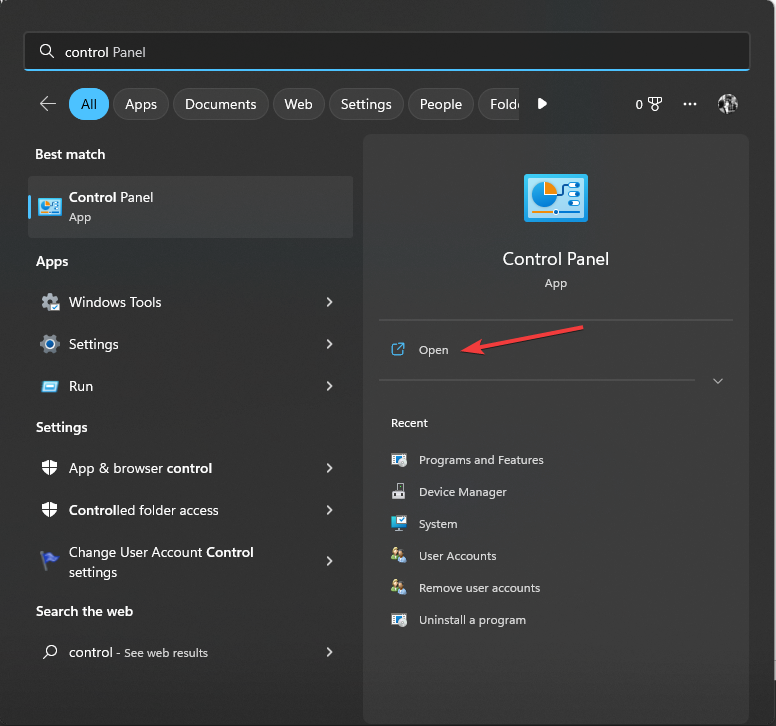
- Press the Windows key, type control panel, and click Open.
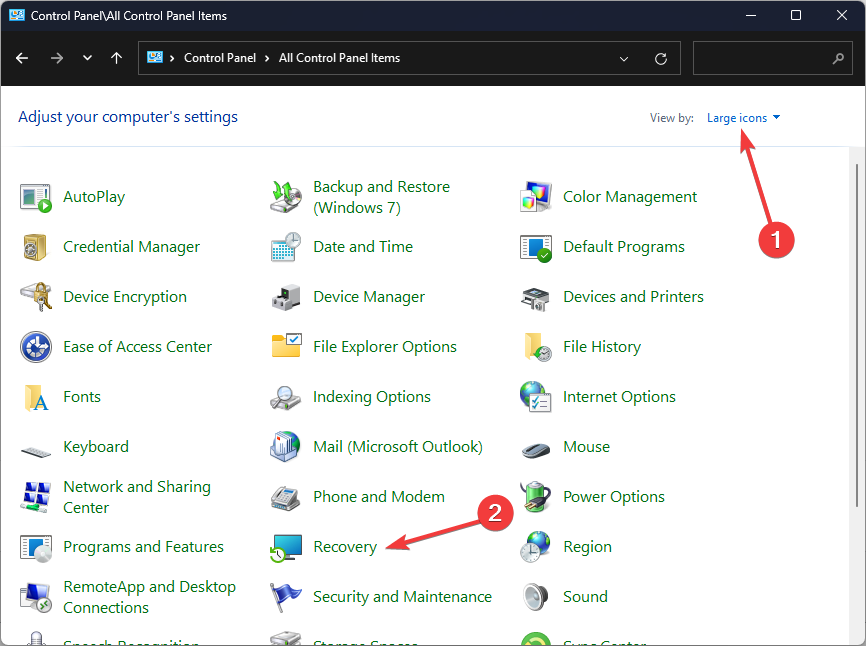
- Select Large icons as View by and click Recovery.
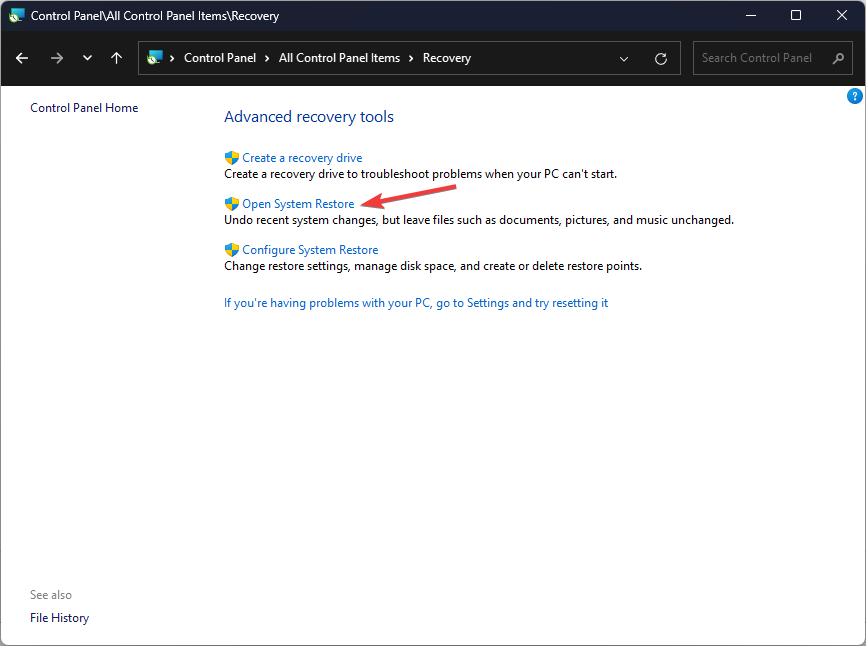
- Click on Open System Restore.
- On the System Restore window, select Choose a different restore point and click Next.

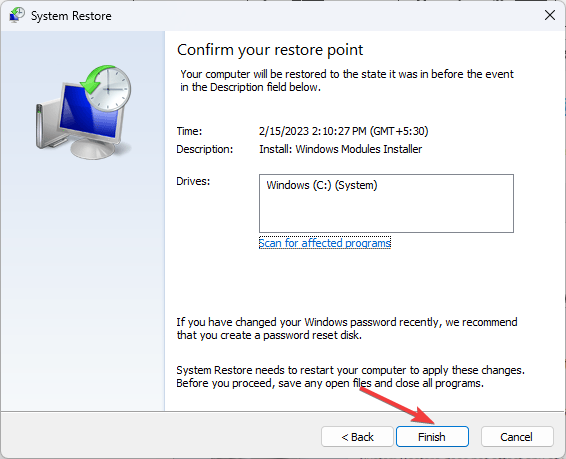
- Select a restore point and click Next.

- Now select Finish.
Windows will restart, and your computer will be restored to the selected point in a few minutes. If the System Restore didn’t successfully complete, we advise you to check out this informative guide for solutions.
If nothing worked for you, you can perform a clean installation to fix the problem. So, these are methods that you can follow to fix the hswultpep.sys BSoD error on Windows.
If you have any questions or suggestions, feel free to mention them in the comments section below.
Read our disclosure page to find out how can you help Windows Report sustain the editorial team. Read more


Improve this guide


User forum
0 messages