How to install Raspbian on Raspberry Pi [Step-by-Step Guide]
Key notes
- If you're the proud new owner of a Raspberry Pi, you must know a thing or two about this wonderful device.
- First of all, note that Raspberry Pi, much like any other computer, requires an operating system so it can run.
- Check out our Raspberry Pi section for more awesome RPi articles and guides.
- Visit the Developer Tools Hub page to discover more development-related software.
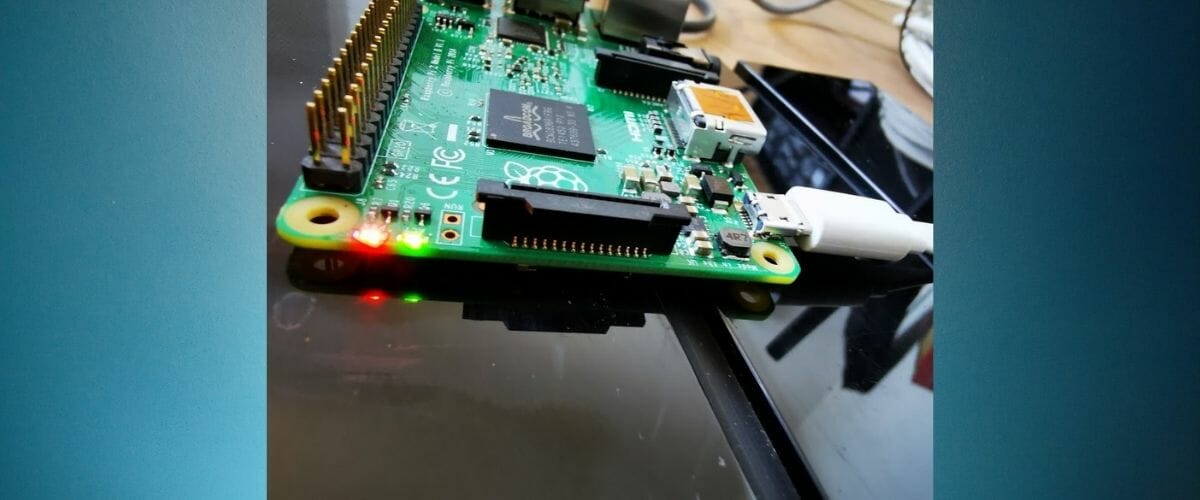
If you’re the proud new owner of a Raspberry Pi, you must know a thing or two about this wonderful device. For starters, it’s a powerful computer and not a toy, or a limited widget you can mess around with.
And as with any other computer, you’ll need a way to interface with its multiple components. The most common way to achieve this is through special software called an operating system.
Now with a standard computer deploying an operating system couldn’t be easier. Back in the day, it was a real challenge, but now it’s been simplified to the point that even PC novices can do it without risking to compromise their systems.
However, with Raspberry Pi things are a bit different. The lack of any integrated peripherals (mouse + keyboard) or display might make it even more difficult. But it’s not that bad once you get the hang of it.
Come on, we’ll show you how to install Raspbian on a Raspberry Pi.
How to install Raspbian on SD card on Windows?
- Download Raspberry Pi Imager
- Fetch an empty (or discardable) SD card
- Install Raspberry Pi Imager on your Windows PC
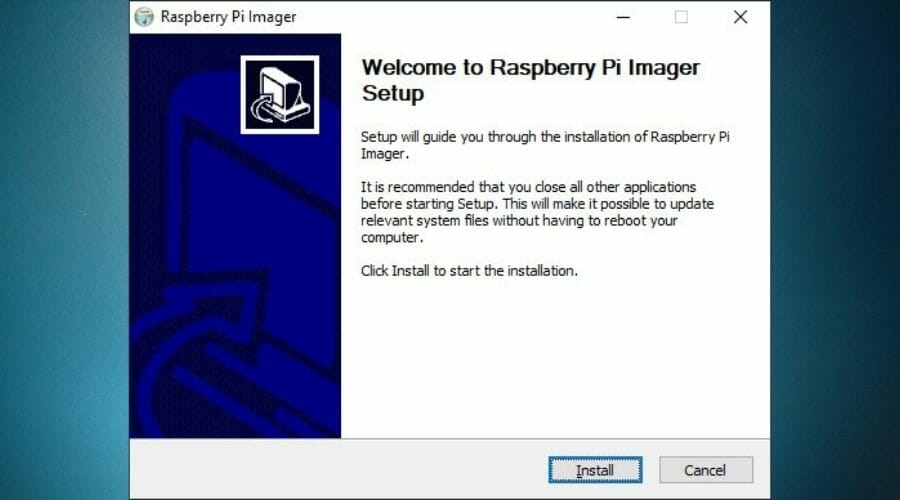
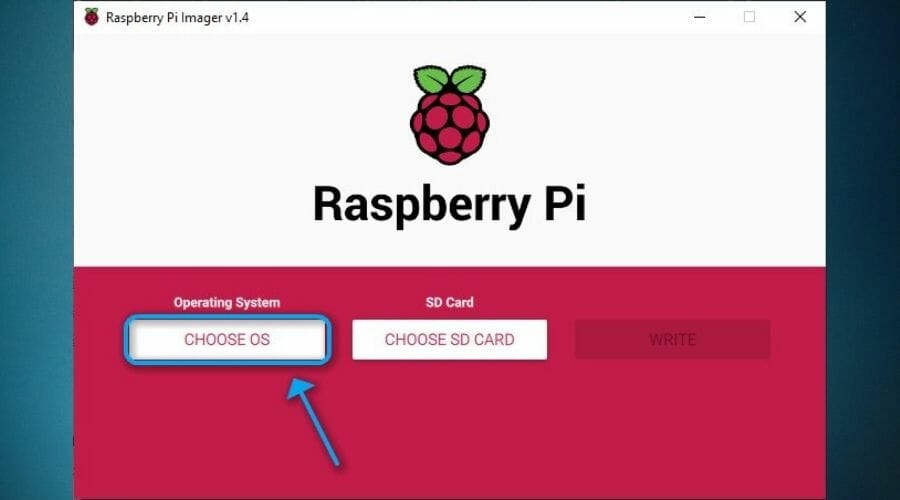
- Run the tool
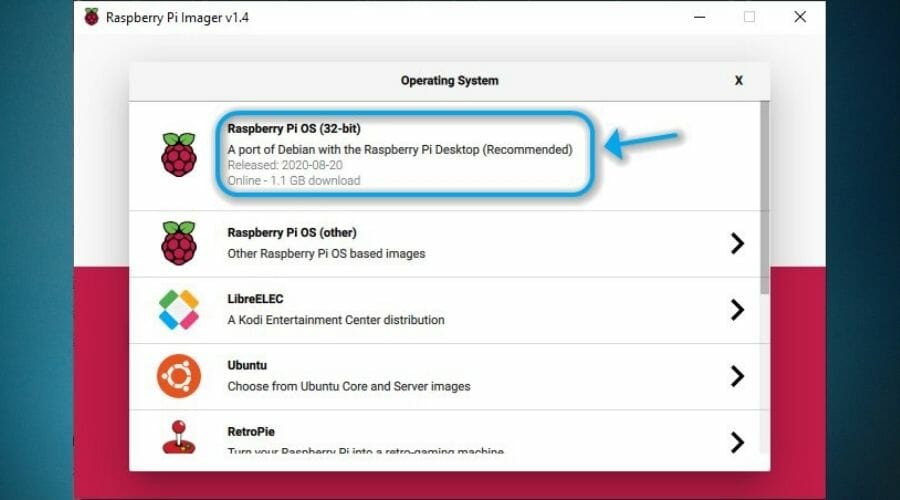
- Click the Choose OS button
- Select Raspberry Pi OS (32-bit) as the program recommends it
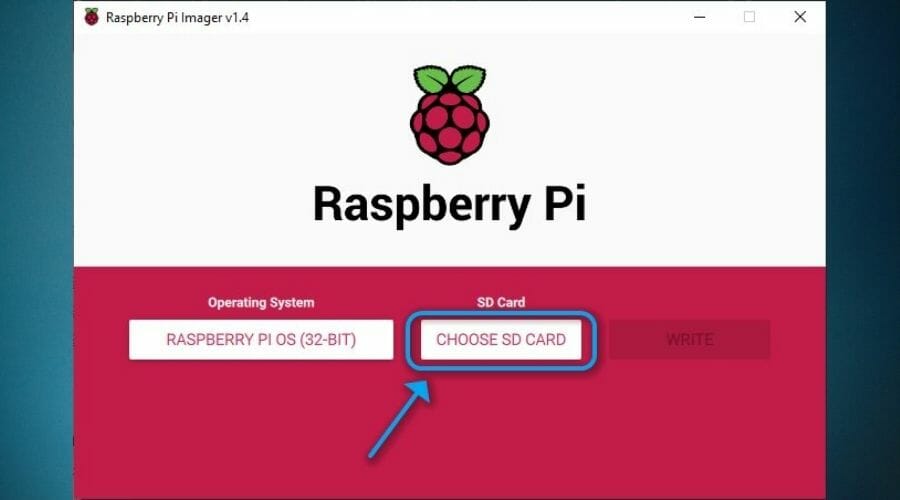
- Click the Choose SD card button
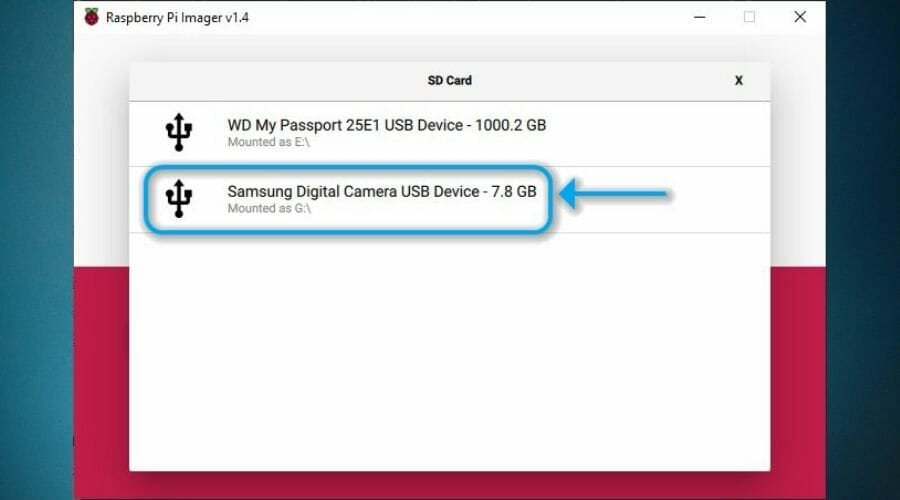
- Select the card you want to write the OS on (we used a camera as a card reader)
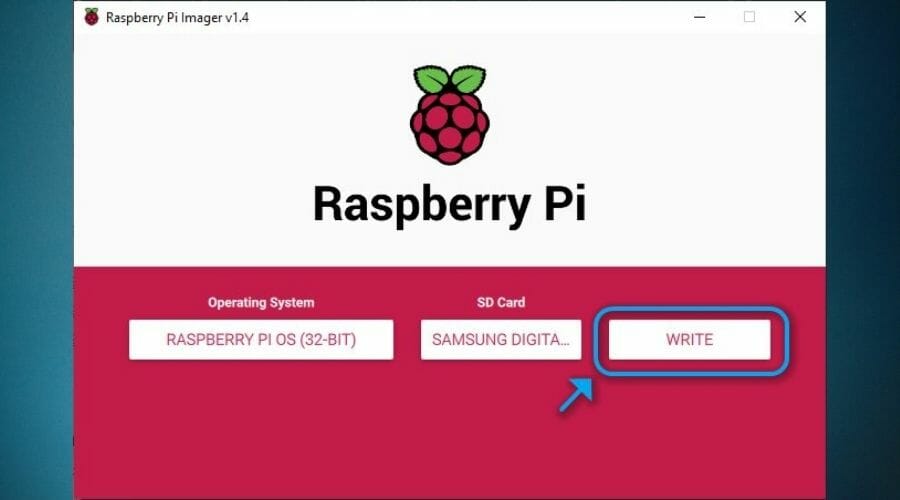
- Click the Write button
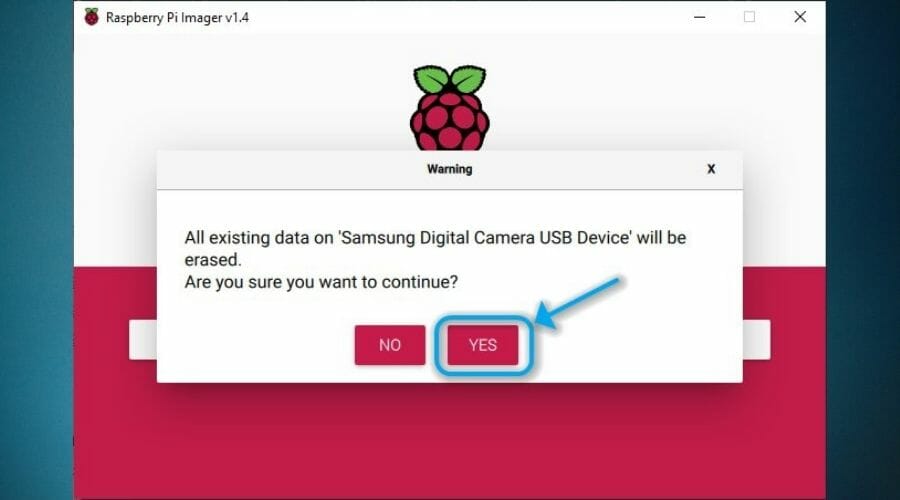
- Confirm your action by clicking the Yes button
- Wait for the process to come to an end
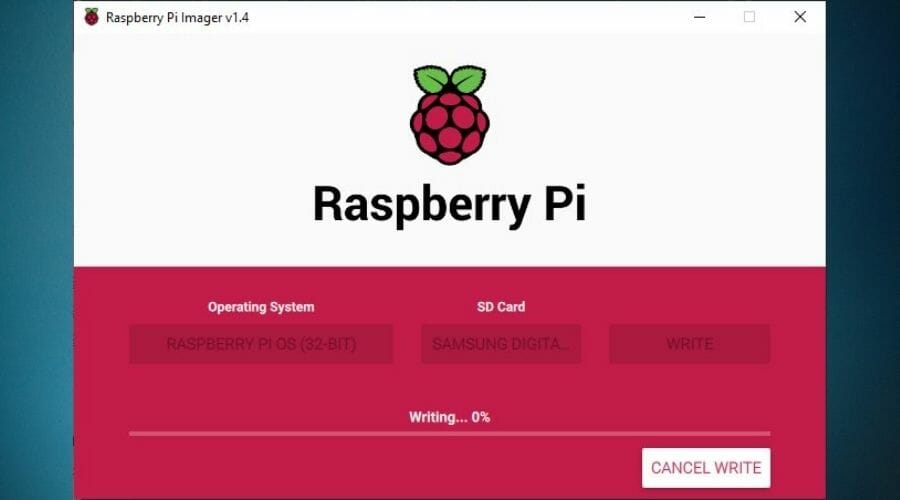
Note that all previous data on your SD card will be erased by the Raspberry Pi Imager tool. Furthermore, you can’t access the content of the SD card or write on it by connecting the RPi to your PC.
Therefore, you’ll also have to use an SD card reader and connect it to your PC so you can write the OS to the card. We’ve used an old photo camera and it worked like a charm. Using a microSD-enabled phone can also work great.
Installing Raspberry Pi OS (formerly Raspbian) on Windows feels a tad less complicated thanks to the GUIs of the programs we used. Linux users prefer deploying it using the Terminal (the equivalent of Windows’ CMD).
How to install headless Raspbian on SD card?
This bit can be very useful in case you don’t have an HDMI cable and a monitor. Installing a headless Raspberry Pi OS on your RPi device can help you interface with it in lieu of the aforementioned components.
It’s quite simple, actually, and doesn’t require a lot of additional steps. You just follow the steps of the standard installation we’ve listed above, and perform the following after you’re done:
- Refrain from removing the SD card from your reader
- Open the SD card’s root in File Explorer
- Click the View button at the top of the Explorer window
- Make sure File name extensions is checked
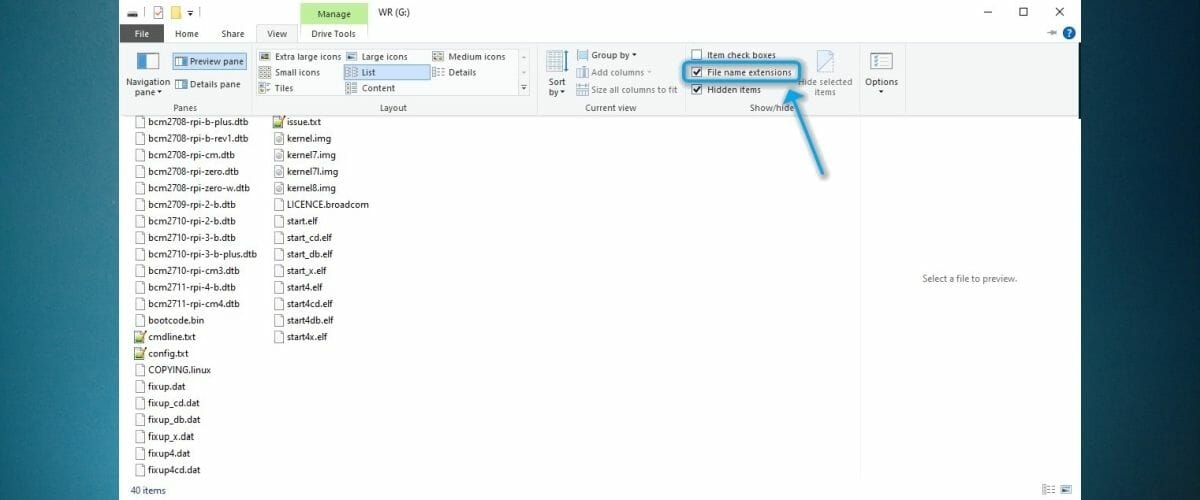
- Right-click anywhere in the window (don’t right-click any files)
- Select New > Text Document
- Name the file SSH and remove the .txt extension
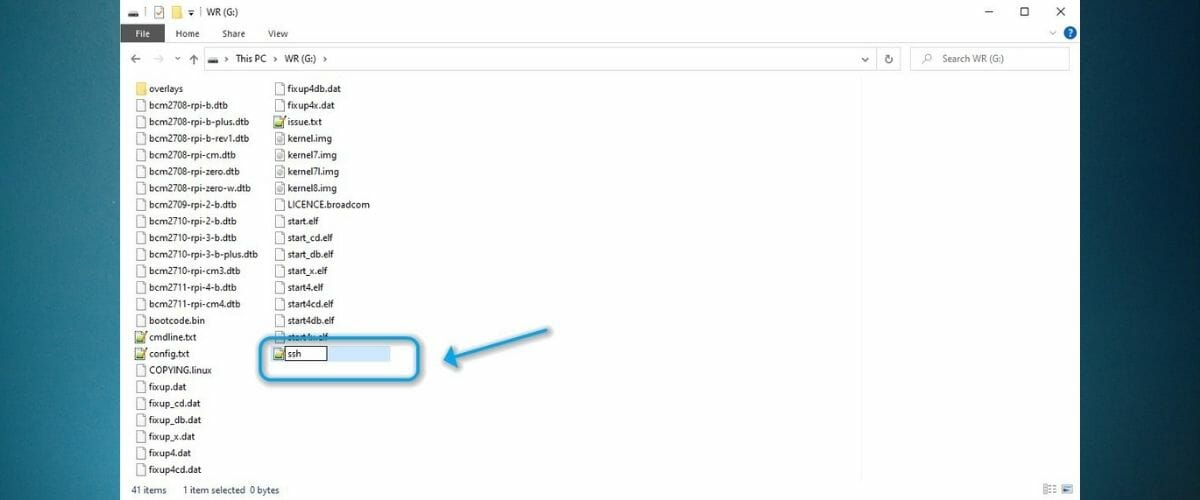
- Confirm your action
- Unplug the SD card from your reader
That’s it, now you’ve enabled SSH on your RPi device, which Raspberry Pi OS disables by default. Upon its first boot sequence, SSH will be activated when the OS sees the empty file you created.
Raspberry Pi not booting? Our guide will help you solve this issue quickly.
Thus, instead of using peripherals to access your RPi device, you can simply interface with it by using a Secure Shell (SSH) client, as we’ll explain in the next section.
How to connect to Raspberry Pi?
1. Using peripherals
- Insert the newly OS-written SD card into your Raspberry Pi
- Get a keyboard, mouse, HDMI cable, and display monitor
- Connect all of the above to your Raspberry Pi
- Plug your RPi to a power source using the dedicated power port
- Optionally: connect an audio output device if you want to have sound
- Wait for the Raspberry Pi OS to boot
- Use pi as the username and raspberry as the password
- Enjoy your new Linux-based mini PC
If you installed the GUI version of Raspbian, you’ll get familiarized with the system quite easily. On the other hand, if you’ve opted for the simplified GUI-less, CLI-driven version, you’ll only see lines of text.
That shouldn’t be necessarily a problem, but many users get put off by operating PCs through typing seemingly complicated text commands. Which gets us to the second method to connect to your Raspberry Pi.
2. Using an SSH client
- Download an SSH client (we used Solar Putty)
- Install the SSH client on your PC
- Connect your Raspberry Pi to your router using an Ethernet cable
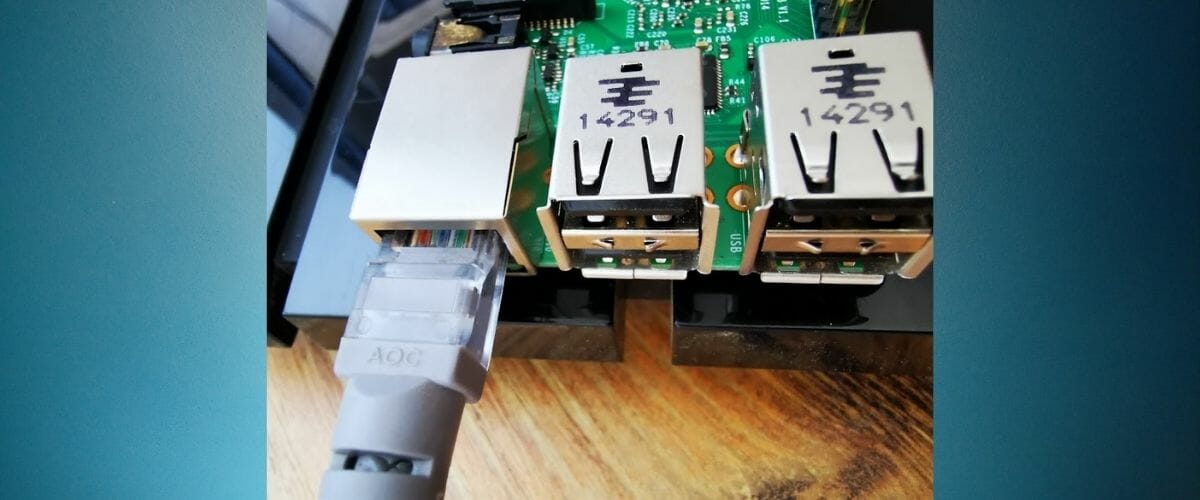
- Insert the Raspberry Pi OS SD card into your RPi
- Plug the Raspberry Pi into a power source (we used our router’s USB port)
- Access your router’s gateway address in your browser
- Identify the local IP address of the RPi device and write it down
- Run the SSH client and create a new session within it
- Type the IP address you saved earlier
- Optional: you can skip the 6th and 7th steps by using raspberry or raspberry.local as the address
- Use pi/raspberry as the username/password combination
- Define a name for the credentials (if needed)
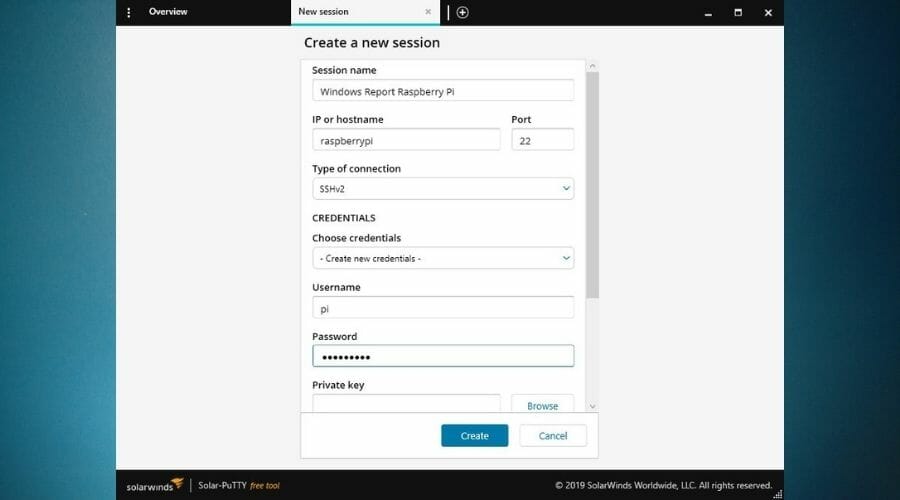
- Save the session details and launch it (hit Create button)
The SSH client version is the CLI one we’ve described above. There’s no GUI and you can only interact with your RPi through lines of text. However, once you get the hang of it, you’ll realize it’s not that complicated.
Granted, the SSH version is more suitable for advanced users, who know their way around Linux operating systems. Note that, unlike the GUI version, the CLI one is more permissive and lets you tamper with things you shouldn’t touch.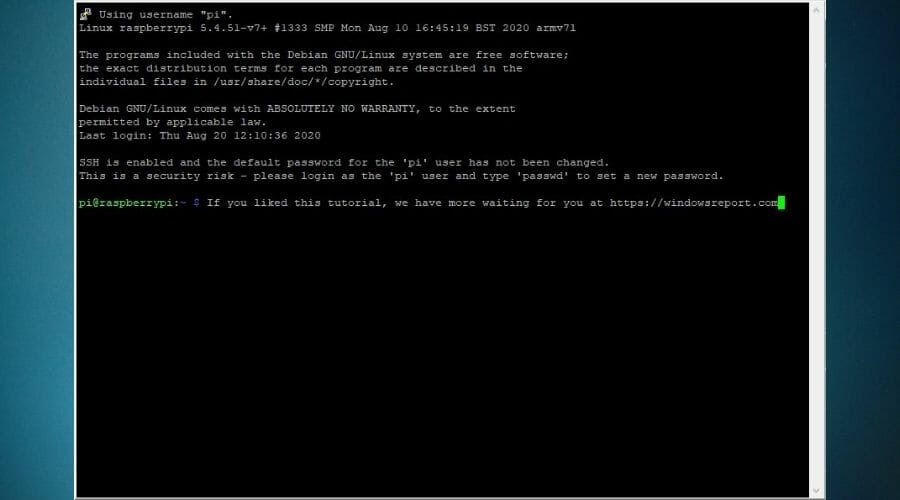
Thus, we feel the need to give you a heads-up: never run any commands you’re not entirely familiarized with unless you feel like risking the integrity of your Raspberry Pi OS.
How to use Raspbian OS?
Now that you’ve successfully deployed Raspberry Pi OS on your Raspberry Pi, a world of opportunities awaits you. You can use your new mini-PC (we’re talking about size, of course) to host a website, run an email server, or even use it as a VPN server.
If none of these sound too appealing, you may be glad to hear that you can turn your Raspberry Pi device into a retro-gaming console. However, that’s a whole nother story and we won’t overburden you with the details here.
Last, but not least, you can use mobile apps to access your Raspberry Pi and control it, if PC interaction doesn’t seem to cut it. One such app is RaspController.
Final thoughts on installing Raspberry Pi OS
All things considered, deploying Raspberry Pi OS on your RPi device may not be exactly a walk in the park. However, following our comprehensive guide will help you perform the setup regardless of your previous experience.
Note that despite its size the RPi is a powerful computer. Therefore, you can use it for a wide range of projects, including but not limited to hosting websites, email servers, and even Minecraft servers.
[wl_navigator]
Read our disclosure page to find out how can you help Windows Report sustain the editorial team. Read more


Improve this guide


User forum
0 messages