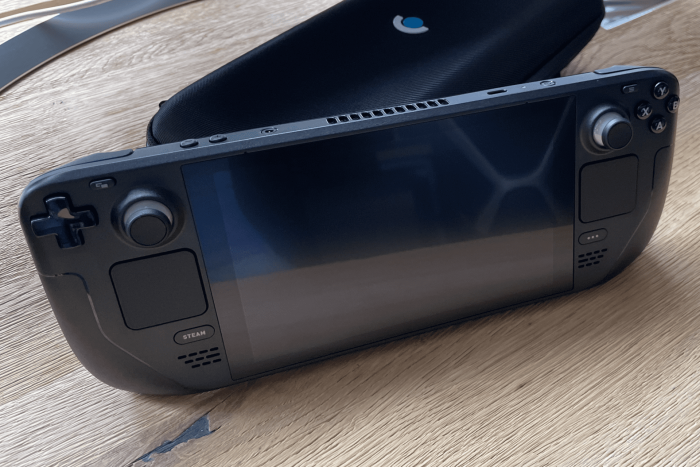
Install Windows on Steam Deck: How to do it and Why?
You can dual-boot or just run Windows
While Steam Deck allows you to install Windows, the process is not that simple. So, while installing it, we thought why not document the process and share it with the gaming community that prefers Windows over the Linux-based SteamOS?
The former offers a better UI, one we are used to, and that’s the primary reason you may consider installing Windows over SteamOS. Secondly, it offers the ability to use Steam Deck as a PC. Just plug in the keyboard and mouse, and you are good to go!
However, you may see a diminished performance since Steam Deck is meant to work with SteamOS. Besides, the absence of TPM (Trusted Platform Module) support may leave your device vulnerable to threats, and it may not receive Windows updates. If you are still interested, keep reading!
How can I install Windows on Steam Deck?
1. Run Windows via an SD card (dual boot Windows and SteamOS)
For the faint-hearted, dual-booting Windows and Steam OS (refer to the guide for the entire process) is the best approach, and the steps are quite simple, given you have previously installed Windows on a PC. Even if not, there’s always a first time!
Besides, since this doesn’t remove the pre-installed SteamOS, you shouldn’t face any problems if the Windows installation fails. And that’s the reason we recommend it because reinstalling the SteamOS is a herculean task.
2. Install Windows on the Steam Deck’s SSD (removes SteamOS)
 Tip
Tip
2.1 Prerequisites
- A 16 GB USB drive or microSD card. If using the former, you will also need a USB type C hub or a USB type C to type A adapter. We recommend you get a hub since it will also allow connecting a keyboard and mouse to the Steam Deck later on.
- Download and install Rufus, a third-party program to create installation media.
2.2 Creating the installation media
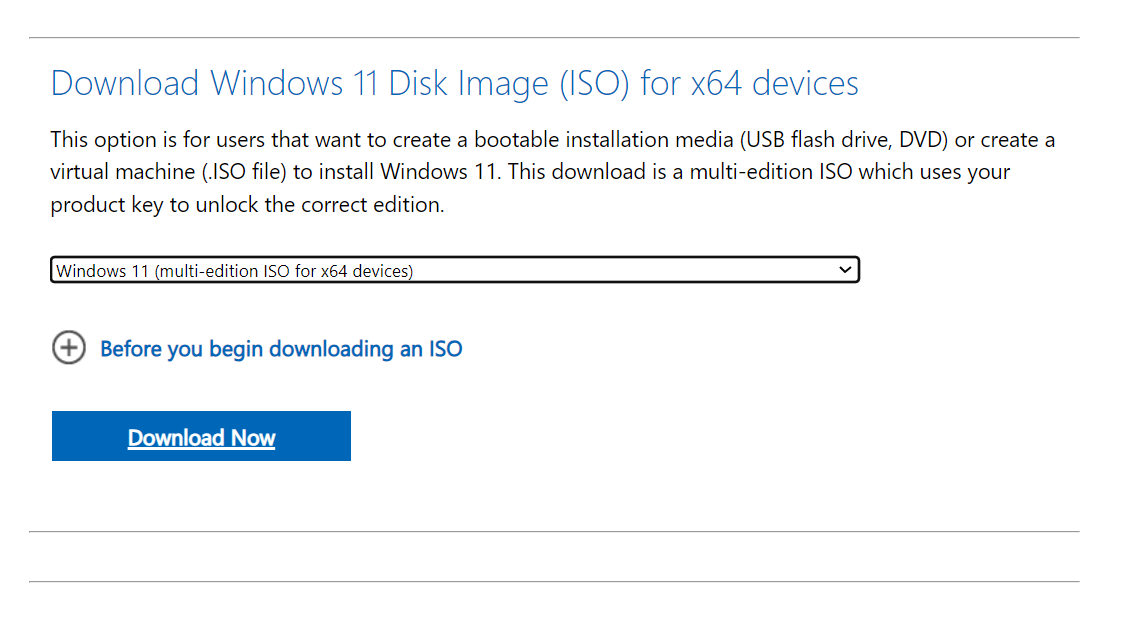
- Go to Microsoft’s official website, select the OS edition and product language, and then download the Windows 11 ISO.
- Now, plug in the USB drive or connect the microSD card.
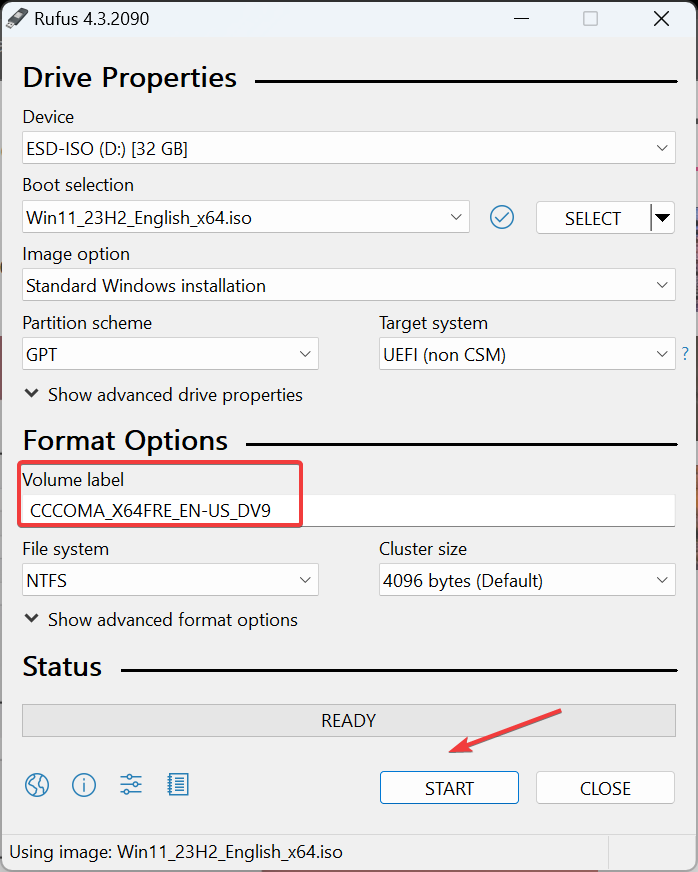
- Launch Rufus, pick the external drive or microSD card from the Device dropdown menu, then choose Disk or ISO image under Boot selection, and then click Select.

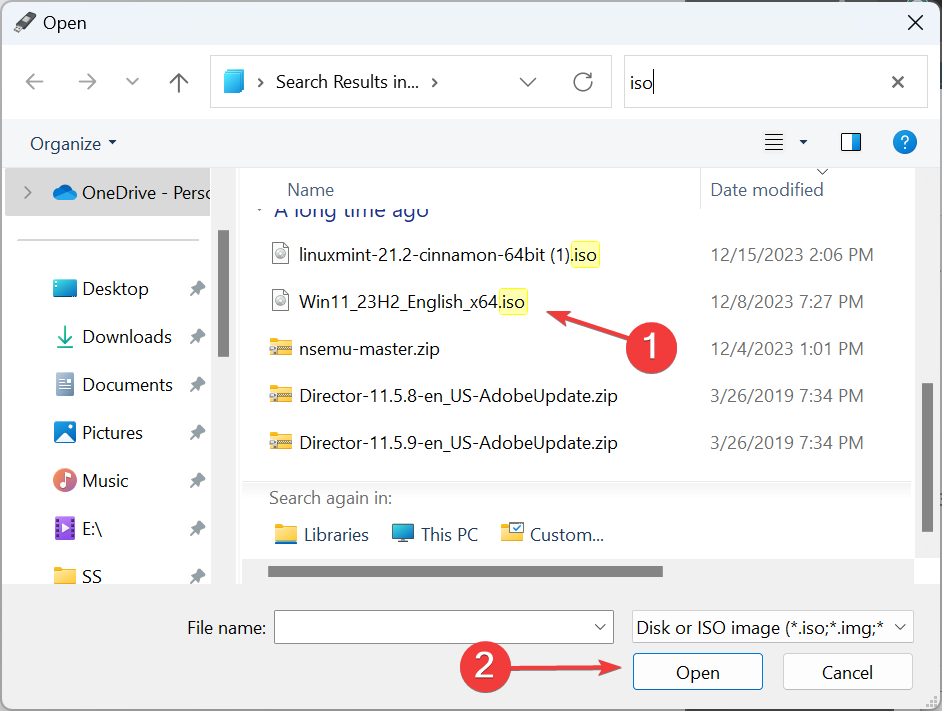
- Head to the Downloads folder, select the Windows 11 ISO file, and click Open.
- Change the Volume label (drive or SD card’s name) if you want, and then click Start.
- Tick the checkbox for Remove requirement for 4GB+ RAM, Secure Boot and TPM 2.0, and click OK.

- Choose the appropriate response in case more confirmation prompts appear.
- Wait for Rufus to create a bootable USB or microSD card, as the case may be.
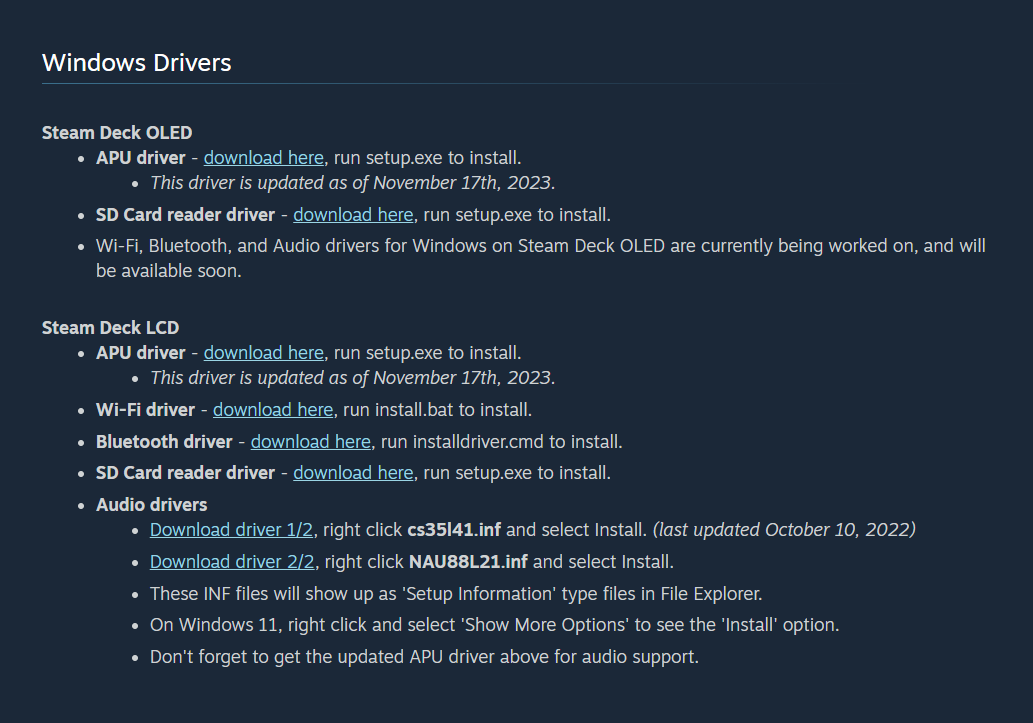
2.3 Download the Steam Deck drivers
- Go to Steam’s official website and download all the drivers for your model of the Steam Deck, depending on whether it is OLED or LCD.
- Right-click on all the downloaded driver folders individually and select Extract All.
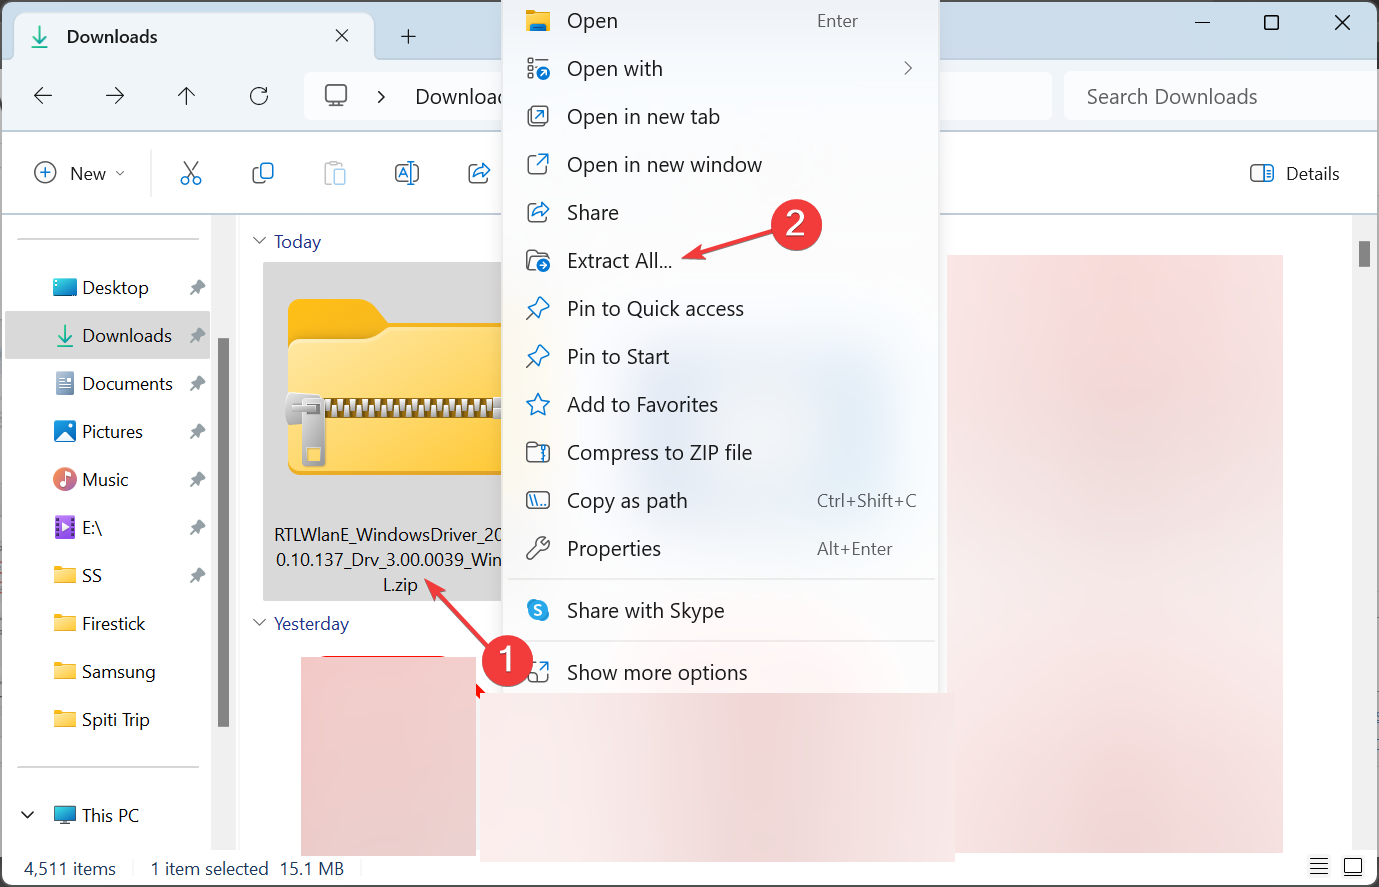
- Go with the default selections and click Extract.
- After all the driver folders are extracted, move them to the bootable USB or microSD card that you earlier created.
2.4 Installing Windows on Steam
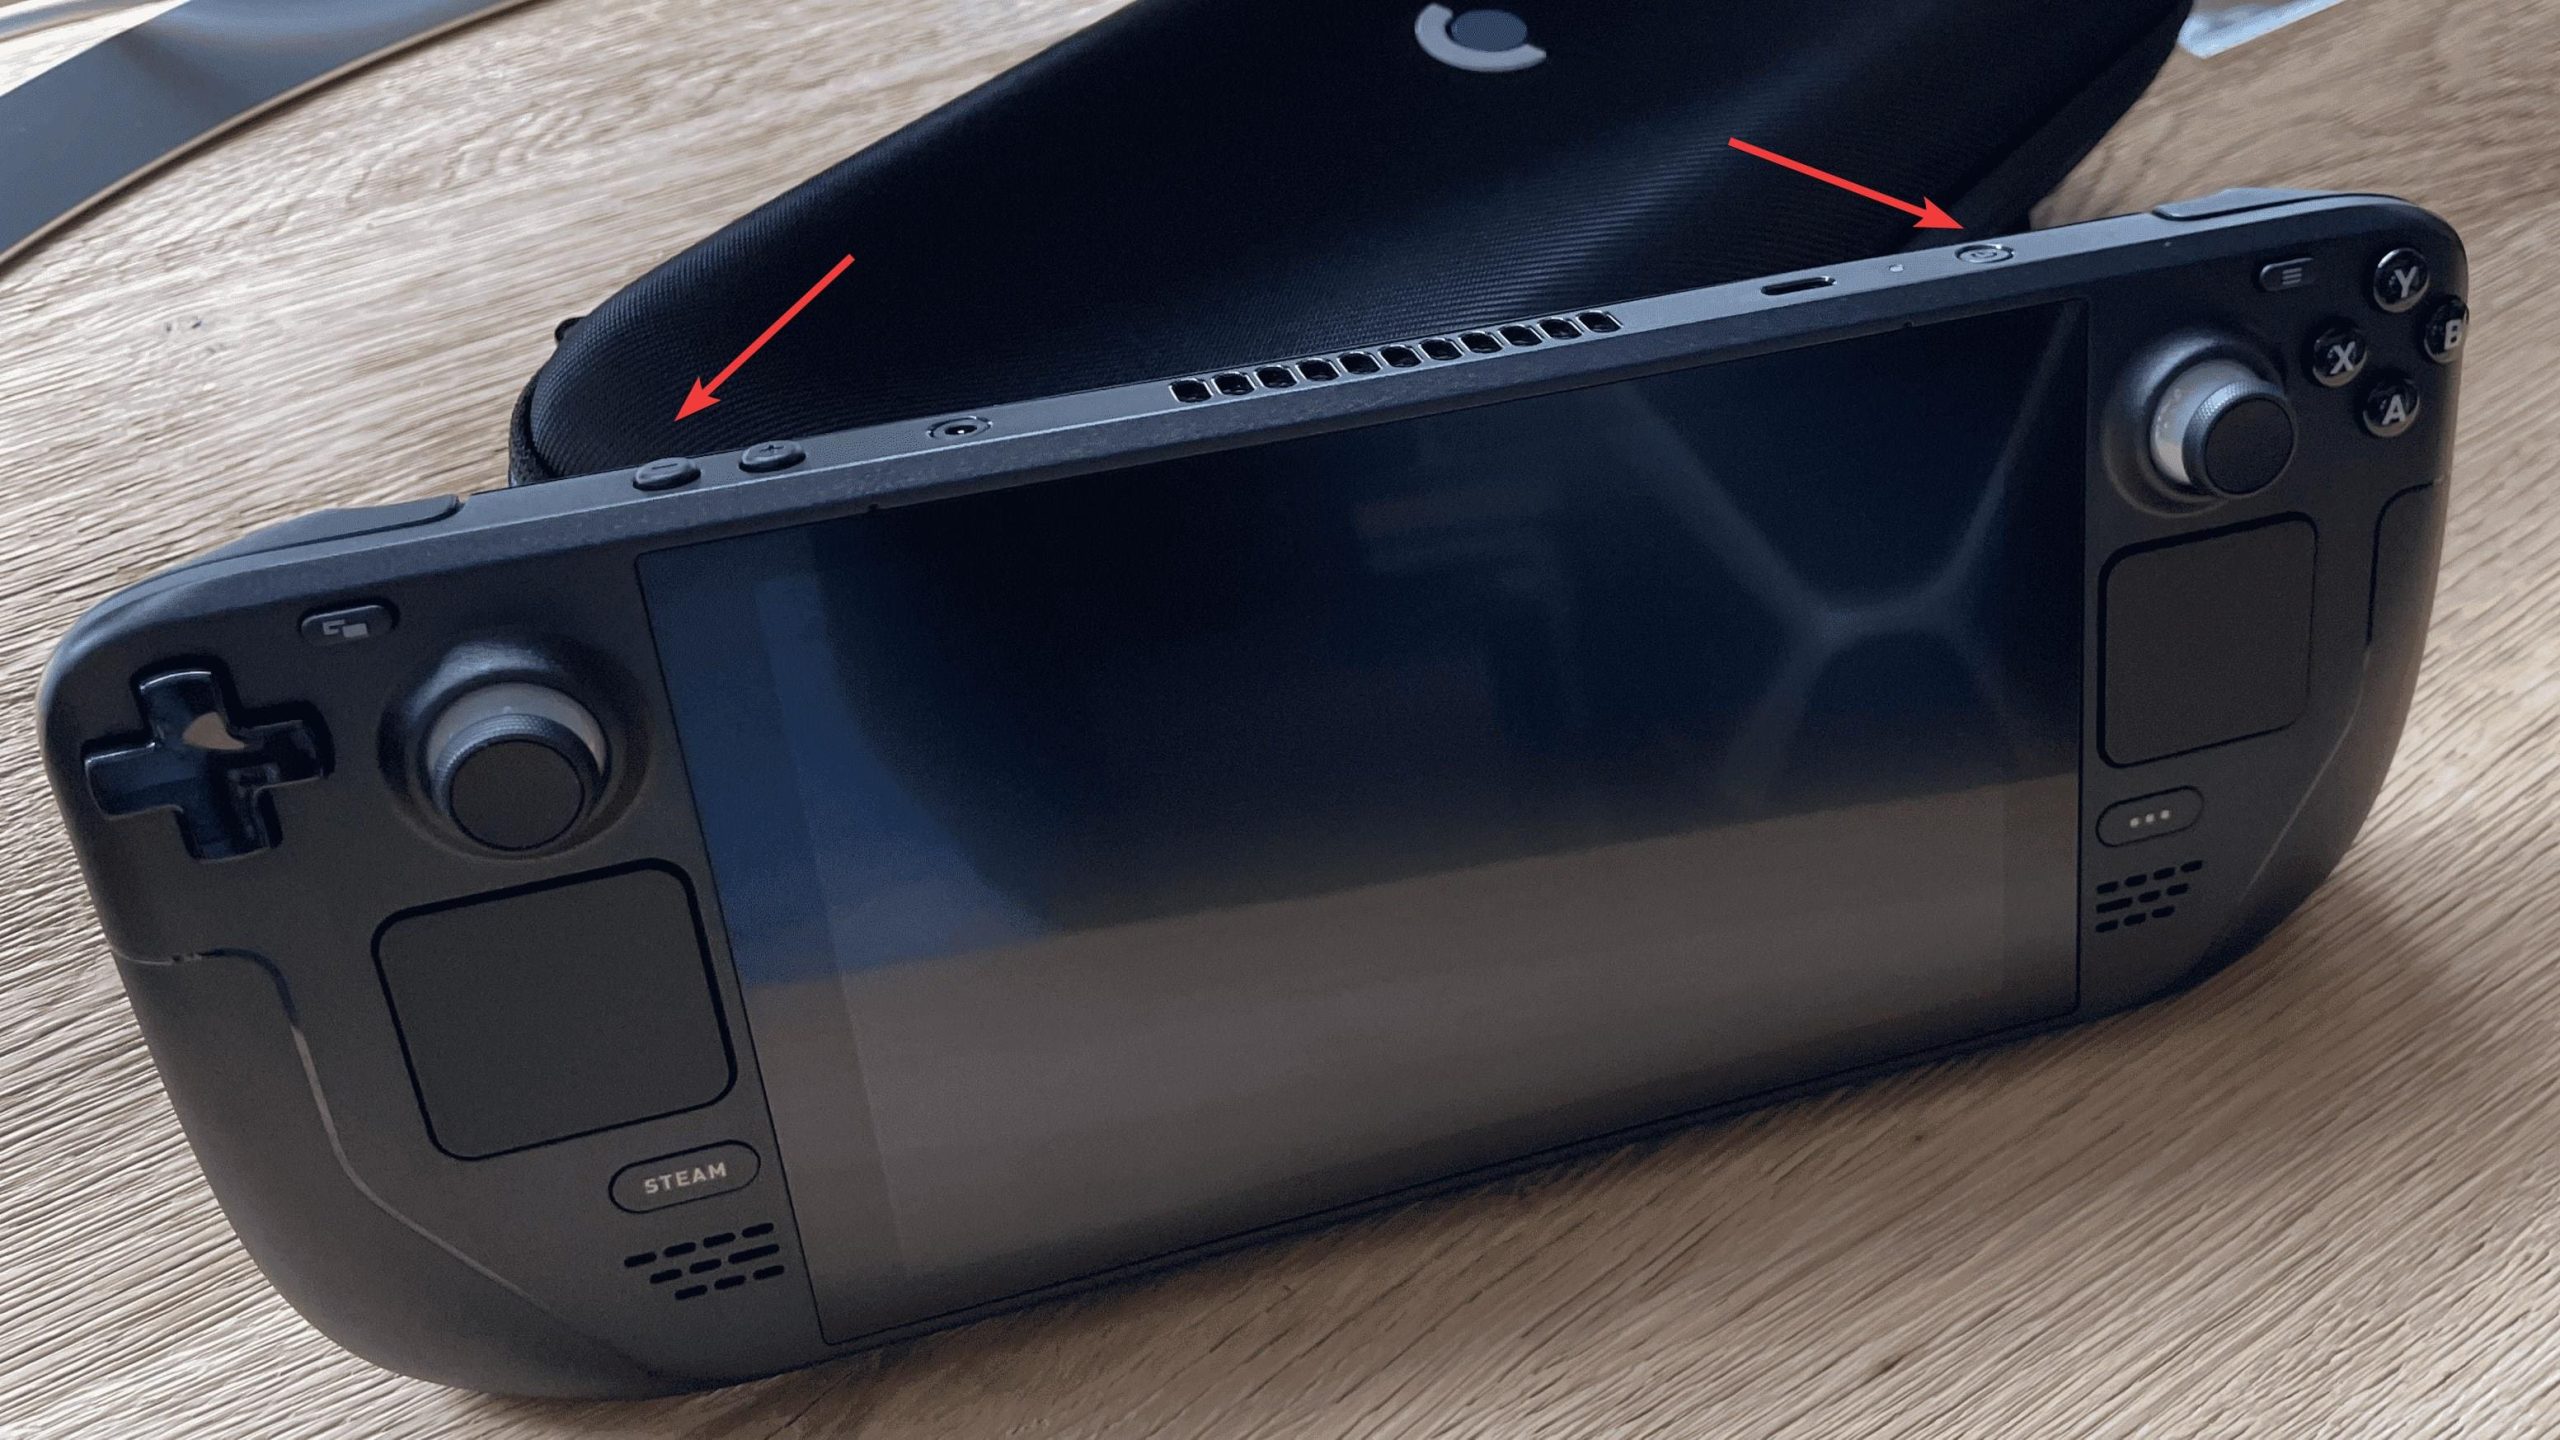
- Now plug in the USB drive or microSD card to the Steam Deck, then hold the Volume Down and Power buttons simultaneously until it loads the Boot Manager.
- Select the bootable installation device (USB or SD card) from the list of options.
- The screen will go black for a while. Don’t worry! The Windows setup will load soon. It will be in portrait mode, and we can only fix that later.
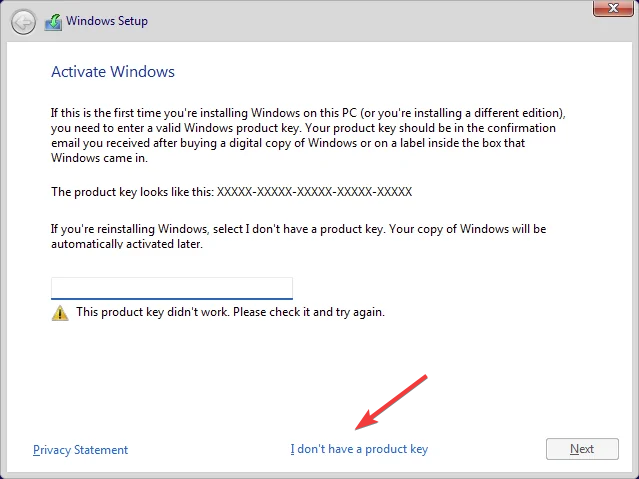
- Follow the on-screen instructions until you reach the point where it asks for a product key. Simply choose I don’t have a product key.
- Now, when the setup lists the existing partitions, delete them all. At last, when there’s just one left, choose it and click Next.
- Again, follow the on-screen instructions to complete the installation, then perform the initial setup of Windows 11 on Steam Deck.
2.5 Getting things ready
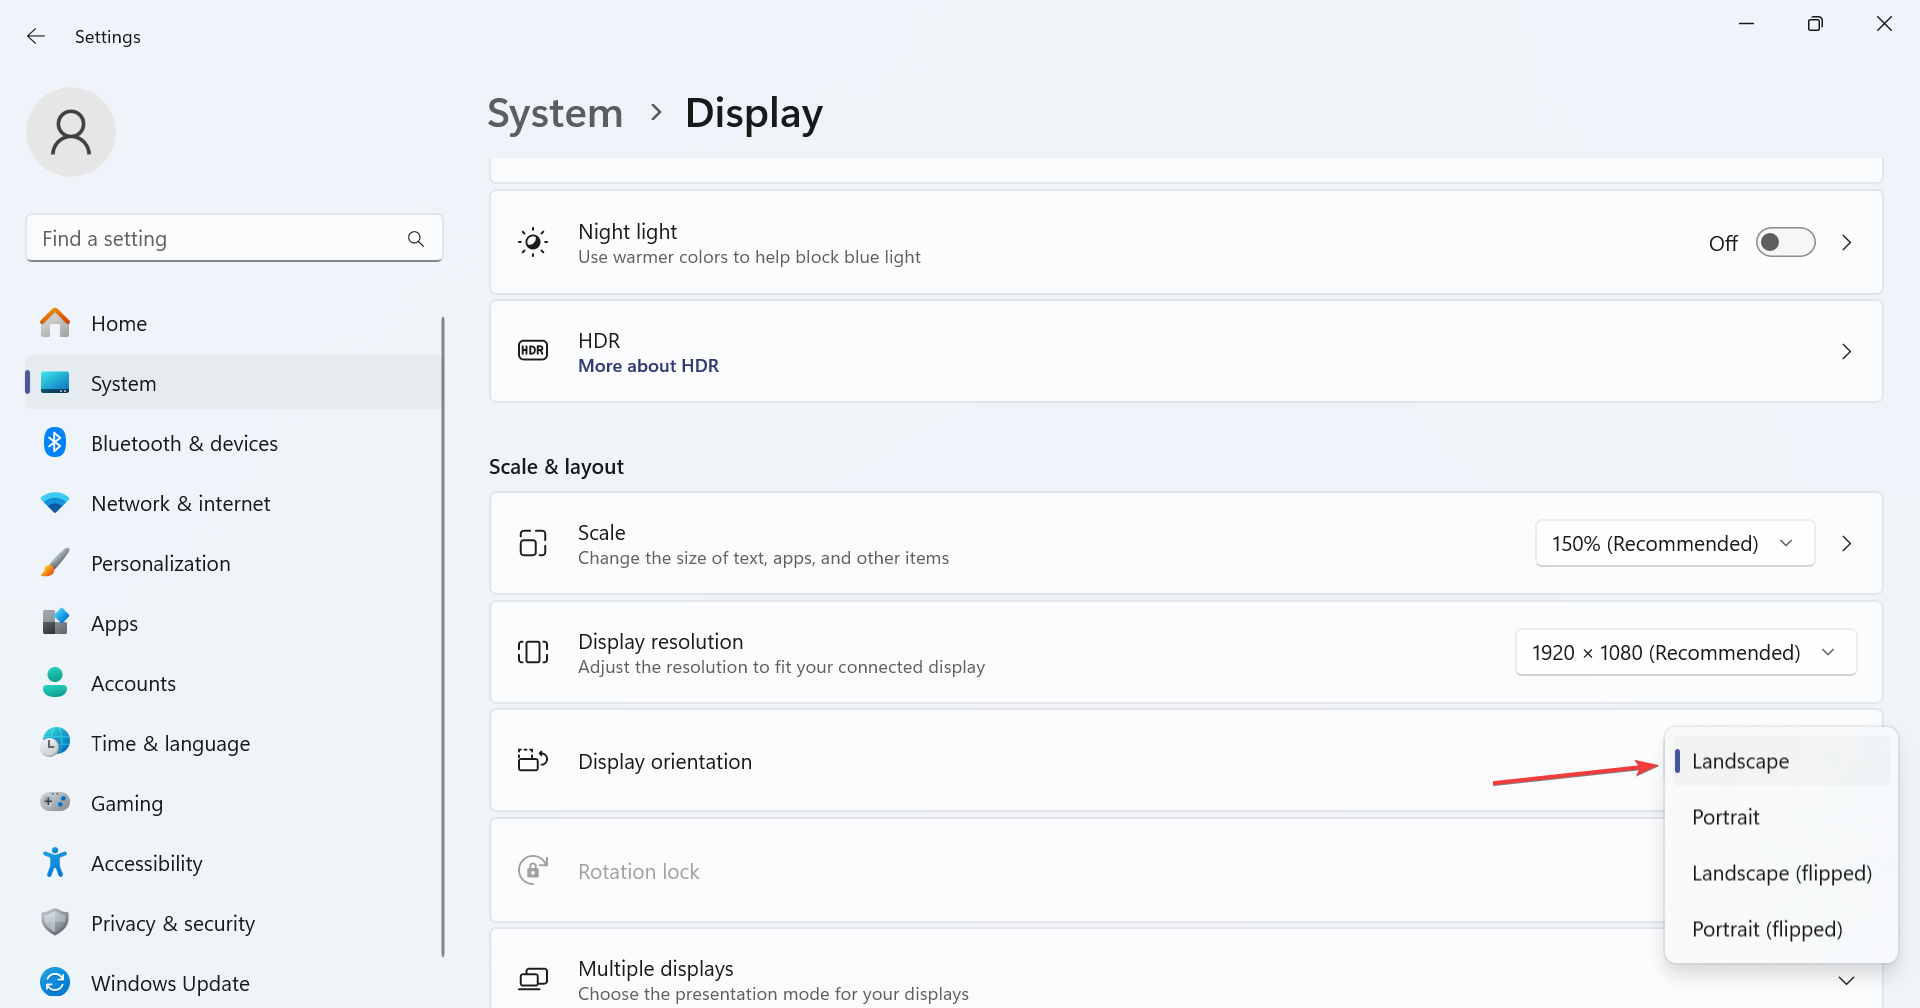
- To fix the display orientation, press Windows + I to open Settings, go to System from the left pane, and click on Display.
- Now, under Display orientation, select Landscape.
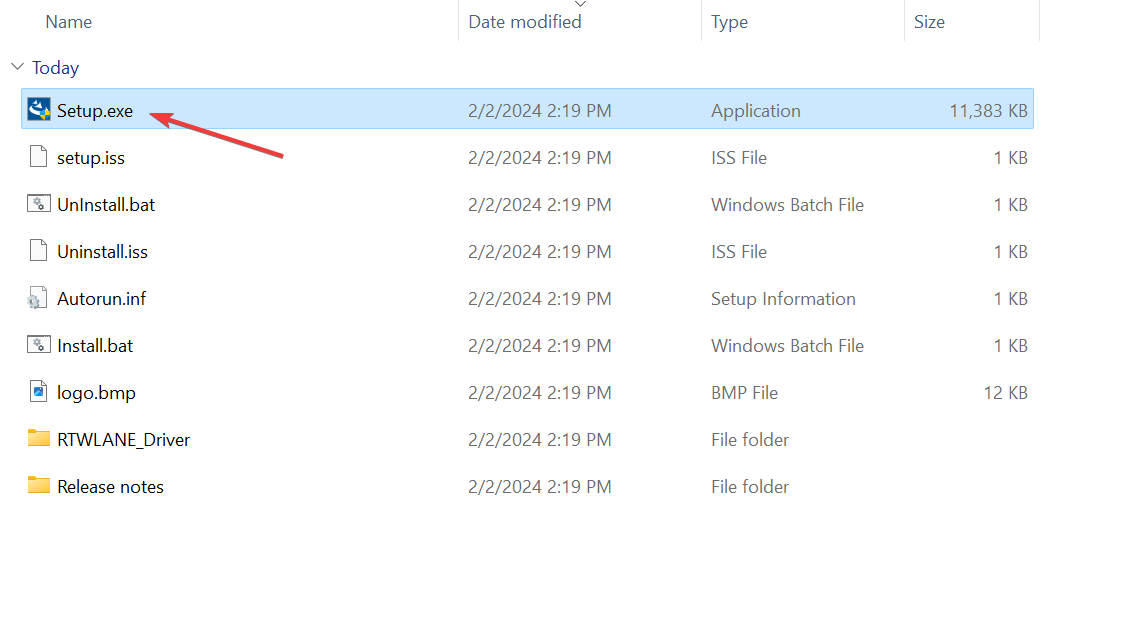
- Next, open File Explorer, go to the USB drive or SD card, and run the Setup.exe files for the drivers we downloaded earlier.
- After installing them all, you will be able to connect to the preferred network and download more apps.
That’s all you need to do to install Windows 11 on Steam Deck and run it as the stand-alone OS. At this point, you can connect the keyboard and mouse and start using them!
Remember, Steam is still working on some of the drivers, and they aren’t polished yet. So you might face trivial issues from time to time, but it won’t significantly affect the experience!
Also, if you plan to keep both operating systems, try using your phone as a keyboard on the Steam Deck.
If you choose to install Windows, we also have a great guide on how to download the Windows 11 Bluetooth driver for Steam Deck, so don’t miss it.
For any queries or to share your experience of running Windows on Steam Deck, drop a comment below.
Read our disclosure page to find out how can you help Windows Report sustain the editorial team. Read more


Improve this guide


User forum
0 messages