Kernel PNP Event ID 411: How to Fix It
Keep your device drivers updated

If you keep getting Kernel PNP error 411 in the Event Viewer and are concerned about what to do, then you are in the right place.
This guide will discuss what Kernel PNP is and how to deal with Kernel PNP errors. Let’s start!
What is Kernel PNP?

Kernel mode PNP manager is a part of Plug and Play manager. It interacts with OS drivers and components to manage, configure and maintain devices. PnP drivers support a machine’s physical, logical, and virtual devices.
What is the Kernel PNP error?
A Kernel PNP error usually comes up on Windows if you have malfunctioning hardware or outdated device drivers. Therefore, for PNP mode to work, all the drivers installed must work properly.
How do I fix Kernel PNP Error 411?
Before moving to the detailed troubleshooting, let us try some quick fixes that can help us with the error:
- Restore your PC to the last known good configuration.
- Check Windows for updates.
- Make sure BIOS is up to date.
1. Clean Boot your PC
- Press the Windows + R key to get the Run console.
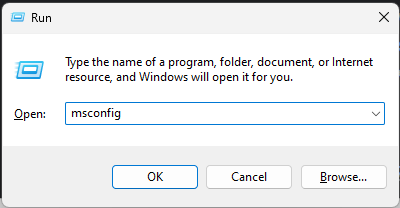
- Type msconfig and press Enter.
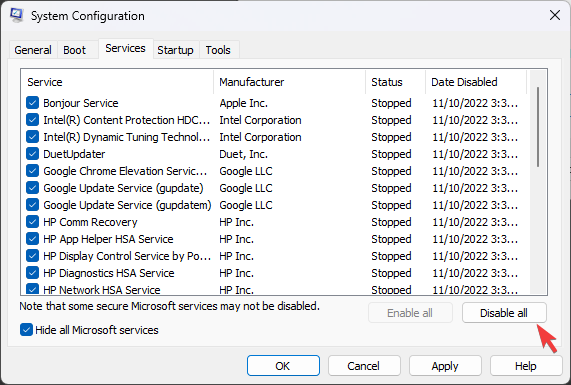
- On the Services tab, place a checkmark beside Hide all Microsoft Services and then click Disable all.
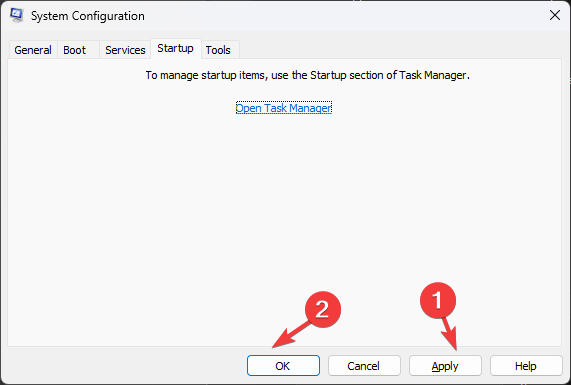
- Go to the Startup tab, and click Open Task Manager.

- Locate each Enabled item, right-click on it, and select Disable.

- Close Task Manager. Click Apply and OK on the System Configuration window.
- Restart your computer when prompted.
2. Use Command Prompt
- Press the Windows key, type CMD, and click Run as administrator.

- Type the following command and press Enter:
sfc/scannow - Copy and paste the following commands and press Enter after every command:
Dism /Online /Cleanup-Image /CheckHealthDism /Online /Cleanup-Image /ScanHealthDISM /Online /Cleanup-Image /RestoreHealth
- Restart your computer.
3. Install/ Update Drivers
3.1 Install Drivers Manually
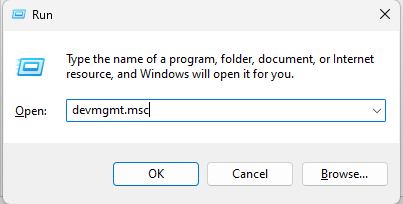
- Press Windows + R to get the Run window.
- Type devmgmt.msc and hit Enter.
- Click on Display drivers to expand, right-click on the Graphics Driver, and click Update driver.

- Now go to System devices, expand it, and follow the same process to update the chipset drivers.
- Reboot your computer.
3.2 Use a third-party tool
- Download and install PC HelpSoft Driver Updater.
- Launch the app to scan your computer for obsolete drivers.
- Once the scan is complete, select the drivers and click Update.
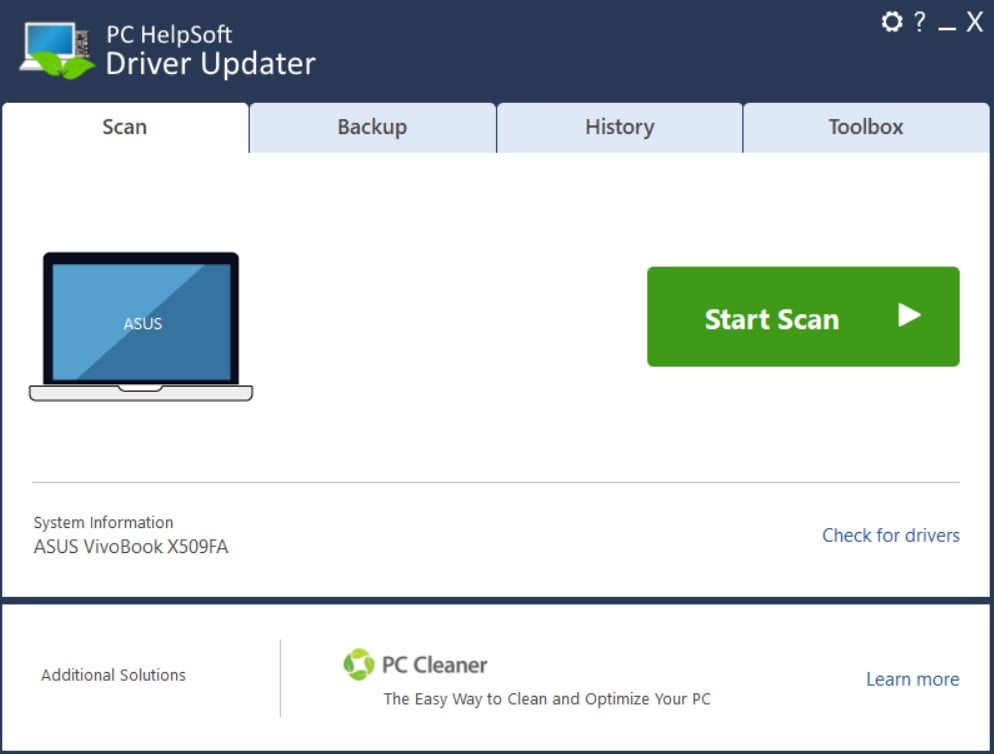
- The tool will start downloading the latest drivers for your PC.
- Now click Next and follow the on-screen instructions, then restart your computer.
Keeping your device drivers updated with a reliable driver updater tool such as PC HelpSoft Driver Updater is easy and less time-consuming. This driver updater downloads and installs the best drivers for your device in a few clicks.
Using PC HelpSoft Driver Updater will make sure that all drivers are updated safely and your PC will automatically receive any other future updates.
⇒ Get PC HelpSoft Driver Updater
4. Disable Fast Startup
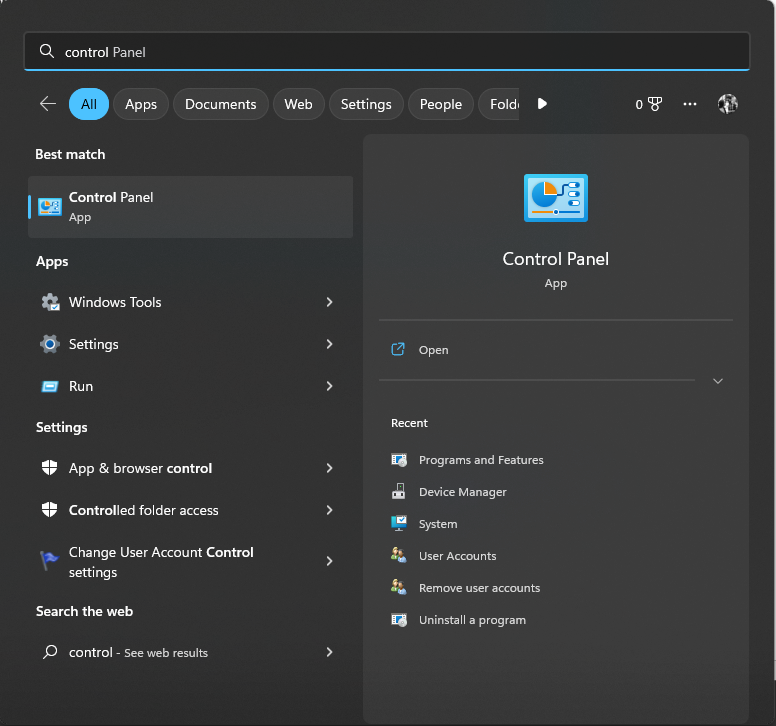
- Press the Windows key, type Control Panel, and click Open.
- Go to the right side of the panel and select Large icons from View by drop-down menu.
- Click Power Options.

- Now select Choose what the power buttons do.

- Click Change settings that are currently available.

- Remove the checkmark beside Turn on fast startup.

- Click Save changes.
5. Perform in-place upgrade
- Go to Microsoft’s software download page, and select the Windows version to install.
- Download Windows 11 ISO and select Windows 11 (multi-edition ISO).

- Select the product language, select English, click Confirm, and then Download.

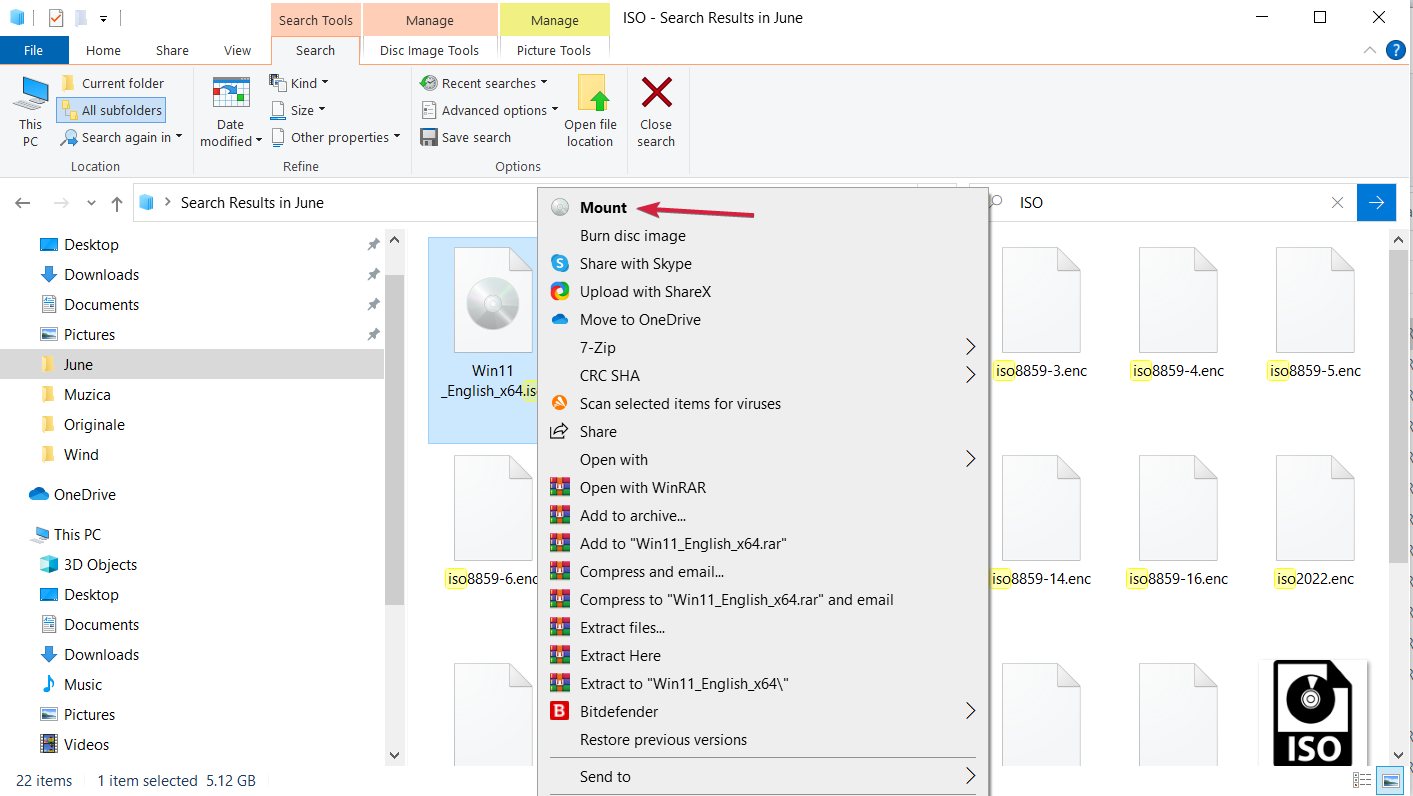
- Right-click on ISO and choose Mount. Now click Setup.exe.
- On the Install Windows 11 dialog box, select Next.
- Now, click Accept to agree to the license terms.
- Follow the on-screen prompts to complete.
 Tip
Tip
So, these are steps to fix Kernel PNP error 411 on Windows. Try these steps and let us know which method worked for you in the comments section below.
Before you go, you might be interested in our latest guide that covers Error Invalid Plugplay Device Path.
Read our disclosure page to find out how can you help Windows Report sustain the editorial team. Read more


Improve this guide


User forum
0 messages