How to Update BIOS In Windows 11 [Step-by-Step]
Keep your device up to date to ensure its good functionality

In this guide, we’ll show you how to update your BIOS safely. We’ll start by showing you how to check the BIOS version and then explain the steps you have to take to install a new one.
The steps below will give you a general framwerok, so you’ll be able to download and install BIOS update regardless of hardware brand. Check them out.
Table of contents
How can I update BIOS in Windows 11?
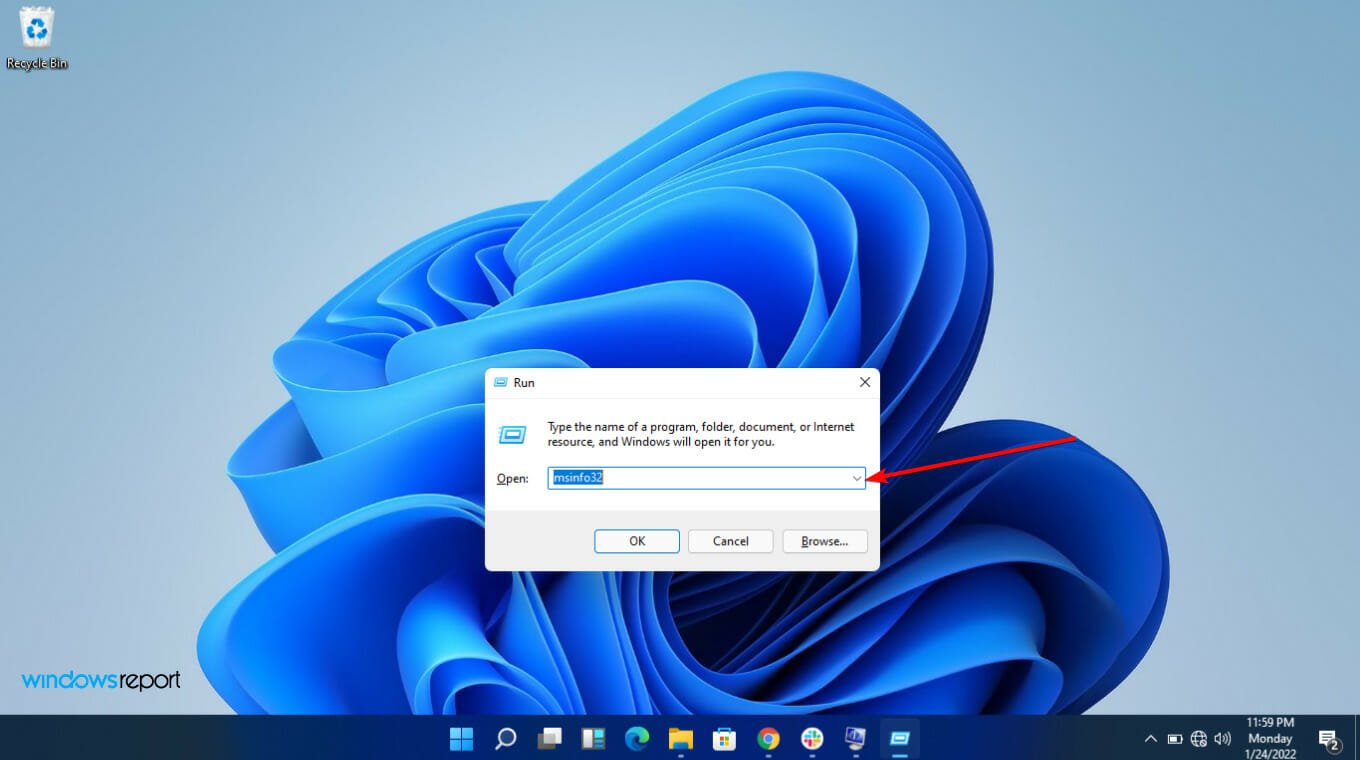
1. Check your BIOS version on Windows 11
- Hit the Windows and R keys together.
- Type msinfo32 and hit Enter.
- Locate the entry marked BIOS version/date.
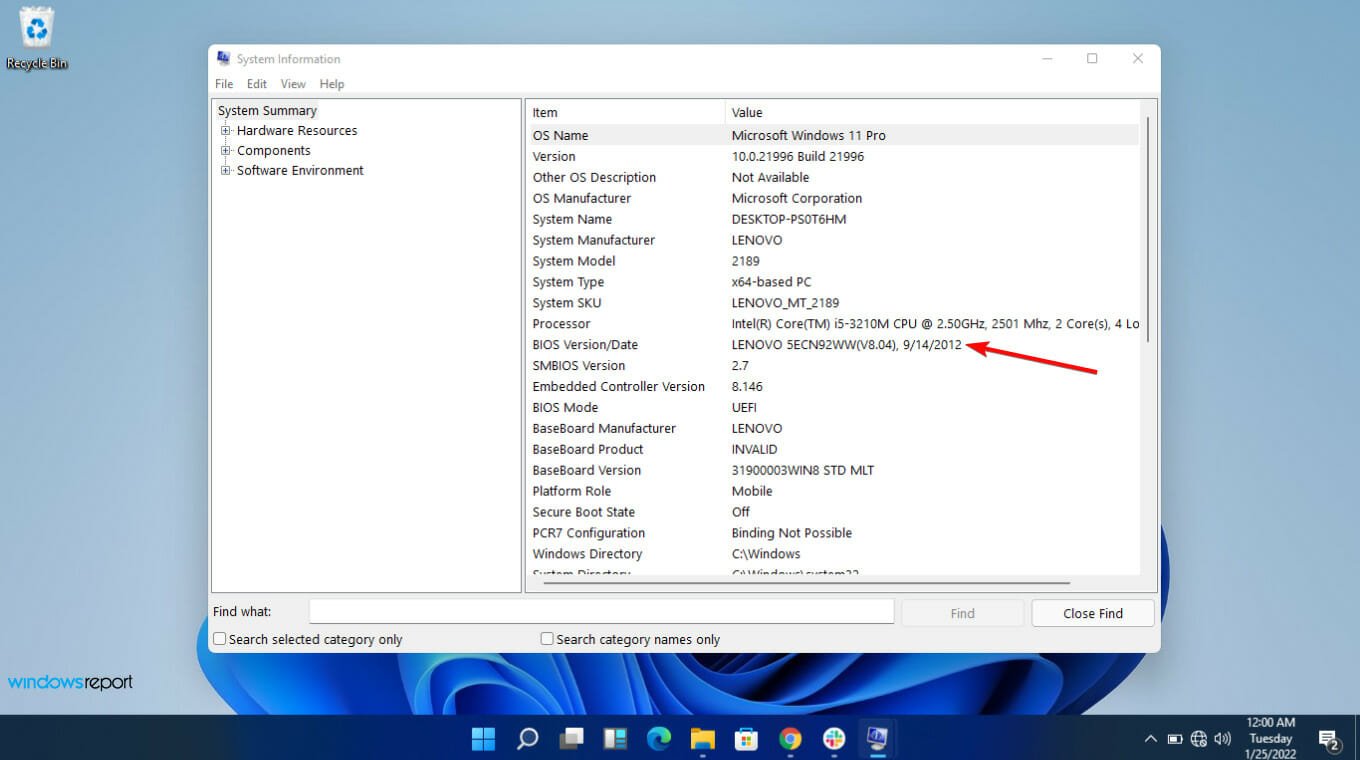
- Note down this information and close the window.
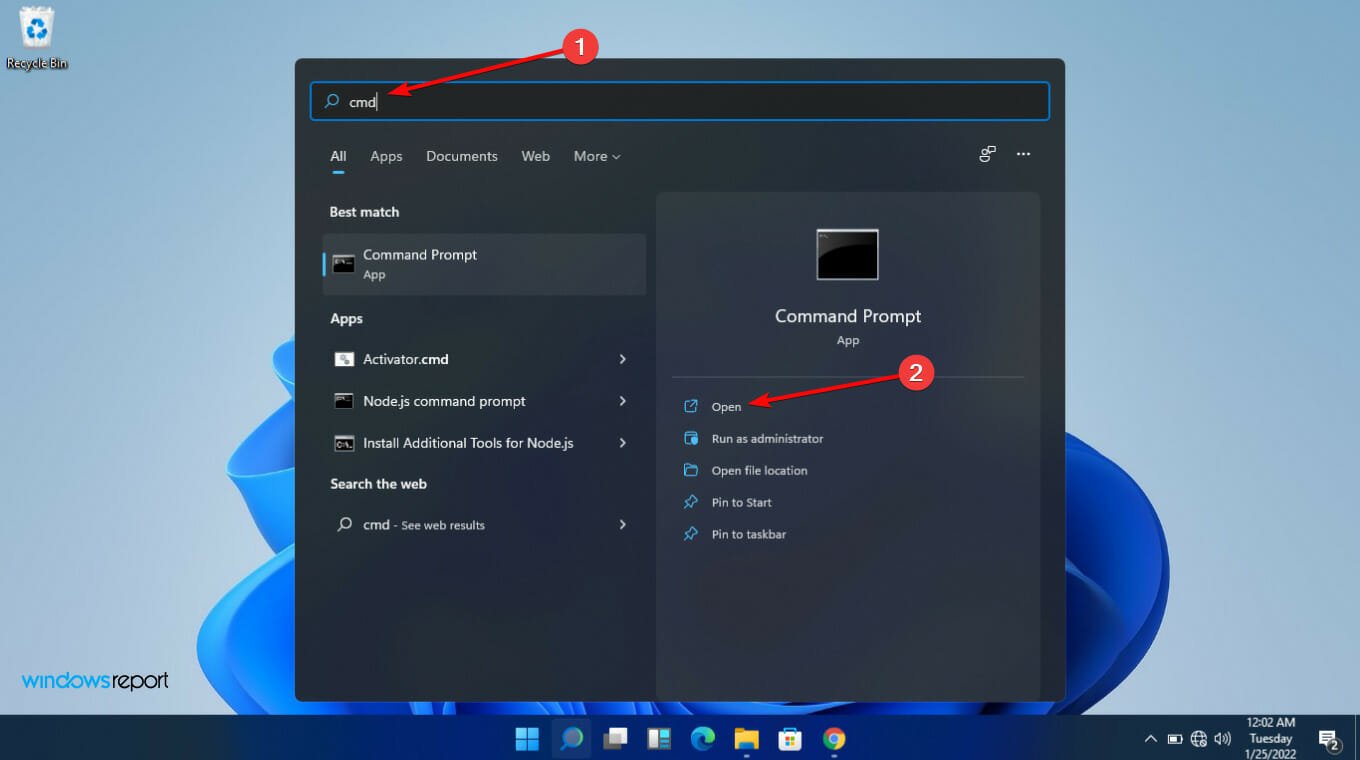
2. Get your computer’s serial number
- Select the Start menu and type cmd. Select the Command Prompt app.
- Type wmic baseboard, get product, manufacturer, version, serial number, and press Enter on the keyboard.
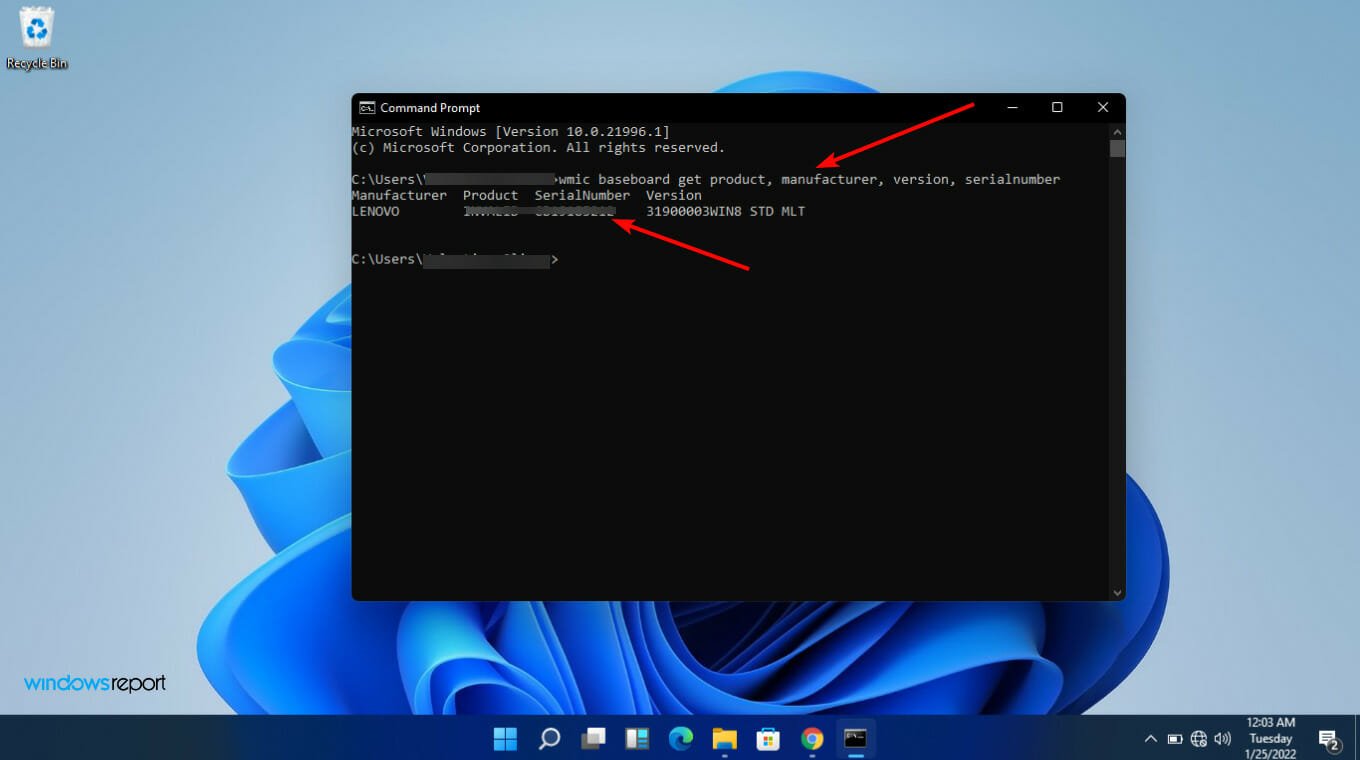
- Note it down.
3. Download and update your BIOS
As mentioned earlier, the upgrading process is specific to the type of computer you use. We will be taking a look at three: Asus, HP, and Lenovo.
If your computer doesn’t fall under these three, you should have a clear understanding of how to boot to BIOS on Windows 11 by the end of this article.
 NOTE
NOTE
Before starting the process you should do the following:
- Close all the open applications
- Temporarily disable your antivirus program
- Also, temporarily disable BitLocker Drive Encryption
How do I update the BIOS on Asus?
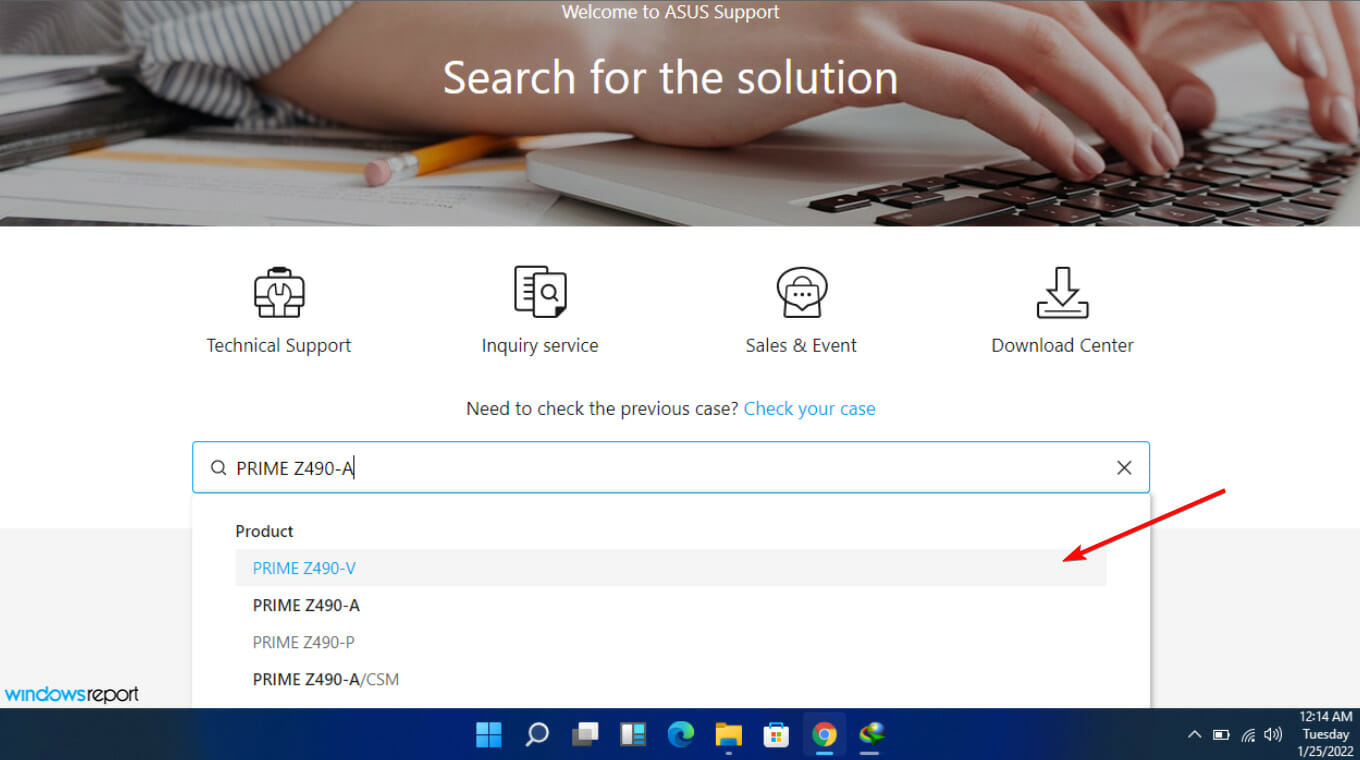
1. Visit the Asus Download Center, type in your motherboard’s model, and choose it when you see it in the drop-do list.
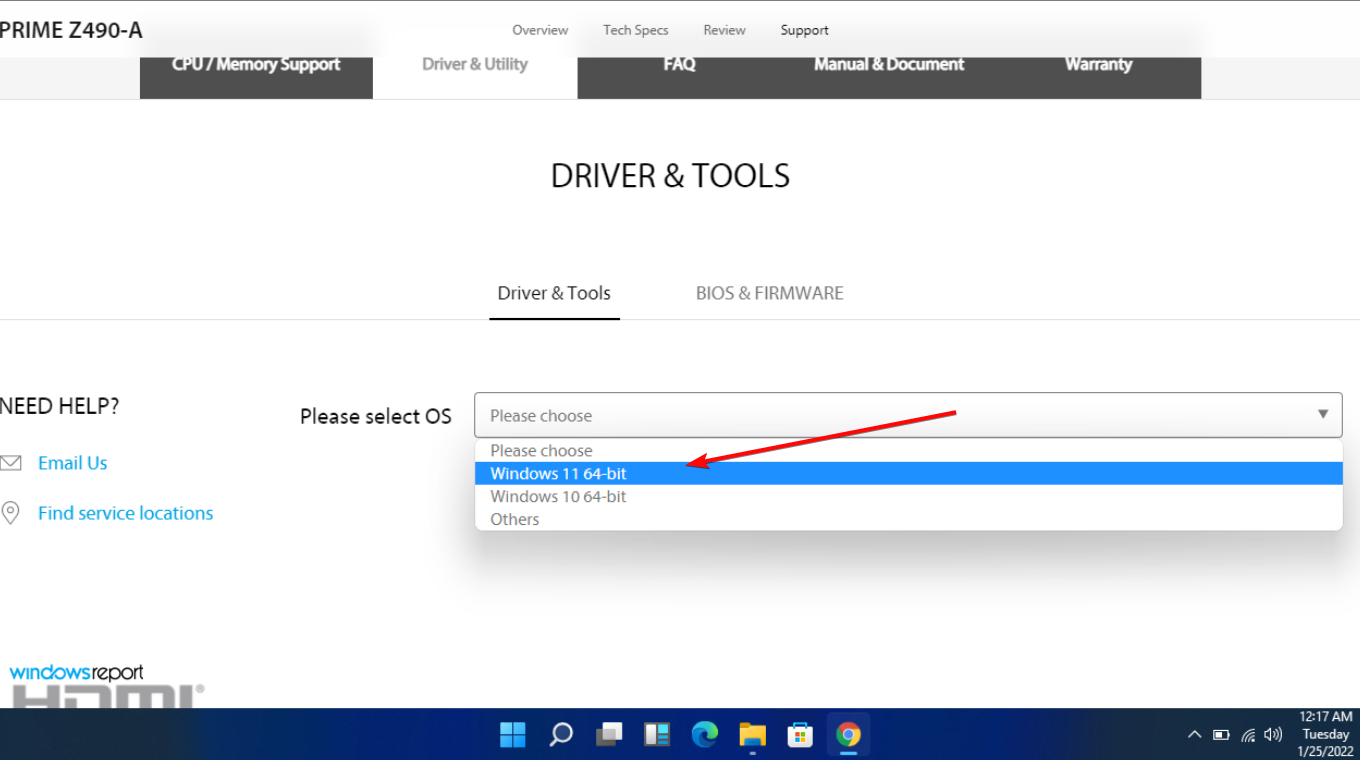
2. Select Driver & Utility and then Driver & Tools.

3. Choose your OS (we chose Windows 11 in this case).
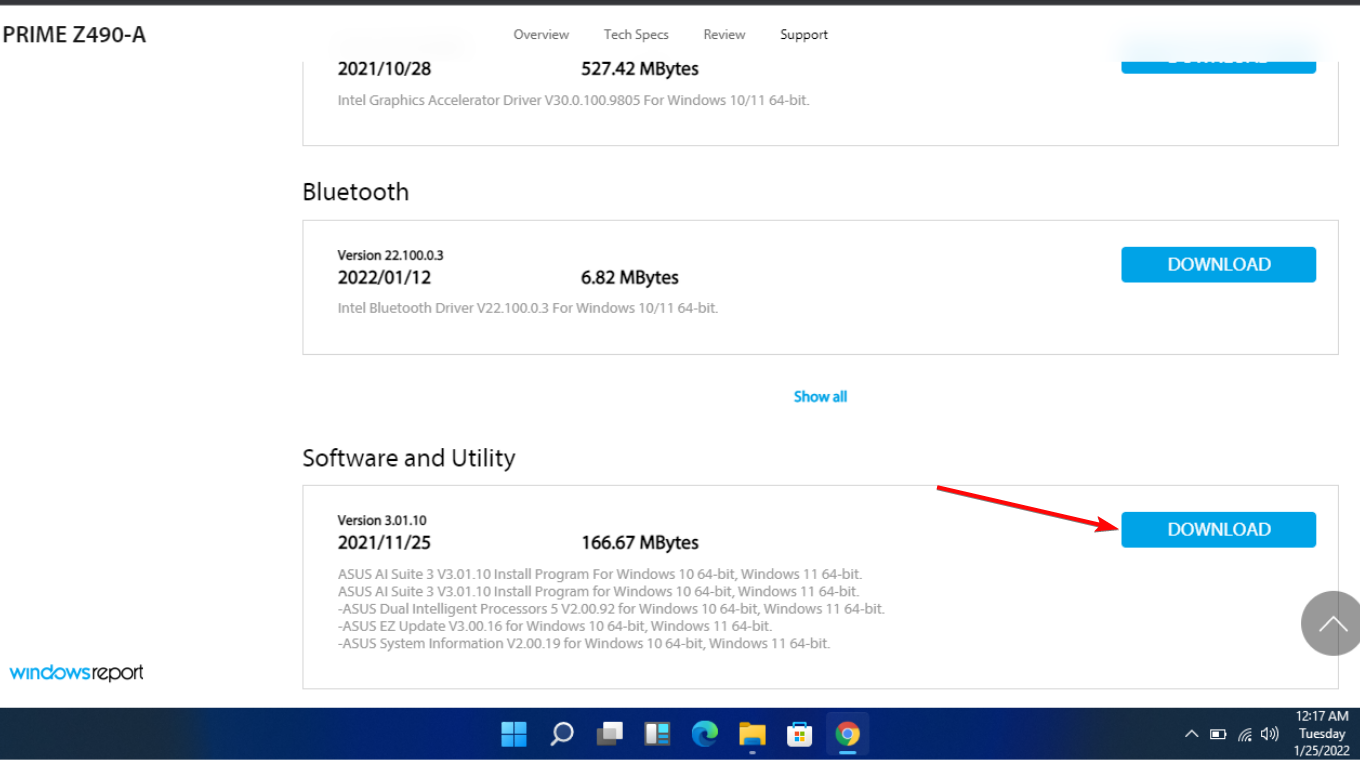
4. Under Software and Utility, look for ASUS AI Suite 3, and select Download.
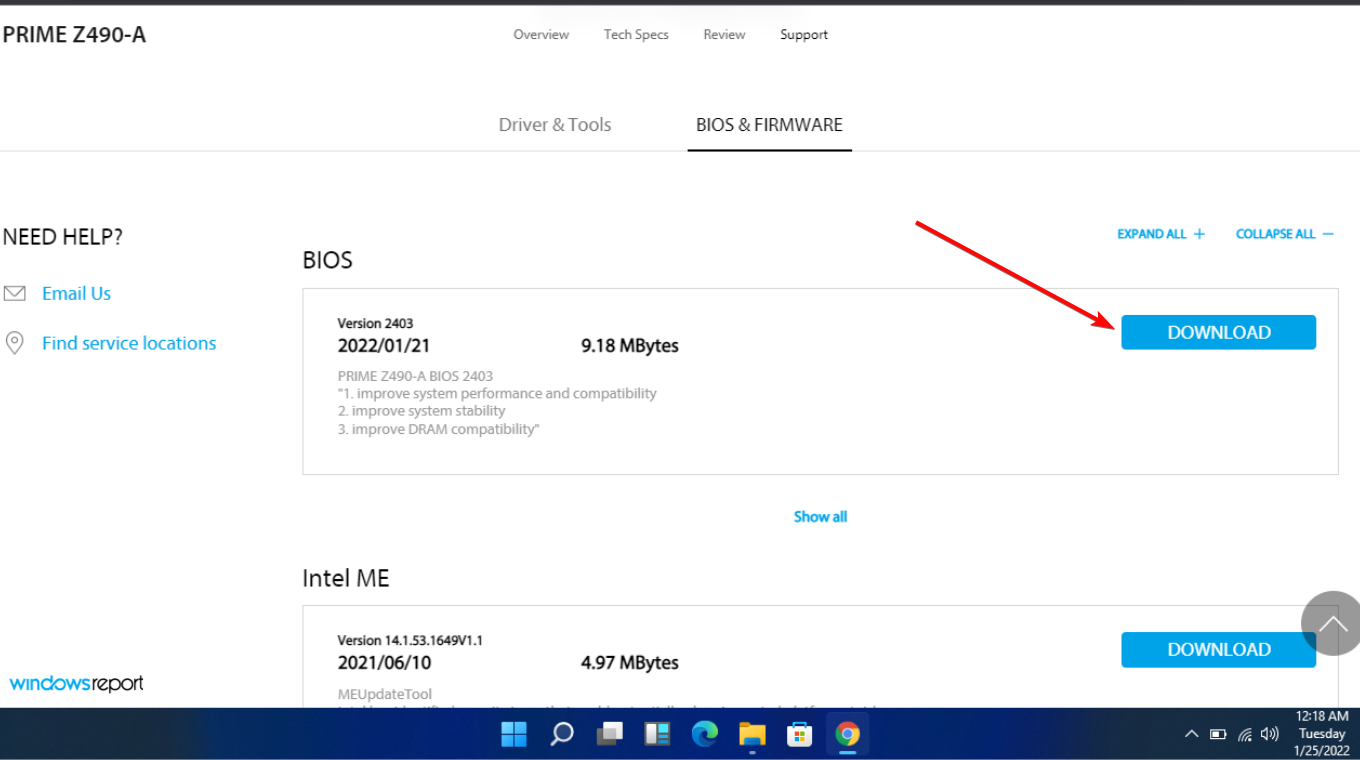
5. Scroll back to the top and click the BIOS & FIRMWARE tab.
6. Up next, scroll to the BIOS section and select Download.
7. Extract the ZIP file containing ASUS AI Suite 3, then open AsusSetup.exe and install the program. When finished, reboot your computer.
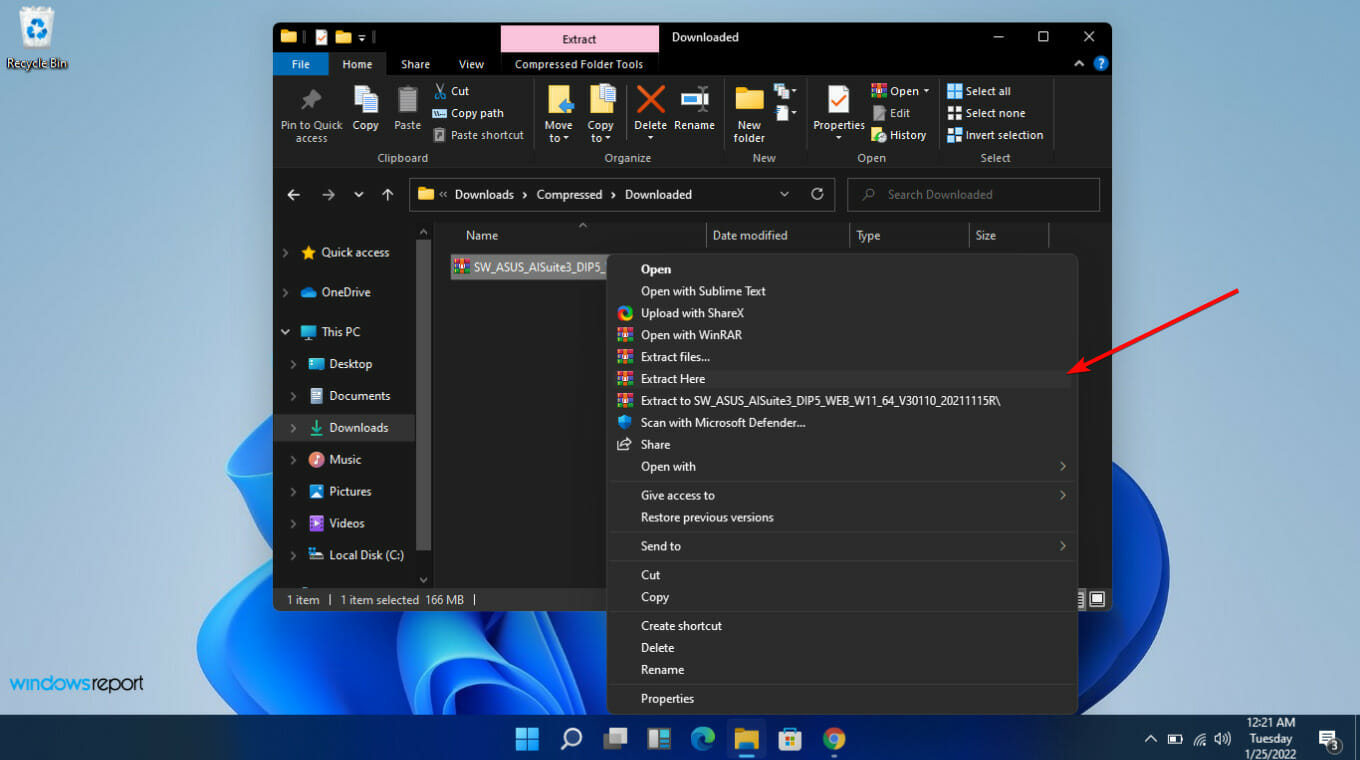
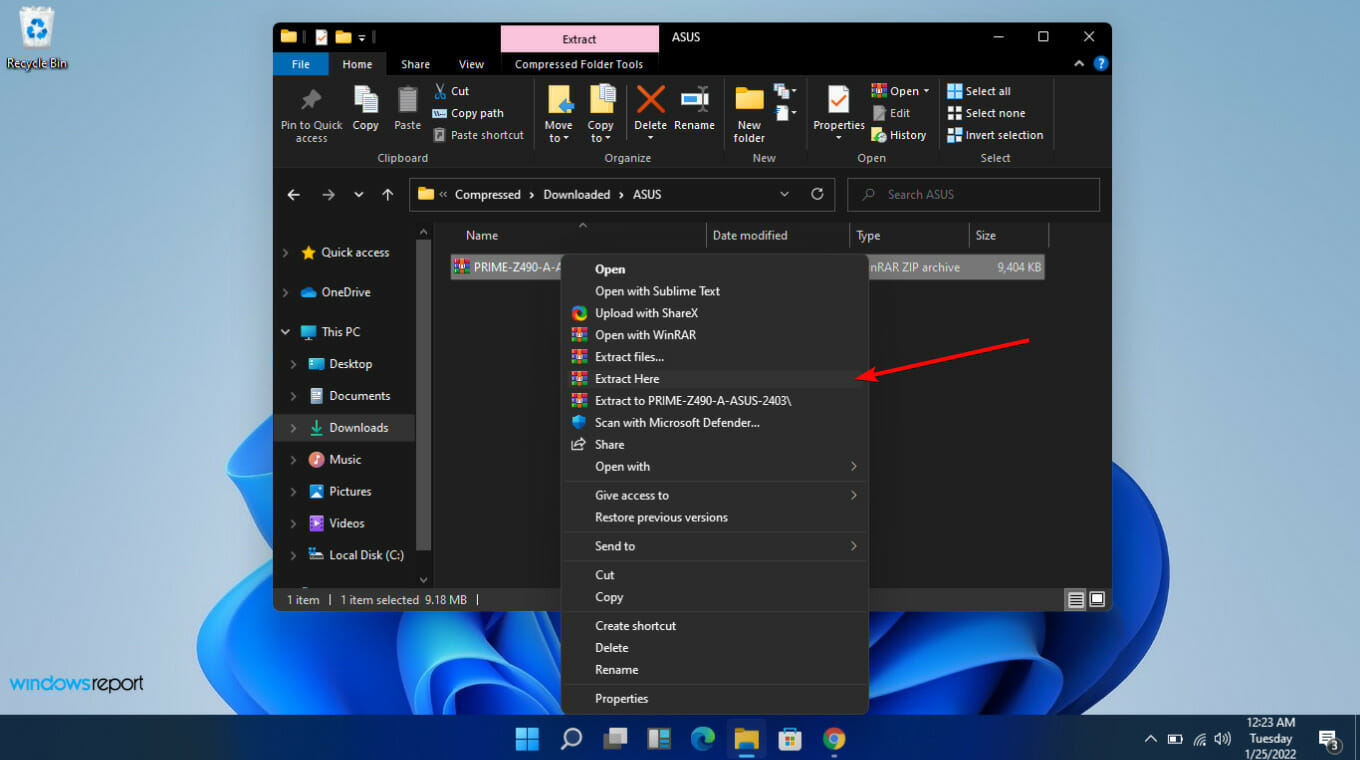
8. Extract the ZIP file that contains the BIOS folder.
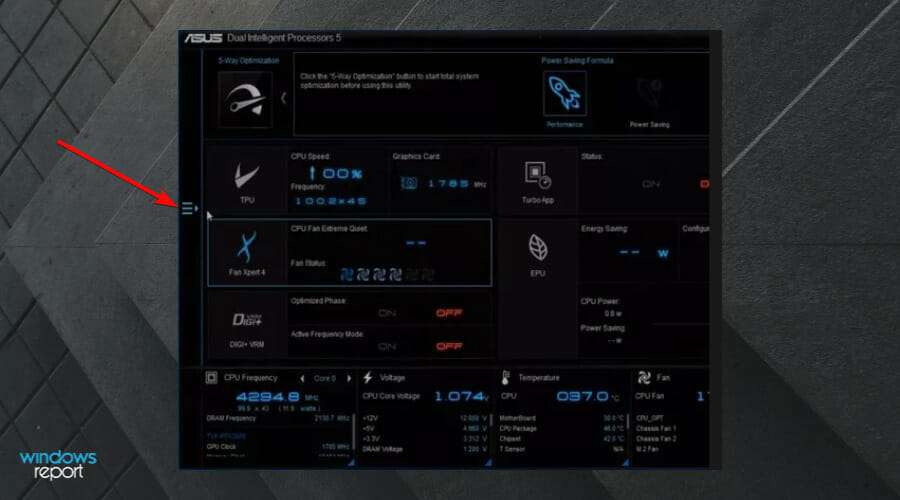
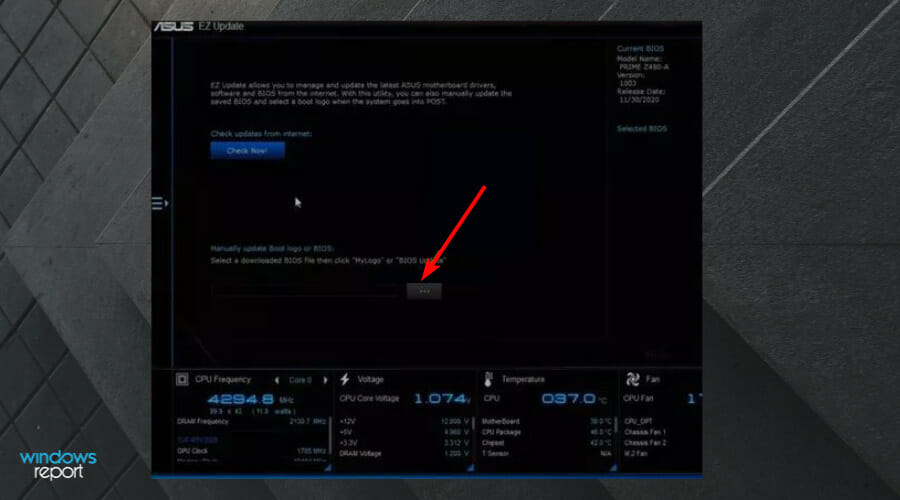
9. Open Asus AI Suite 3 and select the Menu icon (the three horizontal lines) on the left side.
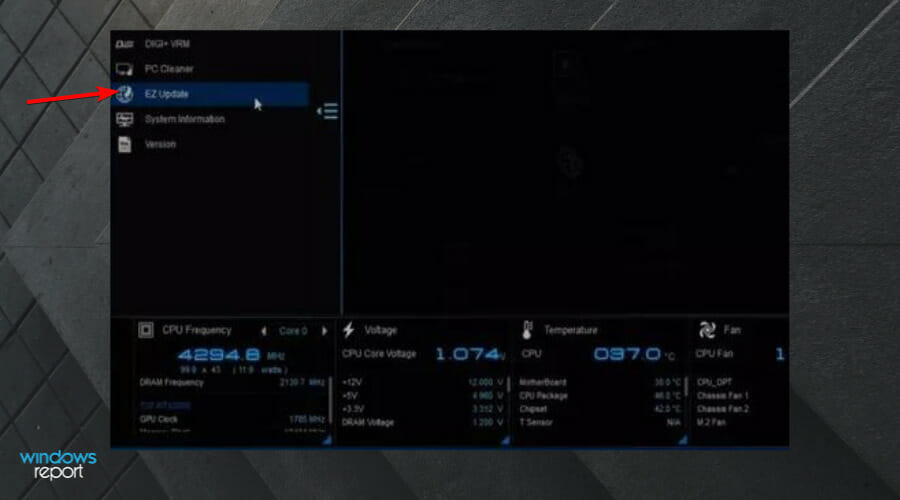
10. Select EZ update.
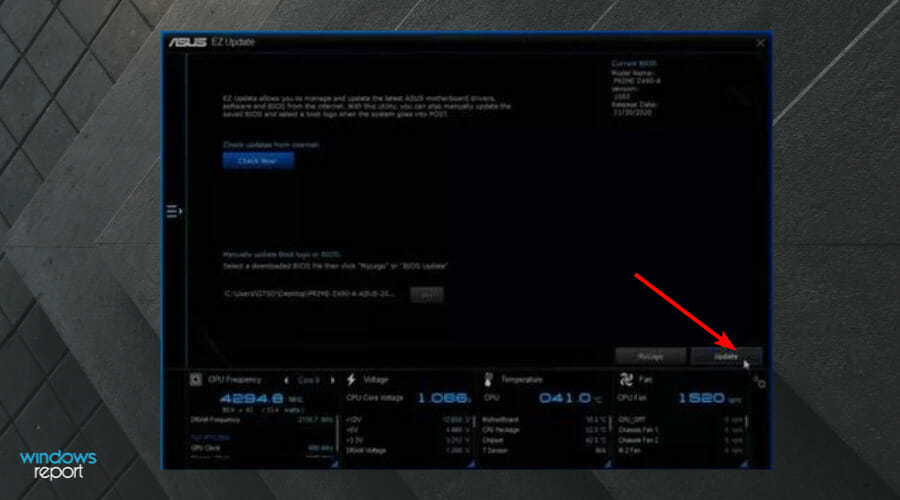
11. Under Manually update boot logo or BIOS, select the Ellipses (…), and choose the same BIOS file you had extracted earlier.
12. Choose Update in the lower-right corner.
13. Select Flash.
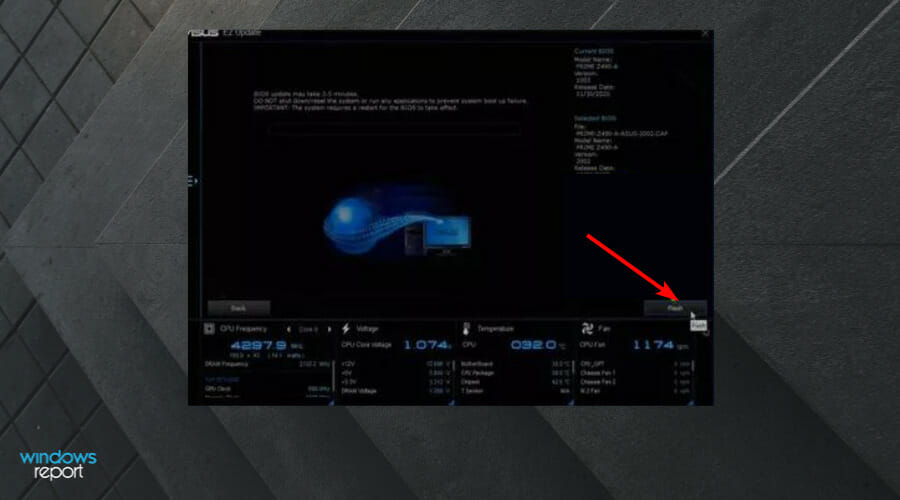
14. Choose OK. Reboot your computer once the process is done.
There are two major ways you can update your BIOS for your Asus computer. You can use the EZ update tool in Asus AI Suite 3 or you can use Asus EZ Flash to flash the BIOS from a USB device.
It’s also possible to update BIOS using ASUS Armoury Crate, and we have an entire guide dedicated to it, so don’t miss it.
And if you want to learn more about alternative methods, check our guide on how to update BIOS without USB.
How do I update BIOS on HP?
NOTE
- Navigate to the HP driver and software download website.
- Choose laptop or desktop, depending on the type of computer you’re using.
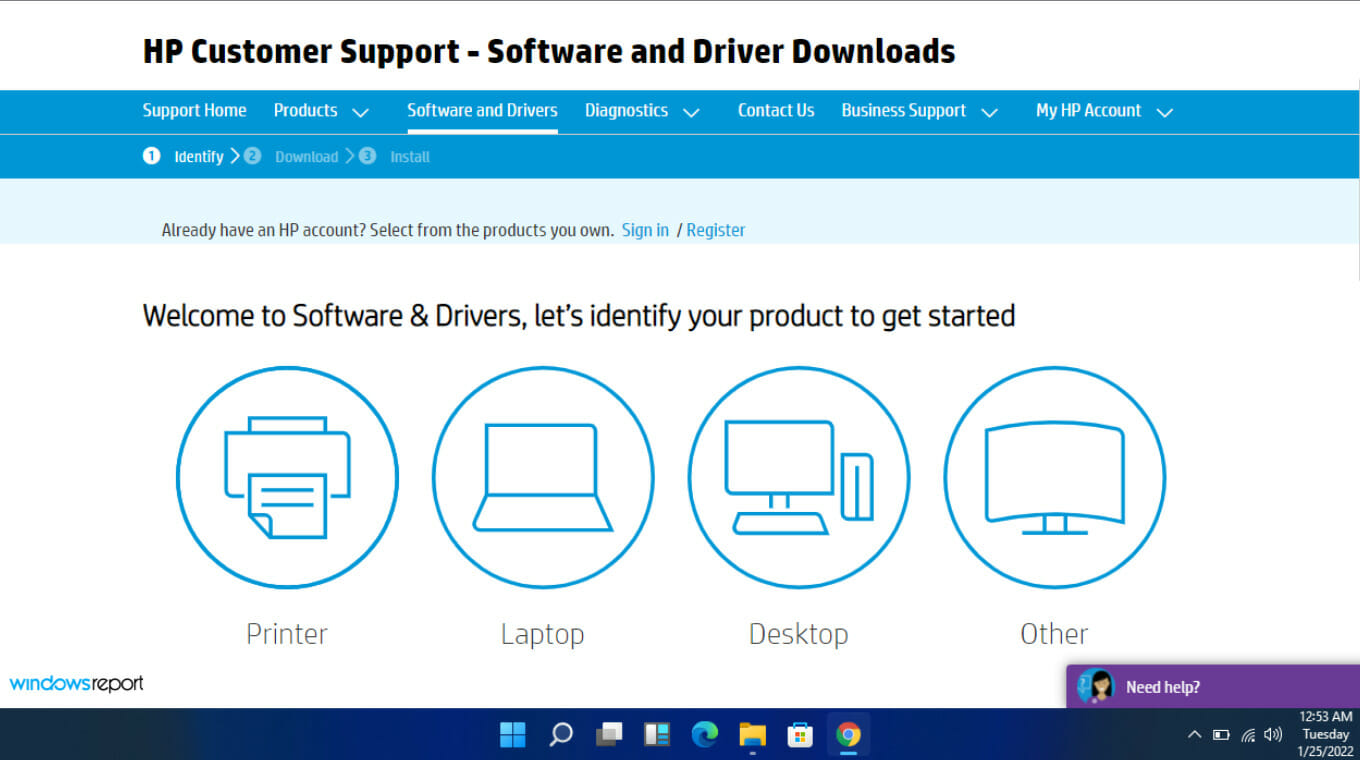
- Enter your exact serial number or your exact computer model.
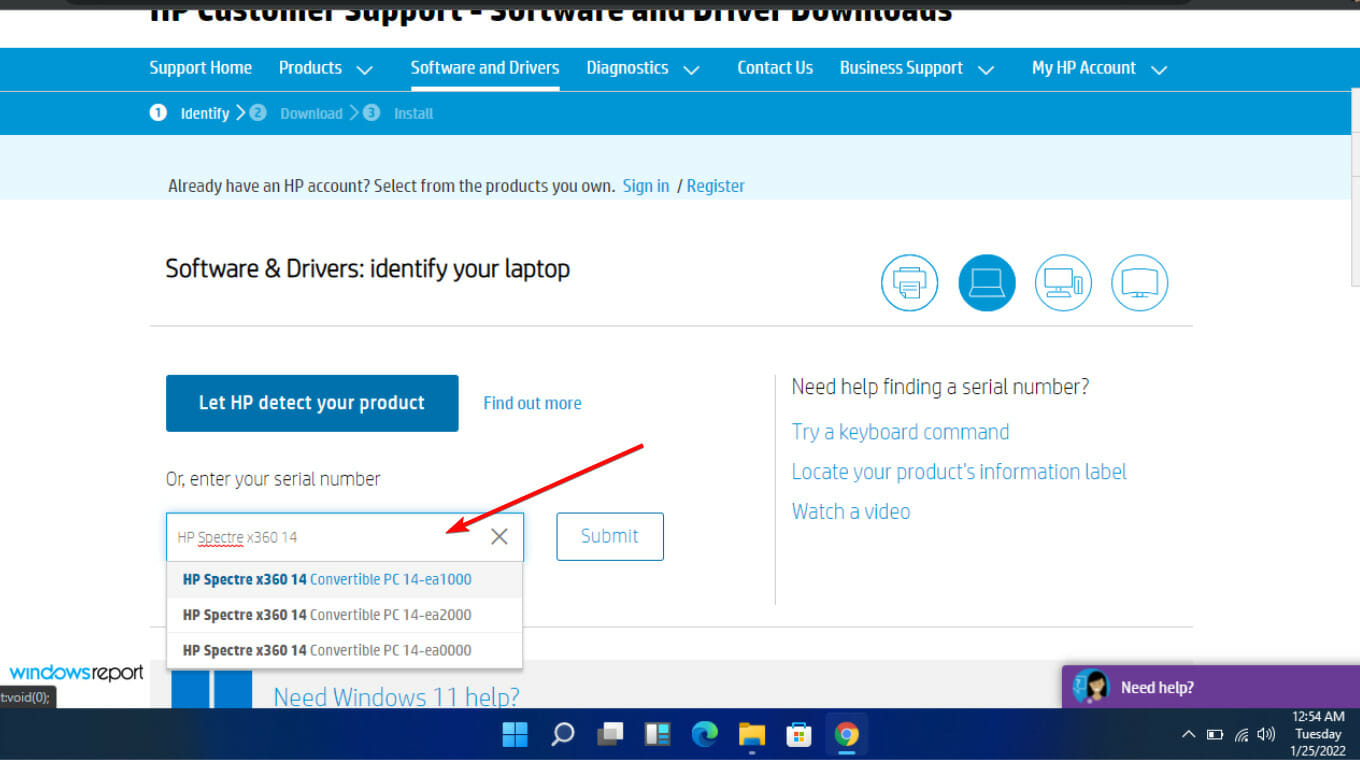
- Select your OS and OS version, then click Submit.

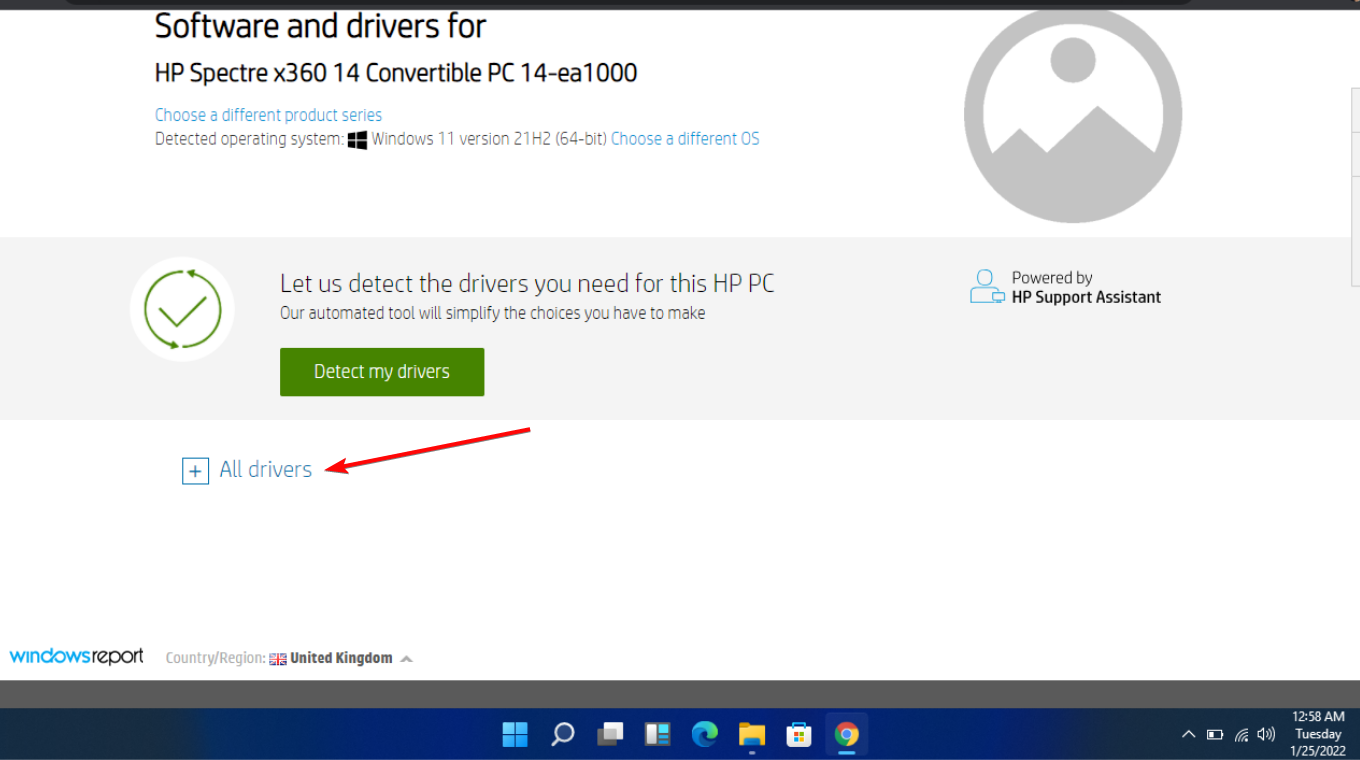
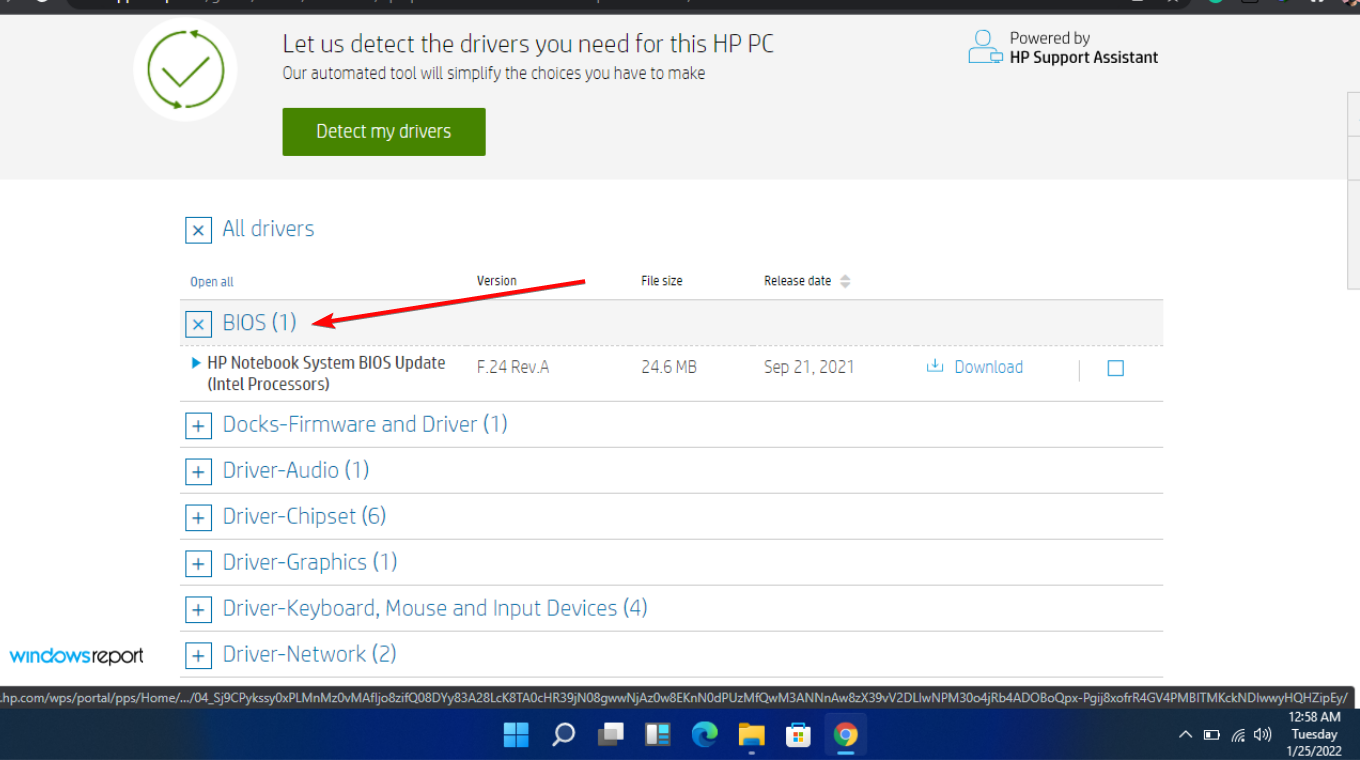
- Click on All drivers and then expand BIOS to see available updates.
- Click the download icon.
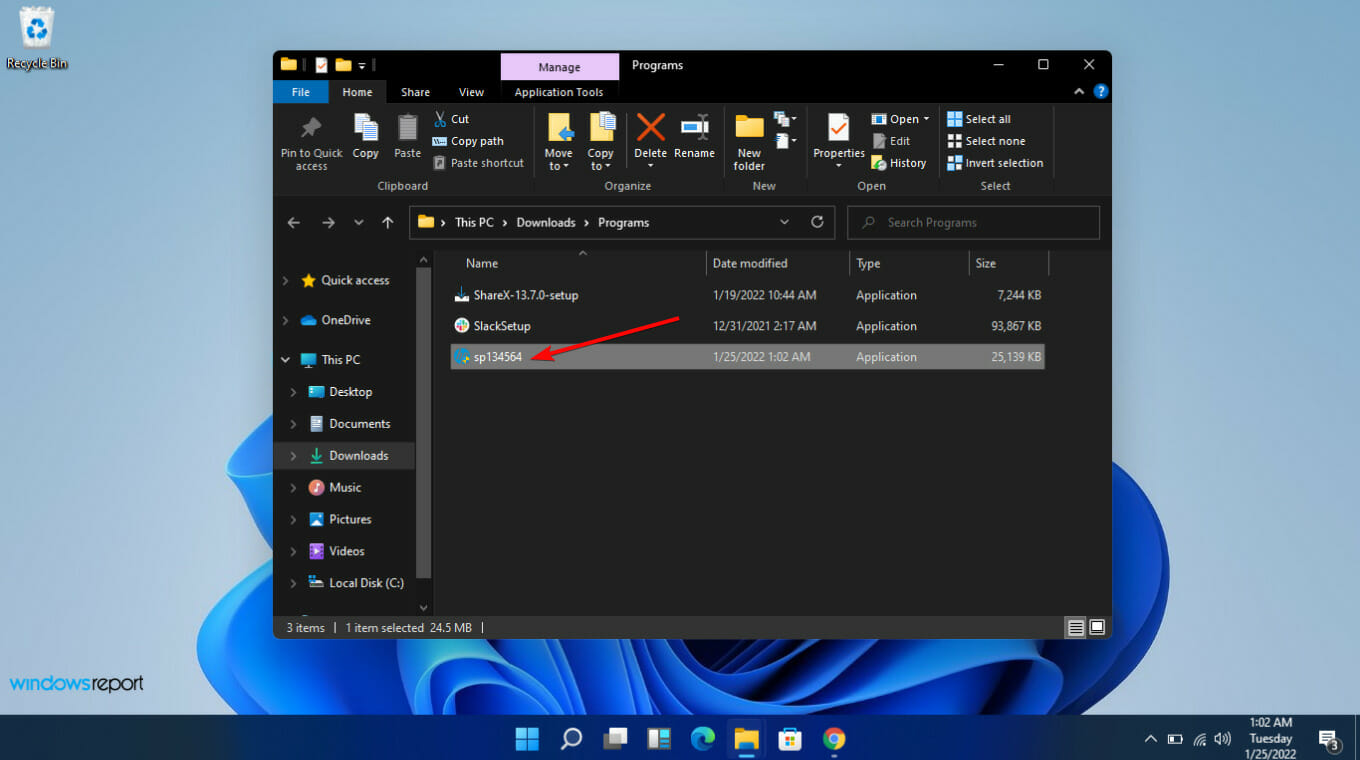
- Install the .exe file, following the on-screen instructions.
- Restart your PC.
- During the startup, you can select Apply Update Now.
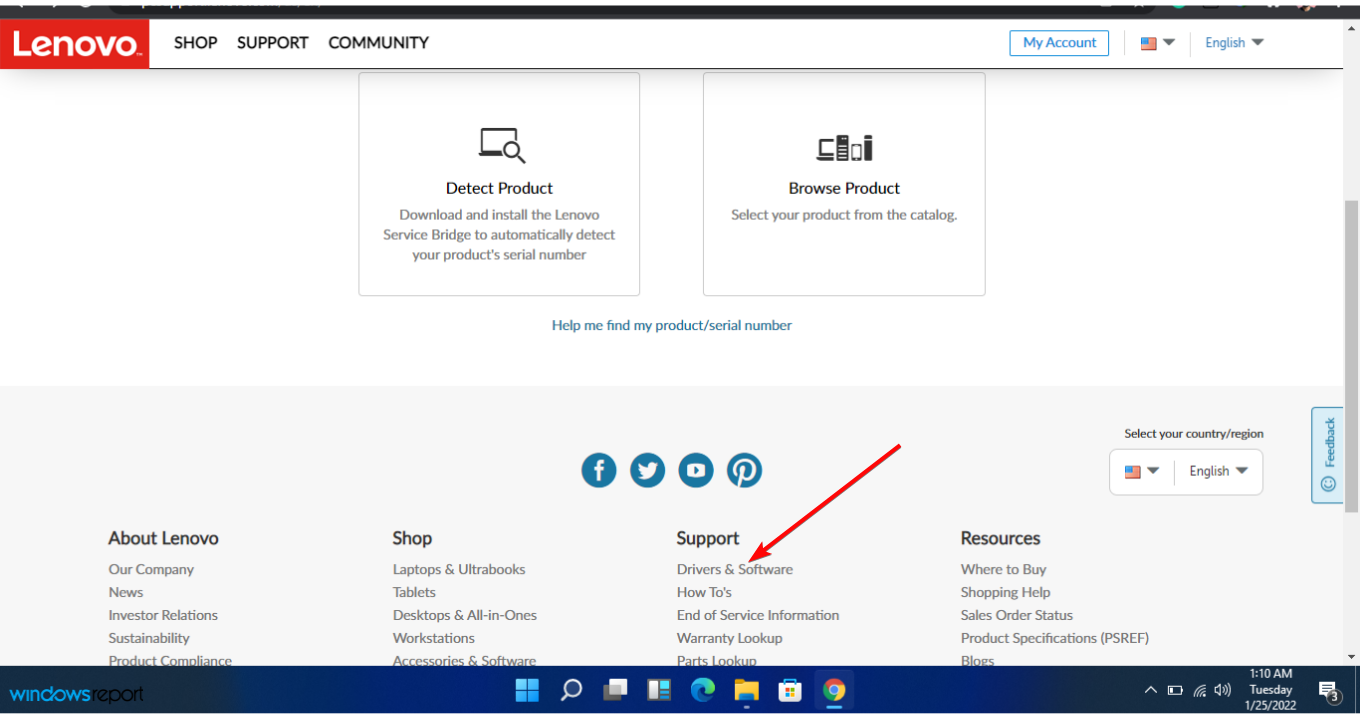
How do I update BIOS on Lenovo?
- Go to the Lenovo support site.
- Scroll down and click Drivers & Software under Support.
- Type in your serial number (you should have already copied this down from the Command Prompt).
- Choose your operating system.
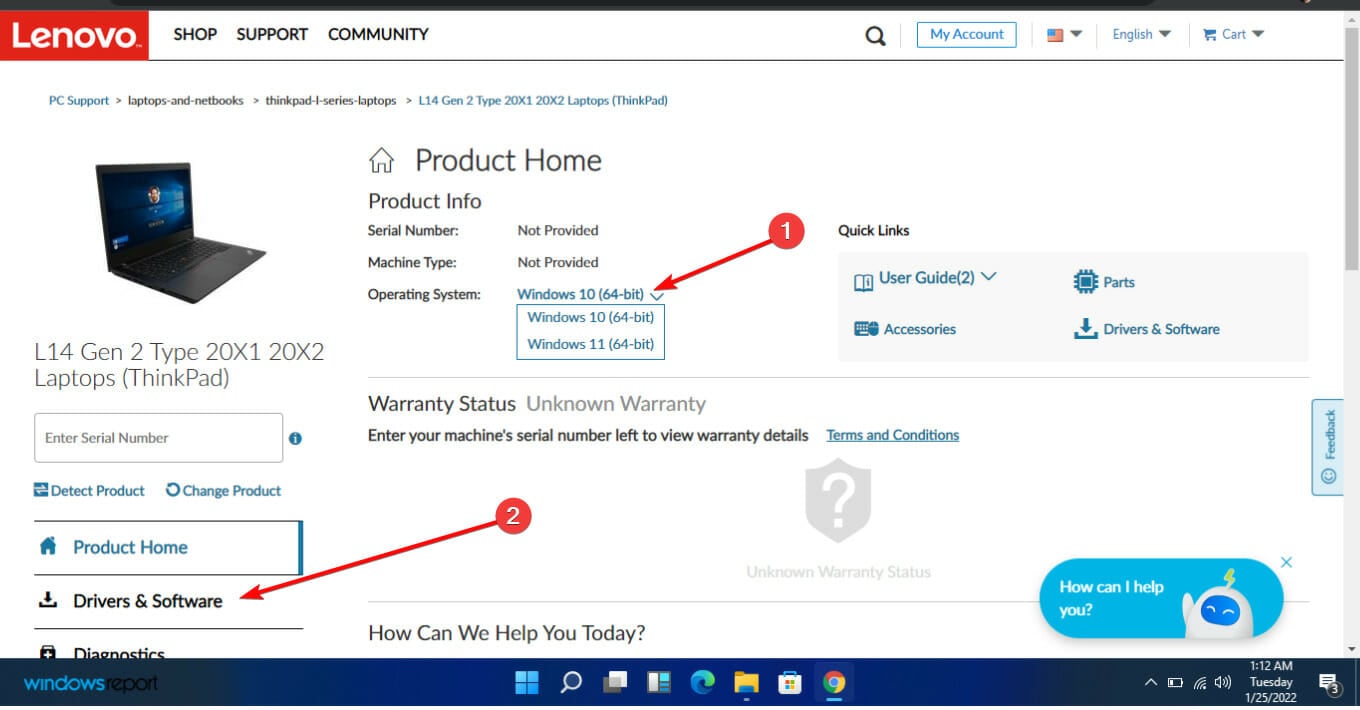
- Choose Drivers & Software and navigate to Manual Update.
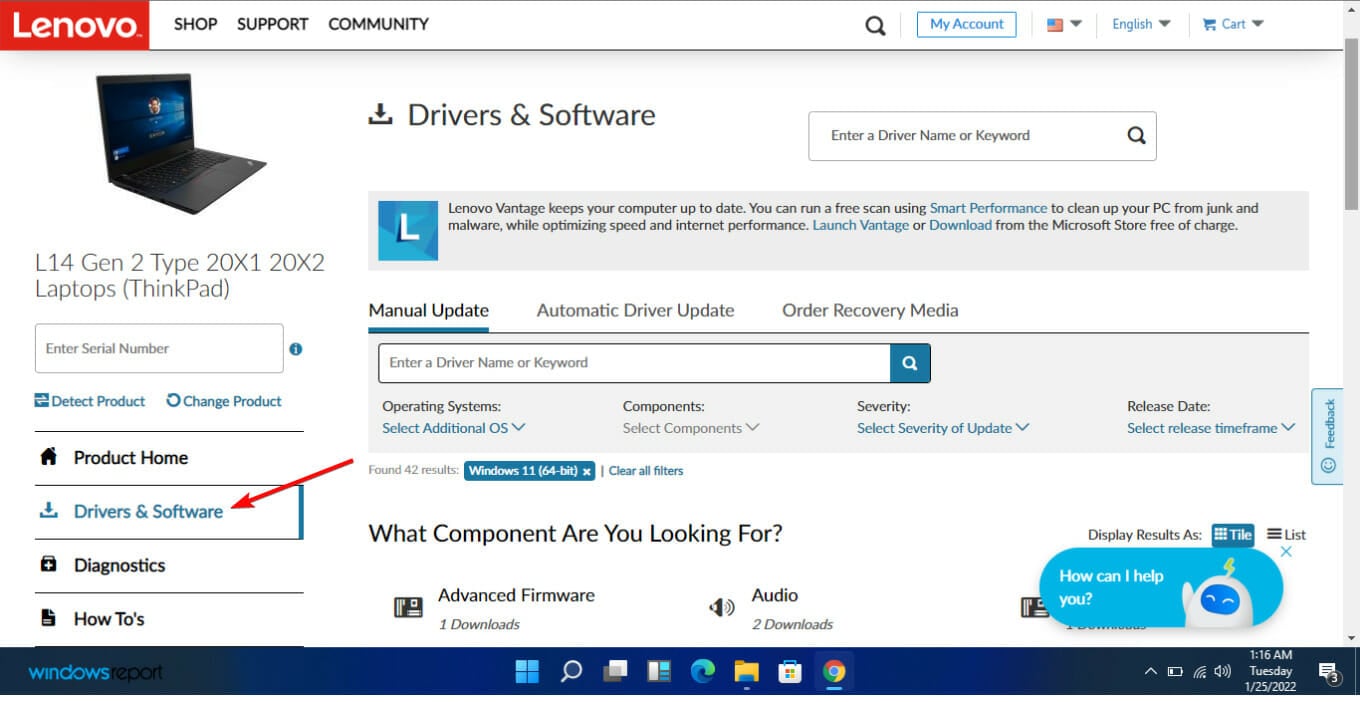
- Expand the BIOS/UEFI option.
- Click on download once you find what you’re looking for.
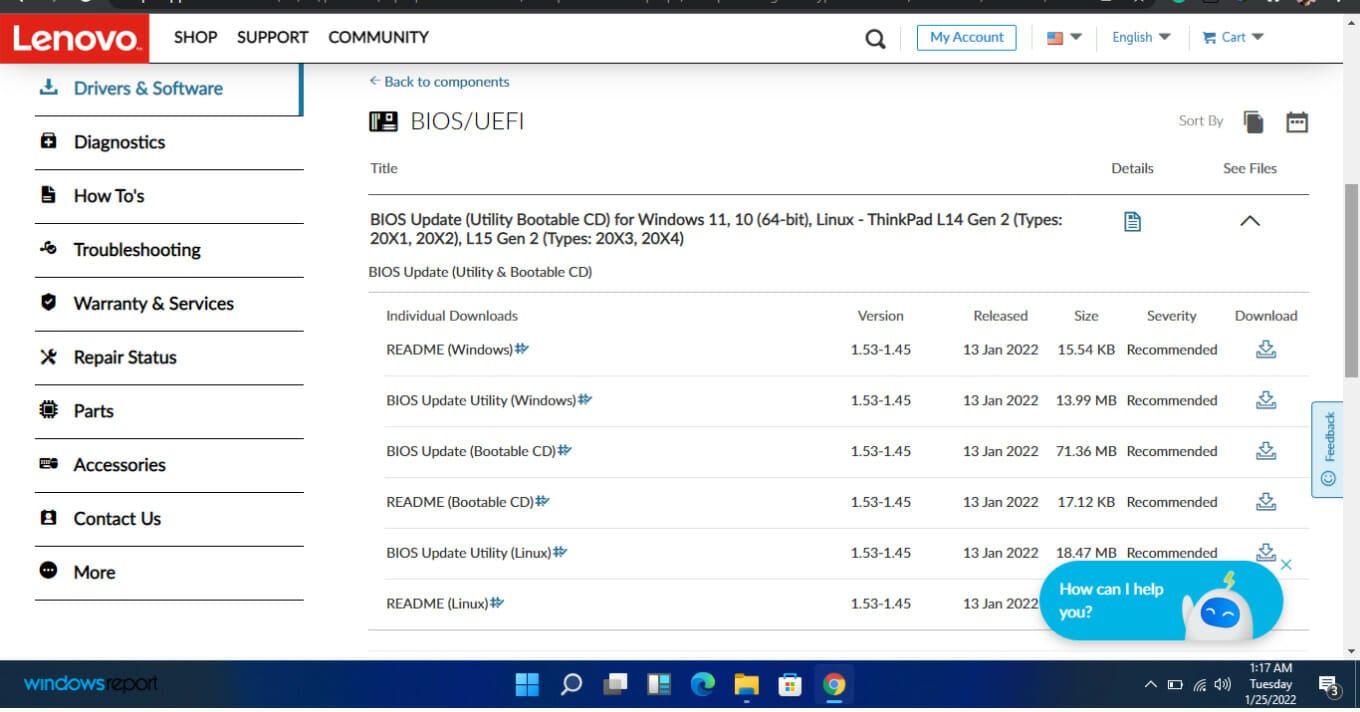
- Once the file is done downloading, extract it and run it. Follow the onscreen instructions.
- Restart your computer after you’re done
💡 Keep in mind that there’s no single solution that covers all computers. For example, updating the BIOS on an Asus, Acer Swift 3 laptop will differ from an HP.
FAQ
To check your BIOS version, press Win + R, type msinfo32, and press Enter. The BIOS version will be listed under “System Summary” and you can compare it to the manufacturer’s website for the latest version.
Yes, many motherboard manufacturers provide BIOS update tools that you can run directly from Windows. Check your manufacturer’s website for any downloadable utilities and follow their instructions.
Ensure your PC is plugged into a power source, back up important data, and carefully read the BIOS update instructions. An interrupted update can cause system failure.
The update process usually takes a few minutes, but it may vary depending on your system. During the update, avoid turning off the computer to prevent any issues.
Your BIOS (aka Basic Input Output System) lets your computer carry out important operations. It plays a big role in keeping your computer secure.
Your BIOS works as a type of firmware, and you can learn how firmware protects your hardware in this detailed guide on what firmware is.
Keeping your BIOS up to date is important, especially for Windows 11, which requires features like the Trusted Platform Module (TPM) 2.0.
In case your computer doesn’t boot after a BIOS update, you can follow this helpful guide on how to flash your BIOS when your computer won’t boot to resolve the issue.
Remember to back up your data and ensure a stable power source before updating.
Read our disclosure page to find out how can you help Windows Report sustain the editorial team. Read more


Improve this guide


User forum
0 messages