Kindle Paperwhite won't connect to Wi-Fi? 6 Steps to fix it
Solve the Kindle connection issue and resume reading
5 min. read
Updated on
Read our disclosure page to find out how can you help Windows Report sustain the editorial team Read more
Key notes
- Your Kindle Paperwhite may fail to connect to the WiFi network due to several reasons, including authentication issues or software glitches.
- We have listed a few common troubleshooting steps to fix WiFi issues on Kindle devices below.

Kindle Paperwhite is a popular E-reader device that comes with WiFi and, in instances, cellular connectivity features. However, at times the device may fail to connect to WiFi.
Several users have reported saying their Kindle Paperwhite won’t connect to WiFi.
If you are experiencing similar issues, this could be due to network issues, software glitches, or even hardware faults.
In this article, we have listed a couple of troubleshooting steps to help you resolve the Kindle Paperwhite that won’t connect to the Wi-Fi problem in five easy steps.
How can I fix the Kindle Paperwhite WiFi error?
1. Perform a power cycle
- Press and hold the power button until either a power dialogue box appears or the screen goes blank.
- Continue holding the power button for another 40 seconds and then release it.
- Leave the device idle for a few minutes.
- Press and hold the power button once again to power the device.
- Try connecting to the WiFi network to see if the problem is resolved.
Restarting your Kindle device at times can fix intermittent issues such as slow devices or poor connectivity.
2. Check your home network for issues
- Try connecting your smartphone or device to the WiFi network.
- If other devices in your home can access the network, skip to other steps.
- If the connectivity issue occurs on other devices as well, restart your home network.
Restart your home network
- Power off your modem and WiFi router.
- Disconnect the power cable from the wall outlet.
- Leave the device idle for a few minutes.
- Reconnect the power cord and turn it on.
- Wait till all the LED indicators on the router stop blinking.
- Try connecting your Kindle Paperwhite to see if the error is resolved.
If the issue persists, check if the Airplane mode is turned on. Your device disables all the connectivity options when Airplane mode is on. Try disabling the Airplane mode and check again.
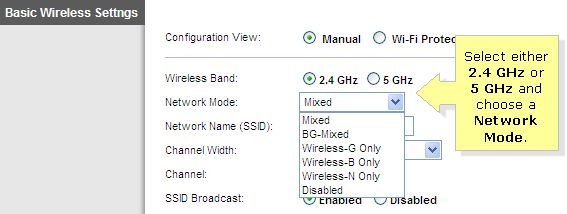
3. Connect to a 2.4 GHz band
- Open your router admin dashboard.
- Disable the 5GHz channel.
- Reboot the router.
- Connect your Kindle to the 2.4GHz network.
- Once connected, enable the 5GHz band again but do not reboot the router this time.
- If this works, your Kindle is facing issues connecting to a 5GHz band.
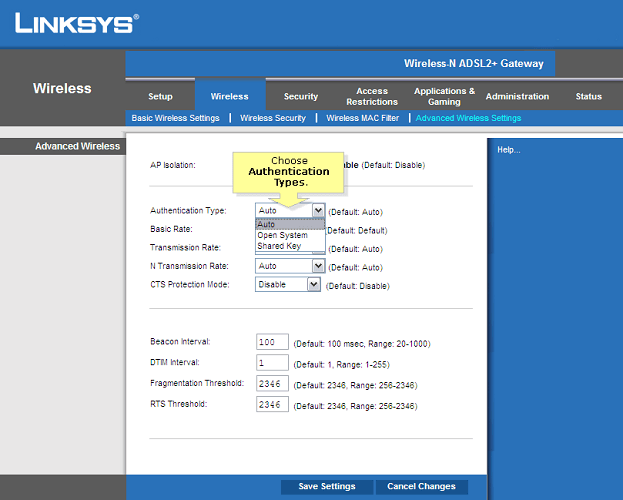
Change the Authentication Type on your router.
- Open your Router admin dashboard.
- Refer to the owner’s manual to find the Authentication Type setting.
- Change the Authentication Type from WPA2-PSK to WPA-PSK/WPA2-PSK.
- Save the changes and exit the dashboard.
- Try connecting your Kindle device again to see if the issue is resolved.
Check if your device is blocked
- Routers allow users to block devices from their WiFi gateway.
- Check if you have accidentally blocked your Kindle device.
- Unblock the device to connect to the WiFi again.
4. Manually update Kindle Paperwhite software
Note: Follow these steps if your Kindle Paperwhite is not downloading the latest updates automatically.
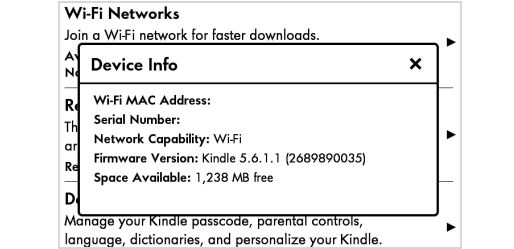
- Open Setting on your Kindle device.
- Tap the three dots in the upper right corner.
- Select Device info.
- Note down the software version.
- Now head over to the Kindle Software Updates page using your computer.
- Download the latest version for Kindle Paperwhite. Make sure you are downloading a newer version than the one already installed on your device. If not, skip this step.
Update Kindle Paperwhite manually
- Connect your Kindle device to the computer.
- Move the downloaded file to the Kindle drive.
- Once the file is transferred, eject the device and disconnect the charging cable.
- On your Kindle device, tap on Menu.
- Open Settings.
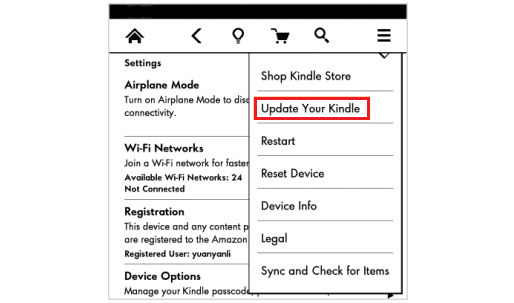
- Tap on Menu and select Update Your Kindle.
- Tap OK to perform the updates.
- Kindle will show Your Kindle is Updating message.
The update may take a few minutes to install. However, don’t try to boot or use the device until the update is successful. At times, it may take more time than usual.
5. Reset to factory default
Note: Resetting your device will delete all the data stored in the device. Create a backup before proceeding with the steps below.
- Tap on Settings from the home screen.
- Tap the Menu
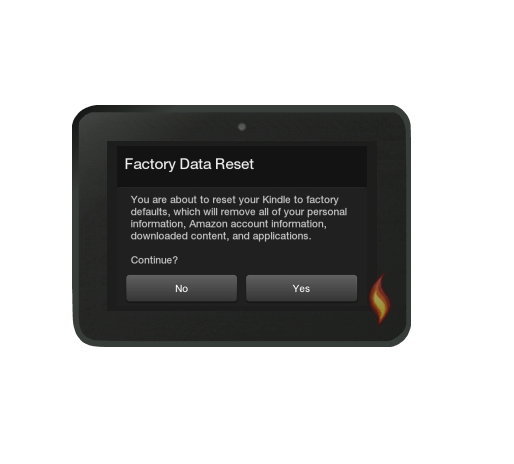
- Select Reset Device.
- Tap Yes when the warning message appears to confirm the action.
Your Kindle Paperwhite will reset in a few minutes. Once done, you may have to re-register the device with Amazon and download your Kindle e-books and other content from the Cloud using your Amazon account.
6. Forget the WiFi network on Kindle Paperwhite.
- From the home screen, tap on Menu.
- Open Settings.
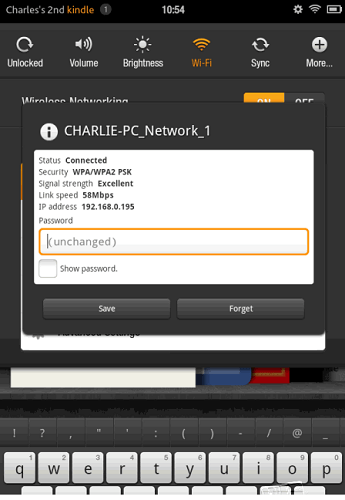
- Tap on WiFi Networks.
- Locate and tap on the network that has a checkmark on it.
- Tap on Forget.
- Search for the network again and select the network from the list.
The Kindle Paperwhite won’t connect to the WiFi problem can occur due to many reasons. Begin with performing a power cycle, change Authentication Type and band speed on the router, and as a last restore reset the device.


