Fix: Can't Adjust Brightness on Lenovo Laptop
Uninstall and reinstall the monitor driver to troubleshoot the issue
3 min. read
Updated on
Read our disclosure page to find out how can you help Windows Report sustain the editorial team Read more
Key notes
- If a Lenovo laptop is unable to change brightness, there’s an issue with system settings or the keyboard.
- Outdated display drivers, power settings, and hardware issues can cause the problem.
- Fix the issue by updating your display driver or installing a previous version on your PC.
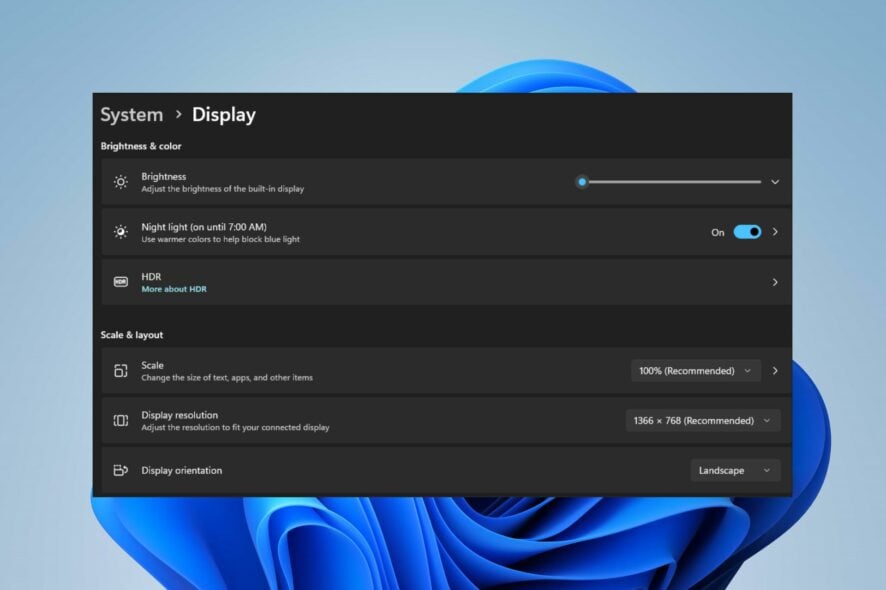
Lenovo laptop users report can’t adjust the brightness on their laptops. The problem may occur for several reasons and can be disturbing. Regardless, we’ll take you through some basic steps for resolving the issue.
Likewise, you may be interested in our detailed guide on fixing the Lenovo laptop touch screen not working in a few steps.
Why my laptop brightness cannot be adjusted?
- Outdated or incompatible display drivers can prevent you from adjusting the brightness.
- The function key or hotkey combination may be disabled, changed accidentally, or faulty.
- Power-saving modes or battery optimization settings can restrict brightness adjustments.
- Hardware issues with the display or backlight components can cause this issue.
- Third-party software or applications can interfere with the display settings.
- The Lenovo laptop may not change brightness due to incorrect BIOS or firmware settings.
What to do if my Lenovo laptop brightness can’t adjust?
Before trying other advanced fixes, we recommend you apply the following preliminary checks:
- Check if you can adjust the brightness using the slider under Settings’ Brightness and Color section.
- Restart the laptop to refresh its processor and resolve any temporary issues affecting it.
- Update your Windows OS to install bug fixes and updates for fixing the display issue.
- Try uninstalling recently installed third-party screen dimming or display management software.
- Disconnect external devices and peripherals like monitors that can interfere with the laptop’s display system.
- Try using the brightness control button on an external keyboard to know if the control keys on your laptop are faulty.
1. Update the graphics driver
- Press the Windows + R keys to prompt the Run window, type devmgmt.msc, and click OK.
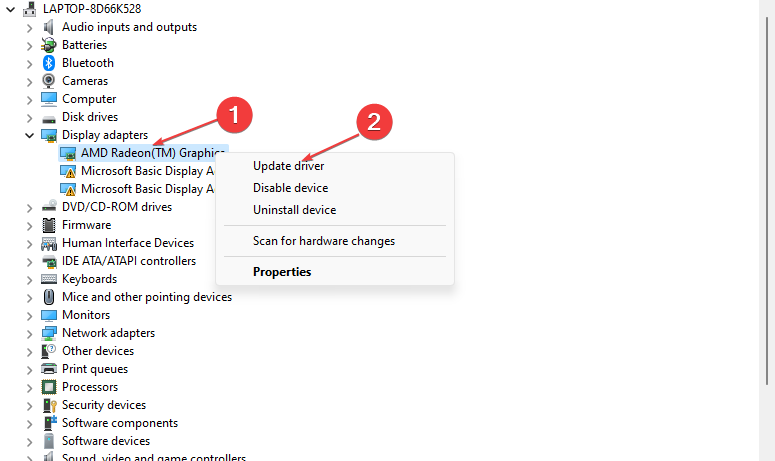
- Expand Display Adapters, select the driver from the drop-down menu, and click the Update driver option.
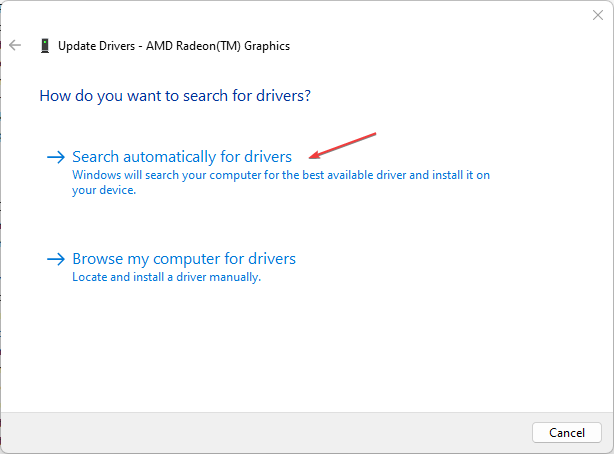
- Then, select the Search automatically for drivers option.
- Restart your PC and check if the m issue persists.
Updating the graphics driver will fix bugs and install the latest features to improve performance. Also, you can check other steps for updating graphics drivers on Windows 11 if you have any issues.
- Download and install the Outbyte Driver Updater app.
- Launch the software and wait for the app to detect all incompatible drivers.
- Now, it will show you a list of all faulty drivers to select the ones to Update or Ignore.
- Click on Update & Apply Selected to download and install the newest versions.
- Restart your PC to ensure the applied changes.

OutByte
Keep your GPU in a flawless state without worrying about possible driver issues.2. Install an old version of your graphics driver
- Press the Windows + R keys to prompt the Run window, type devmgmt.msc, and click OK.
- Expand the Display Adapter entry, right-click on the driver, then select Update driver from the drop-down menu.
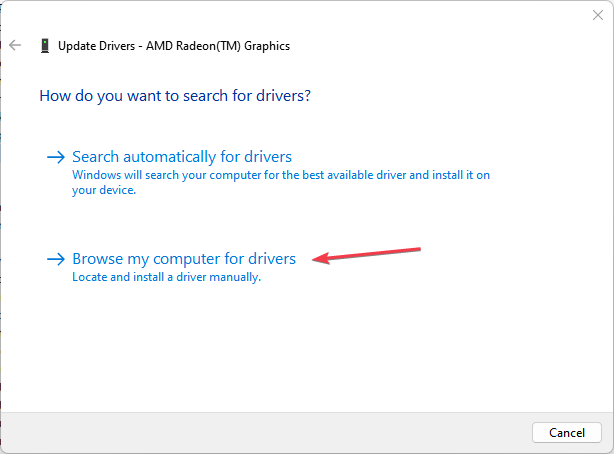
- Select Browse my computer for drivers.
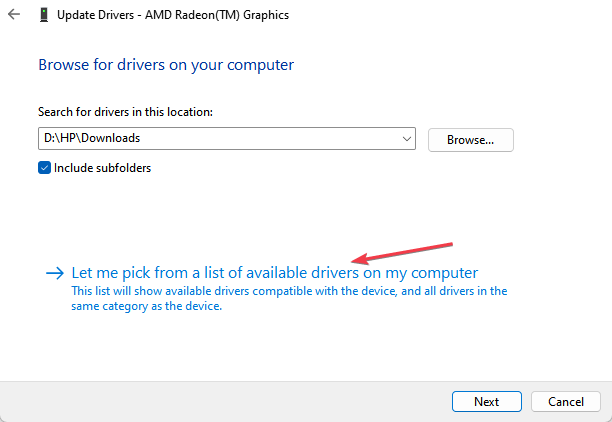
- Click Let me pick from a list of available drivers on my computer.
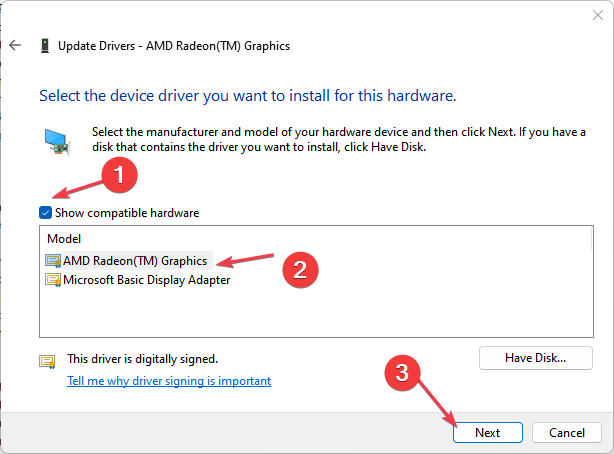
- Then, check the box for the Show compatible hardware option, select an older driver version from the list, and click Next.
- Restart your PC and check if you’re able to adjust the brightness.
Running an older graphics driver fixed the issue for some users. It resolves incompatibility issues and faulty update issues causing the Lenovo laptop’s inability to adjust brightness.
3. Uninstall the Monitor driver
- Press the Windows + R keys to prompt the Run window, type devmgmt.msc, and click OK.
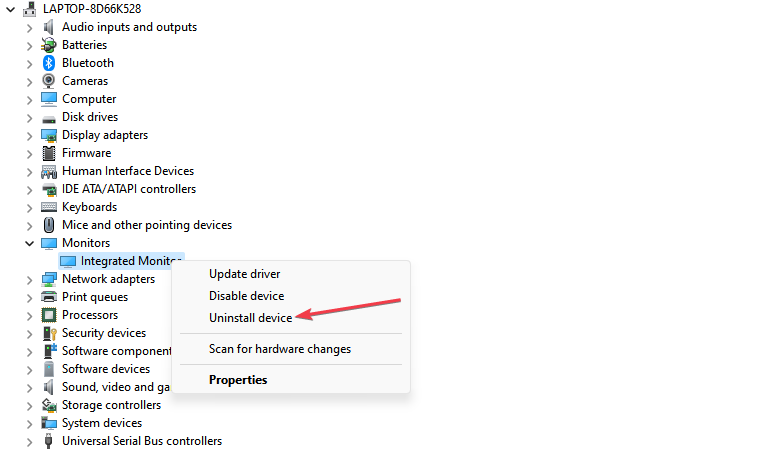
- Then, expand the Monitor entry, right-click on the drivers, and select Uninstall from the drop-down menu.
- Finally, reboot your laptop and check if the bright adjustment feature works.
Uninstalling the monitor drivers will remove the mirror drivers and other devices interfering with the system display functions.
Further, we have a more comprehensive post on fixing the brightness not working issue in Windows 11. You can check this if your device isn’t Lenovo.
In addition, if your PC screen becomes dark at full brightness, you can check our recommended solutions in this guide.
Should you have any questions or suggestions regarding this guide, please drop them in the comments section.

