Fix: Stuck on Let's Connect You to a Network on Windows 11
Use CMD to bypass the network requirement
5 min. read
Updated on
Read our disclosure page to find out how can you help Windows Report sustain the editorial team. Read more
Key notes
- To skip the Let’s Connect You to Network screen on Windows 11 Setup, press Shift + F10 and kill the Network Connection Flow process, or create a local user account via Command Prompt.
- Keep reading this guide to know the detailed steps for each method!
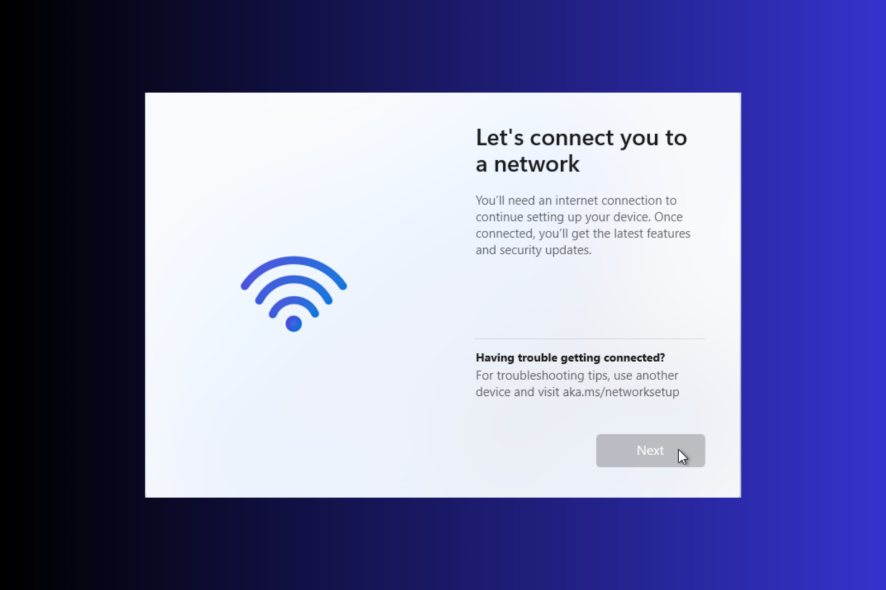
Microsoft made it compulsory to connect to the internet while installing or upgrading to Windows; however, if want to bypass the Let’s Connect You to a Network screen on Windows 11 setup for any reason, this guide can help!
We will explore a few workarounds that can help bypass the internet connection requirement and successfully install Windows 11.
Why Windows 11 cannot connect to the Wi-Fi network?
- Your device might be missing or have outdated network drivers.
- Incorrect network settings.
- Weak Wi-Fi networks or interference from other electronic devices could cause no internet connection issues.
- The Wi-Fi router or network adapter is not functioning properly.
How do you get past let’s connect you to a network on Windows 11?
1. Using the OOBE command
- Once you see Let’s connect you to a network screen, press Shift + F10. This will open the Command Prompt.
- Now type the following command to bypass network connection requirements and hit Enter:
OOBE\BYPASSNRO - Once the command is executed, your computer will reboot and relaunch the OOBE dialog box.
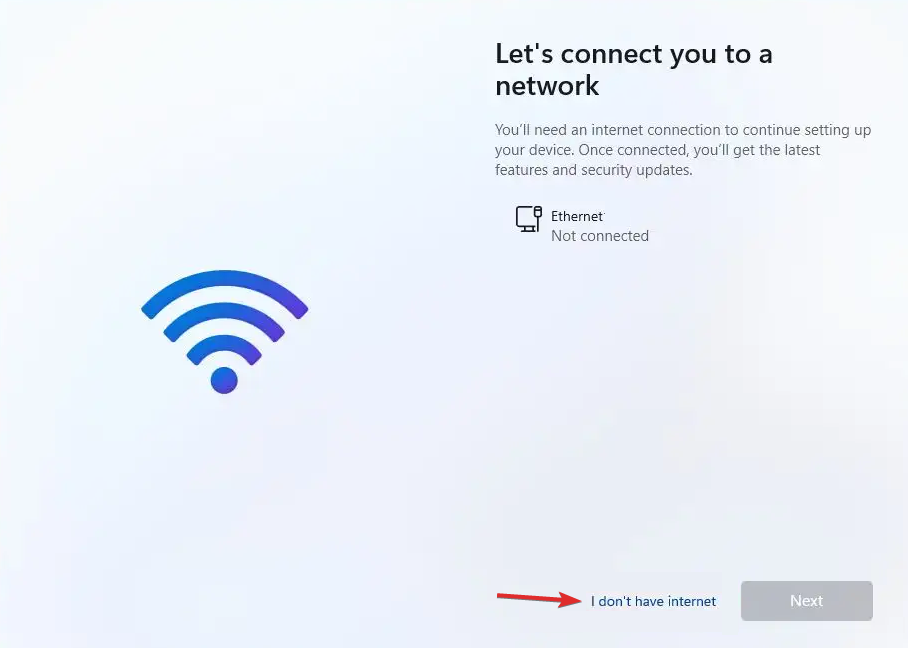
- Follow the onscreen instructions until you reach Let’s connect you to a network screen; this time, you will get I don’t have internet option; click that.
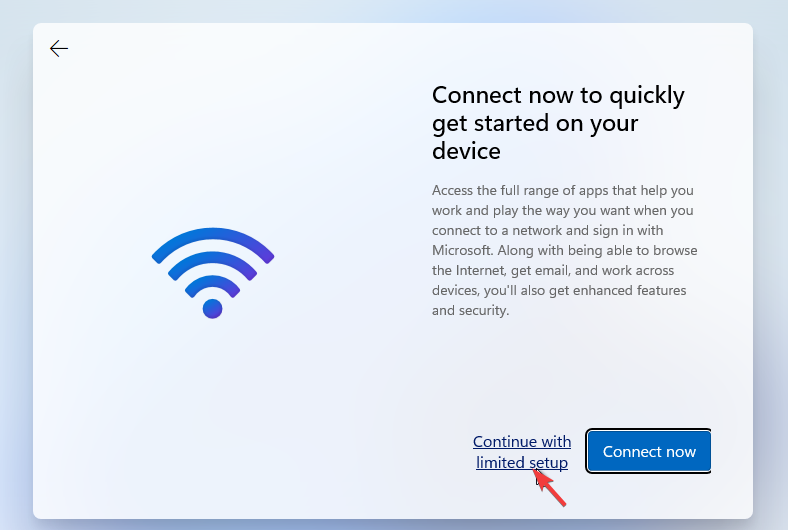
- Next, choose the Continue with limited setup option.
- Accept the license agreement terms and move forward to create a local user account.
2. Kill the Network Connection Flow process
- Once you see Let’s connect you to a network screen, press Shift + F10 to launch Command Prompt.
- Type taskmgr and hit Enter to open Task Manager.
- Click More Details to access Task Manager in full view.
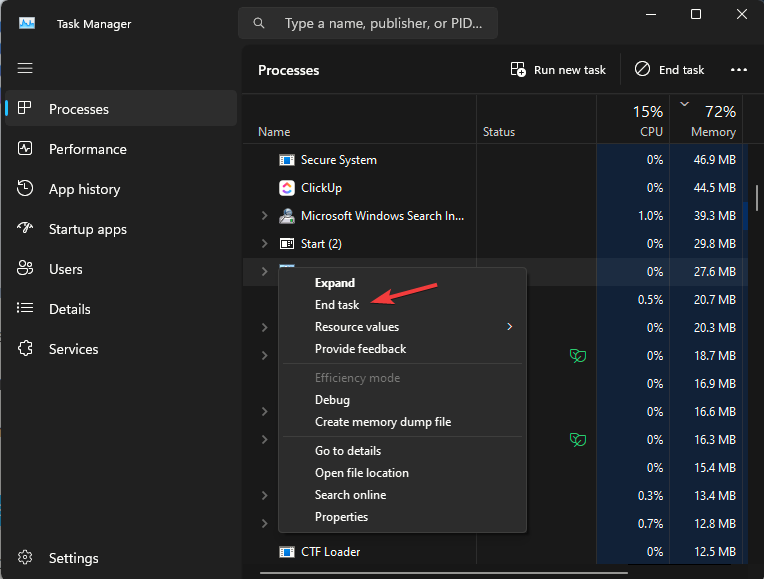
- In the Processes tab, locate Network Connection Flow, right-click it, and select End task from the context menu.
- Close Task Manager, type exit, and hit Enter on the Command Prompt window.
Now you will get the Windows 11 setup wizard again; it will prompt you to enter your name and password to create a local user account on Windows 11; follow the on-screen instructions to complete the process.
Once it is done, you must activate your Windows before using it; in case you are facing activation issues, check out this quick guide to fix the issue.
3. Create a local user account using Command Prompt
- Once you see Let’s connect you to a network screen, press Shift + F10 to open Command Prompt.
- Copy & paste the following commands one by one after replacing the User Name with the name for a user account and hit Enter after every command:
net.exe user "User Name" /add
net.exe localgroup "Administrators" "User Name" /add
cd OOBE
msoobe.exe && shutdown.exe -r
- Windows will now restart and follow the on-screen prompts to complete the installation with a local account.
- You will get The user name or password is incorrect message, click OK.
- Choose the right account from the bottom left corner of the screen to log in and start using Windows 11.
4. End the Network Connection Flow process using the Command Prompt
- At the Let’s connect you to a network screen, press Shift + F10 to open the Command Prompt.
- Copy & paste the following command and hit Enter:
taskkill /F /IM oobenetworkconnectionflow.exe - Once executed, reboot your PC to let the changes take effect.
- You will get the Windows 11 setup wizard again; now, enter your local name and password to create a local user account; follow the on-screen prompts to complete the process.
5. Use the Microsoft media creation tool
First, you need another computer to download a Windows 11 ISO image and use an 8 GB USB flash drive to create bootable media. Once done, follow these steps:
- Plug in the USB flash drive and boot your computer using it.
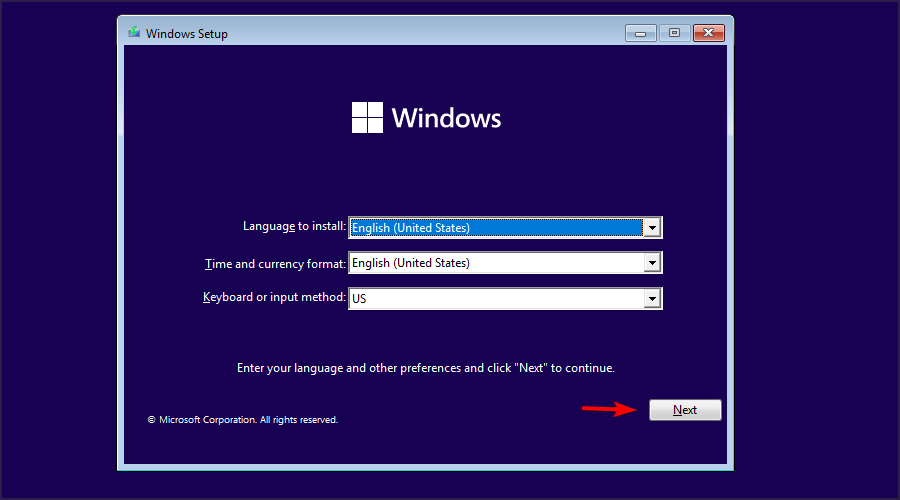
- Now, the Windows 11 installation setup wizard will appear on the screen.
- Select language, time & keyboard and click Next.
- Accept the license terms, and click Next.
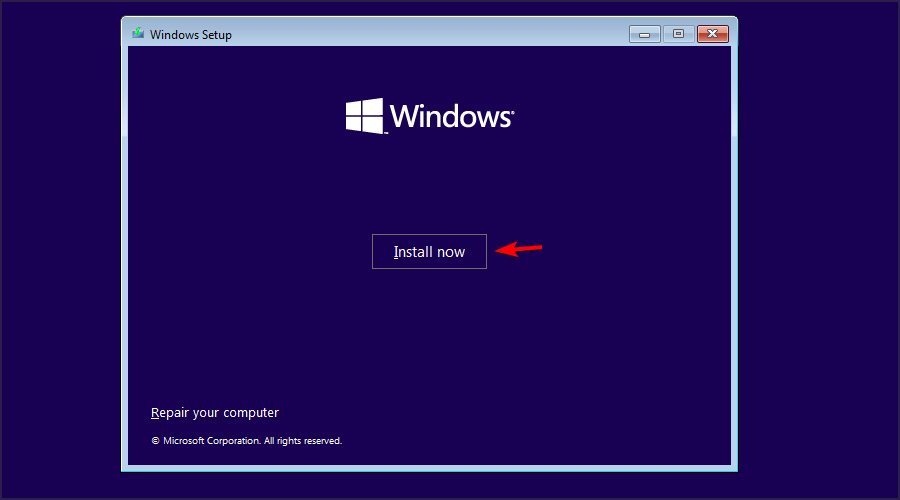
- Now, click Install now.
- Follow the on-screen instructions to complete the process to set up Windows 11 without an internet connection.
Installing a fresh copy of Windows via a bootable media is always a good idea, especially when you have issues like Windows is stuck Just a moment.
Can you install Windows 11 without the internet?
To install Windows 11 without the internet, you need to create a USB bootable media with Windows 11 ISO file on it, then boot your PC with it to install the operating system.
However, if you are already on the setup wizard and on the network connection screen, you can use any of the methods mentioned above to bypass the wireless network requirement to complete the process.
In case you have network errors on your Windows 11 computer, it is best to update your Windows and drivers to the latest version; read this guide to learn more about it.
If you have any questions or suggestions about the topic, don’t hesitate to mention them in the comments section below. We would be happy to interact!






User forum
0 messages