Can't Connect to This Network on Windows 11: Fixed in 8 Ways
Conduct preliminary checks before any advanced solutions
Key notes
- Several users have reported encountering the Windows 11 can't connect to this network error after upgrading to the latest iteration.
- It could be due to outdated drivers, misconfigured settings, VPN, problems with the modem/router, amongst other issues.
- Also, find out which amongst the two, Wi-Fi and Ethernet, offers higher reliability.

The Internet has become a necessity of late, and we are connected to it for most of the day. You will require a stable Internet connection for work, social networking, or purchasing a product from an e-commerce website.
However, several users have reported encountering the Can’t connect to this network error in Windows 11.
This error prevents you from connecting to a network, which usually helps access the Internet. The worst part, it doesn’t mention what’s causing the problem, which makes the troubleshooting even more confusing.
Hence, before we head to the fixes, it’s imperative to look at the possible causes of the Windows 11 can’t connect to this network error.
What is causing the Windows 11 Can’t connect to this network error?
While there can be many of these, we have listed the common ones to help you get acquainted with the issue and save some time while troubleshooting.
- Issues with the connection
- Problems with the modem/router
- Outdated or corrupt network driver
- Misconfigured network settings
- Running an older version of Windows 11
If you remember making any changes to the network settings in the recent past, try reverting to the previous one. In case that doesn’t help, follow the steps listed here to get rid of the Windows 11 can’t connect to this network error.
How can I fix the Can’t connect to this network Windows 11 error?
1. Some preliminary checks
Before we delve into many intricate fixes, it only makes sense to cross out the simpler ones initially.
1.1 Check if airplane mode is disabled
- Click on the Quick Settings icon near the bottom-right of the desktop.

- Verify if the Airplane mode is disabled. When the mode is disabled, the tile will be dark grey in color, similar to other enabled Quick Settings listed here.

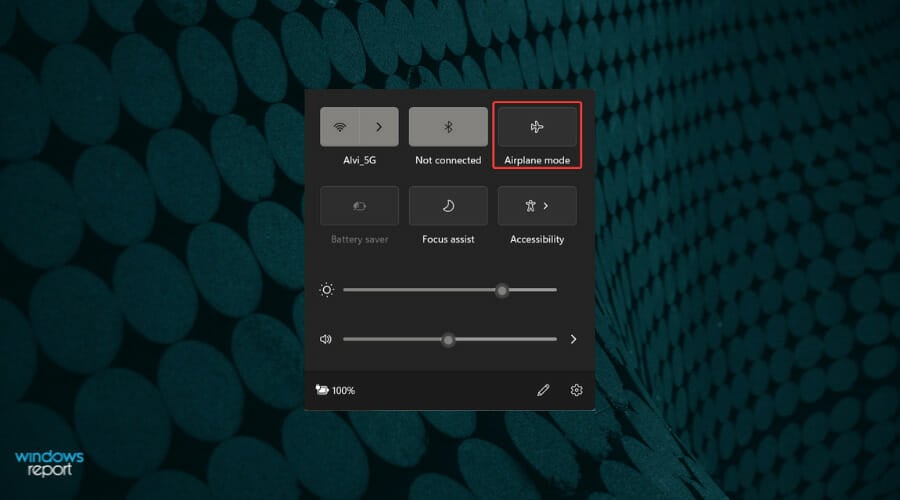
Airplane mode basically cuts you off from any network. If the mode is turned on, you may encounter the Windows 11 can’t connect to this network error. Disable the mode and check if that fixes the problem.
1.2 Power off the modem/router
Like any other machine, the modem/router also needs rest for effective functioning. Though they are meant to run for days at a stretch, the internal components may heat up and cause issues.
To fix this, unplug the router/modem from the source, wait at least 10 minutes, and then replug it. Some come with internal batteries and continue to function even when disconnected, in which case, you will have to take out the batteries to turn off the modem/router completely.
1.3 Check if you can access the network on other devices
Another important aspect that often goes unnoticed is identifying whether the problem lies with the PC or the network itself. Hence, it’s recommended that you try connecting to the network using other devices.
If a connection is established on the other device, you can continue with the methods listed in the article, since the problem is limited to your PC.
1.4 Clean the ports and firmly replug the cable
Over prolonged use, there are chances of dust buildup in the ports, which may cause Windows 11 can’t connect to this network error. Though the dust buildup is usually minor, it’s recommended that you clean the ports.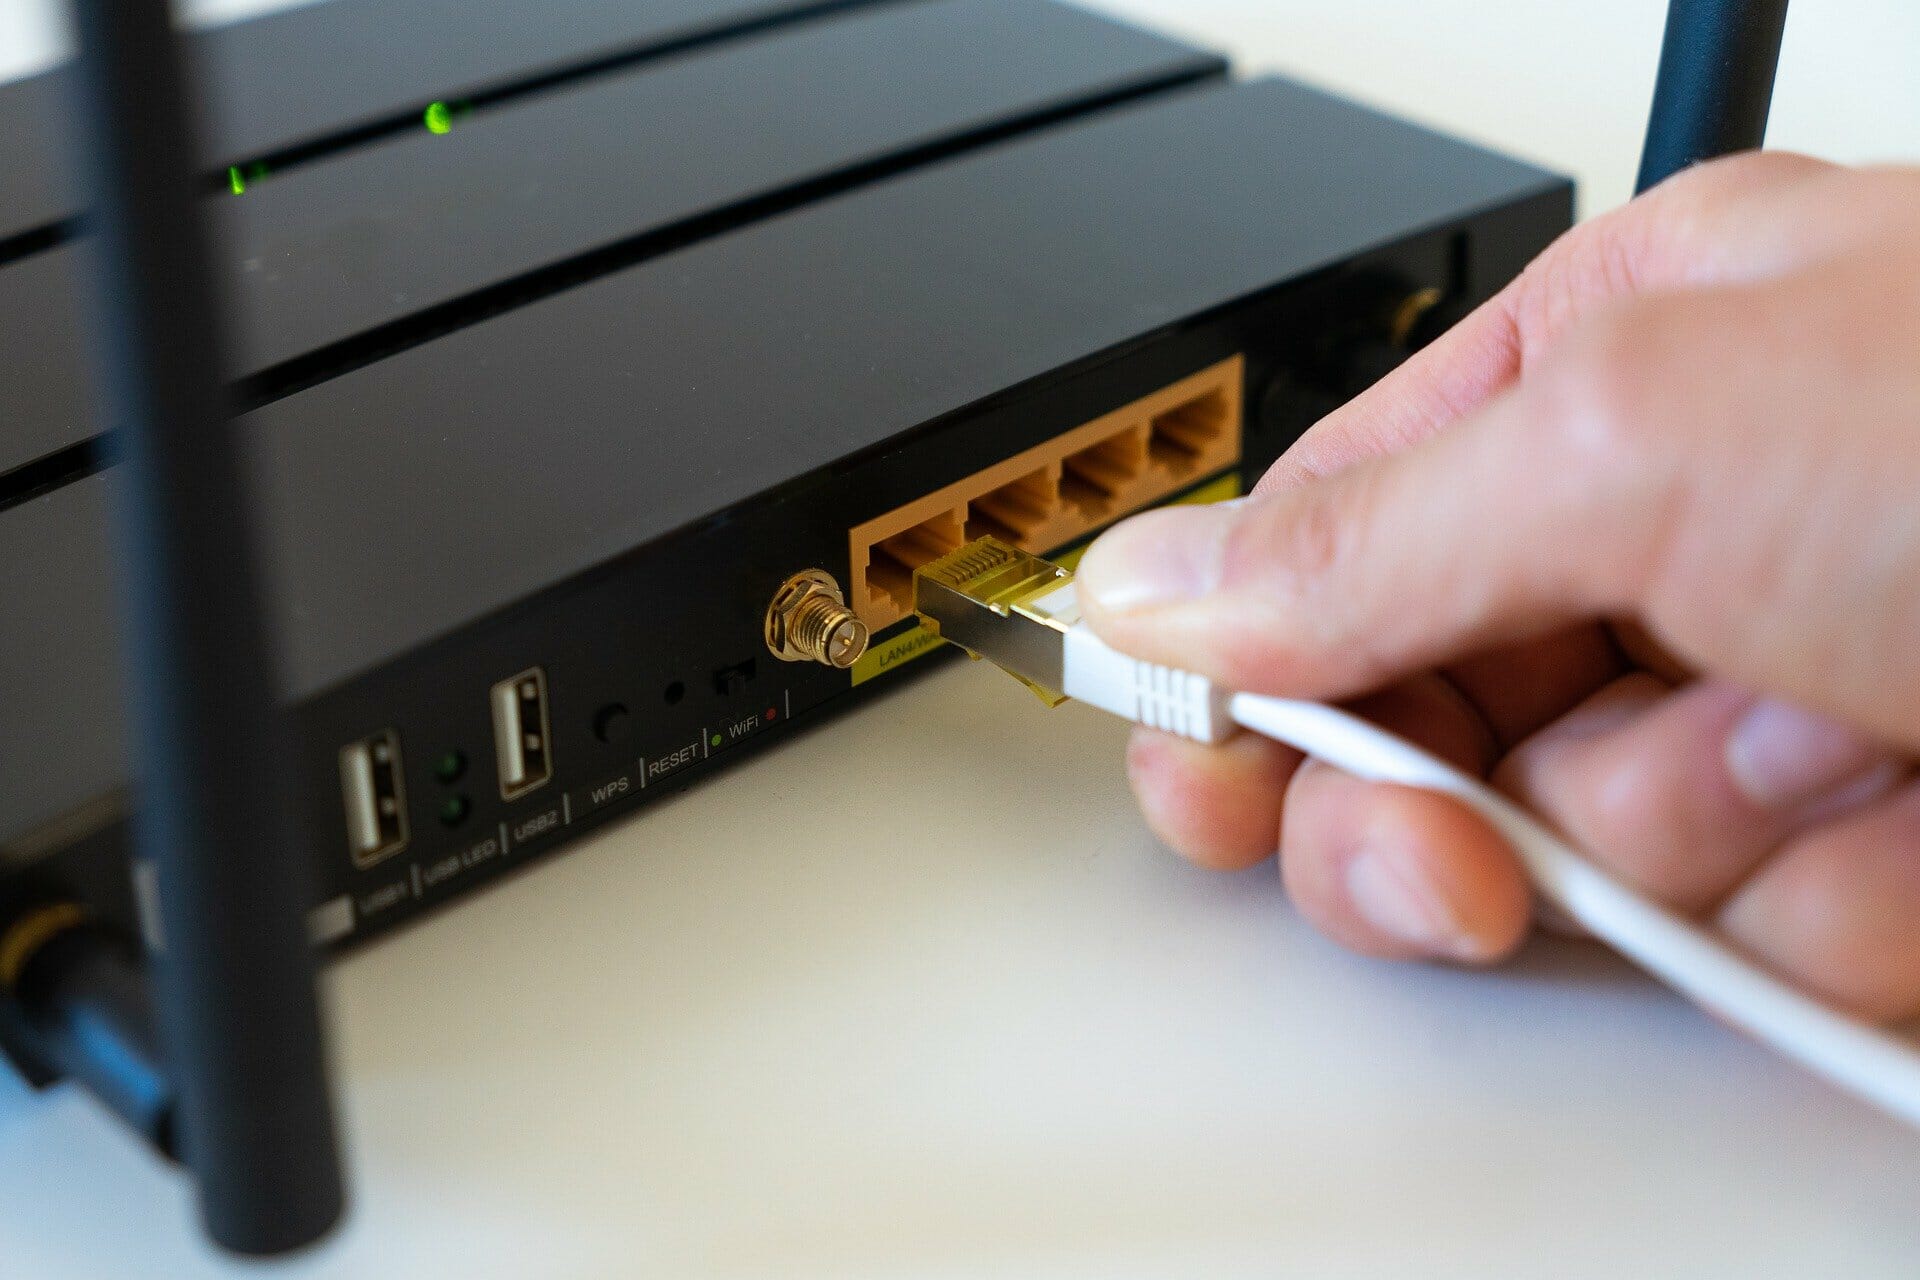
To do that, unplug the cables, lightly blow air into the ports, and then firmly replug the cables. Now, check if you are able to establish a connection with the network you were earlier facing issues with.
2. Restart your Windows 11 PC
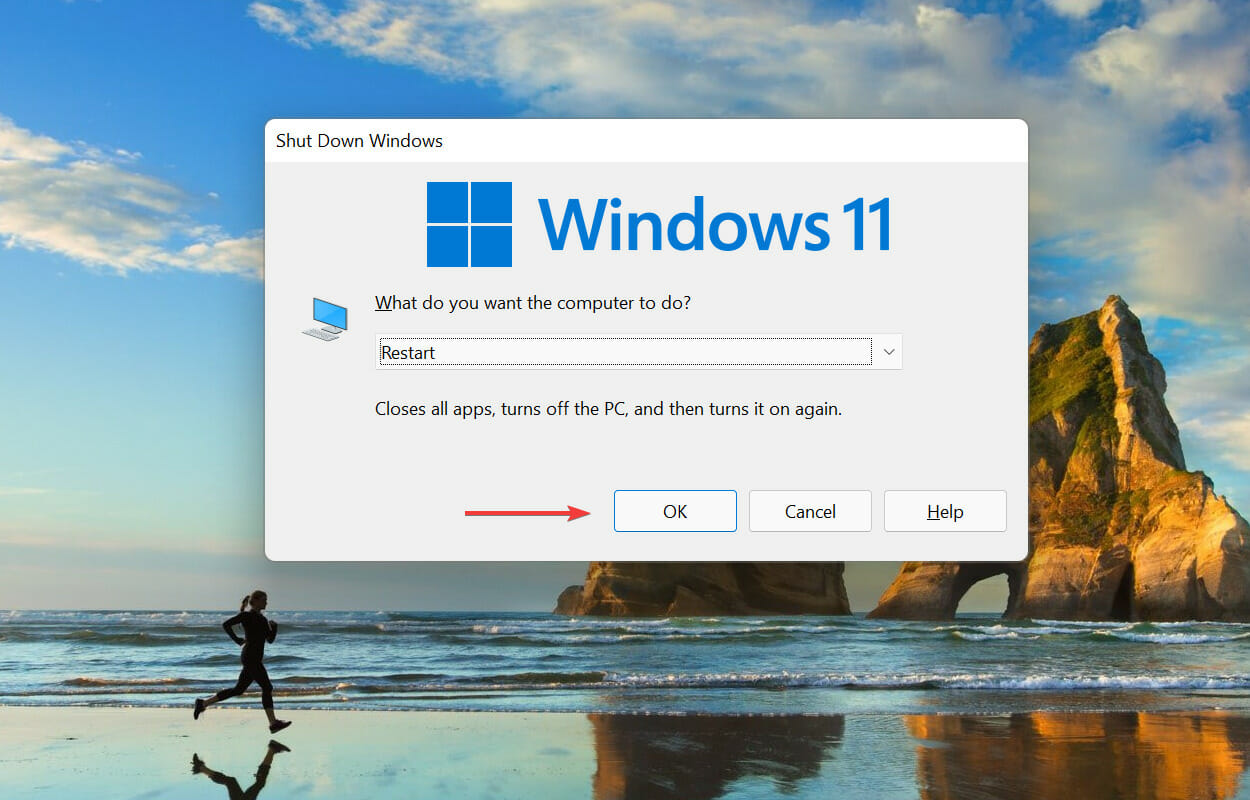
- Navigate to the desktop and press Alt + F4 to launch the Shut Down Windows box.
- Click on the What do you want the computer to do the dropdown menu and select Restart from the list of options.
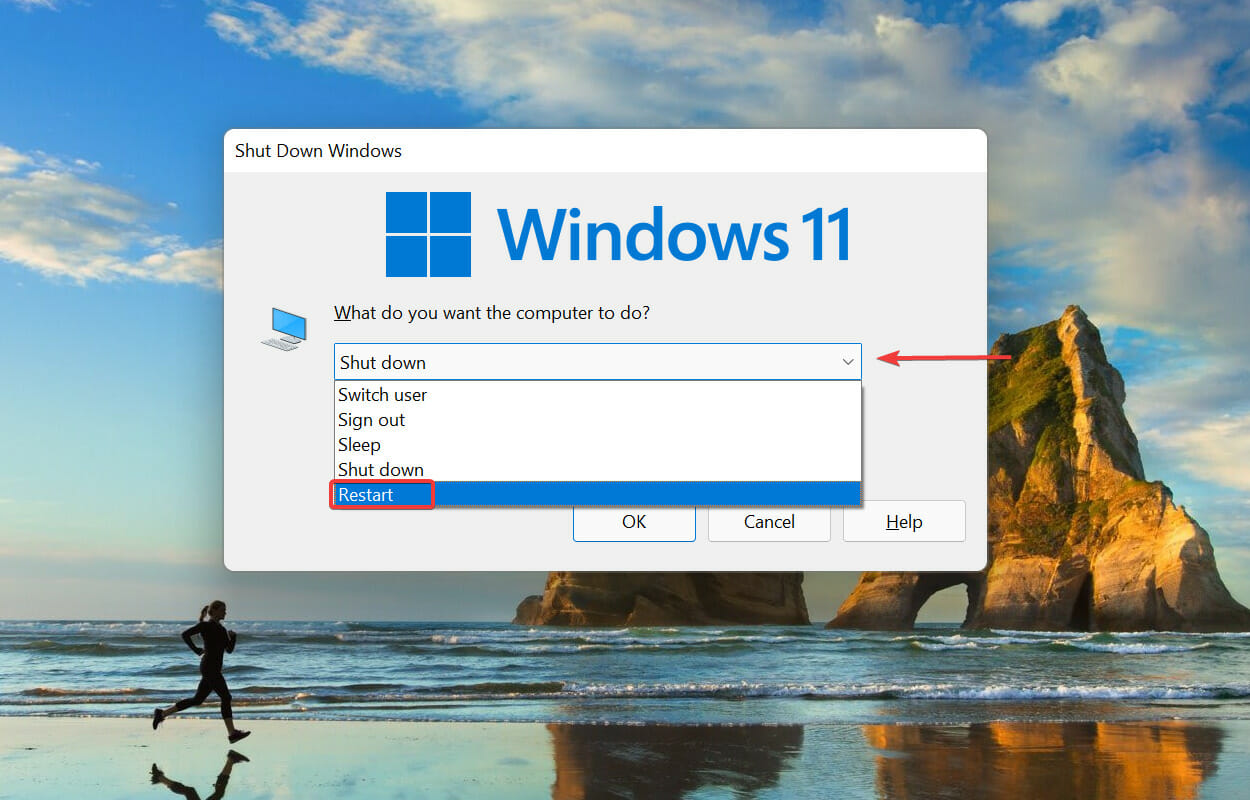
- Click on OK to restart the Windows 11 PC.


If you encounter issues with the system, a simple restart should be your primary approach. When you restart the computer, the OS is reloaded and any trivial or minor bug causing the can’t connect to this network Windows 11 error is eliminated.
3. Reconnect to the network
1. Press Windows + I to launch the Settings app.
2. Select Network & Internet from the tabs listed in the navigation pane on the left.
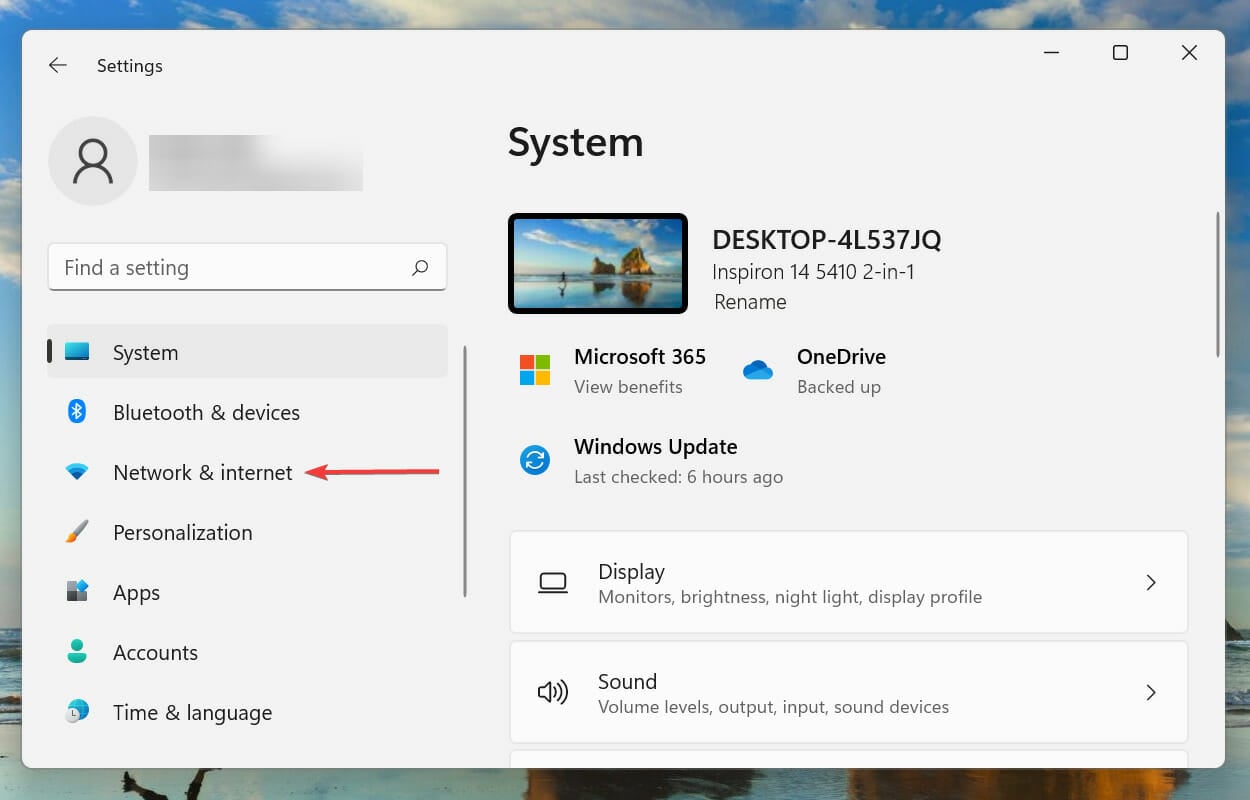
3. Click on Wi-Fi.

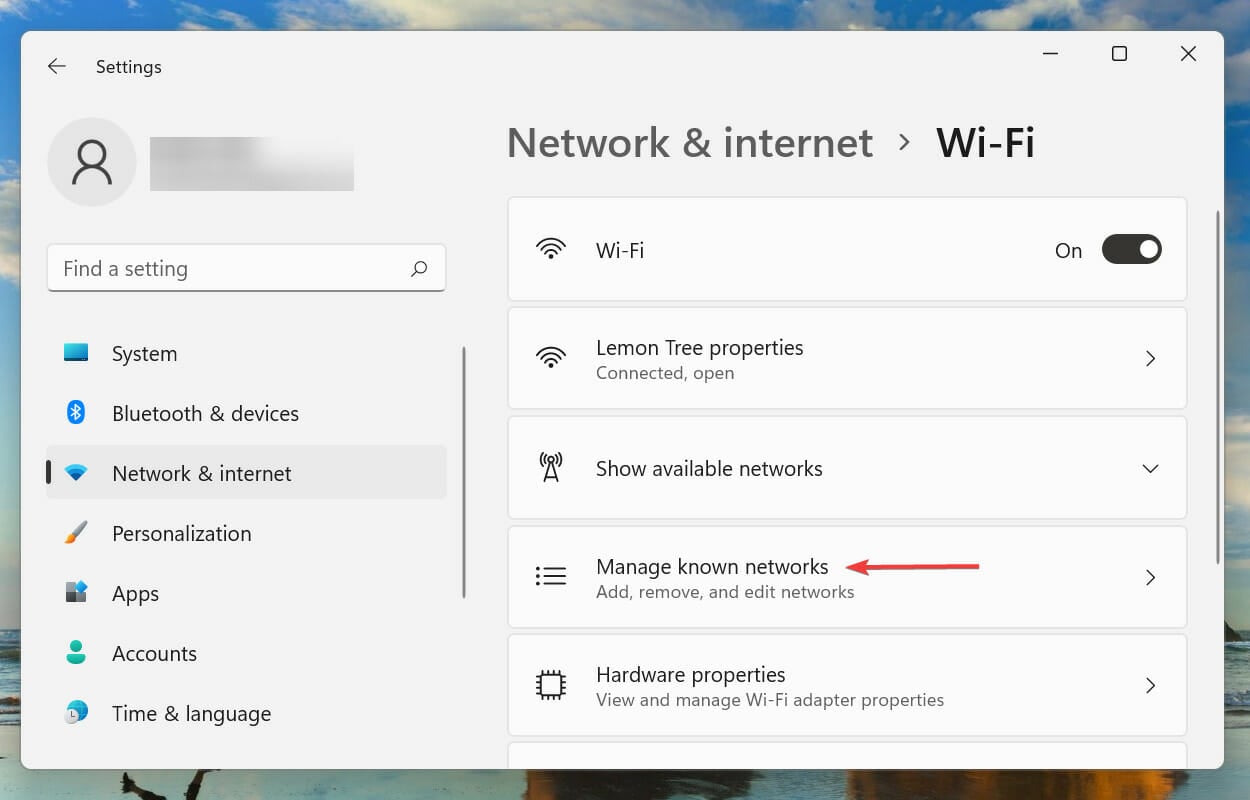
4. Press on Manage known networks.
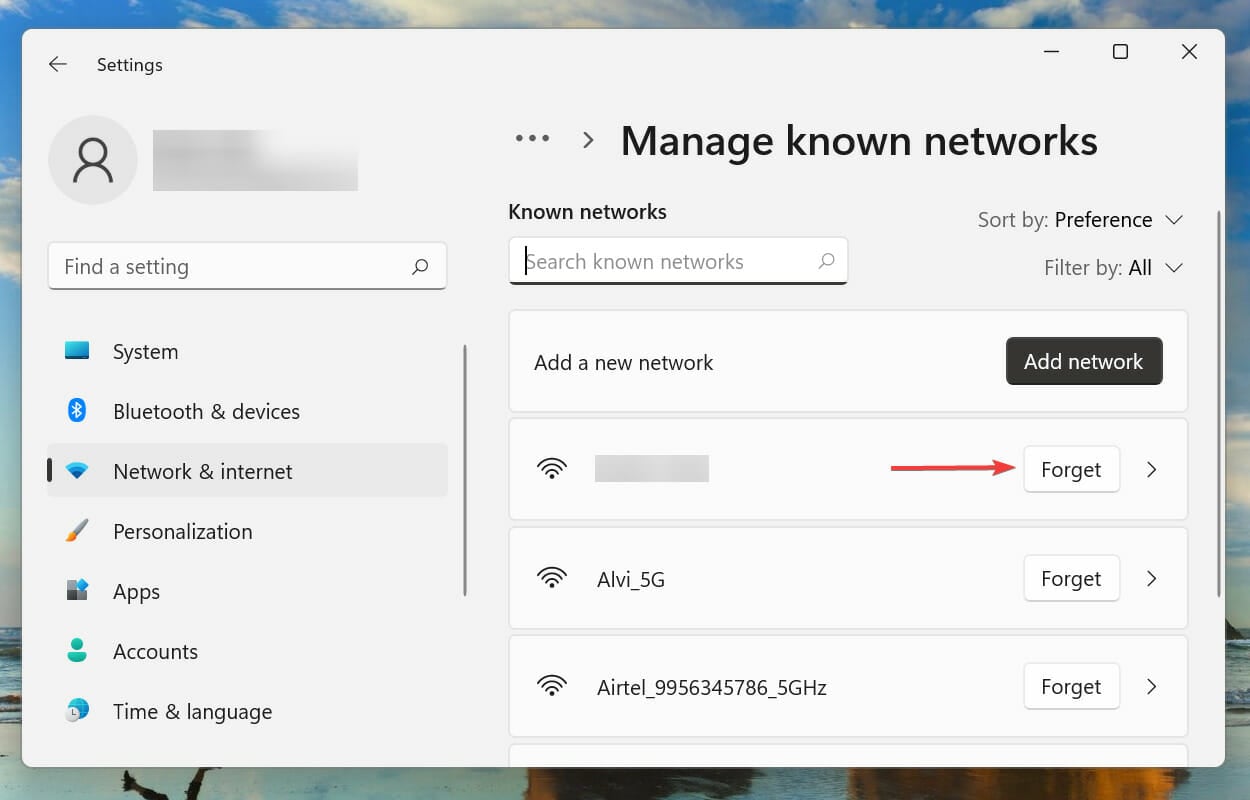
5. Next, click on the Forget button next to the network you are facing trouble connecting to.
6. Now, go back to the Wi-Fi settings and click on Show available networks.
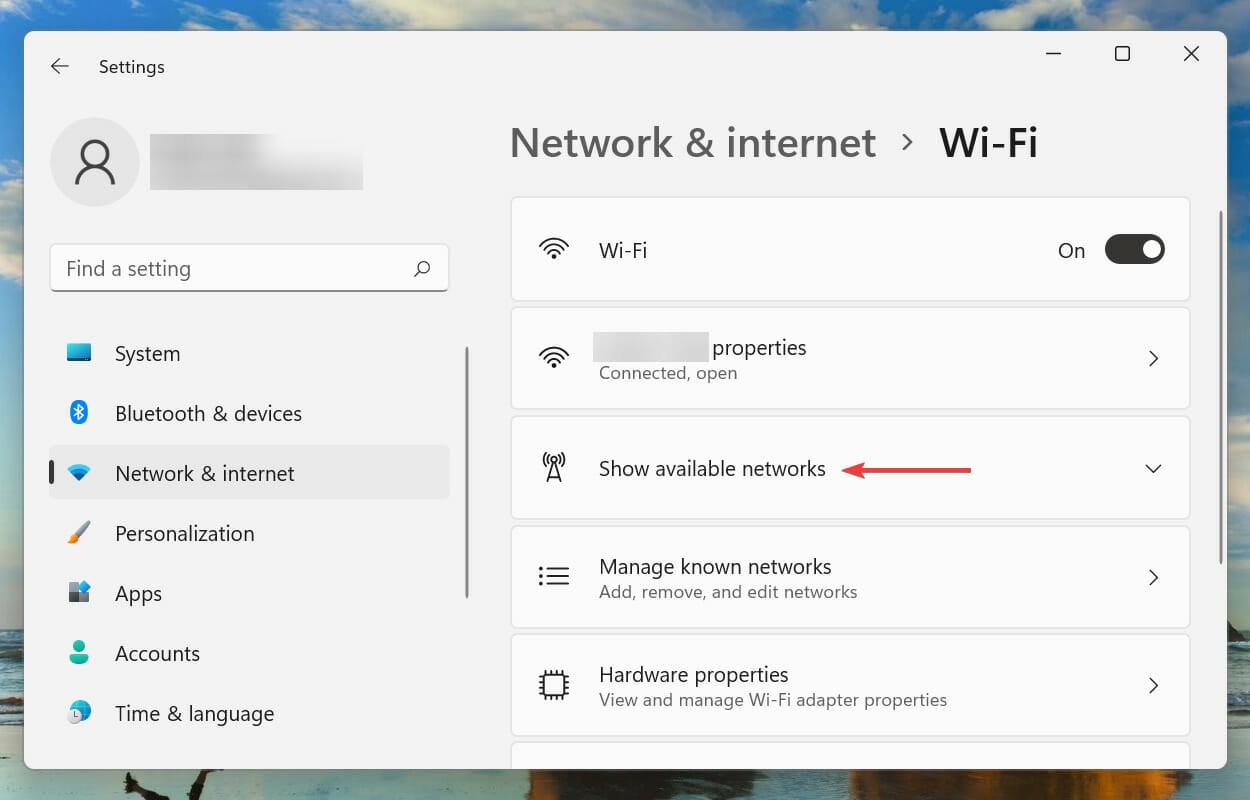
7. Select the network and click on the Connect button. If required, enter the password for it.
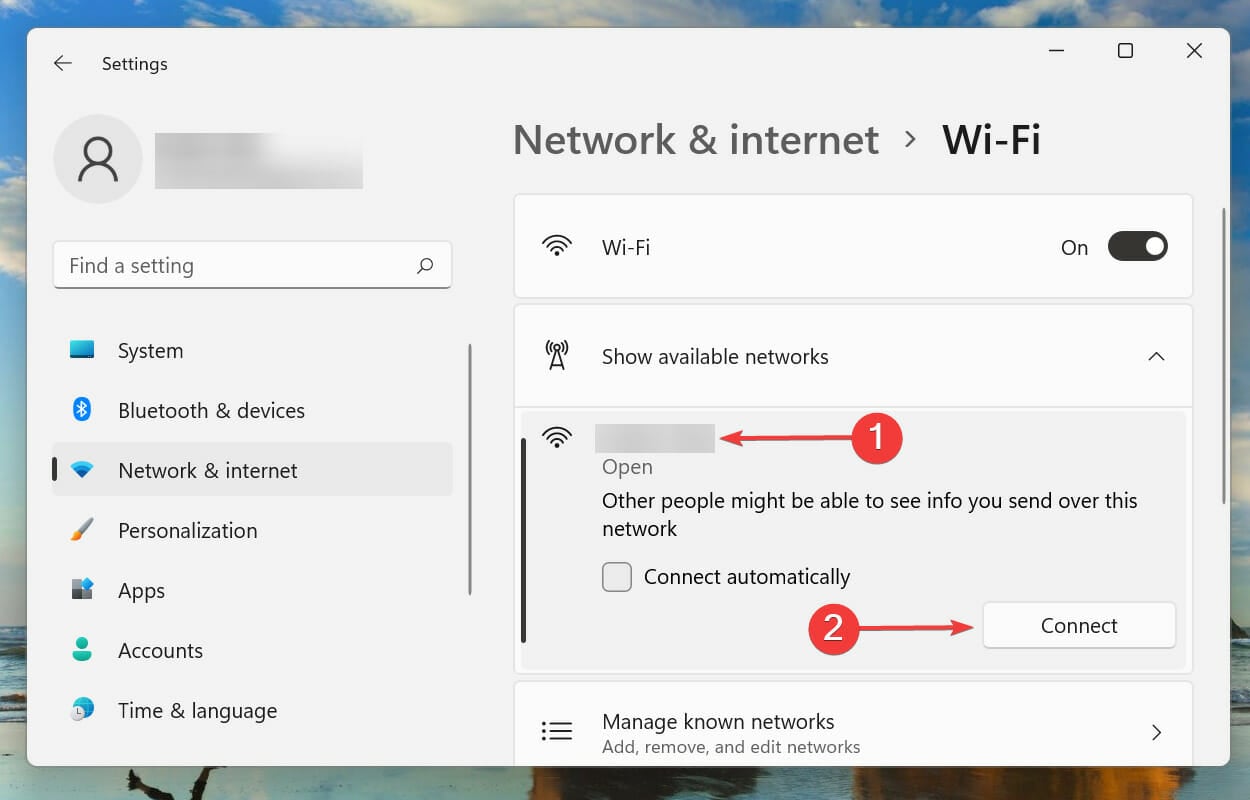
The network connection settings may get corrupt or misconfigured over time, which can cause network connections errors. In this case, it’s best to forget the network and then reconnect to it to try to fix the can’t connect to this network Windows 11 error.
4. Update the network driver
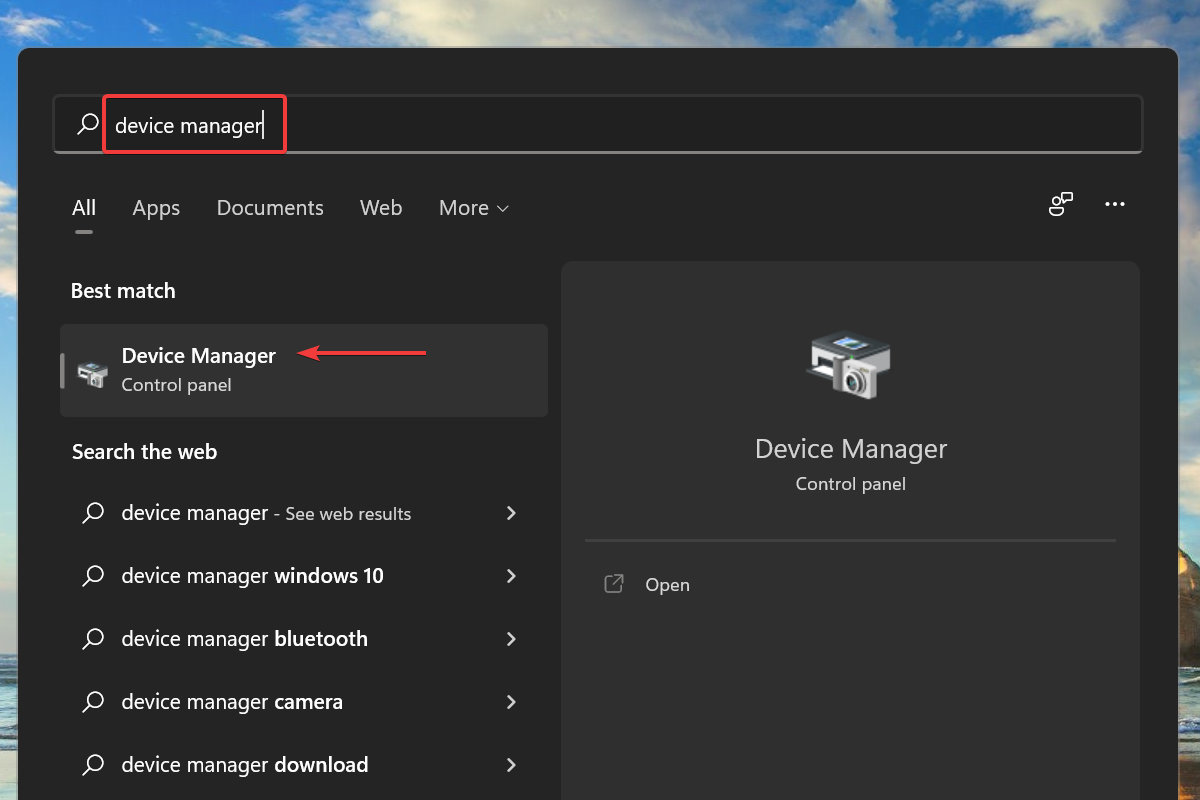
- Press Windows + S to launch the Search menu.
- Enter Device Manager in the text field at the top, and click on the relevant search result that appears.
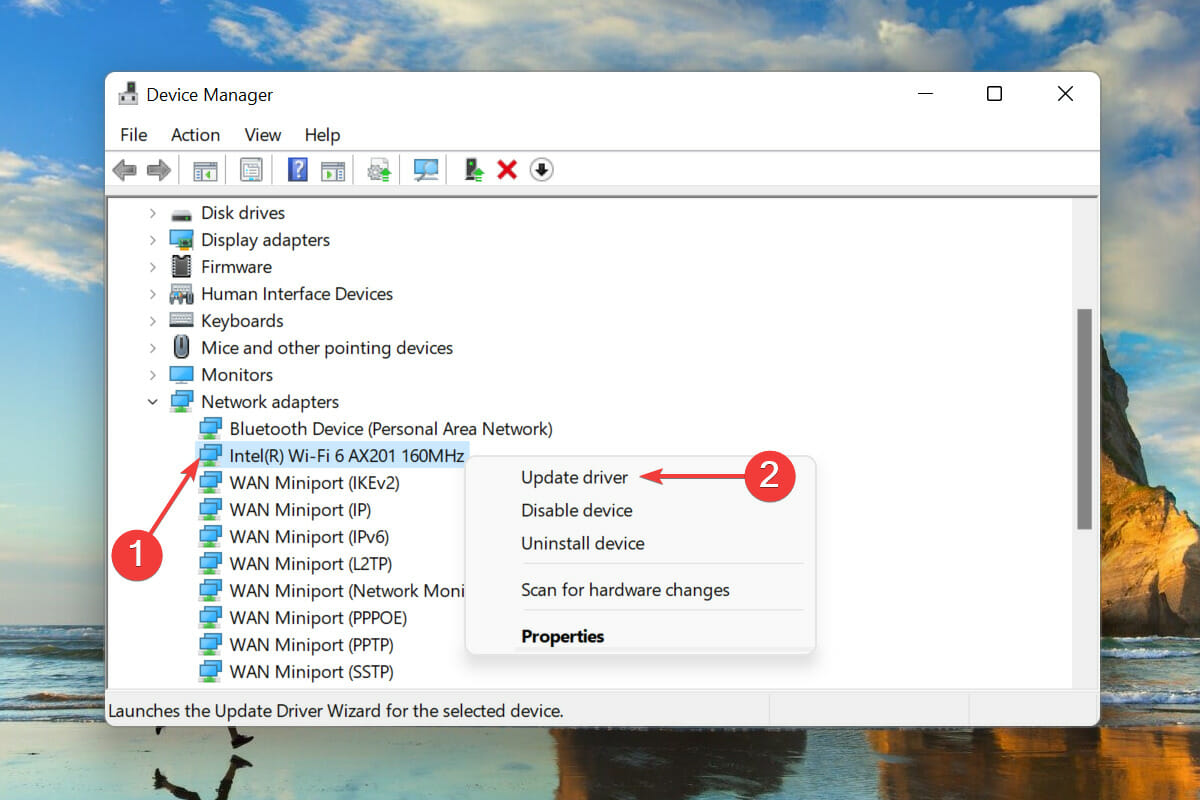
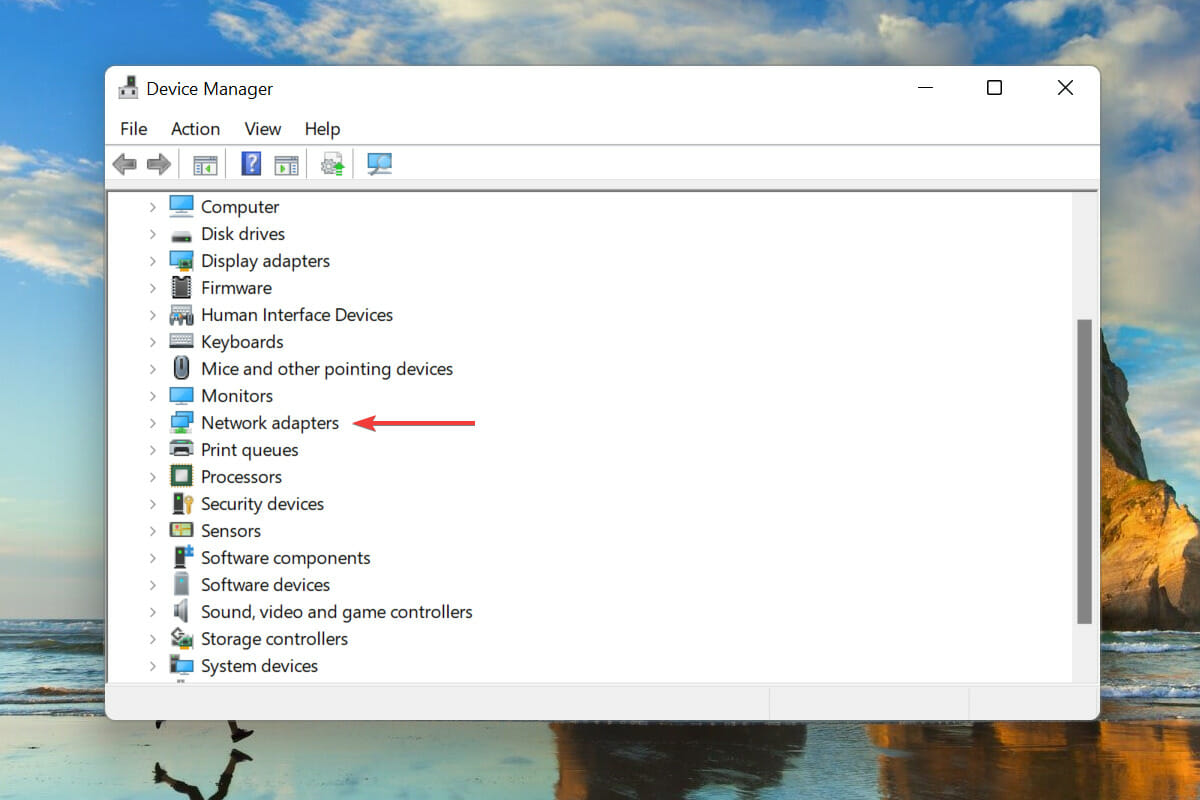
- Double-click on the Network adapters entry to view the various devices listed under it.

- Next, right-click on the Wi-Fi adapter, and select Update driver from the context menu.
- Select Search automatically for drivers from the two options in the Update drivers window.
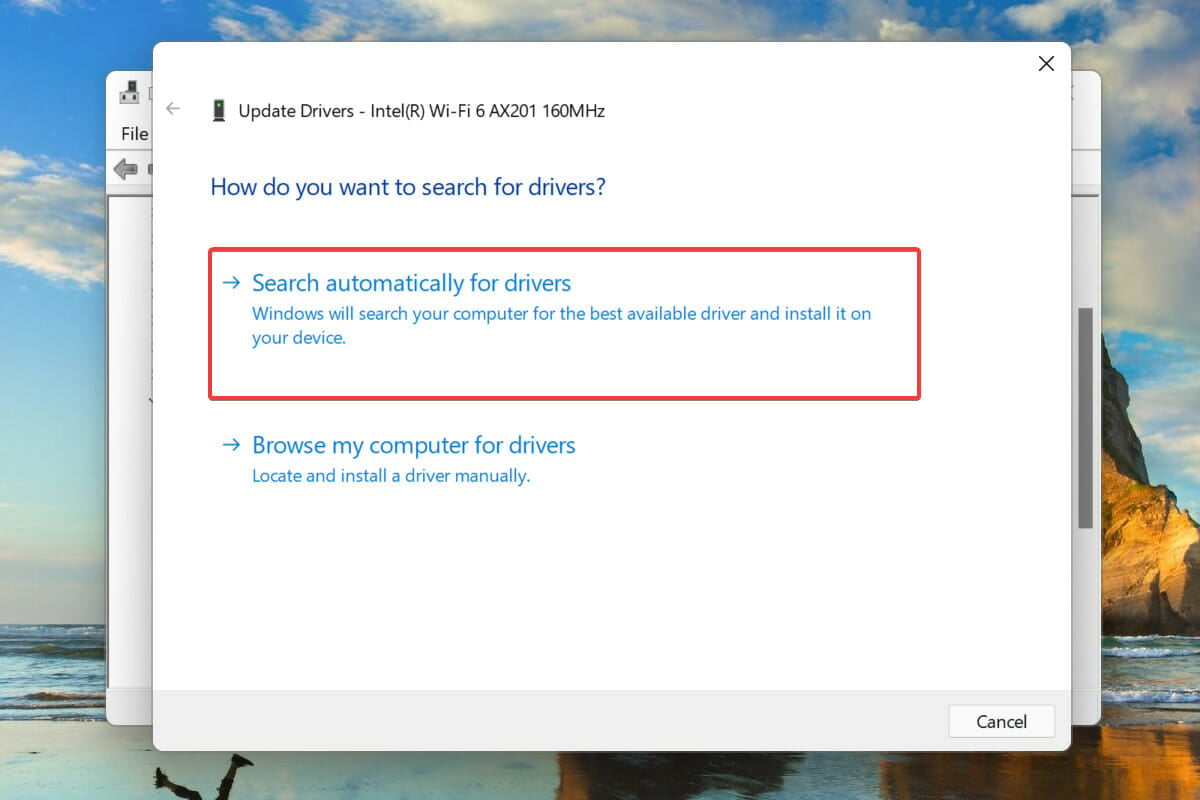
- Windows will now search for the best available driver on the computer and install it for the Wi-Fi adapter.


The Device Manager method works as an offline update and only installs driver versions that already exist on the computer. If you haven’t downloaded any previously, it’s highly likely that the driver won’t be updated.
In this case, you can look for the latest driver version in Windows Update or manually download it from the manufacturer’s website.
Also, you can use a dedicated utility to update the drivers installed on your PC. We recommend using Outbyte Driver Updater, a third-party tool that automatically scans the web for a newer version and updates the installed drivers.
5. Update Windows 11
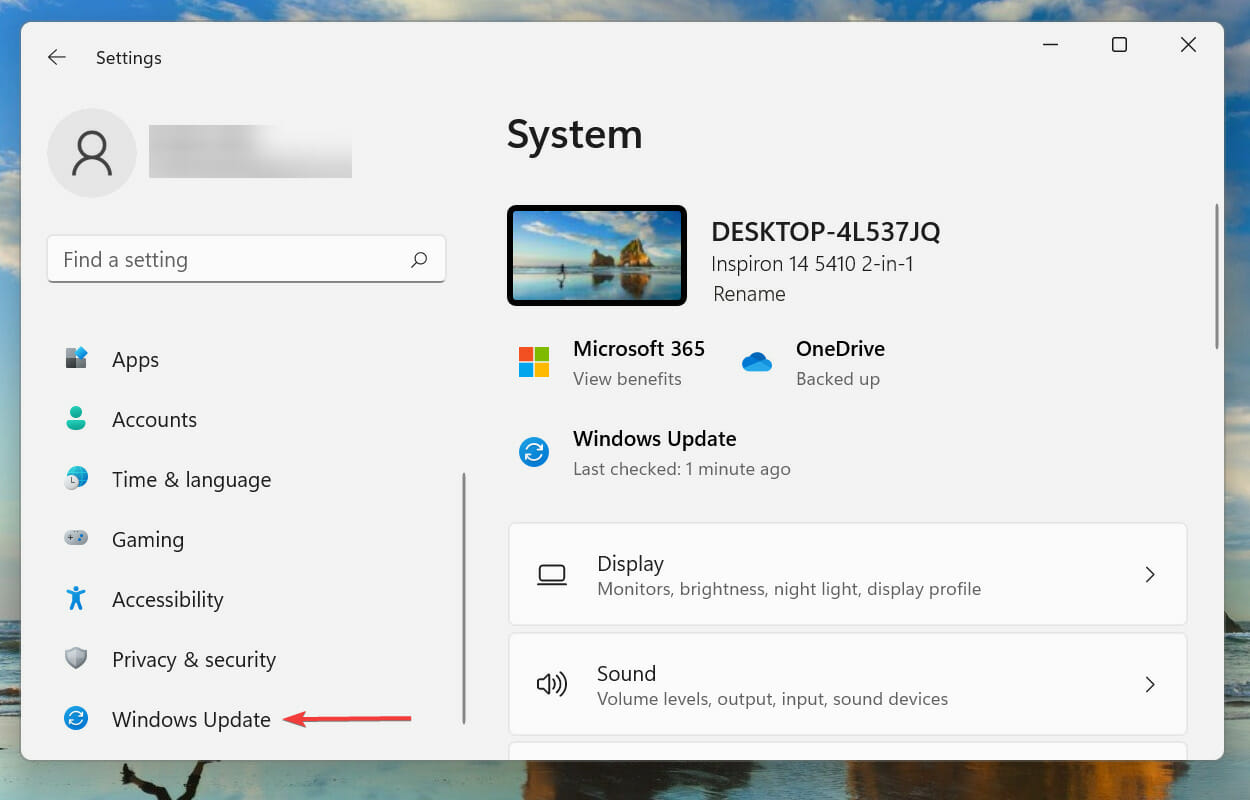
- Press Windows + I to launch the Settings app.
- Select Windows Update from the tabs listed in the navigation pane on the left.
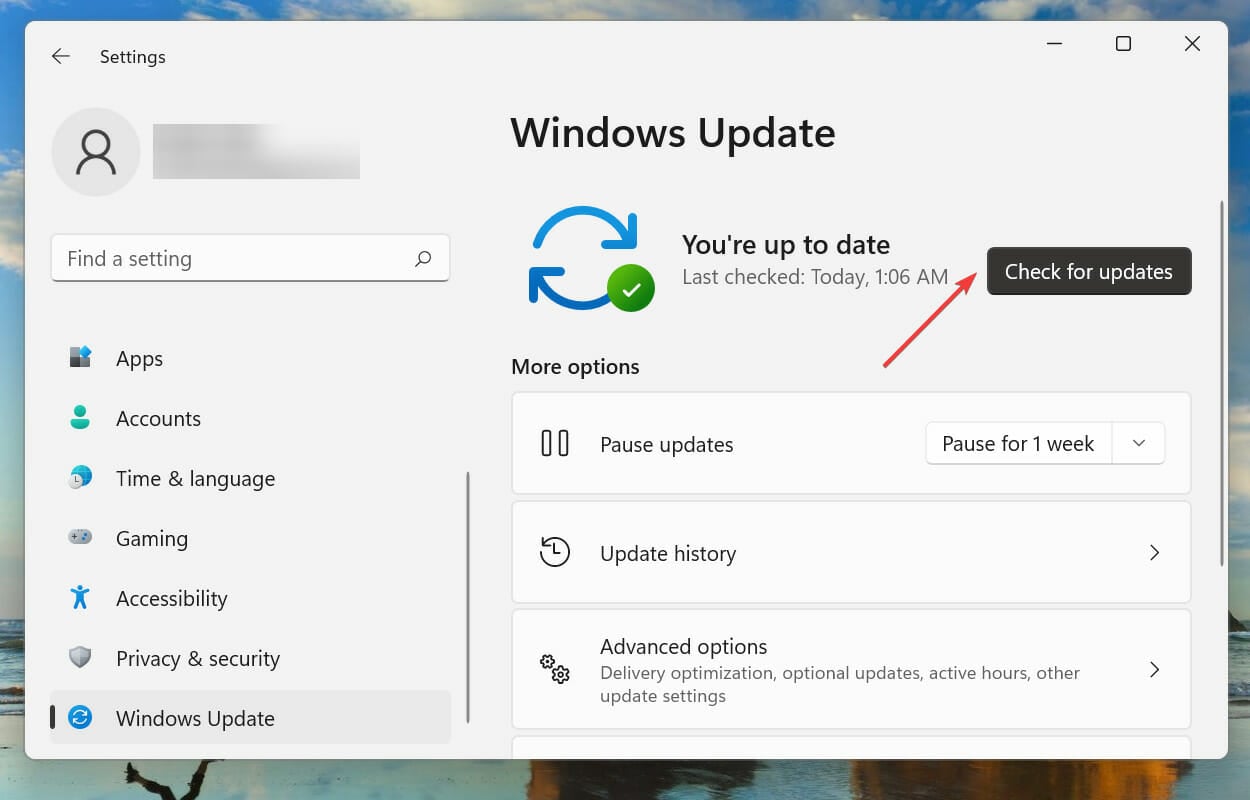
- Next, click on Check for updates to scan for any available newer versions available for download.


6. Run the Network adapter troubleshooter
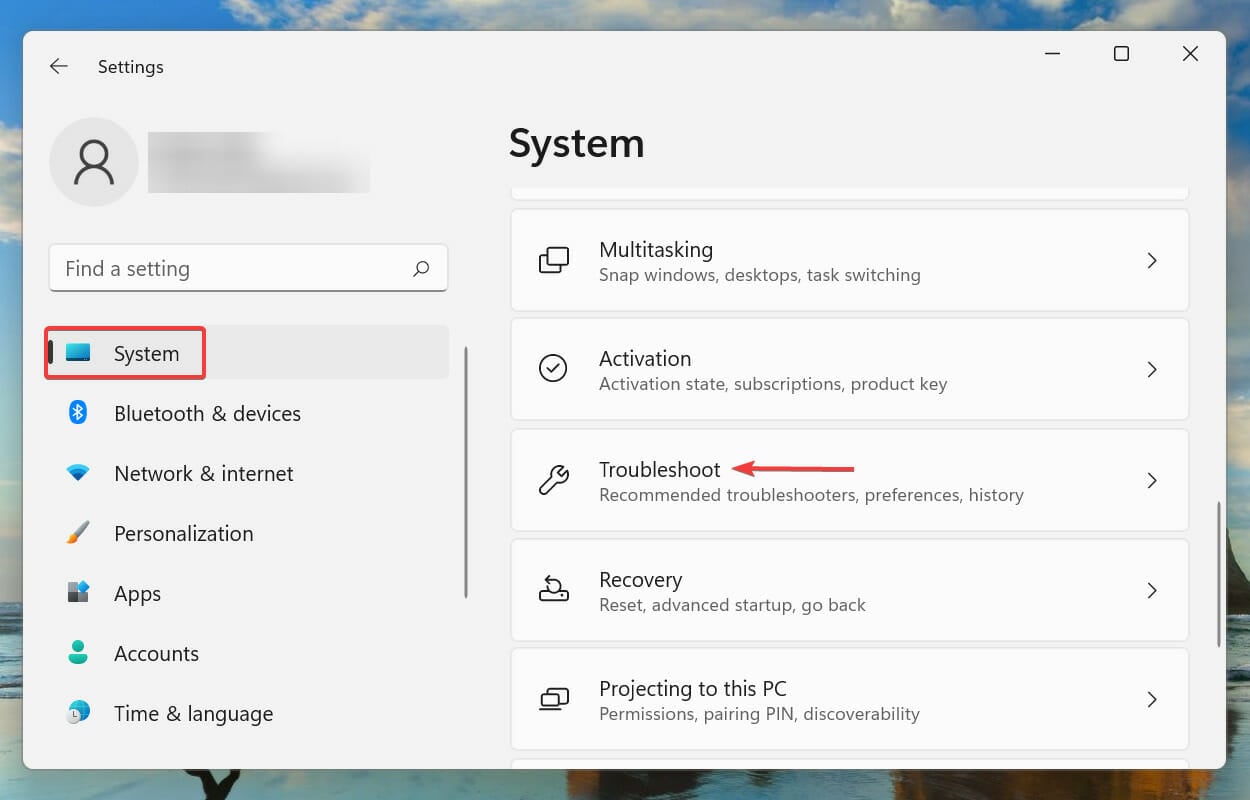
- Press Windows + I to launch the Settings.
- Click on Troubleshoot on the right in the System tab.
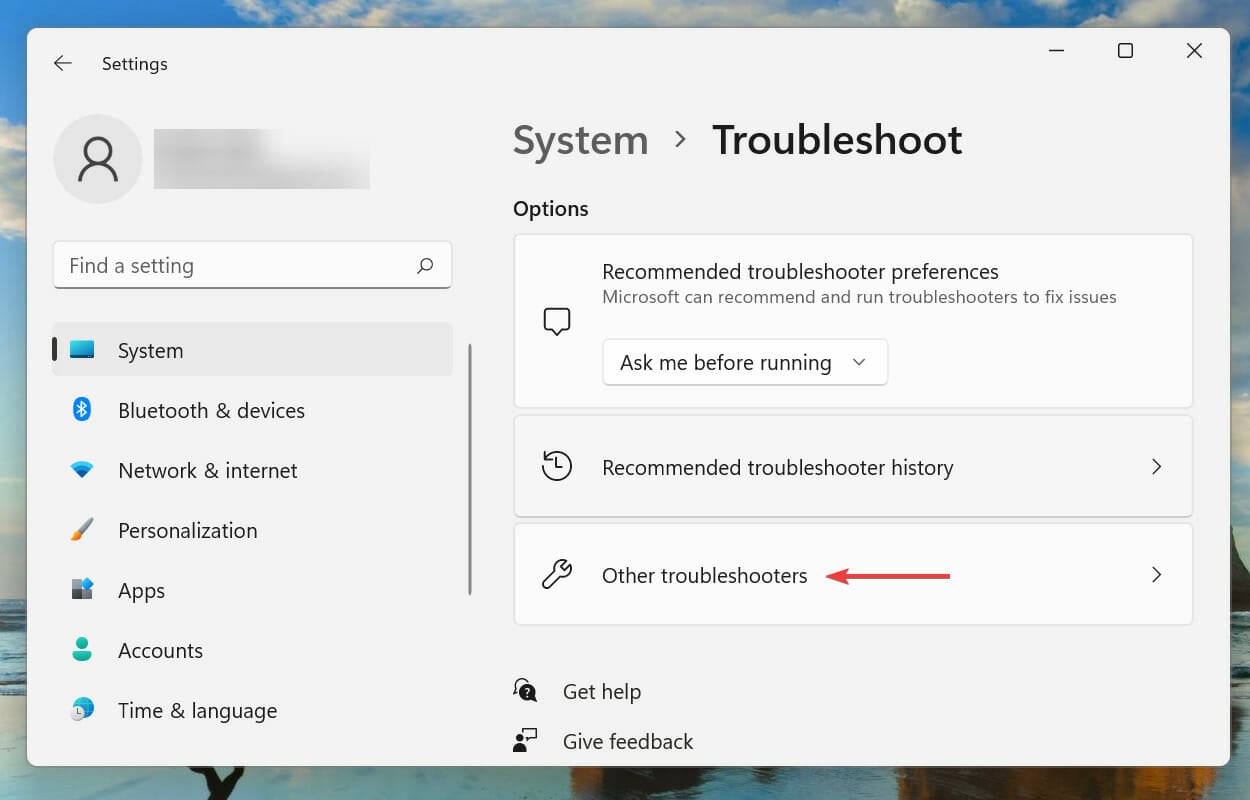
- Click on Other troubleshooters.

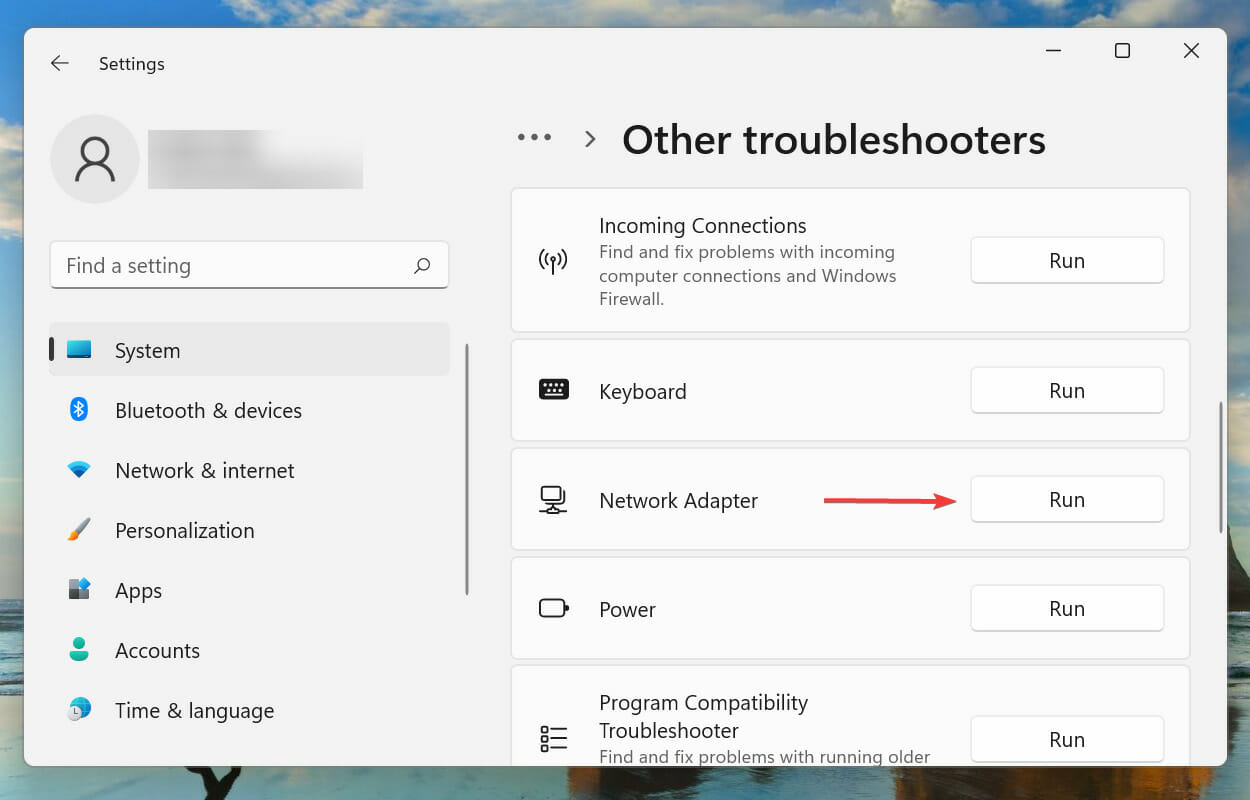
- Next, look for the Network adapter troubleshooter and click on the Run button next to it.

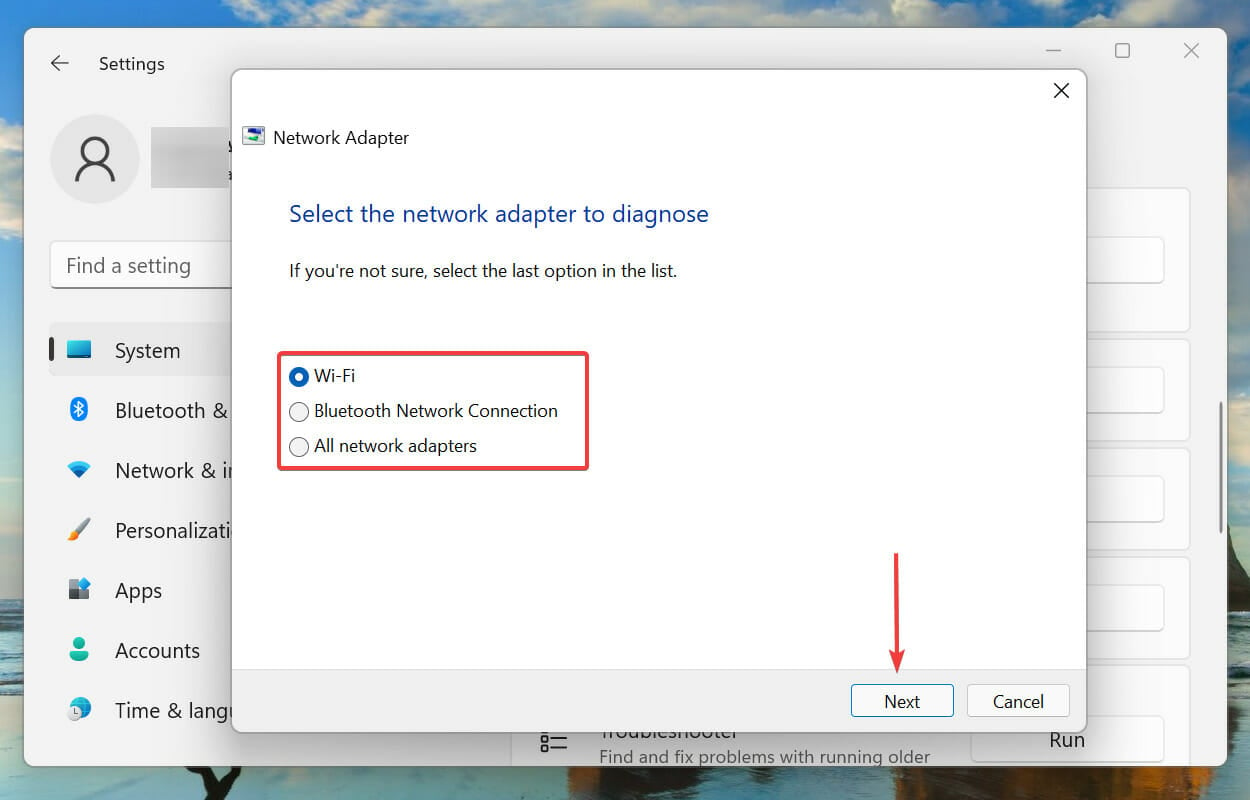
- Choose the type of network adapter you are facing trouble with, and click on Next at the bottom.
- Wait for the troubleshooting to complete. Choose the appropriate response when prompted and execute the recommendations listed at the end, if any.


The built-in troubleshooters offered by Microsoft are an easy way of resolving trivial and intricate Windows errors. Once it’s run, check if the issue is fixed.
7. Disable VPN
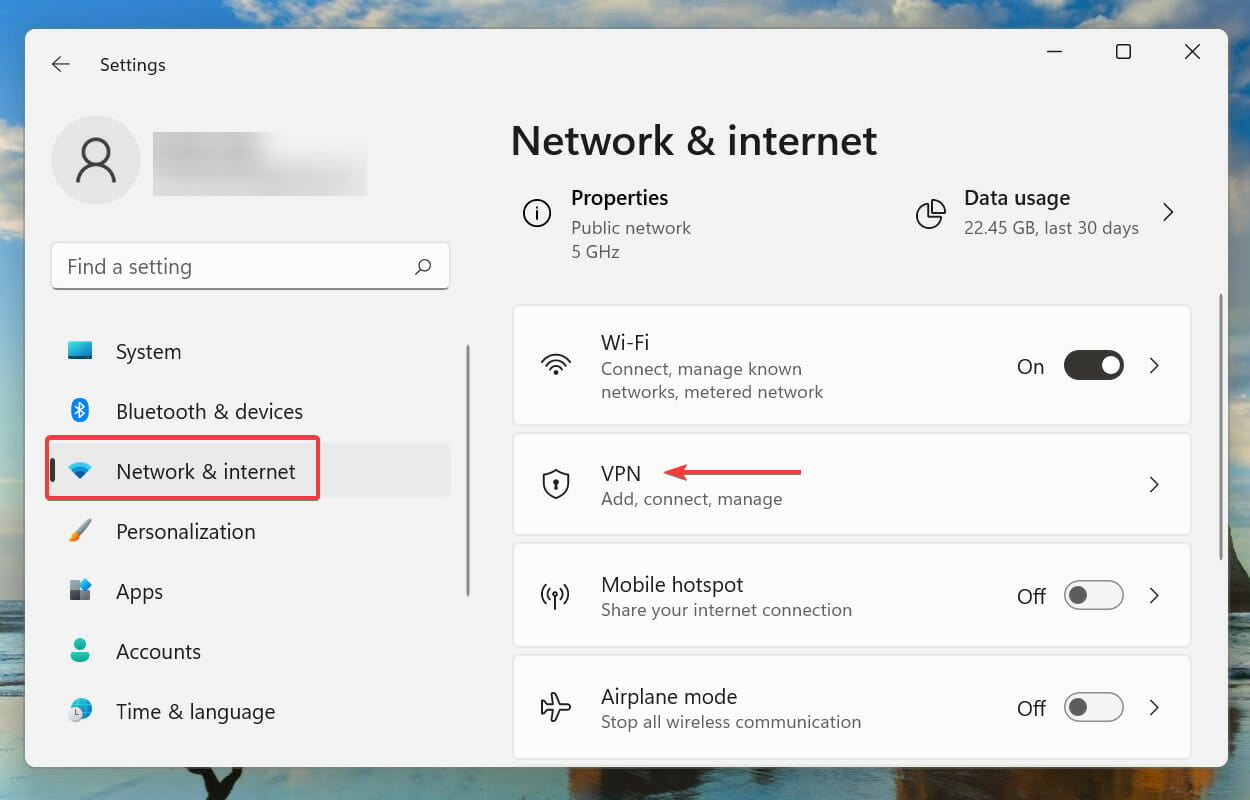
- Press Windows + I to launch Settings.
- Select Network & Internet tab from the navigation pane and click on VPN on the right.
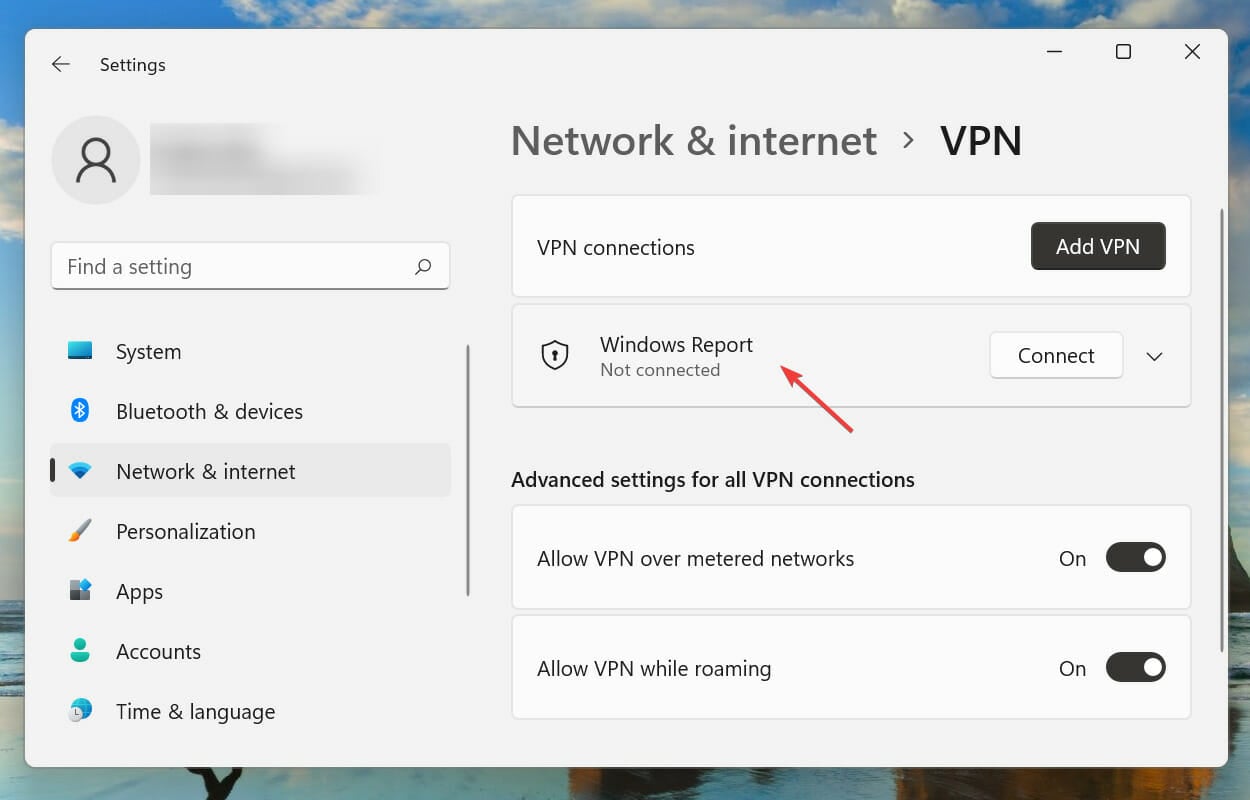
- Now, click on the currently added VPN.

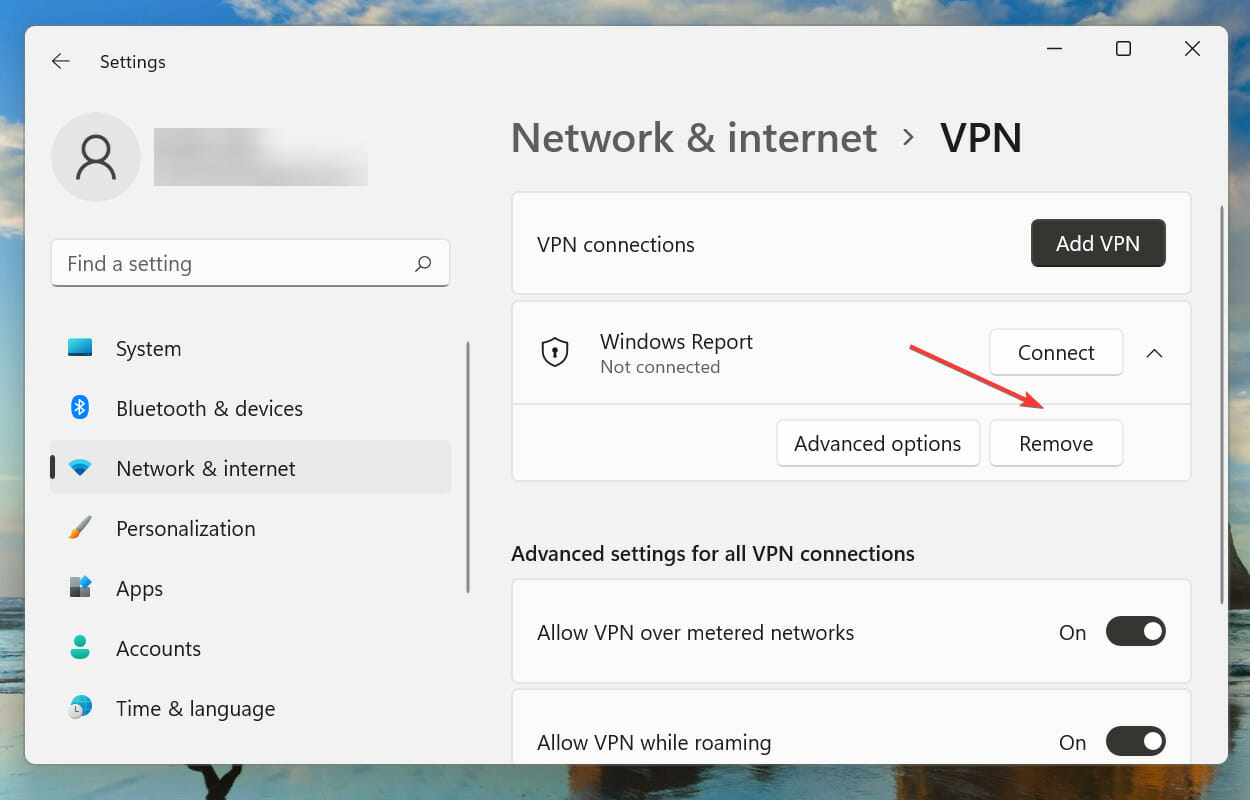
- Click on the Remove button.

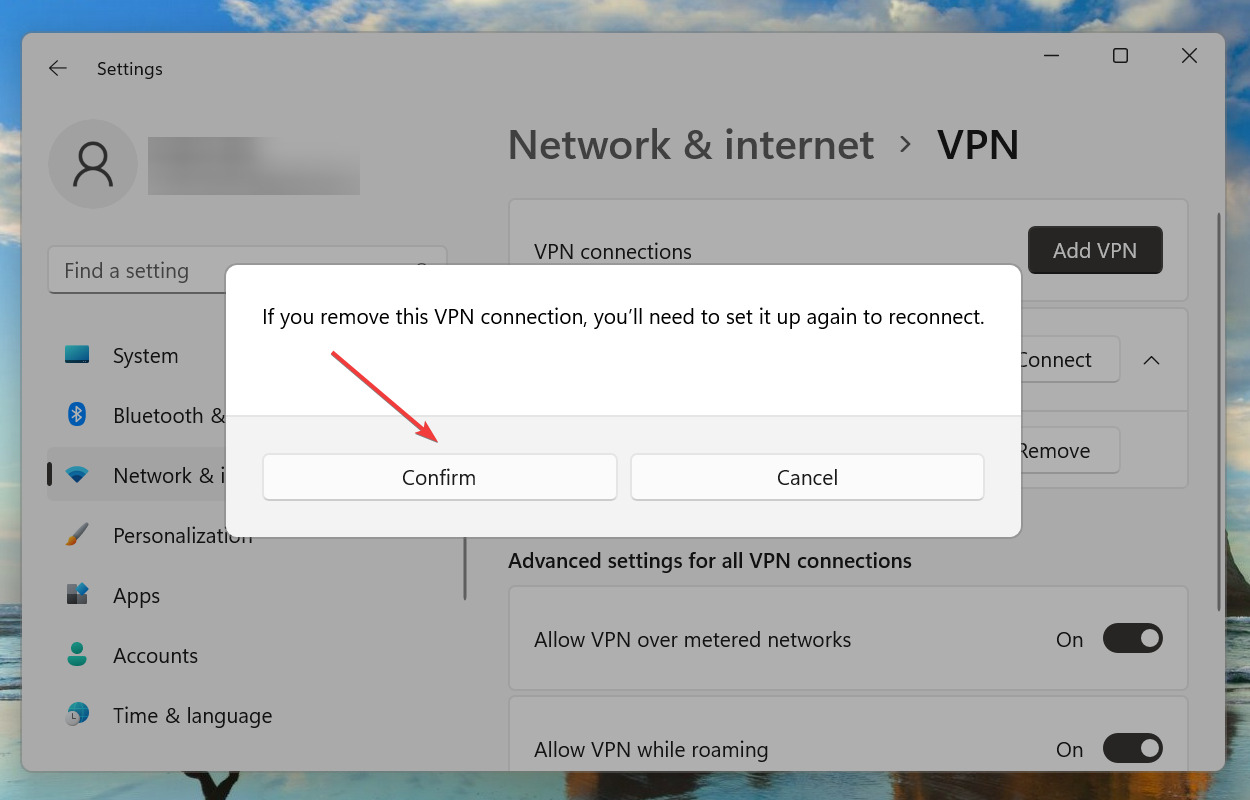
- Click on Confirm to approve the changes.


8. Reset network settings
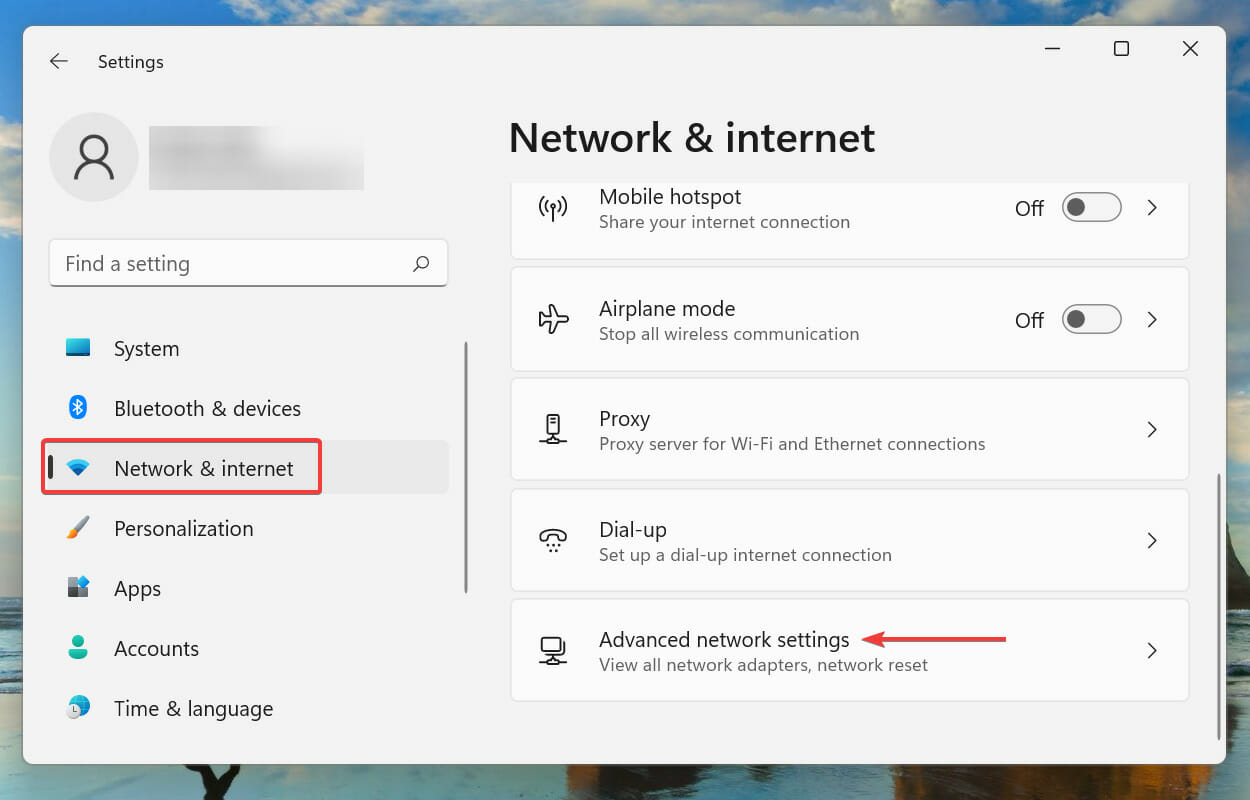
- Press Windows + I to launch Settings.
- Select Network & Internet from the navigation pane, and click on Advanced network settings on the right.
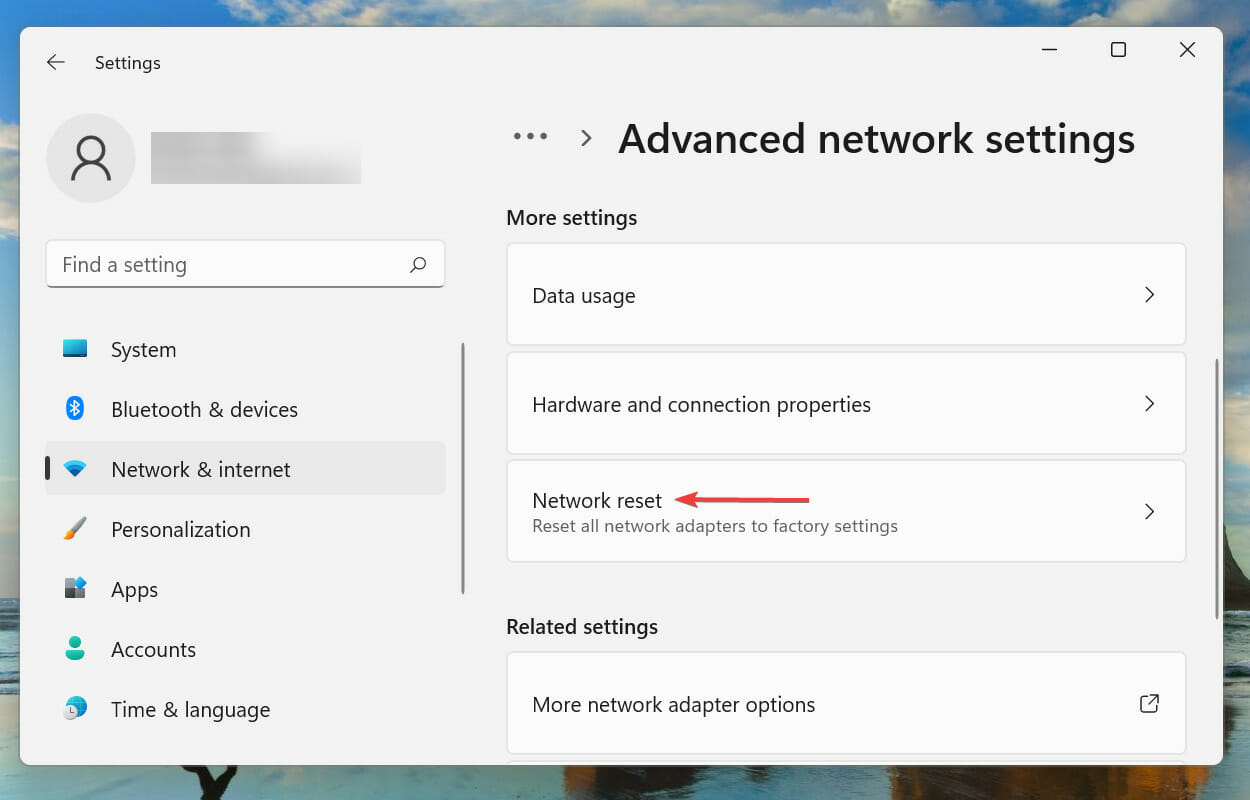
- Click on Network reset under More settings.

- Now, click on the Reset now button.

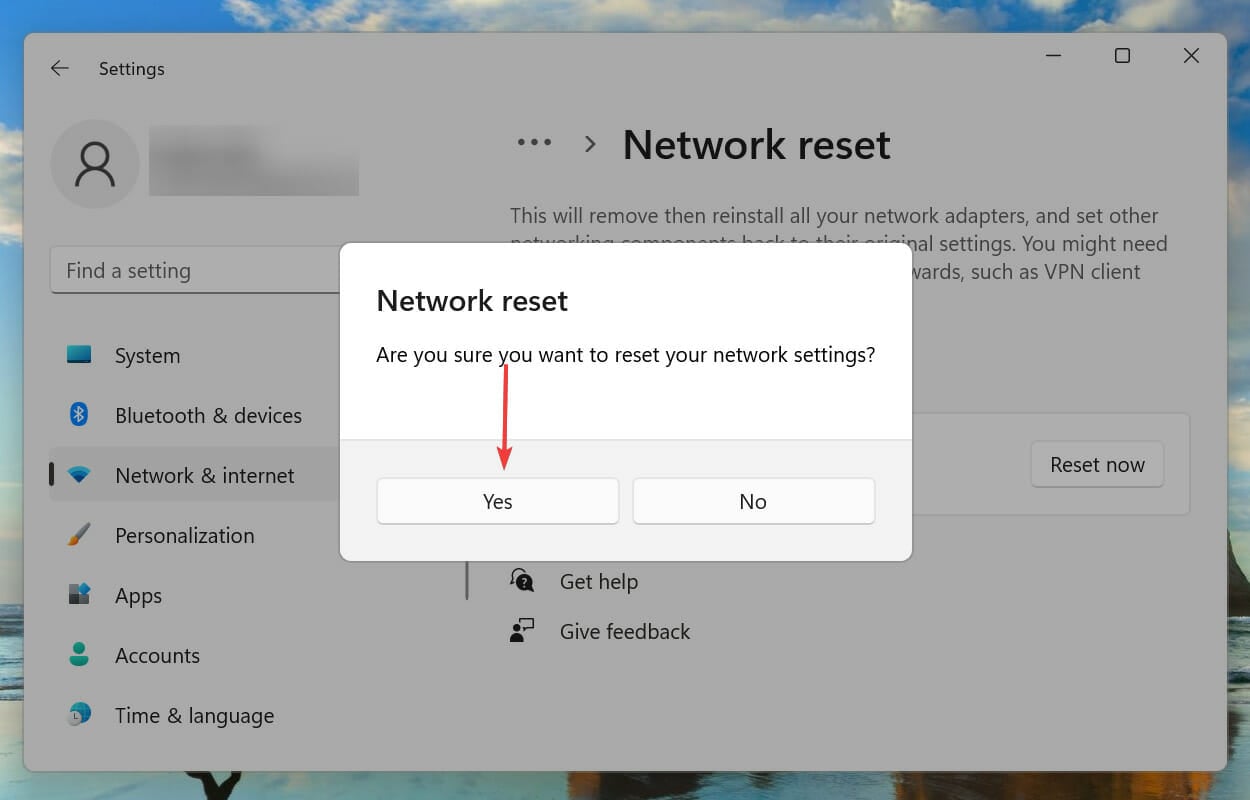
- Click Yes on the confirmation prompt that appears.

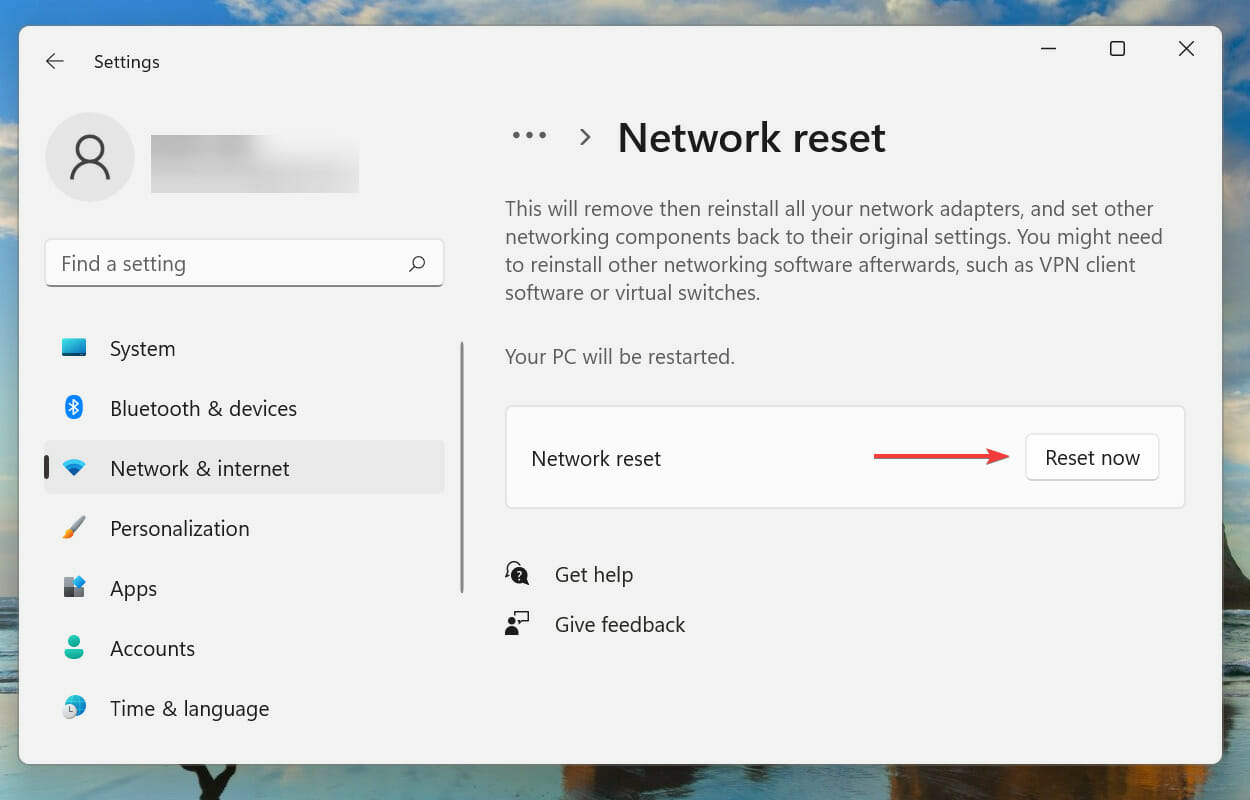

Before resetting the network settings, make sure you save any open files so as to avoid data loss since the computer would be restarted during the process.
After the reset, Windows 11 can’t connect to this network error should be fixed. This may also fix The network you are using may require you to visit its login page error.
Which is better, Ethernet or Wi-Fi?
If you are facing issues with the network, it’s recommended that you switch to Ethernet or wired networks. These are far more reliable than Wi-Fi networks, where the connections are wireless.
Though both have their sets of pros and cons, Ethernet offers higher reliability. Until a few years ago, Ethernet also trumped Wi-Fi in terms of speed, but with the advancements in technology, the latest generation routers offer a speed at par with Ethernet.
There’s also the option to enable eSIM on Windows 11 and use the cellular data network if the feature is available on your device.
That’s all there’s to this network connection error and its most relevant fixes. In case these don’t work, you can try to reset Windows 11 to its factory settings or roll back to Windows 10 if the problem started after upgrading to Windows 11.
If you started encountering Internet issues after updating Windows, find out how to easily fix them.
Also, learn to solve issues with the hotspot in Windows 11 or resolve the Wi-Fi disappearing problem, in case the icon doesn’t appear altogether.
Tell us which fix worked for you and your experience with Windows 11 in the comments section below.
Read our disclosure page to find out how can you help Windows Report sustain the editorial team. Read more


Improve this guide


User forum
1 messages