Microsoft LifeCam Not Working: Fix It with 6 Easy Tips
Outdated or faulty drivers can cause this issue
4 min. read
Updated on
Read our disclosure page to find out how can you help Windows Report sustain the editorial team. Read more
Key notes
- If the Microsoft LifeCam camera is not working, it might be due to faulty USB ports or outdated drivers.
- Some users might need to change certain Windows 10 camera settings to fix the problem.
- Changing port connections and unplugging other devices are also recommended.
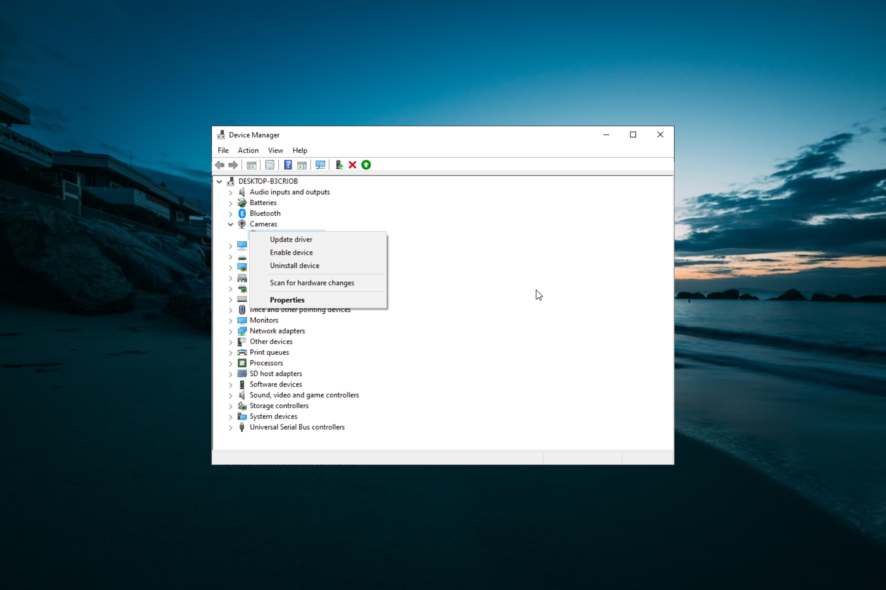
LifeCam Studio is a webcam for Windows PCs. Despite being a Microsoft camera, it is not without flaws some users are reporting that LifeCam is not working on their PC.
If that’s happening to you as well, rest assured that there are quite a few solutions that you can try to apply. Just take a closer look at the fixes in this guide.
Why is Microsoft LifeCam not working?
Listed below are some of the notable reasons Microsoft LifeCam might not be working:
- Outdated driver: The most prevalent reason Microsoft LifeCam keeps disconnecting is an outdated or faulty driver. You can fix this by reinstalling or updating the driver.
- Issues with the hardware: Sometimes, this problem might occur because of some minor hardware and connection issues. You need to run the Hardware and Devices troubleshooter and check your connections to solve the problem.
- Outdated PC: If Microsoft LifeCam cinema doesn’t work properly on your PC, it might due to an outdated operating system. The solution is to update your PC.
How to fix a LifeCam Studio webcam that’s not working?
Here’s what to do first:
- Your camera might work fine when connected to a different USB port. Try plugging your Lifecam camera into alternative USB ports on your PC.
- Also, make sure you plug the LifeCam directly into the PC without any USB hub.
- Aside from that, it would be best if you also unplugged any superfluous USB devices. The mouse is one notable exception, but make sure you unplug things like external hard drives, USB hubs, etc.
1. Update your PC’s USB port and camera drivers
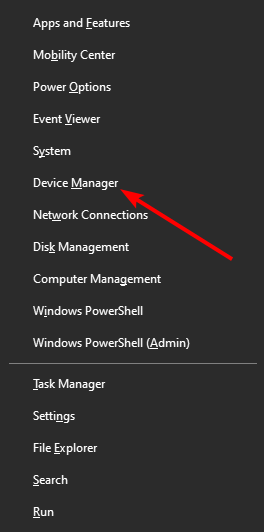
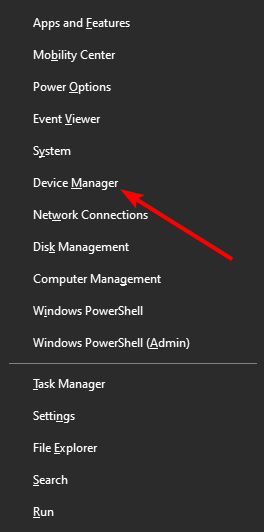
- Press the Windows key + X and select the Device Manager option.
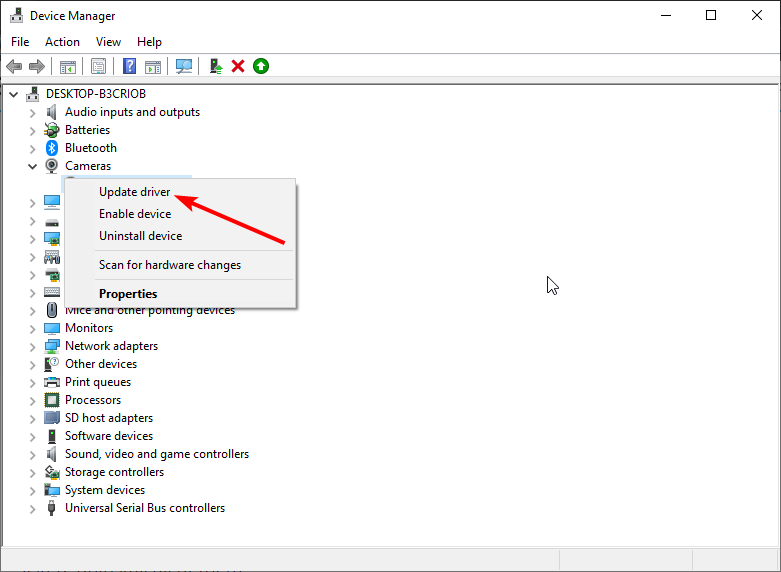
- Double-click the Imaging devices or Cameras option to expand it.
- Now, right-click LifeCam and select Update driver.
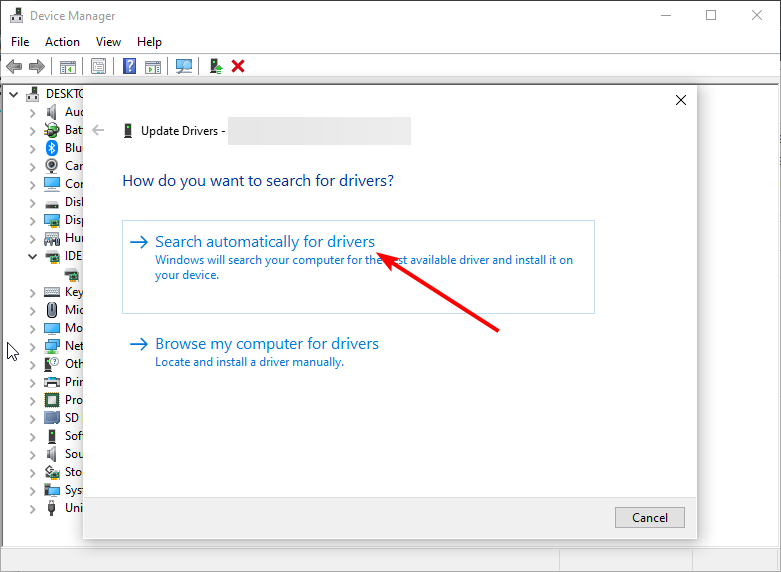
- Finally, choose Search automatically for drivers and install any available updates.
It’s recommended to scan your PC with driver updater software to identify outdated or faulty USB ports or webcam drivers.
A driver updater utility will show you all the devices you need to update drivers for. Then you quickly update drivers for devices with the driver updater software.
2. Run the Hardware and Devices troubleshooter
- First, make sure your LifeCam Studio camera is connected to your PC.
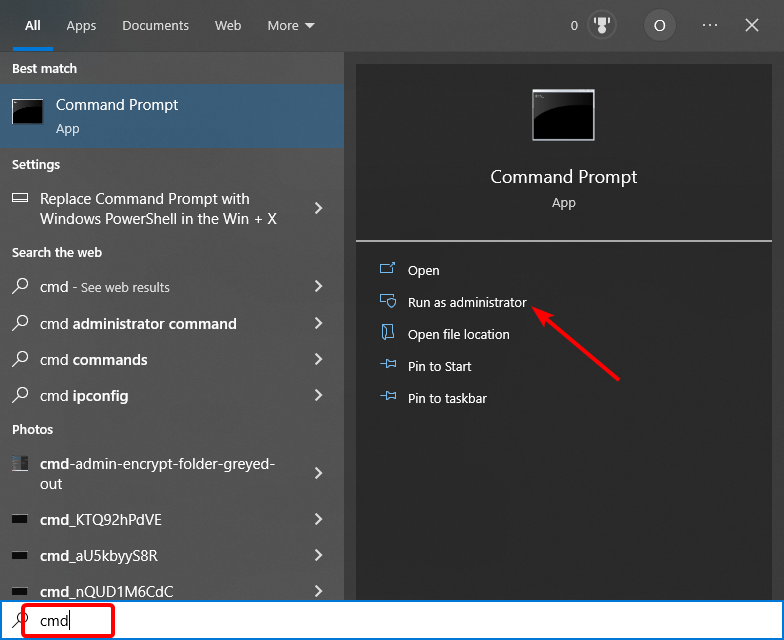
- Press the Windows + S, type cmd, and click Run as administrator under Command Prompt.
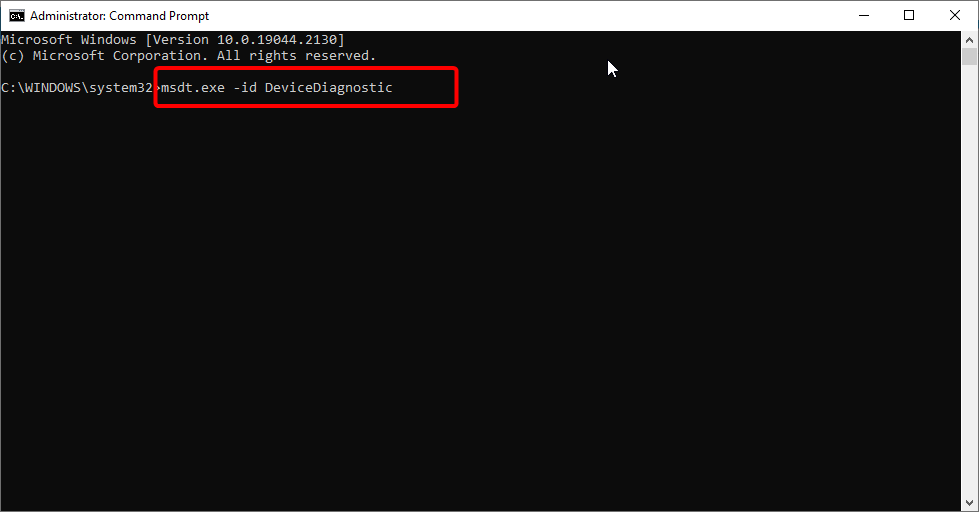
- Next, input this command and hit Enter:
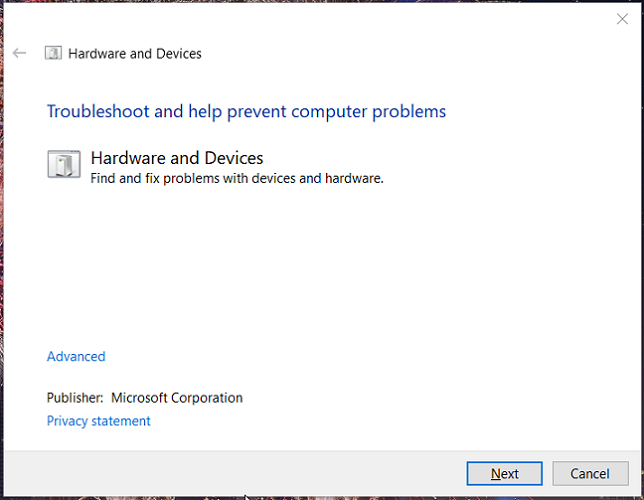
msdt.exe -id DeviceDiagnostic - Click Advanced in the Hardware and Devices troubleshooter window.
- Finally, check the Apply repairs automatically checkbox and click the Next button to resolve hardware issues with the troubleshooter.
3. Make sure the LifeCam webcam is enabled
- Right-click your Start button and select the Device Manager shortcut on the menu.
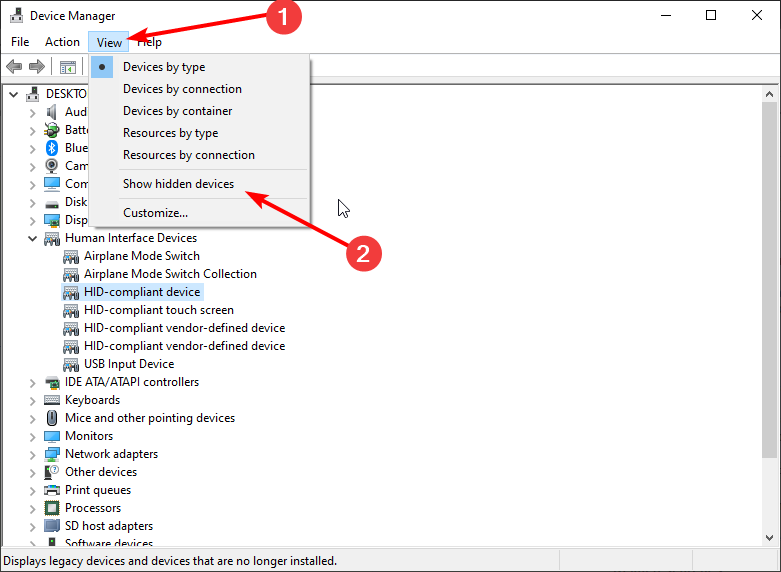
- Next, click the View menu and select Show hidden devices.
- Double-click the Imaging devices category, which usually includes Microsoft LifeCam Studio cameras. However, double-click the Cameras or Sound, video, and game controllers category if you can’t find it in Imaging devices.
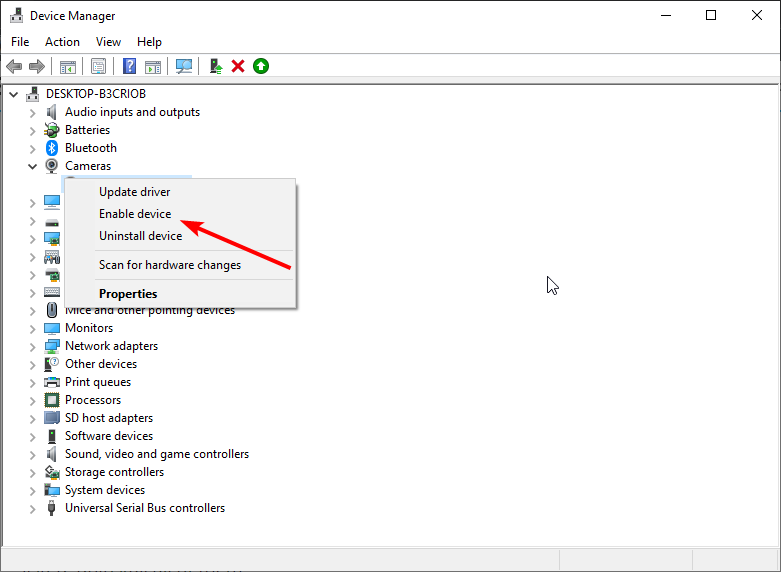
- Finally, right-click your LifeCam camera and select the Enable device option if that webcam is disabled.
4. Uninstall the LifeCam driver
- Launch Device Manager and expand the Imaging devices or Cameras section.
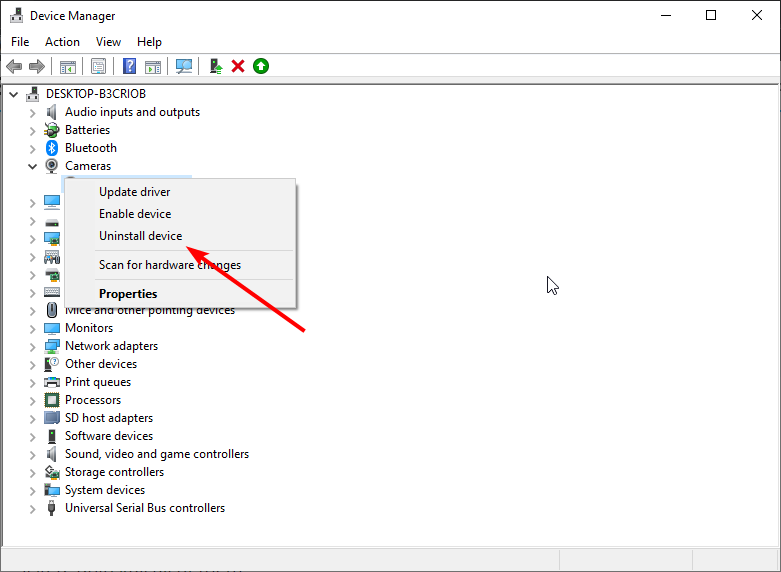
- Right-click the LifeCam device and select Uninstall device.
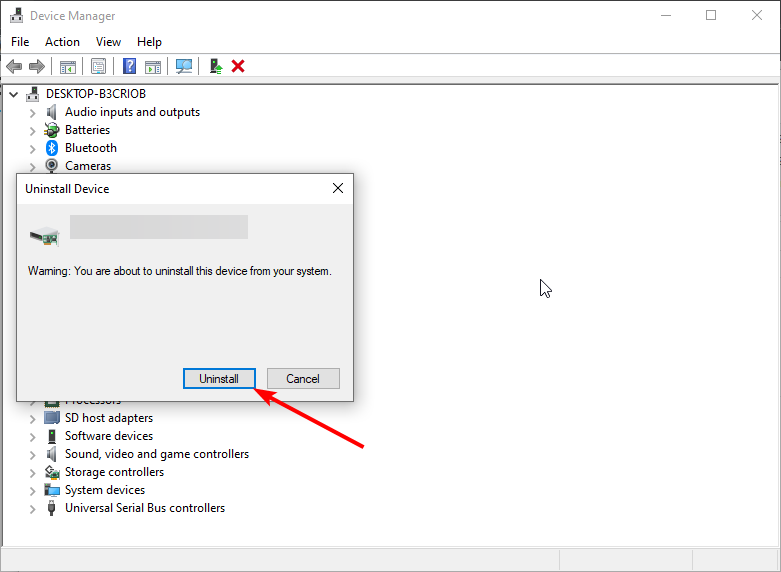
- Now, click the Uninstall button to confirm the action. If there are multiple LifeCam devices listed, uninstall all of them.
- Finally, restart your PC, and Windows will automatically reinstall the drivers.
5. Check your PC’s camera settings in Windows 10
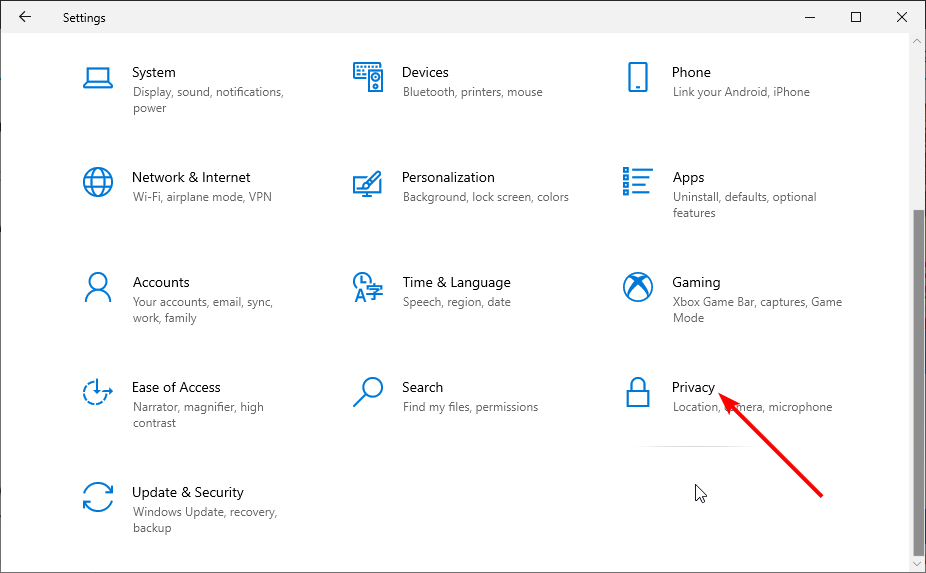
- Press the Windows key + I and select Privacy.
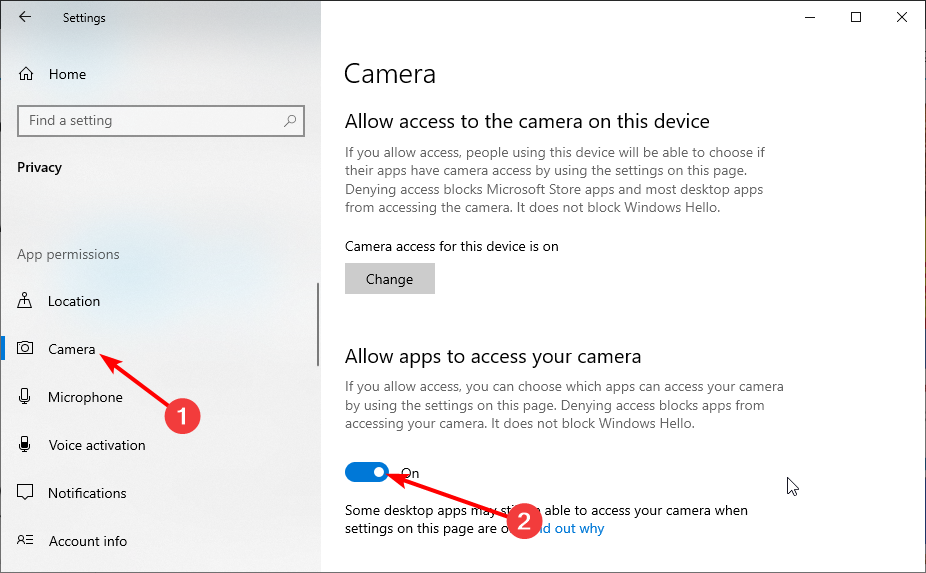
- Select the Camera in the left pane.
- Now, toggle the Allow apps to access your camera switch forward to enable it.
- Also, enable the listed camera apps you need to utilize LifeCam Studio with.
6. Update Windows 10
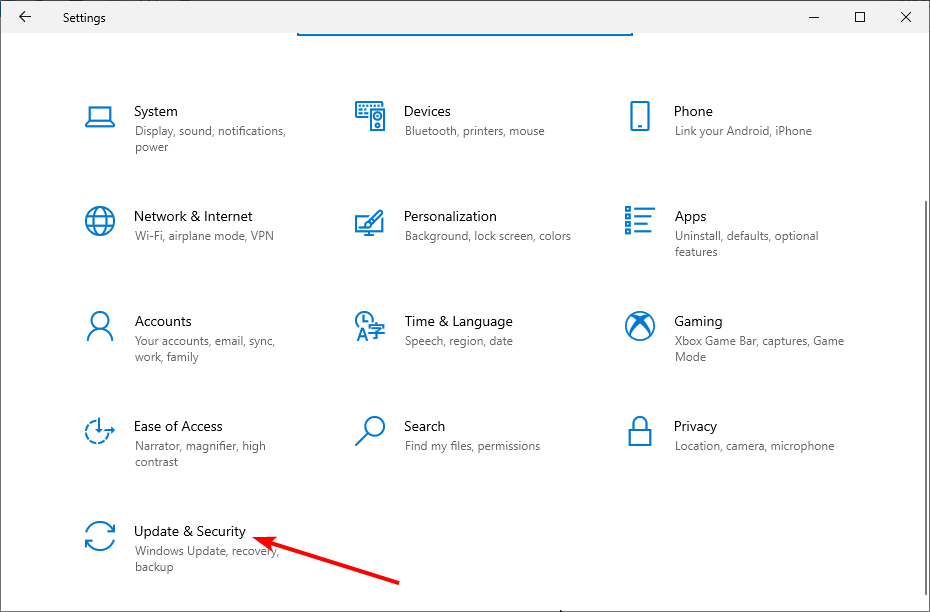
- Press the Windows key + I and select the Update & Security option.
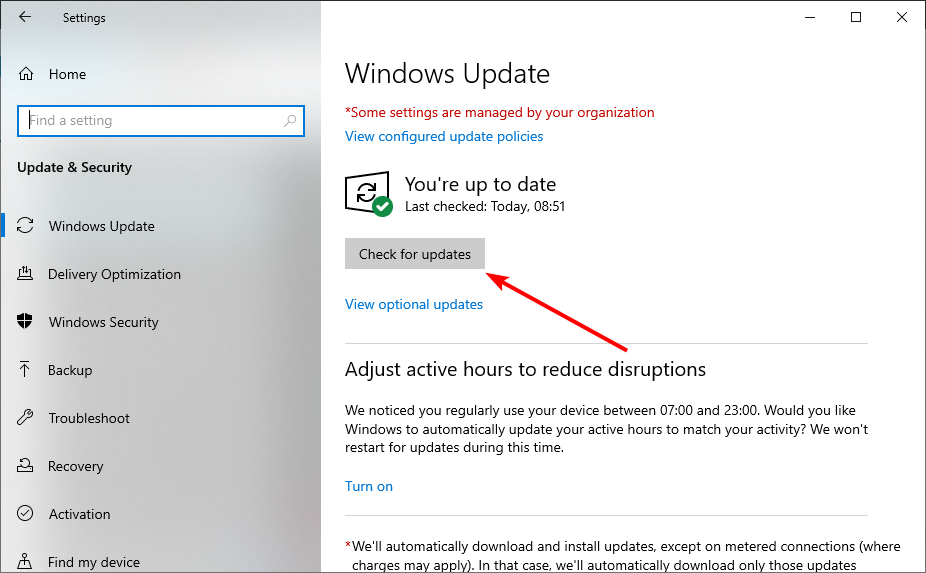
- Now, click the Check for updates button.
- Finally, download and install any available updates, including the optional ones.
The above resolutions might be enough to fix LifeCam Studio webcams not working for most users. If those resolutions aren’t enough, you can get in touch with a support agent via the Microsoft Contact Us page for more troubleshooting guidance.
And if you still happen to suspect a driver-related issue, just take a closer look at this guide dedicated to Microsoft LifeCam software and drivers.
Hardware troubleshooters might also come in handy for fixing LifeCams not working in Windows 10. Just let us know which method worked for you in the comments area below.
User forum
0 messages