6 Easy Ways to Fix Macbook Not Connecting to iPhone Hotspot
Adjusting your network settings fixes this issue

Today, we’ll walk you through tested steps that’ll help you if your MacBook doesn’t connect to your iPhone’s mobile hotspot. The usual suspects here are faulty settings, the hotspot name, and service availability.
Whether you’re getting a particular error like Unable to join, or your personal iPhone hotspot is not visible and not showing up, the steps below will help you sort this annoying issue out fast.
What to do if the MacBook is not connecting to the hotspot?
1. Adjust your network settings
- Try connecting with another device to your hotspot.
- If it manages to connect, open the connection settings to view the connection info.
- Look for IP address, network mask, and DNS settings.
- Next, open Apple menu and go to System Preferences.
- Navigate to Network.
- Click Advanced.
- In the menu next to Configure IPv4 select Manually.
- Next, enter the same data from Step 3. However, be sure to change the last number for the IP address by adding 10 to its last number.

- Also, don’t forget to set DNS in the DNS tab.
- Save changes.
Some users suggested using 1.1.1.1 as your DNS, so you can try that as well.
2. Change IPv6 settings
- Connect to your hotspot.
- On the connected device go to System Settings and then Network. Navigate to Details.
- Select TCP/IP and set Configure IPv6 to Automatically.

- Save changes.
IPv6 settings need to be properly configured; otherwise will cause all sorts of errors. A similar hotspot error can also happen when you try to connect your Windows PC to a mobile hotspot, all because of IPv6.
3. Remove the Wi-Fi service, restart and add your Wi-Fi service back
- Go to Apple > System Preferences > Network.
- From the left side select the Wi-Fi service.
- Now click the cog icon at the bottom-left and choose Make Service Inactive.

- Click the minus icon to delete the service and click Apply.
- Restart your Macbook.
- Once the device restarts repeat Step 1.
- Click the plus sign and select Wi-Fi.
- Click the Create
- If required, enter your Wi-Fi settings.
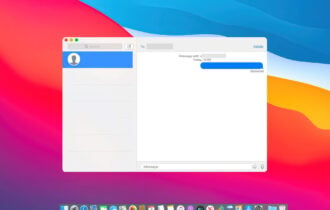
4. Change phone name
- Turn off your hotspot.
- Next, go to Settings. Select General and then About.
- Tap your phone name and change it to something other than iPhone. Make sure it doesn’t have spaces or special characters.
- Save changes and try again.
5. Other tips
- Ensure you’re on the Hotspot screen when trying to connect.
- Keep Auto Lock disabled since it can put hotspot on standby.
- Before we try anything, enable the maximize compatibility in hotspot settings.
- Creating a new local in macOS network settings can also help.
- If you have any Bluetooth device connected, disconnect it before starting hotspot on your phone.
- Disable mobile VPN before using the hotspot.
- Select Other network when connecting and enter hotspot’s name and password and it should connect.
There you go, these are a couple of solutions that you can try out if your Macbook isn’t connecting to a hotspot. If you found our solutions helpful, let us know in the comments section.
This isn’t the only network issue, many reported that they can’t turn on WiFi on Mac and that MacBook is not showing any Wi-Fi networks.
Using Windows and having a similar issue? Check our tested guide on how to fix the inabiility to setup mobile hotspot on Windows.
Before you leave, you might be interested in what to do if MacBook Wi-Fi is not configured.
Read our disclosure page to find out how can you help Windows Report sustain the editorial team. Read more


Improve this guide
User forum
27 messages