How to Make a GIF in GIMP: 2 Easy Methods
Learn to create your perfect GIFs using the GIMP software
2 min. read
Updated on
Read our disclosure page to find out how can you help Windows Report sustain the editorial team. Read more
Key notes
- GIMP is an incredibly popular image editing software with thousands of users worldwide.
- This software can work with text, and in today’s article, we’re going to show you how to easily make a GIF using GIMP.
- The built-in Open as layers option in the app allows users to make GIFs using GIMP in just a few minutes.

GIMP is a great open-source photo editor, with an abundance of features. Speaking of which, did you know you can use GIMP to create GIFs?
That’s right, and in this short guide, we’re going to show you how to make a GIF in GIMP with a few simple steps.
If you don’t already have GIMP installed on your PC, you can simply download and install it by following the on-screen instructions.
How can I make a GIF using GIMP?
1. Use the Open as Layers option
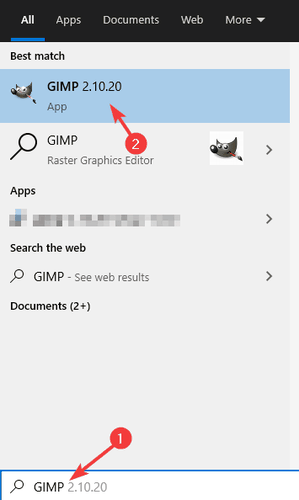
1. Launch the GIMP app on your device.
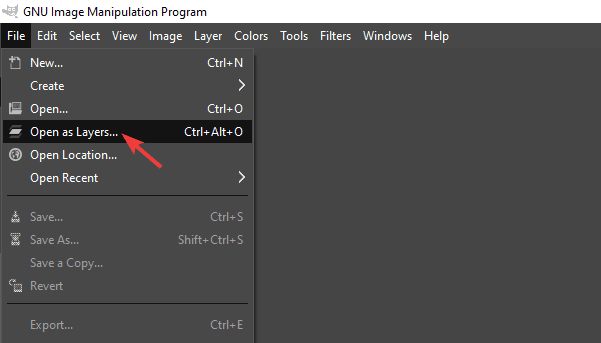
2. When GIMP opens, click on File and then choose the Open as Layers option.
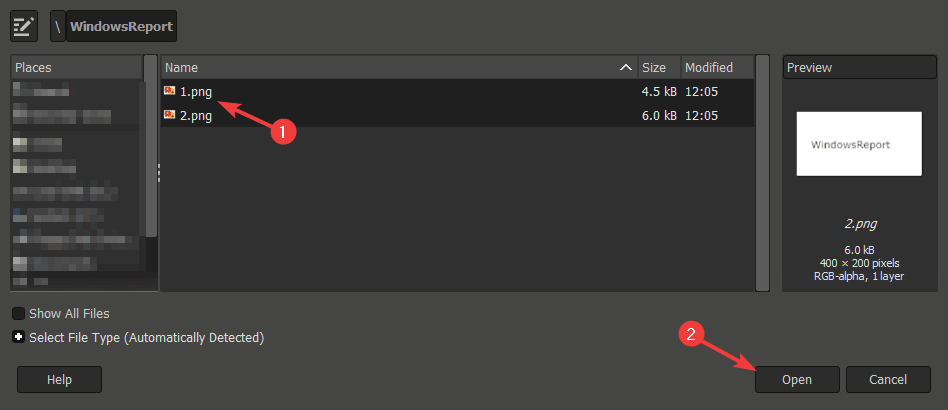
3. Now you need to locate the images that you want to use in your GIF, select them all, and then click on Open.
You can select multiple images by holding Shift and clicking on individual images.
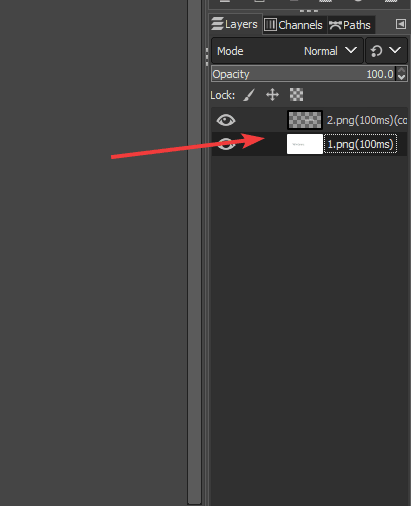
4. From the Layers tab, select the desired order for the images you just selected. The GIF will start with the image on the bottom layer, and continue with those above it. Basically, it goes from the bottom to the top.
5. Click on Filters > Animation > Optimize (for GIF).
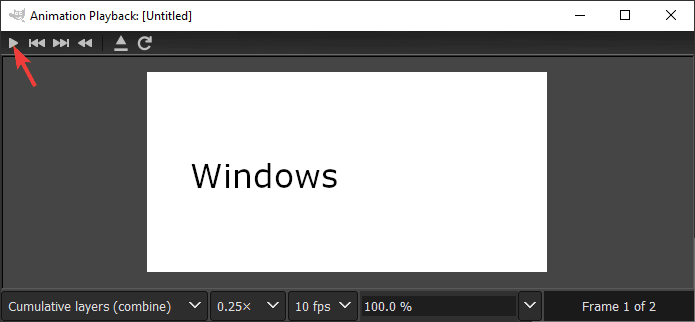
6. Now click on Filers > Animation > Playback.
7. A new window will now appear. Click the Play button to preview your GIF.
8. If the order of frames isn’t good, you’ll need to rearrange them in the Layers section, as described in step 4.
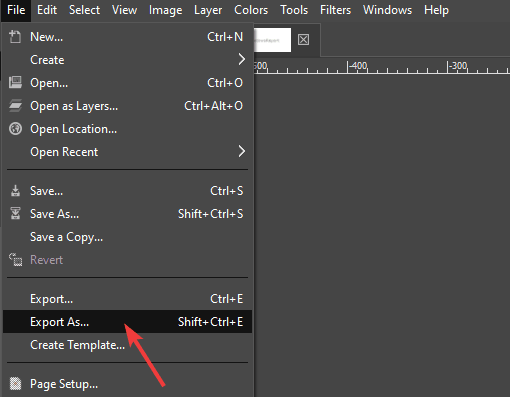
9. To save your GIF file go to File > Export as.
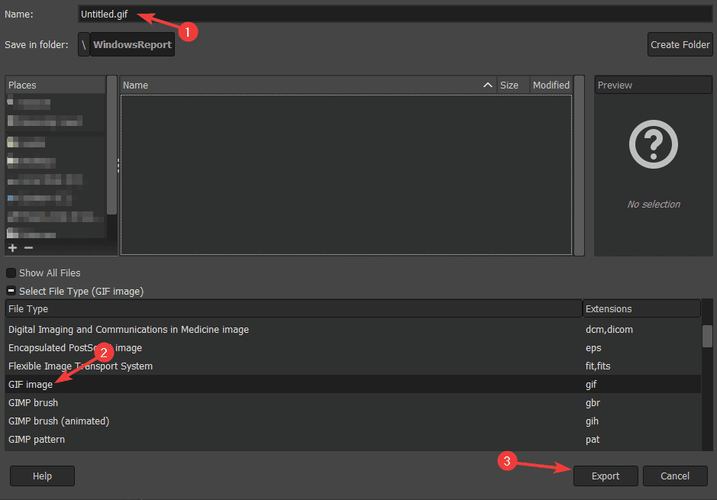
10. Select the save location, give the GIF a name, and set the File Type to GIF.
11. Now click Export.
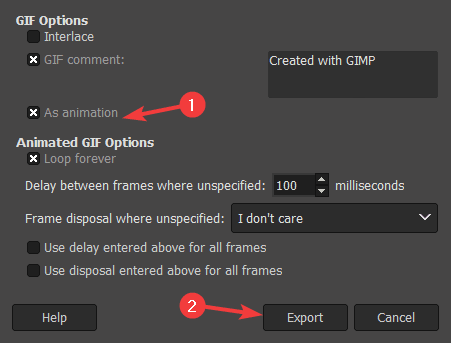
12. Select As animation and Loop forever. You can adjust other settings if you want as well, from this window.
13. Click on Export.
The first and best way to make GIFs using GIMP is by using the app’s built-in Open as layers option. This method is incredibly simple because it automates the entire process.
However, in order to use this method effectively, you need to create images that will be used in the GIF beforehand.
2. Create an animated GIF using GIMP from scratch
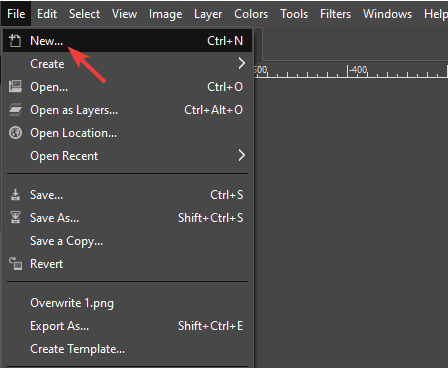
- Open GIMP and go to File > New.
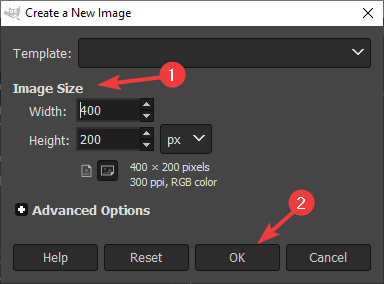
- Set the desired size for the image and click on OK.
- Add the desired graphics to the GIF.
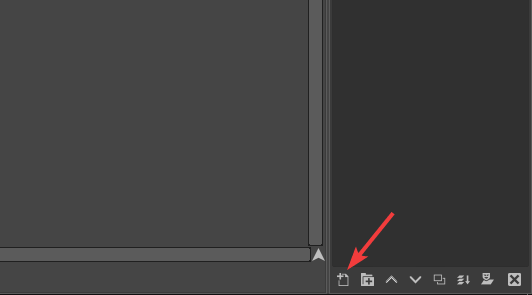
- After you’re satisfied with the current frame, create a new layer, and add the desired graphics to it.
In some cases, you might have to right-click the current layer and choose the Duplicate layer option to get the desired results. - Repeat these steps until you get the desired results. If needs be, rearrange your layers accordingly.
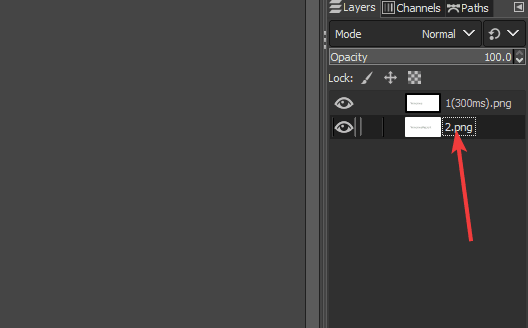
- Double-click the layer name and add (300ms) in its name. This is used to set the delay between the next layer. Of course, you can change the value as you want.
- Repeat the previous step for all available layers.
- After you’re done, you can preview your animation by going to Filters > Animation > Playback.
- If everything is in order, you just need to export your animation like in the previous solutions.
This method might be more complicated because you need to create your frames on the fly and set the delay time for each frame.
If you don’t have your frames created, this method will be perfect for you, and you’ll master it with a bit of trial and error.
Creating GIF animations in GIMP is simple, and as long as you have your frames created, you can just import them as layers and you’re good to go.
On the other hand, if you want to create layers from scratch, you’ll have to manually create or duplicate each frame.
In case you find GIMP too complicated to use, you might want to consider using a specialized GIF maker and viewer software.
We hope you managed to make a GIF in GIMP using our guides. Let us know in the comments section if you encountered any difficulties.


User forum
0 messages