Fix: Microsoft Defender Threat Service Has Stopped
Disconnect your work/school accounts as it could be the problem
5 min. read
Updated on
Read our disclosure page to find out how can you help Windows Report sustain the editorial team. Read more
Key notes
- Windows Defender works great with additional antiviruses, but if you install too many, they may cause complications with each other.
- One of these issues is that the threat service may stop working. If so, we recommend disabling other antivirus programs or any other solution listed in this article.
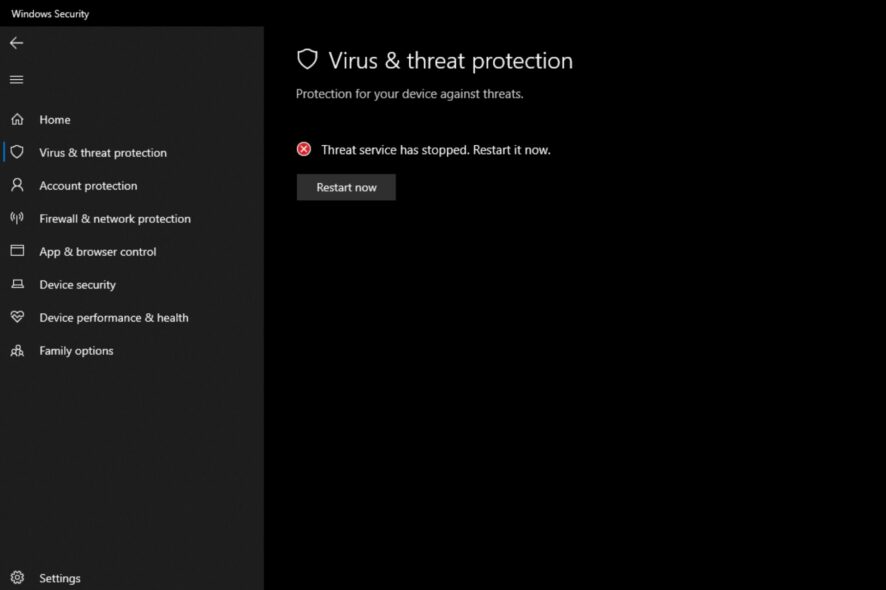
Windows Defender is a built-in security solution in Windows. It protects your system from malware and other types of harmful threats. This makes Windows Defender your only security against threats if you have no additional antivirus programs.
If Windows Defender is not working, your system is exposed to many vulnerabilities. Usually, when the threat service has stopped, you can click on the Restart button, but this doesn’t always work. Luckily, we put together this article to help you resolve this issue.
Why has Windows Defender stopped working?
The most common reasons for Windows Defender to stop working are:
- Conflicting antivirus programs – If you use many different antivirus solutions, one of them is likely causing the Microsoft Defender threat service to stop.
- Organization restrictions – If you’re using a work or school account, your organization may have enforced Group Policy settings that prevent you from making some changes.
- Corrupt user profile – Your current user profile may be corrupted, especially if someone made changes to the registry.
- Viruses – It is also possible that a virus infection has taken hold of your computer and overpowered Microsoft Defender threat service hence why it has stopped.
How do I restart the Windows threat service?
Try these basic workarounds before moving to the complex solutions below:
- Disable or uninstall your third-party antivirus. Ensure to remove any software leftovers.
- Check for updates. Make sure that your computer is receiving updates from Microsoft through Windows Update.
- Run an anti-malware scan on your computer.
- Run the DISM and SFC scans.
- Restart your computer. A restart can sometimes clear up issues caused by software and hardware settings.
1. Restart Windows Defender service
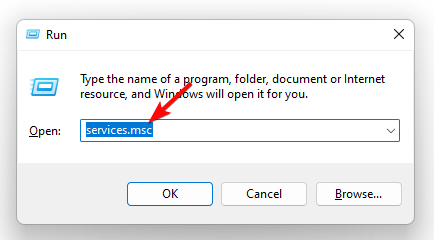
- Hit the Windows + R keys to open the Run command.
- Type services.msc in the dialog box and hit Enter.
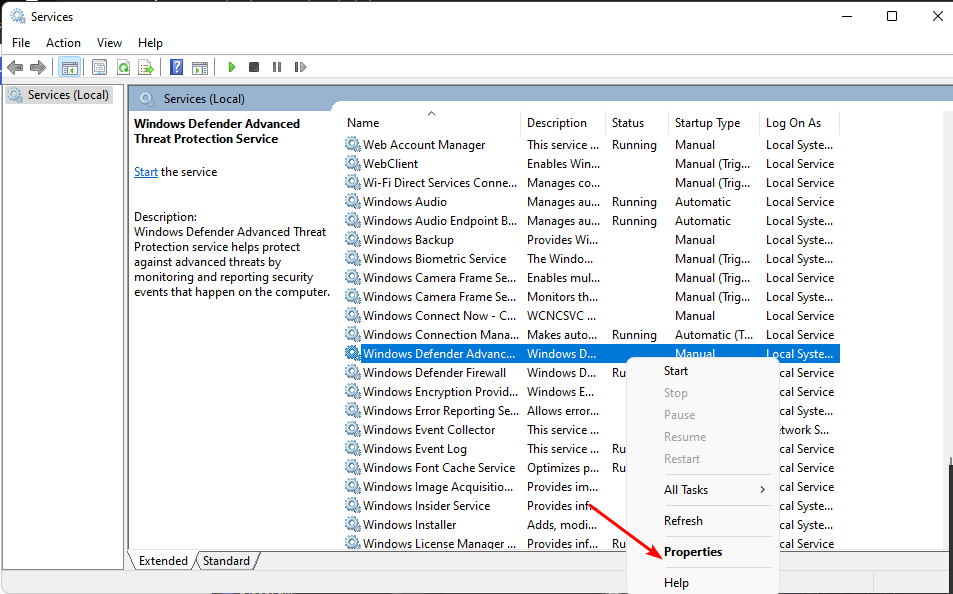
- Navigate to Windows Defender Advanced Threat Protection Service, right-click on it, and select Properties.
- Under Startup type, click on the drop-down menu, select Automatic, click on Start, then Apply and OK to save the changes.
2. Disconnect work/school accounts
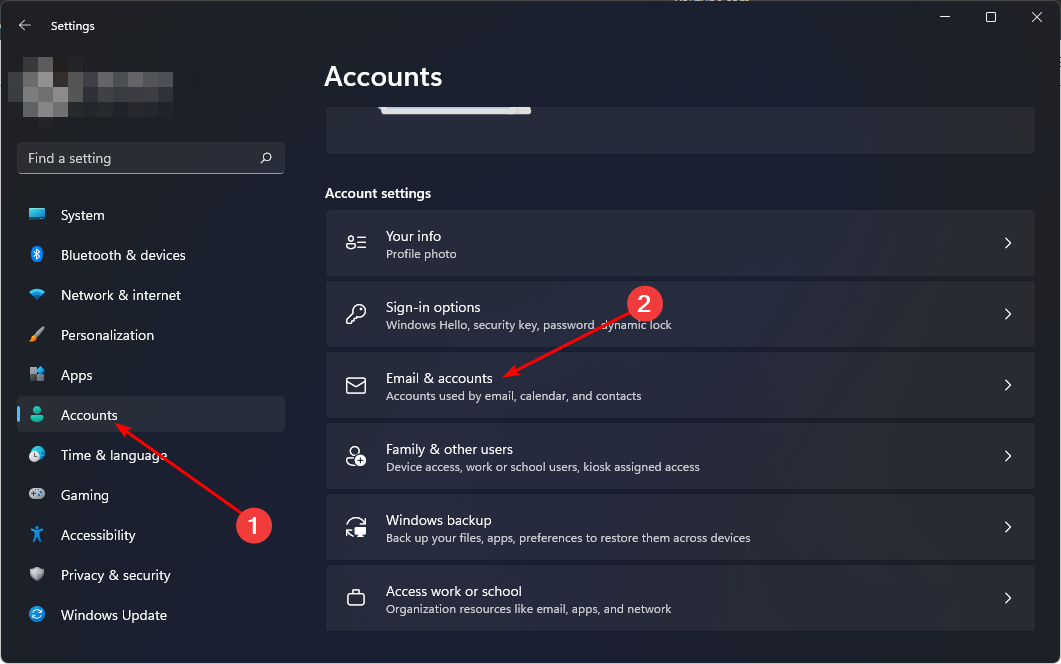
- Hit the Windows key and click on Settings.
- Click on Accounts on the left pane, then select Access Work & School.
- Hit the Disconnect button.
3. Repair Microsoft Defender
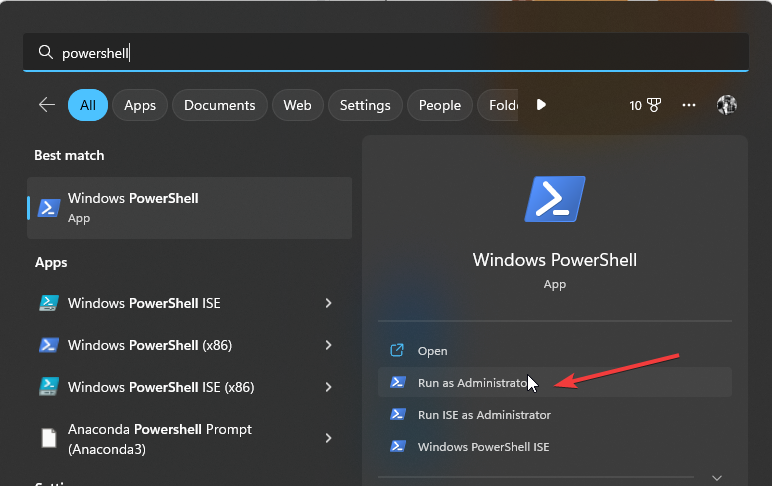
- Hit the Windows key, type Powershell in the search bar, and select Run as administrator.
- Type the following command and hit Enter:
Get-AppXPackage | Foreach {Add-AppxPackage -DisableDevelopmentMode -Register "$($_.InstallLocation)\AppXManifest.xml"} - Restart your PC and check if the error is present.
4. Reinstall Microsoft Defender
- Hit the Windows + R keys to open the Run command.
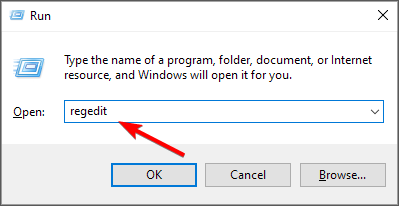
- Type regedit in the dialog box and hit Enter to open the Registry Editor.
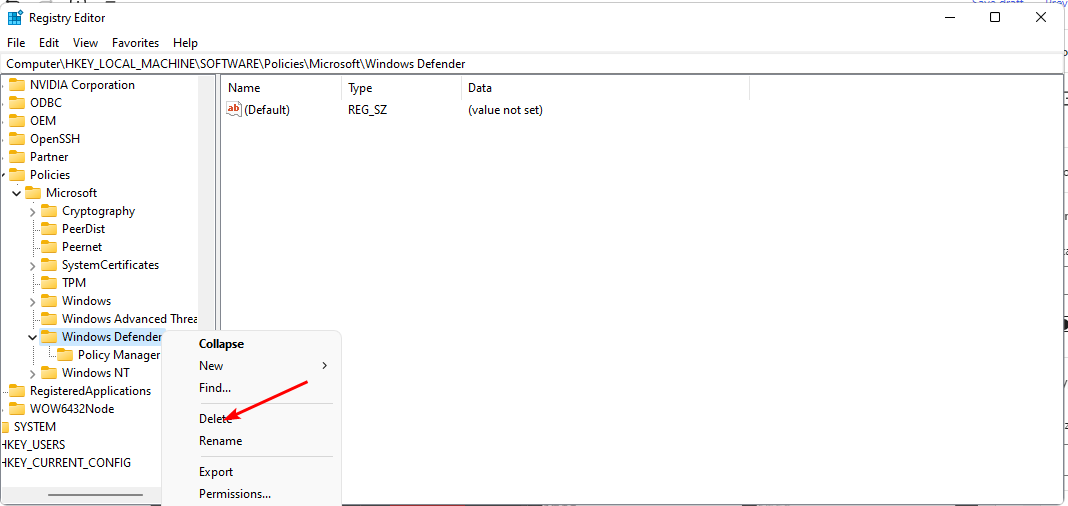
- Navigate to the following location:
Computer\HKEY_LOCAL_MACHINE\SOFTWARE\Policies\Microsoft\Windows Defender - Delete the Windows Defender folder and restart your PC.
5. Create a new user account
- Hit the Windows + R keys to open the Run command.
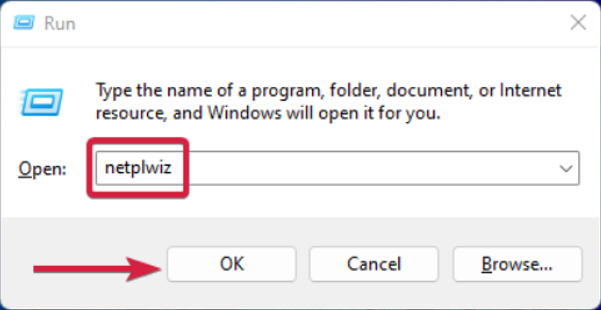
- Type netplwiz and press Enter.
- Click Add in the User Accounts window.
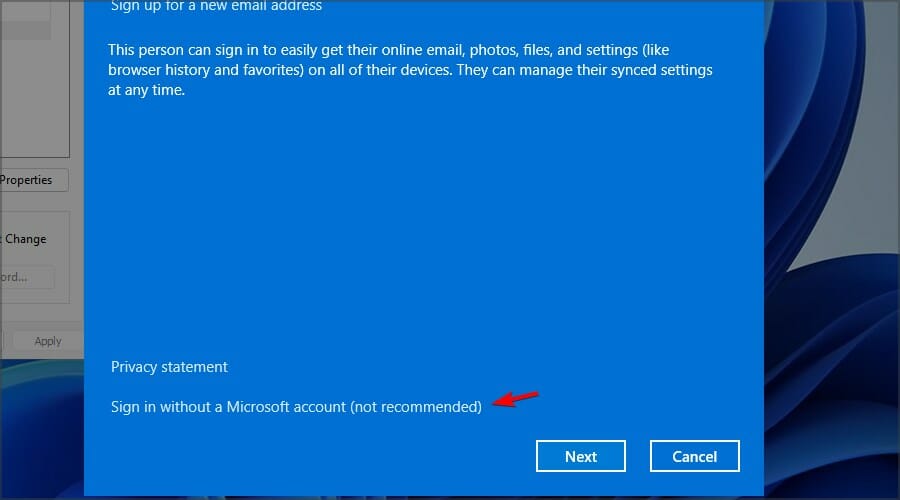
- Select Sign in without a Microsoft account (not recommended).
- Click on the Local account button.
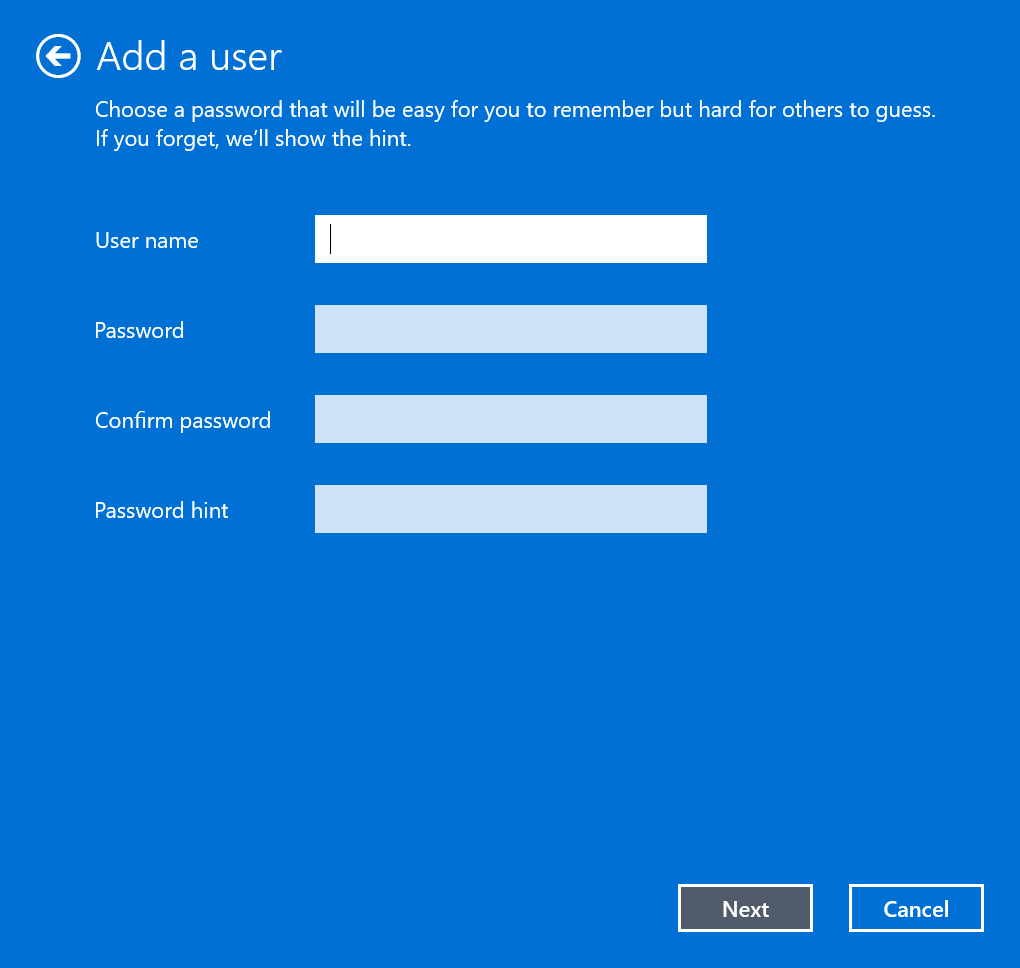
- Enter a username and password (optional) for the new user account, and a hint, in case you set a password. Once done, click on Next.
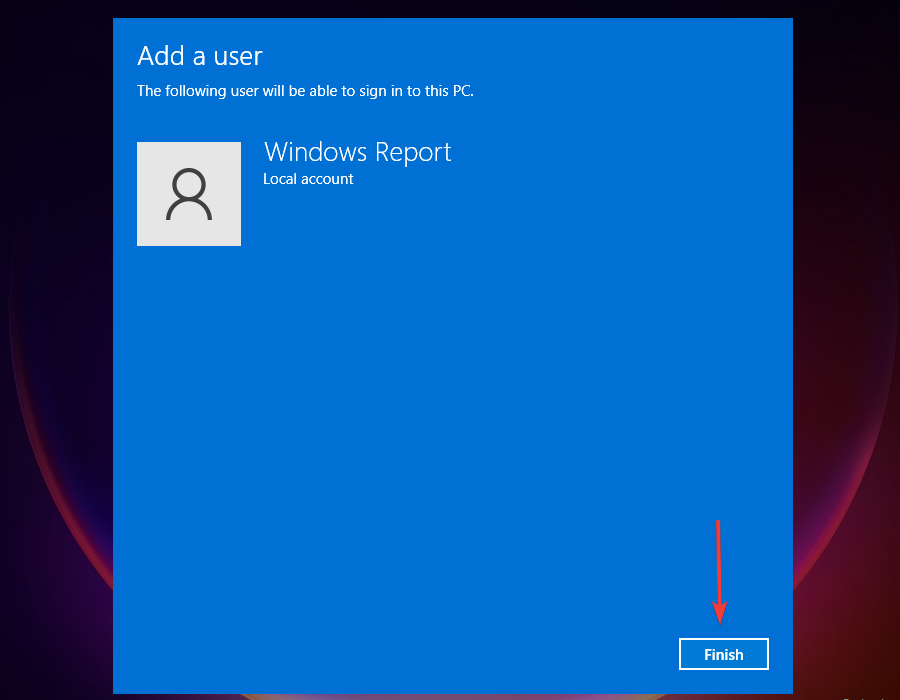
- Click on Finish to create the Local account.
Once you log in to the new profile, test it and check whether the Microsoft Defender threat service runs smoothly. If it is, you can conclude that your previous profile was corrupt and take the necessary steps to repair it.
6. Re-enable Windows Defender
- Hit the Start Menu icon, type cmd in the search bar, and select Run as administrator.
- Type the following command and hit Enter:
REG DELETE "HKLM\SOFTWARE\Policies\Microsoft\Windows Defender" /v DisableAntiSpyware
7. Delete Group Policy restrictions
- Hit the Windows key, type cmd in the search bar, and click Run as administrator.
- Type the following commands and press Enter after each one:
reg delete "HKCU\Software\Microsoft\Windows\CurrentVersion\Policies" /freg delete "HKCU\Software\Microsoft\WindowsSelfHost" /freg delete "HKCU\Software\Policies" /f reg delete "HKLM\Software\Microsoft\Policies" /freg delete "HKLM\Software\Microsoft\Windows\CurrentVersion\Policies" /freg delete "HKLM\Software\Microsoft\Windows\CurrentVersion\WindowsStore\WindowsUpdate" /freg delete "HKLM\Software\Microsoft\WindowsSelfHost" /f reg delete "HKLM\Software\Policies" /freg delete "HKLM\Software\WOW6432Node\Microsoft\Policies" /freg delete "HKLM\Software\WOW6432Node\Microsoft\Windows\CurrentVersion\Policies" /freg delete "HKLM\Software\WOW6432Node\Microsoft\Windows\CurrentVersion\WindowsStore\WindowsUpdate" /f
Deleting the above registry entries will disable the settings managed by your organization and give you more control of your system. You may receive errors when running some of them, but this should not cause alarm as it just means those entries are not on your PC.
We recommend performing a System Restore if you’ve tried all these solutions, but none seem to work. This can help you roll back to a previous point where Windows had no issues.
If you had not created a restore point, try a clean install of Windows. This could help you restart Windows afresh with no issues. With such issues, it is important to consider whether Windows 11 needs an antivirus program.
Let us know if you have solved this issue in the comment section below.





User forum
0 messages