FIX: Microsoft Flight Simulator X fatal error in Windows 10/11
Key notes
- Some users have stated that a fatal error occurred error message appears when they try to launch Microsoft Flight Simulator X.
- That same error message can pop up for users with the Flight Simulator X: Steam Edition or DVD version. This guide will help you fix the problem.
- We recommend our Gaming section if you're looking for other simulators or games.
- If you're looking for more tech troubleshooting guides, the Fix Hub is ideal for you.

Microsoft Flight Simulator X is still among Windows’ most beloved flight games. Yet, some users have stated that a fatal error occurred error message pops up when they try to launch FSX.
Consequently, those users can’t get the game running.
That same error message can pop up for users with the Flight Simulator X: Steam Edition or DVD version.
Update: Microsoft released the sequel title, Flight Simulator 2020 and many users reported problems with installing and running the game.
Six potential resolutions for Flight Simulator X fatal error
1. Get a new uiautomationcore.dll file for Flight Simulator X
- First, open DLL-Files.Com in a browser.
- Enter uiautomationcore.dll in that website’s search box, press the Search DLL file button, and click uiautomationcore.dll to open the page shown directly below.

- Then click Download to download a 32 or 64-bit uiautomationcore.dll. If you’re running Flight Simulator X on a 32-bit Windows platform, you’ll need a 32-bit DLL.
- The file saves as a compressed ZIP. So, extract the uiautomationcore.dll ZIP by opening it in File Explorer and clicking Extract all.

- Then click the Browse button to choose a folder to extract the ZIP to.
- Click the Extract all button.
- Next, open the folder that you extracted the ZIP to in File Explorer.
- Thereafter, move the uiautomationcore.dll file into the Microsoft Flight Simulator X folder that includes FSX.EXE. The path for that folder might be
Program Files/Microsoft Games/Microsoft Flight Simulator X
2. Run Flight Simulator X in Compatibility Mode and as Administrator
- First, click the File Explorer button on the taskbar.
- Then open the Flight Simulator X folder.
- Right-click FSX.EXE and select Properties to open its properties window.

- Select the Compatibility tab shown in the snapshot directly below.
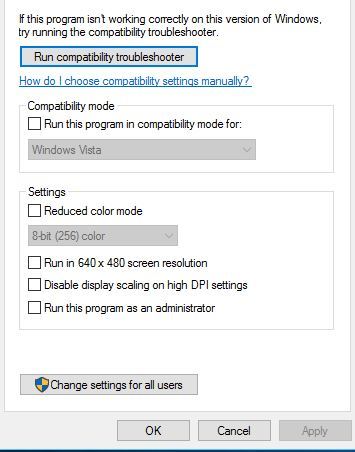
- Select the Run this program in compatibility mode for option.
- Then select Windows XP Service Pack 2 on the drop-down menu.
- In addition, select the Run this program as an administrator option.
- Select the Apply option.
- Click OK to close the window.
3. Reinstall Flight Simulator X
Uninstall Flight Simulator X using Advanced Uninstaller PRO 12
- Click Download Now on Advanced Uninstaller PRO 12’s webpage to download the software’s setup wizard. Open the utility’s setup wizard to install Advanced Uninstaller.
- Launch the Advanced Uninstaller software.
- Click General Tools and Uninstall Programs to open the software’s uninstaller window.

- Select Flight Simulator X and click Uninstall.
- Click the Use the leftover scanner option on the dialog box window that opens.
- Select Yes to provide further confirmation.

- Thereafter, a window will open that shows users leftover registry entries and files. Click the Next button to erase all the selected leftovers.
- Select the Done option to finish.
- Restart Windows after uninstalling FSX.
- Then reinstall Flight Simulator X with the DVD.
Uninstall Flight Simulator X using Steam
- Steam users can uninstall FSX within Steam. Open Steam and click Library.
- Then right-click Flight Simulator X and selectUninstall.
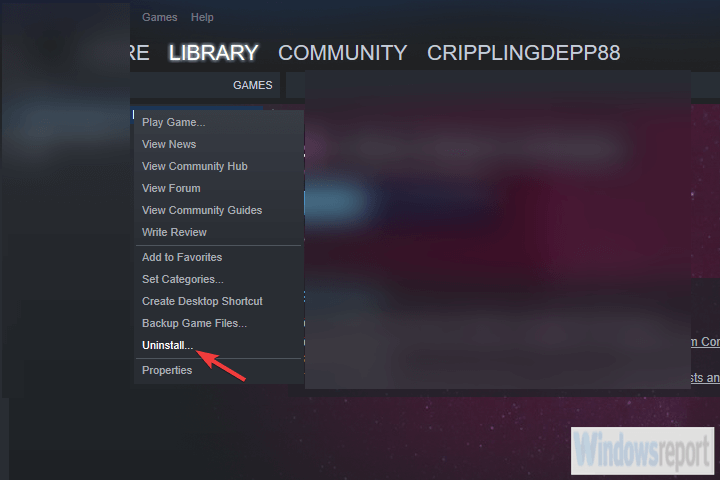
- Click Delete to confirm.
- Open this directory in File Explorer: C://Program Files (x86)/Steam/SteamApps/commonFSX.
- Then open the FSX folder, and press Ctrl + A to select all its content. Click the Delete button.
- Users might also find further leftover files at this path: C://Users<user name>/Documents/Flight Simulator X Files.
- Select all the files in the Flight Simulator X Files folder, and press the Delete button. Then delete the folder itself.
- Click Restart to reboot Windows 10.
- Open Steam and click Library. Right-click Flight Simulator X and select Install.
4. Free up some RAM
- Right-click the Start button and select Task Manager to open the system utility shown below.

- Select third-party software listed under Apps and Background processes, and click End Task to close them.
- Select the Start-up tab.

- Select the software to remove from the system startup, and press the Disable button.
- Restart Windows.
5. Verify the Game’s Cache
- Launch the Steam game client.
- Click Library to open the game list.
- Right-click Flight Simulator X and select Properties.
- Select the Local Files tab.

- Then select the Verify Integrity of Game Cache option.
6. Erase Flight Simulator X’s Log File
Some players have also stated that erasing FSX’s log file can fix the fatal error occurred error. Note, however, that the log file stores all the game’s pilot records.
To erase the log, open this path in File Explorer and delete the Logbook.BIN: C:Users<user name>DocumentsFlight Simulator X Files.
Those resolutions might fix Flight Simulator X’s fatal error for some players. However, they aren’t guaranteed to fix the issue for everyone.
This game post also includes further resolutions that could fix FSX: Steam Edition when it doesn’t run in Windows 10.
[wl_navigator]
Read our disclosure page to find out how can you help Windows Report sustain the editorial team. Read more


Improve this guide


User forum
0 messages