What is Mobsync.exe & How to Disable it
Disable the Offline files feature to disable mobsync.exe process
3 min. read
Updated on
Read our disclosure page to find out how can you help Windows Report sustain the editorial team Read more
Key notes
- Introduced in Windows Vista, the Microsoft Sync Center is part of Windows ever since.
- Mobsync.exe process is also included with installations of ActiveSync, SQL Server, and can also be activated when enabling the viewing offline feature in Internet Explorer.
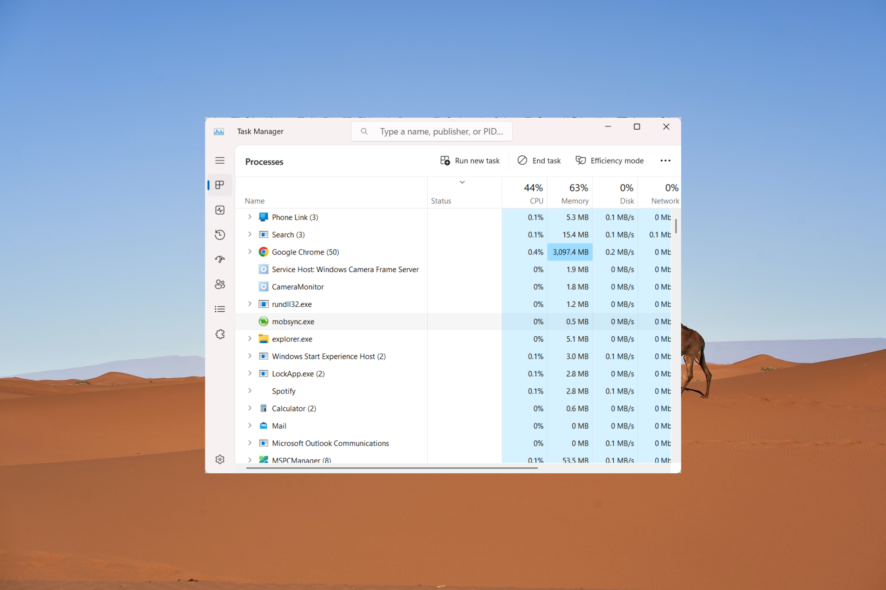
Mobsync.exe lets you work on files even when you’re not connected to the network. However, the Sync Center feature is unnecessary if your computer is always connected to the network.
If you encounter the mobsyc.exe process in the Task Manager among the many background processes and are confused about its purpose on your Windows computer, don’t worry! In this article, we will explain what mobsync.exe is and guide you on how to turn it off if needed.
What is Mobsync EXE used for?
Mobsync.exe is an executable file associated with the Microsoft Sync Center in Windows systems. The Sync Center is a feature in Windows that lets users sync files and data between their computer and other devices like mobile devices or network servers.
It automatically starts when you log in to your computer and runs in the background to keep a copy of your network files and folders for offline access. When you reconnect to the network, the Sync Center will synchronize all the files, folders, and any modifications made to them.
Should I disable mobsync.exe?
Mobsync.exe helps sync files between your computer and network, keeping everything up to date. If you often use sync features and need files synced, it’s best not to disable mobsync.exe.
But if you don’t use sync or it slows down your system, you can disable it to improve your PC performance. Note that disabling mobsync.exe can free up resources, but it will stop syncing your files and folders.
How do I disable mobsync.exe process?
1. Disable Sync Center via Control Panel
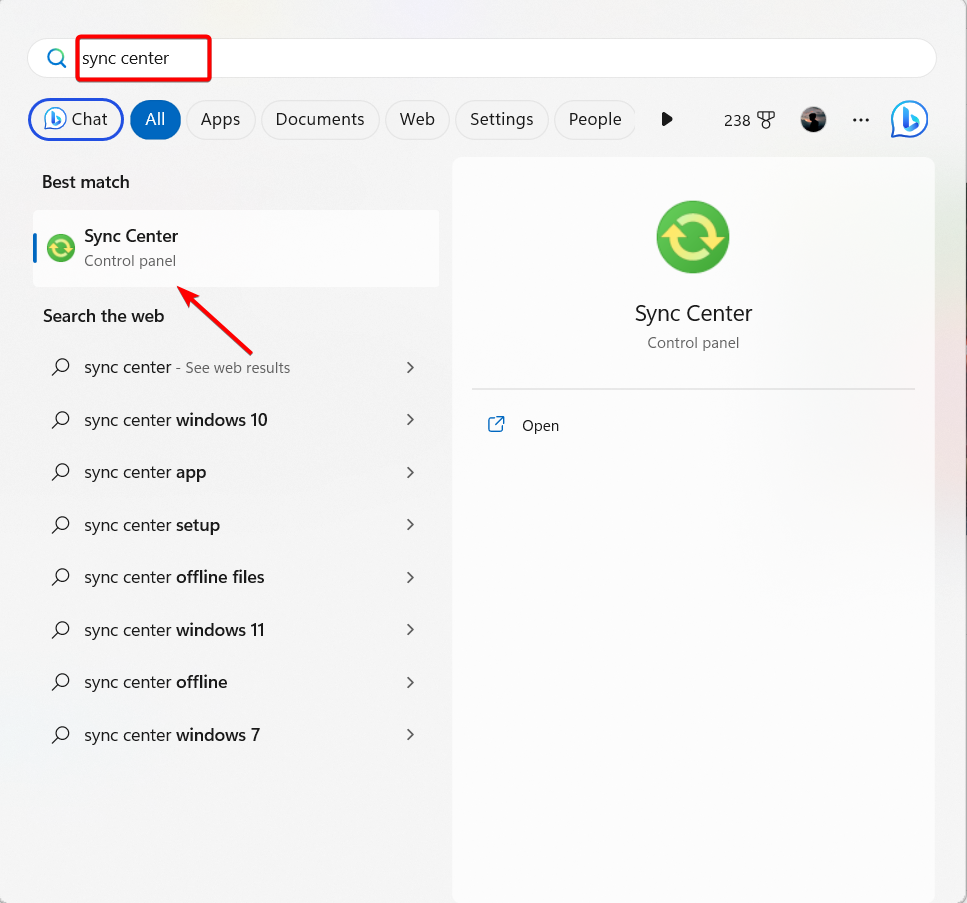
- Open the Start menu and type Sync Center in the search bar.
- Click on Sync Center from the search results.
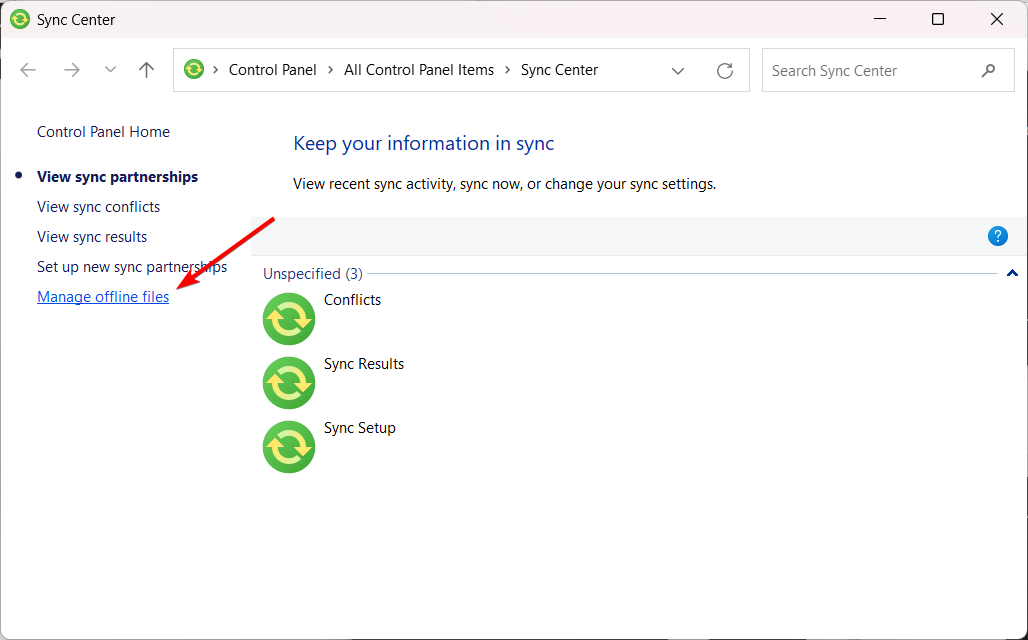
- In the left-hand pane of the Sync Center, click on Manage offline files.
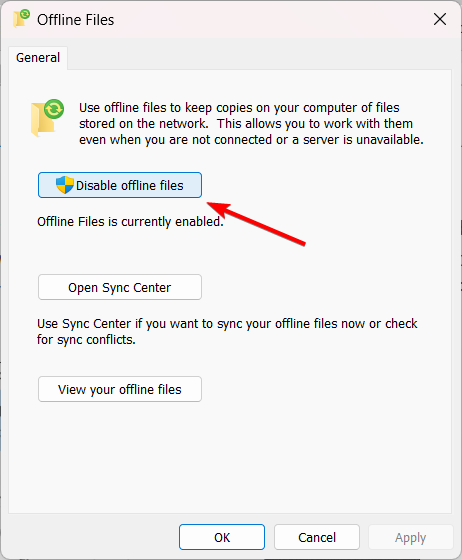
- Click on the Disable offline files button.
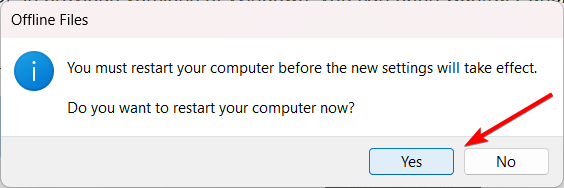
- Click Yes in the confirmation dialog box to restart your computer for the changes to take effect.
Disabling offline files will disable mobsync.exe and prevent it from running in the background.
Remember that this will also disable the Sync Center feature and any associated synchronization functionality.
2. Disable Portable Device Enumerator Service
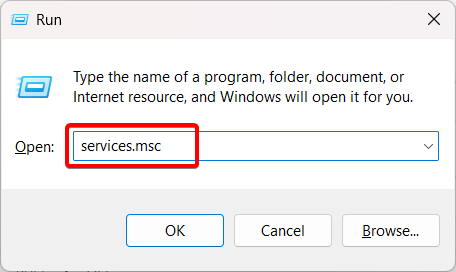
- Press Windows + R, type services.msc, and click on OK.
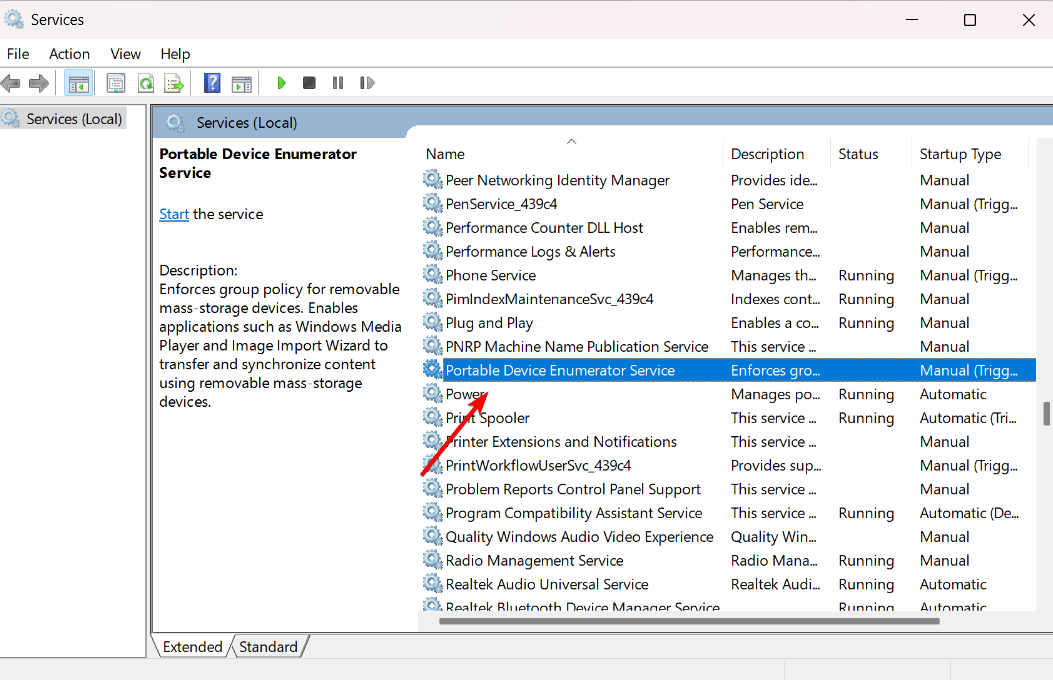
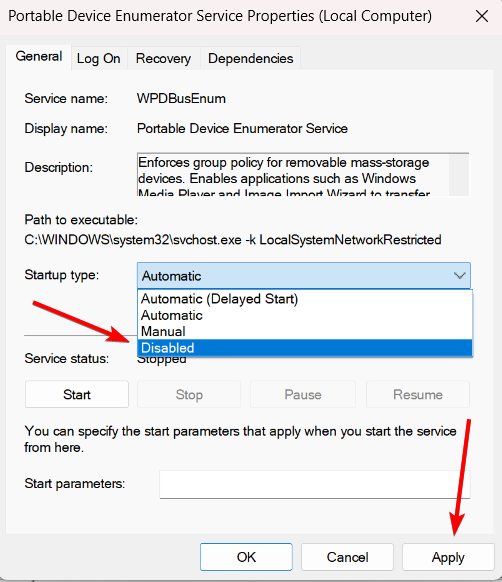
- Find the service named Portable Device Enumerator Service and double-click on it.
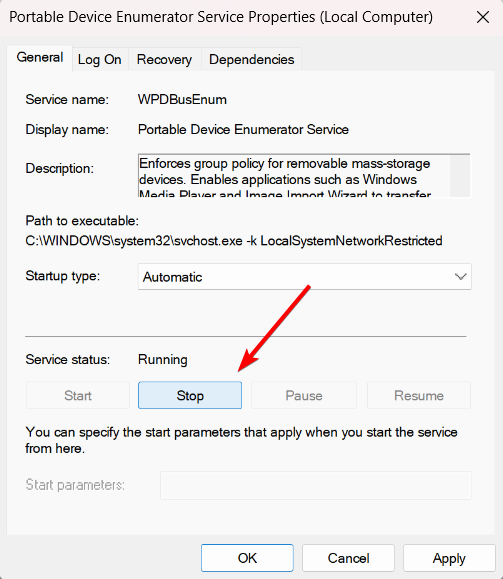
- Click the Stop button to terminate the process.
- Then, set the Startup type to Disabled and click Apply.
- Restart your computer to stop the mobsync.exe at the start-up.
3. Disable Sync Center using Group Policy Editor
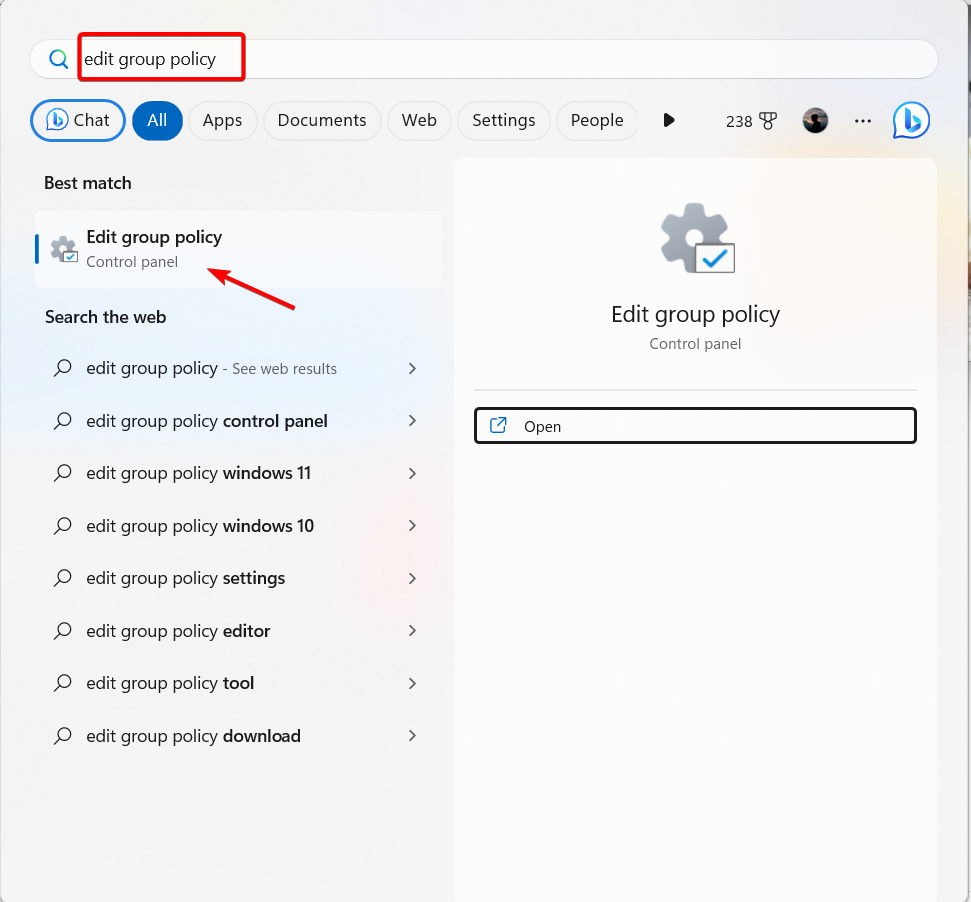
- Open the Start menu, search for Edit group policy, and open it.
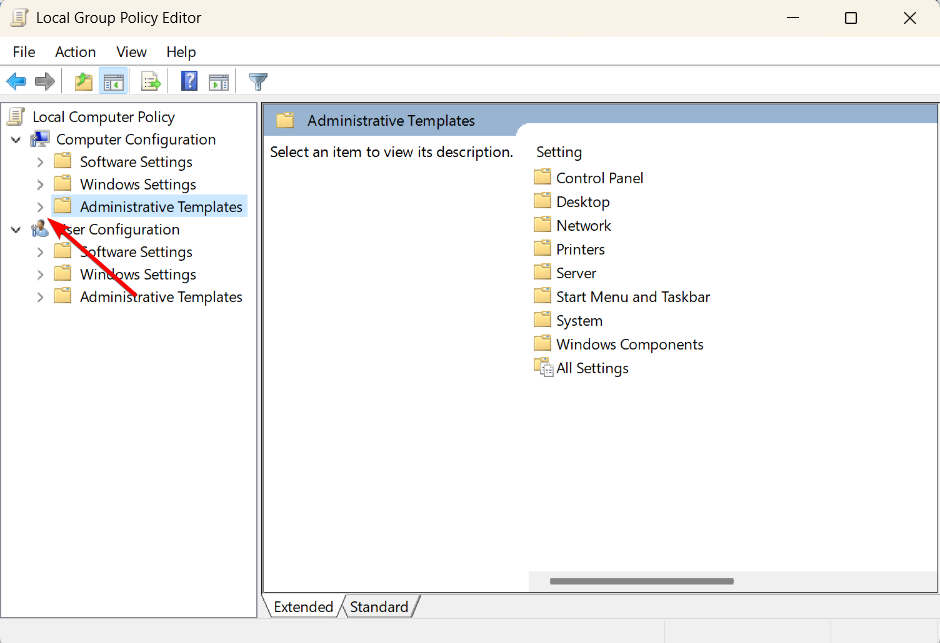
- Under the Computer Configuration section, click on the arrow next to the Administrative Templates option to expand it.
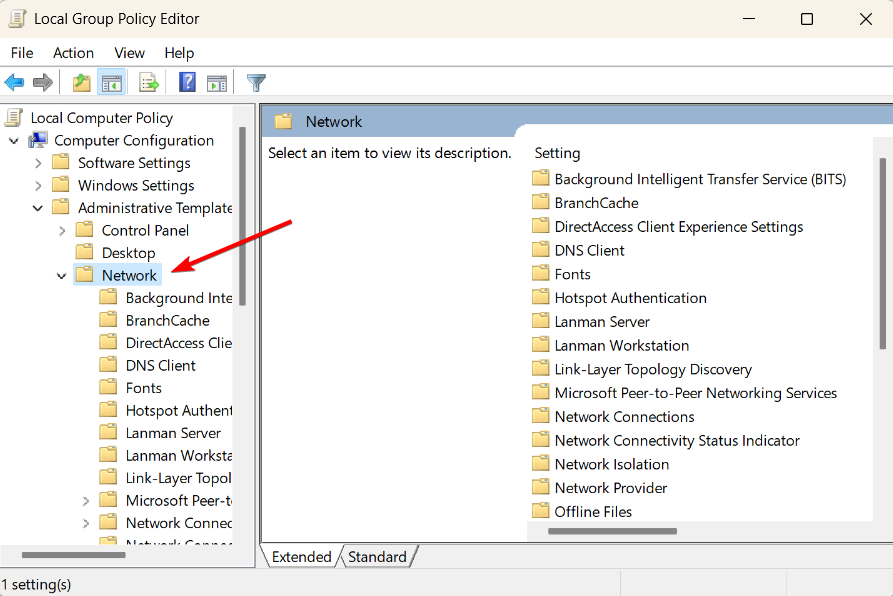
- Next, double-click the Network folder to expand.
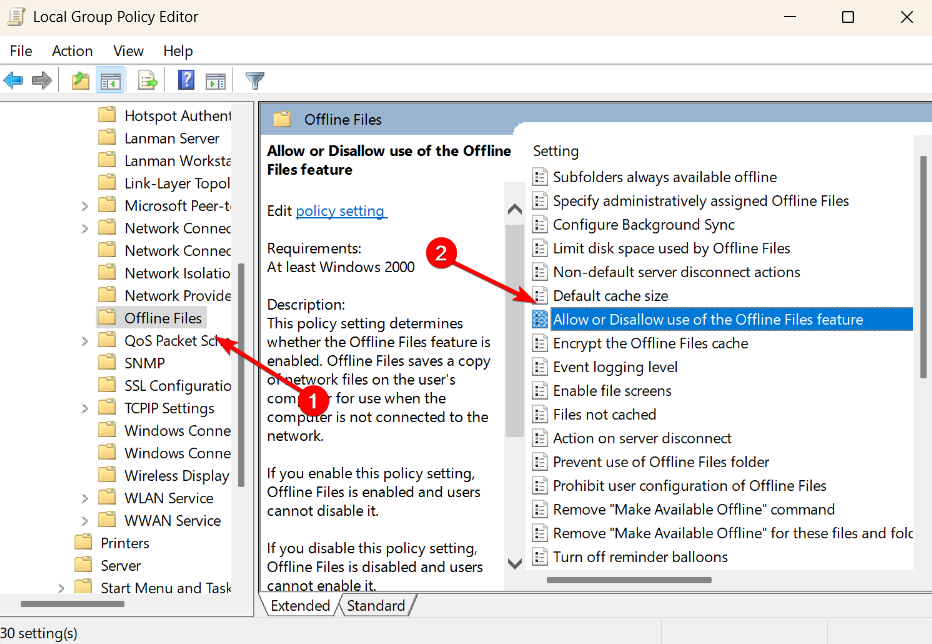
- Then, select the Offline Files folder on the left and double-click on the Allow or Disallow use of the Offline Files feature setting on the right pane.
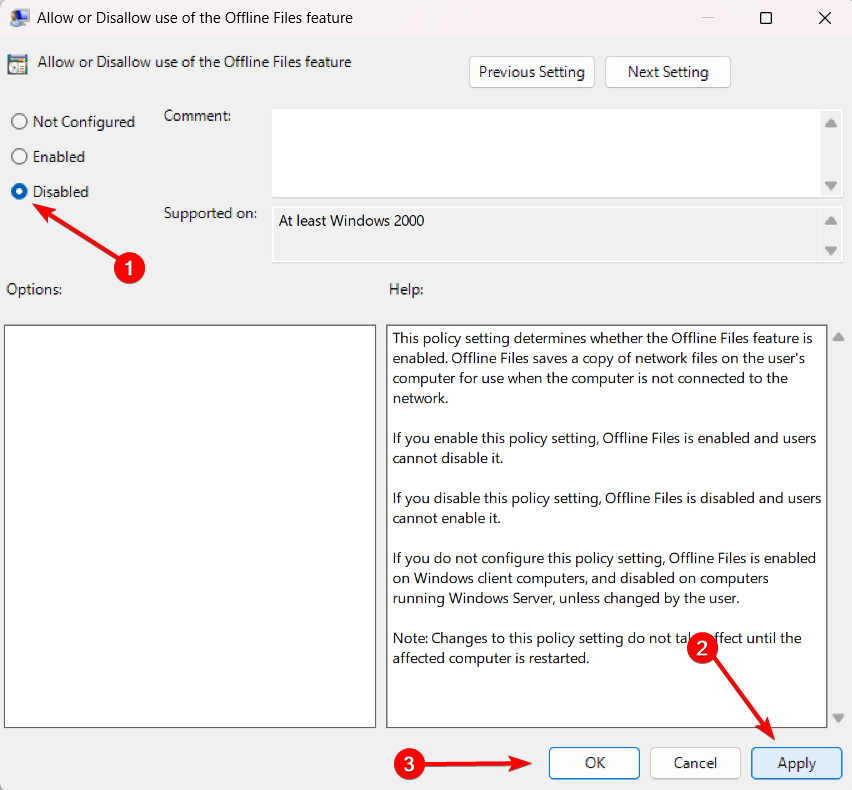
- Choose the Disabled option, click Apply, and then OK.
If high CPU usage lowers your Windows 11 PC’s performance, following these simple solutions can greatly improve CPU speed.
If you have any questions or other ideas on disabling the process, please share them in the comments section below.






User forum
0 messages