Msv1160cp10.dll: What is It & How to Fix It If It's Missing
Malware infection could cause this DLL error
5 min. read
Updated on
Read our disclosure page to find out how can you help Windows Report sustain the editorial team. Read more
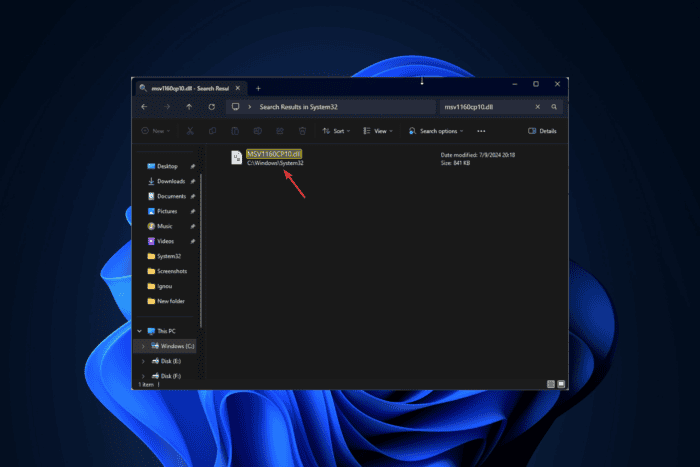
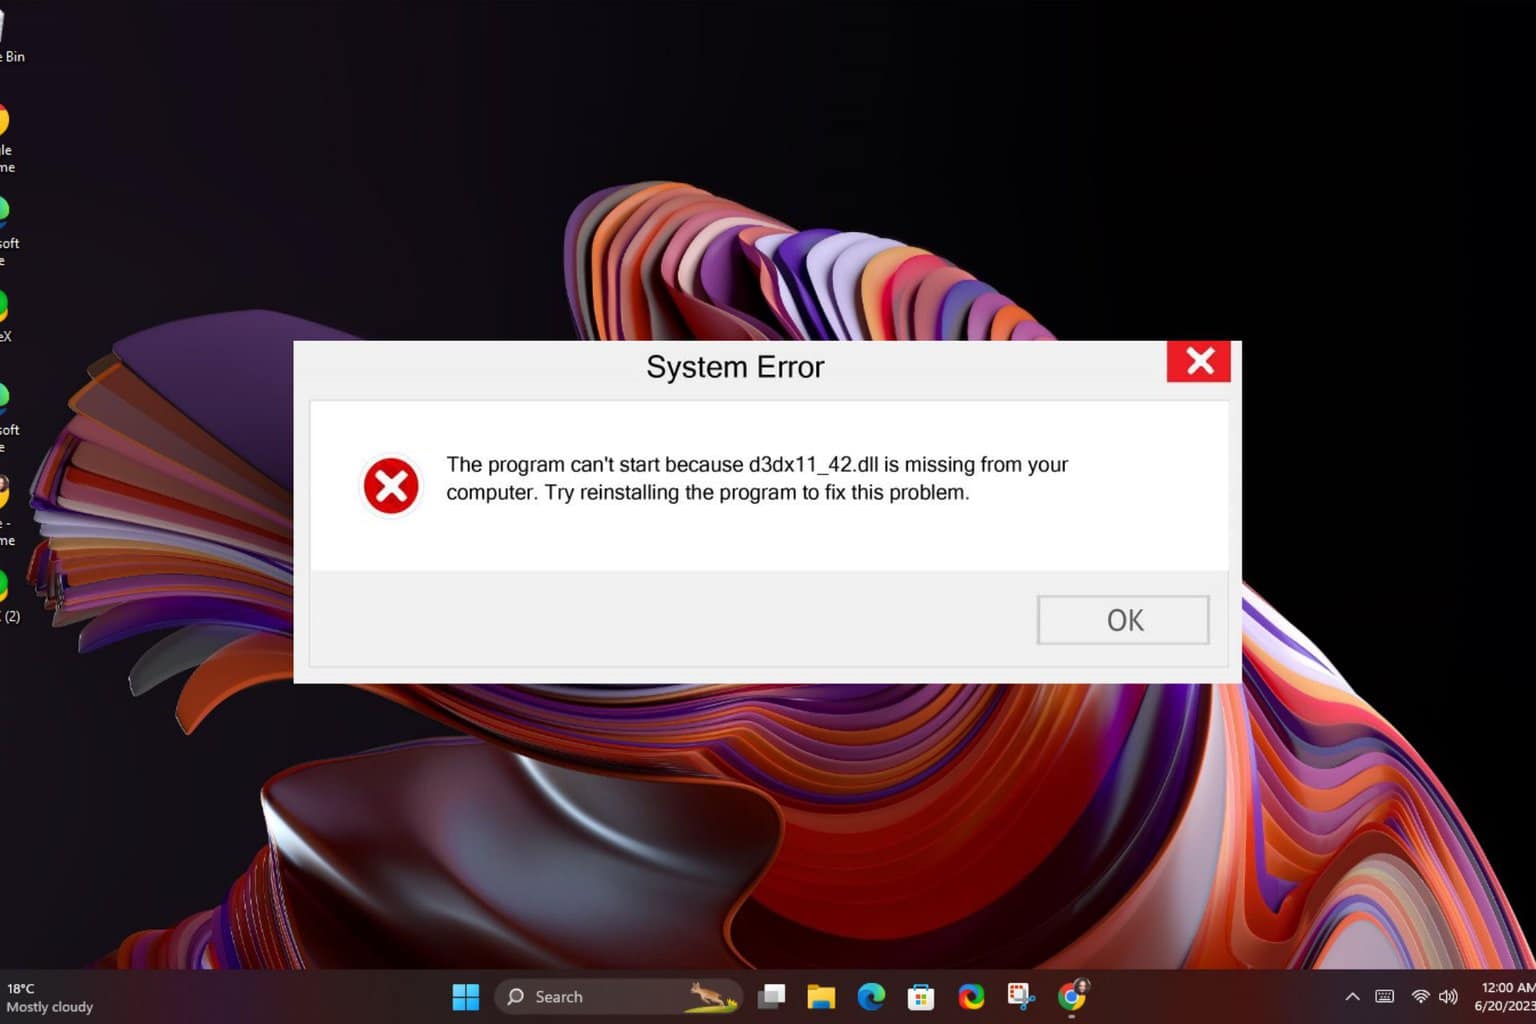
If your games are crashing and you get the msv1160cp10.dll error dialog box, then it is because this DLL file has been infected or accidentally deleted. You need to either reinstall the game or download the DLL file again to fix the issue.
To begin with, you can restart your computer, run a malware scan, reinstall the game or app that is showing the error, and ensure there are no pending updates on your Windows.
What is msv1160cp10.dll?
The MSVCP110.dll is a dynamic link library file that is part of the Microsoft Visual C++ 2010 ++ Redistributable package. The package consists of libraries used in various games and applications.
How can I fix the msv1160cp10.dll missing error?
1. Use a third-party DLL fixer
If not done correctly, restoring a DLL file manually can cause more harm than good to your computer! Therefore, it is advised to use a third-party DLL fixer tool.
These tools can recover or restore all Windows DLL files, like msv1160cp10.dll, without hassle. Thus, they resolve conflicts between third-party apps and the operating system and enhance PC performance.
2. Reregister the DLL file
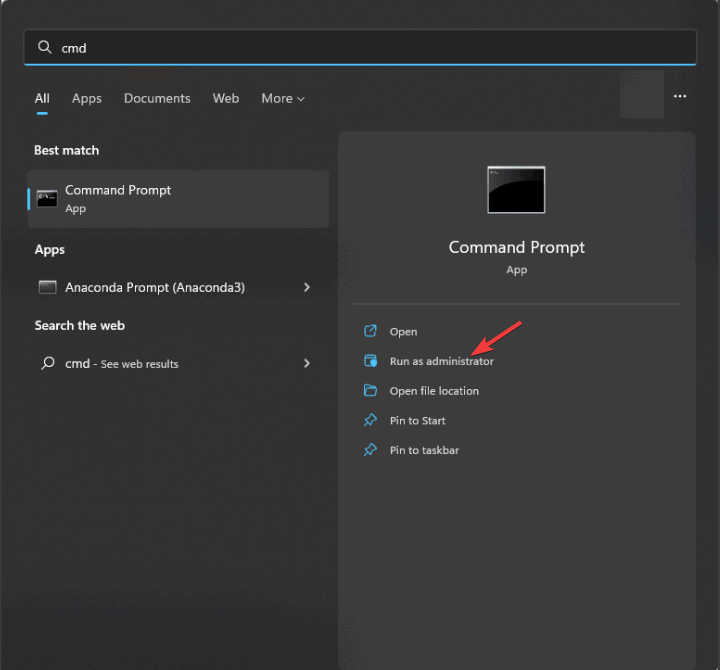
- Press the Windows key, type cmd and click Run as administrator.
- Copy & paste the following command to register the msv1160cp10.dll and hit Enter:
regsvr32 msv1160cp10.dll - Click OK if prompted and reboot your PC.
3. Repair/Reinstall the Microsoft Visual C++ redistributable
- Press Windows + I to open the Settings app.
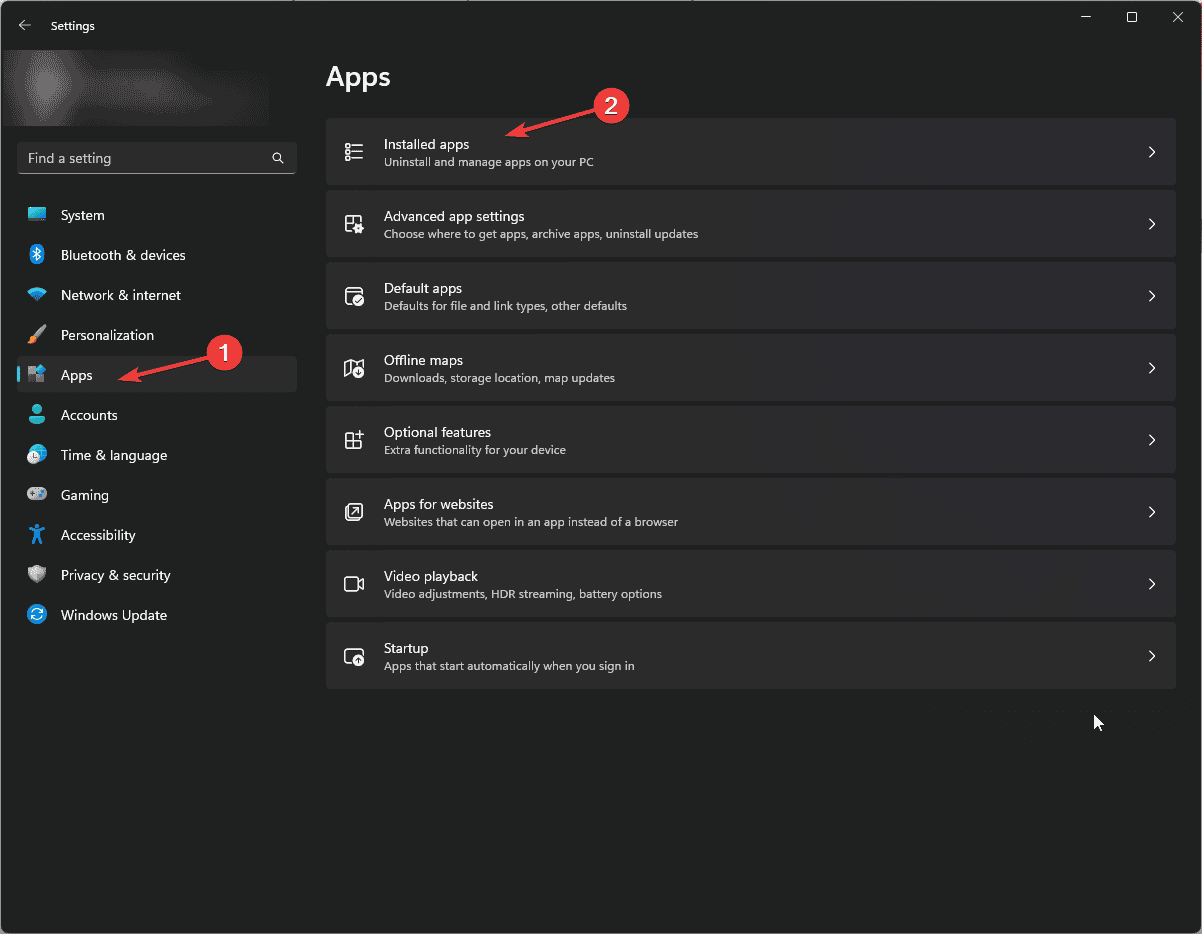
- Go to Apps, then click Installed apps.
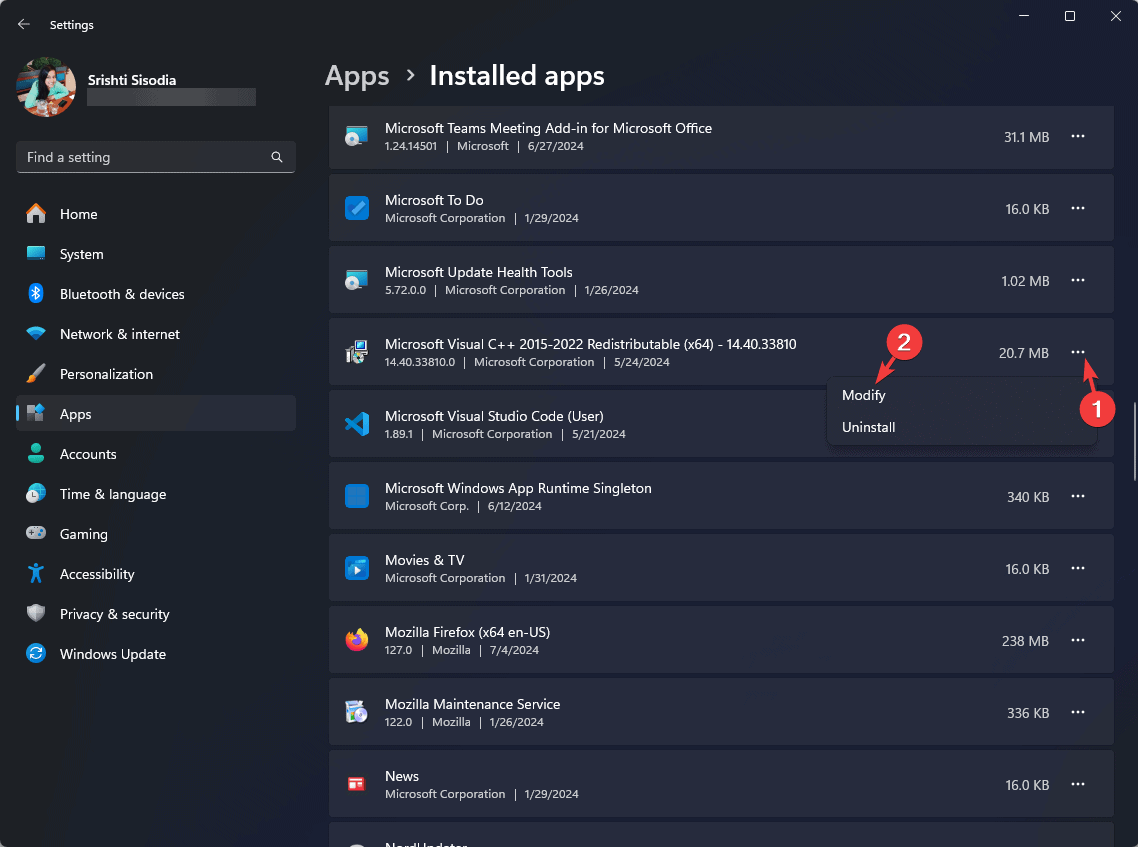
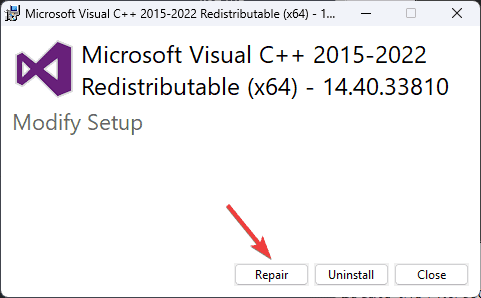
- Locate the Microsoft Visual C++ Redistributable and click the three dots and select Modify.
- Click Repair and follow the on-screen instructions to complete the process.
If repairing doesn’t work for you, try reinstalling the app. For that, follow these steps:
- Press Windows + I to open the Settings app.
- Go to Apps, then click Installed apps.
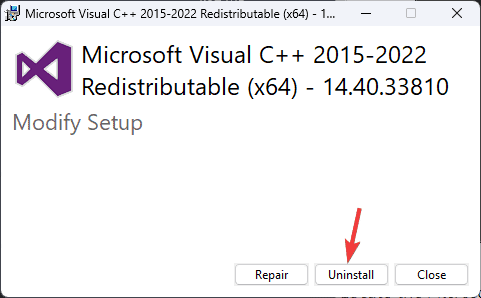
- Locate the Microsoft Visual C++ Redistributable, click the three dots icon, and select Uninstall.
- Click Uninstall and follow the on-screen instructions to complete the process.
- Click this link to download Microsoft Visual C++ Redistributable.
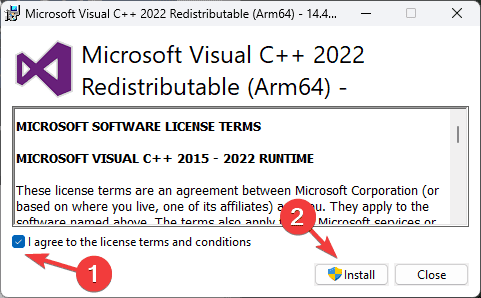
- Once downloaded, double-click the file to initiate the installation.
- Click on Agree, then Install and let the process get completed.
- Once done, reboot your computer.
4. Run SFC & DISM scans
- Press the Windows key, type cmd, and click Run as administrator.
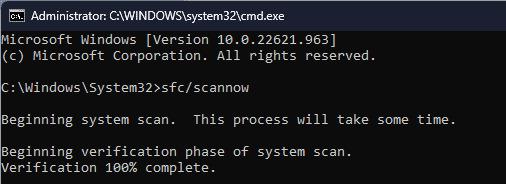
- Type the following command to repair the system files and hit Enter:
sfc/scannow - Wait for the scan to complete, copy & paste the following command to restore Windows OS image files, and press Enter:
Dism /Online /Cleanup-Image /RestoreHealth - Once the scan is completed, your computer will automatically connect to the Windows Update service to download and replace the corrupt files. Restart your computer to let the changes take effect.
5. Perform a System Restore
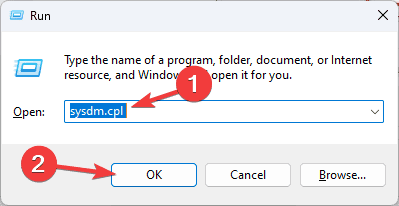
- Press Windows + R to open the Run window.
- Type sysdm.cpl and click OK to open the System Properties window.
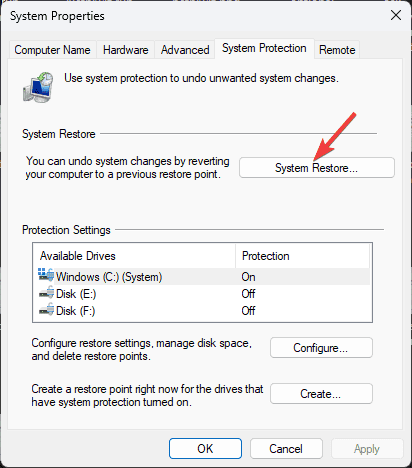
- Go to the System Protection tab and click the System Restore button.
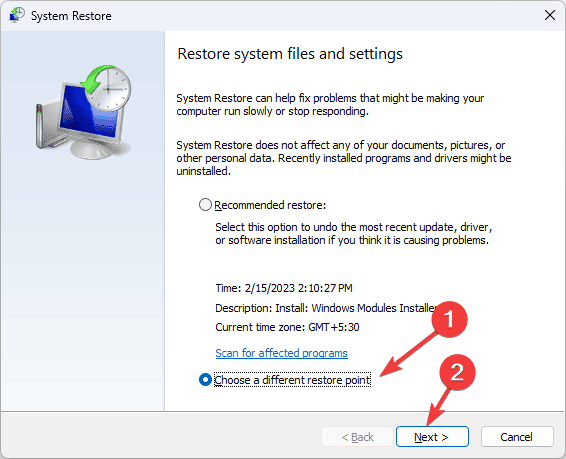
- On the System Restore window, select Choose a different restore point, then click Next.
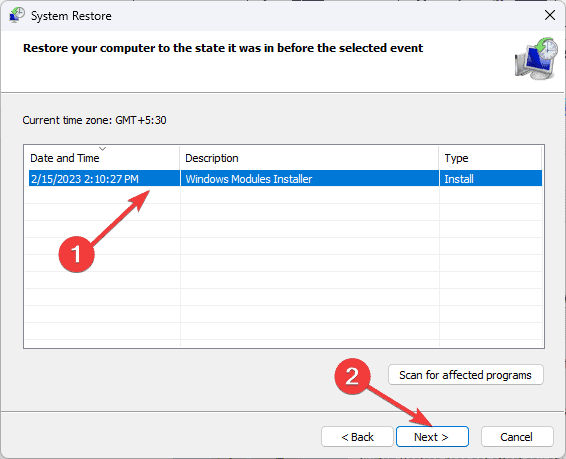
- Select the restore point before the DLL missing error appears and click Next.
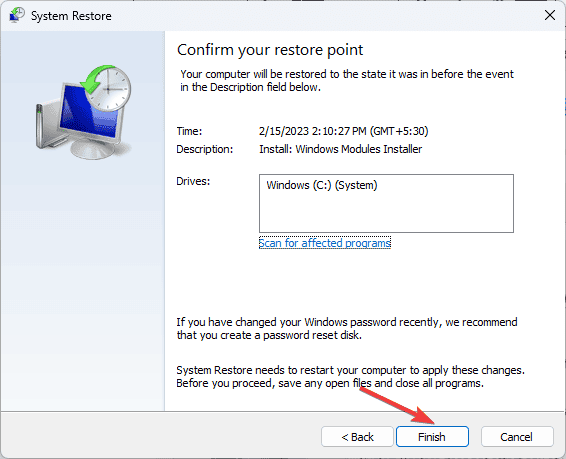
- Click Finish to initiate the restoration process.
Windows will restart and restore to the selected version. If you see the System Restore didn’t complete successfully error, we advise you to check out this informative guide for solutions.
6. Download the file manually & replace it
 NOTE
NOTE
- Visit the DLL Files website, search for msv1160cp10.dll, select an appropriate option, and click Download.
- Press the Windows key, type cmd, and click Run as administrator.
- Copy & paste the following commands one by one and press Enter after every command:
takeown /f %windir%\system32\msv1160cp10.dll /a
icacls %windir%\System32\msv1160cp10.dll /grant administrators:F
ren %windir%\System32\msv1160cp10.dll msv1160cp10.dll.bak
copy c:\temp\msv1160cp10.dll %windir%\system32\msv1160cp10.dll
- Once done, the new DLL can be found in the System32 folder. Now, try using the apps that are throwing the error to check if it works.
This is how you can fix the msv1160cp10.dll missing error. However, if you are facing the same issue due to any other DLL file, our guide can help you recover the DLL file with ease.
If you want to learn more about the causes of missing DLL files on Windows, we have a separate guide for you. You can also fix a similar issue with Netapi32.dll.
Before you go, don’t miss our latest guide on what to do if libgcc_s_dw2-1.dll was not found on your PC.
Did we miss a step that helped you fix this missing DLL error? If so, share the method in the comments section below, and we will add it to the list.



User forum
0 messages