What Is MusNotification.exe & How To Disable It?
Verifying the digital signature of the file is recommended
Key notes
- MusNotification.exe is an executable file by Microsoft Corporation which is responsible for maintaining the status of Windows updates.
- This file is vulnerable to malware infection which is known to trigger a series of issues on Windows PC including security breaches.
- The solutions provided in this guide will come in handy to solve the MusNotification.exe-related errors.
MusNotification.exe or Microsoft Update System Notification Broker, is a core Windows system file that is the part of MusNotificationBroker process. This executable file is a part of the Windows operating system and is located within the C:\Windows\System32 folder.
Is MusNotification.exe file malware?
MusNotification.exe, along with MusNotify.exe, MusNotificationux.exe, MusDialogHandlers.dll, and MusUpdatesHandlers.dll, is responsible for displaying the Windows Updates status in the notification area on the taskbar – whether it is pending for download or installation or the device needs to be restarted to apply the updates.
Unlike popular belief, MusNotification.exe is not malware or virus and is completely safe for your Windows PC.
However, there are chances that the file may have been infected by a virus. Similarly, malware may be masquerading as this Windows file to avoid being caught.
Issues caused by MusNotification.exe
A infected file MusNotification.exe may cause several runtime errors. Some of them are:
- MusNotification.exe – bad image.
- MusNotification.exe is not running.
- Cannot find MusNotification.exe.
- MusNotification.exe could not be found.
- MusNotification.exe could not be installed.
- Faulting Application Path: MusNotification.exe.
- MusNotification.exe could not be started.
- MusNotification.exe could not be launched. Class not registered.
- This file is missing or corrupt: MusNotification.exe.
- MusNotification.exe Application error.
- MusNotification.exe is not a valid Win32 application.
- Windows failed to start.
- MusNotification.exe failed to initialize properly.
- MusNotification.exe has encountered a problem and needs to close. We are sorry for the inconvenience.
- Error starting program: MusNotification.exe
If you also running into issues related to MusNotification.exe on your Windows PC, go through this guide to find effective solutions.
How to fix MusNotification.exe file-related errors?
Before jumping on to the methods listed below, make sure you perform the following actions.
- Uninstall the recently installed programs to prevent interference.
- Install the pending operating system and the security software updates to avoid trivial bugs and errors.
- Scan your PC with Windows Defender or any third-party antivirus.
- Search File Explorer for the different instances of the MusNotification.exe file and delete the ones not located within the System32 folder.
If these workarounds do not seem to help, try the advanced solutions listed below.
1. Disable the MusNotification.exe process
- Right-click the Windows icon and choose Task Manager from the quick links menu.
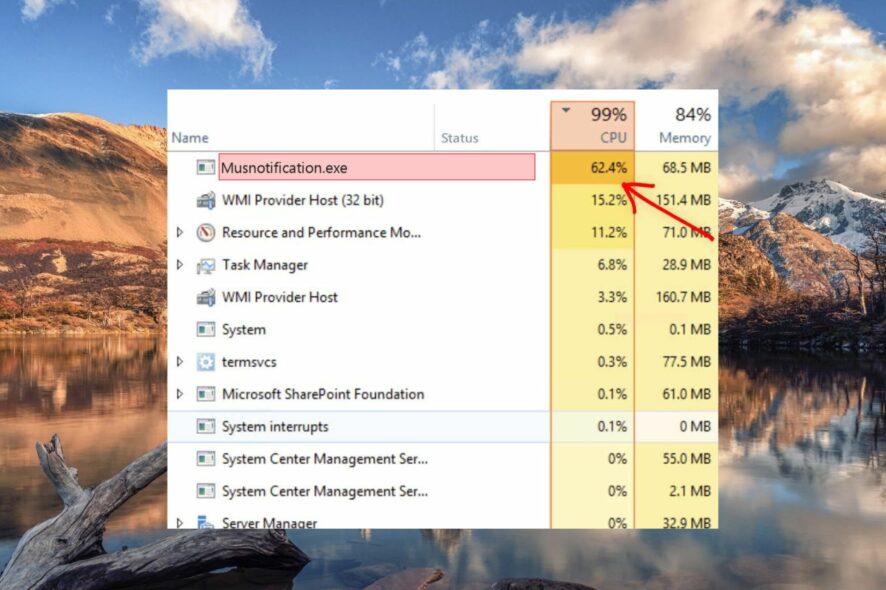
- Scroll down the process list in the Processes tab and look for MusNotification.exe.
- Right-click MusNotification.exe and choose End Task from the context menu.

Temporarily disabling the MusNotification.exe process from the task manager window should fix the related issues like high CPU usage for the time being.
2. Verify the legitimacy of MusNotification.exe
- Bring up the File Explorer using the Windows + E shortcut combination.
- Copy and paste the following path in the address bar to access the System32 folder in the system drive.
C:\Windows\System32 - Scroll down and look for the MusNotification.exe file. Once located, right-click it, and select Properties from the context menu.
- Switch to the Digital Signatures tab of the Properties window and check whether the name of the signer is Microsoft Corporation.

Verifying the name of the signer within the digital signature tab will help you comprehend whether the file is a genuine Windows component or is an imposter harming your PC.
3. Repair the system file
- Press the Start icon on the taskbar, type cmd in the search section, and click the Run as administrator option on the right section.
- Type or paste the following command and press the Enter key to initiate the SFC scan.
sfc /scannow
- Next, type the following command after the SFC scan is completed and press Enter to execute it.
DISM.exe /Online /Restorehealth
- After the process is completed, restart your PC and see if the ongoing errors are resolved for good.
The SFC and DISM tools are built-in utilities for repairing all the protected system files like MusNotification.exe. They then replace the corrupt system files and disk images with the cached version stored in a compressed folder resolving the errors hogging your PC.
4. Perform a system restore
- Use the Windows + I shortcut to launch the Run dialog box, type the following command in the text box and press the OK button.
rstrui
- The System Restore wizard will open up on your PC. Press the Next button to proceed further.
- Select a suitable restore point from the list and press the Next button to proceed. You can also press the Scan for affected programs button to determine the recent changes made to your PC.
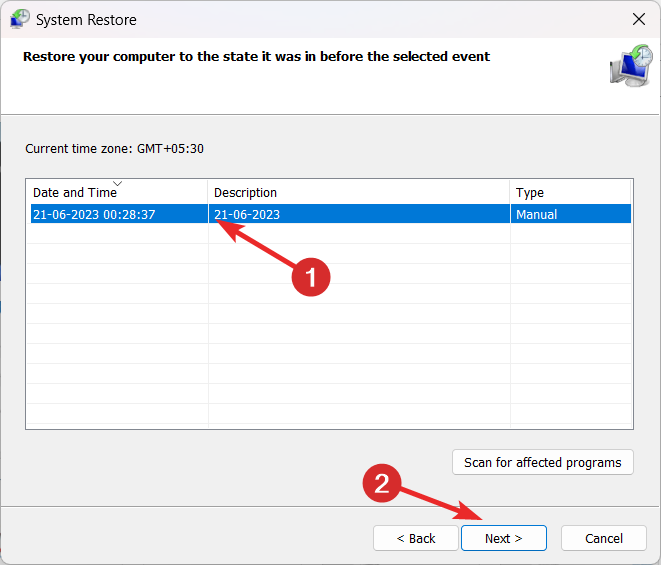
- Confirm your restore point from the next window and press Finish to begin restoring your PC to the restore point selected.
If the MusNotification.exe is still causing your PC to malfunction or crash abruptly, a system restoration process will undo all the changes made recently which be the culprit.
Despite trying the above workarounds if the MusNotifcation.exe error still bothers you, you should for a clean install of Windows which will wipe out all the infected files and provide a fresh start.
Before you leave, you might want to check out to guide for resolving the ARP.exe-related errors on your PC if you come across them frequently.
If you have any queries in this regard, feel free to reach out to us in the comments section.
Read our disclosure page to find out how can you help Windows Report sustain the editorial team. Read more


Improve this guide


User forum
0 messages