No Checkbox in Netplwiz? Get it Back in 4 Ways
Disable the Windows Hello sign-in feature
4 min. read
Updated on
Read our disclosure page to find out how can you help Windows Report sustain the editorial team. Read more
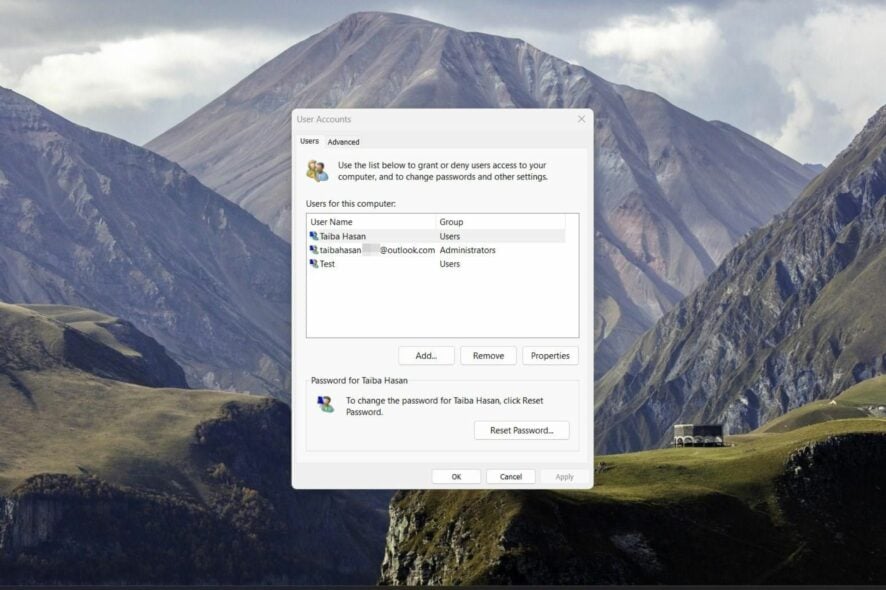
Some Microsoft users reported that there is no checkbox to manage this feature in the netplwiz property window. This is happening because Microsoft’s passwordless sign-in feature, like Windows Hello, is enabled.
When this feature is active, the system no longer uses passwords for login, so the option to require a username and password is hidden. Here’s how to get it back:
What can I do if there is no checkbox in netplwiz?
1. Disable Passwordless sign-in in Windows
1.1 Via. Registry Editor
 NOTE
NOTE
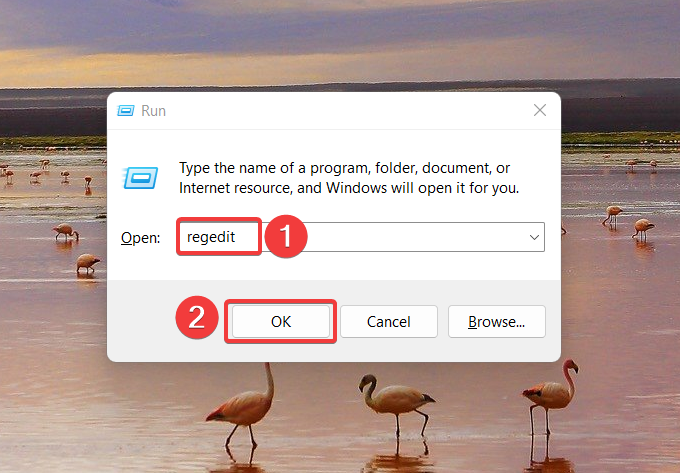
- Use the Windows + R shortcut key to launch the Run dialog box.
- Type the following command in the text box and press OK to execute it.
regedit - Navigate to the following location in the registry editor window:
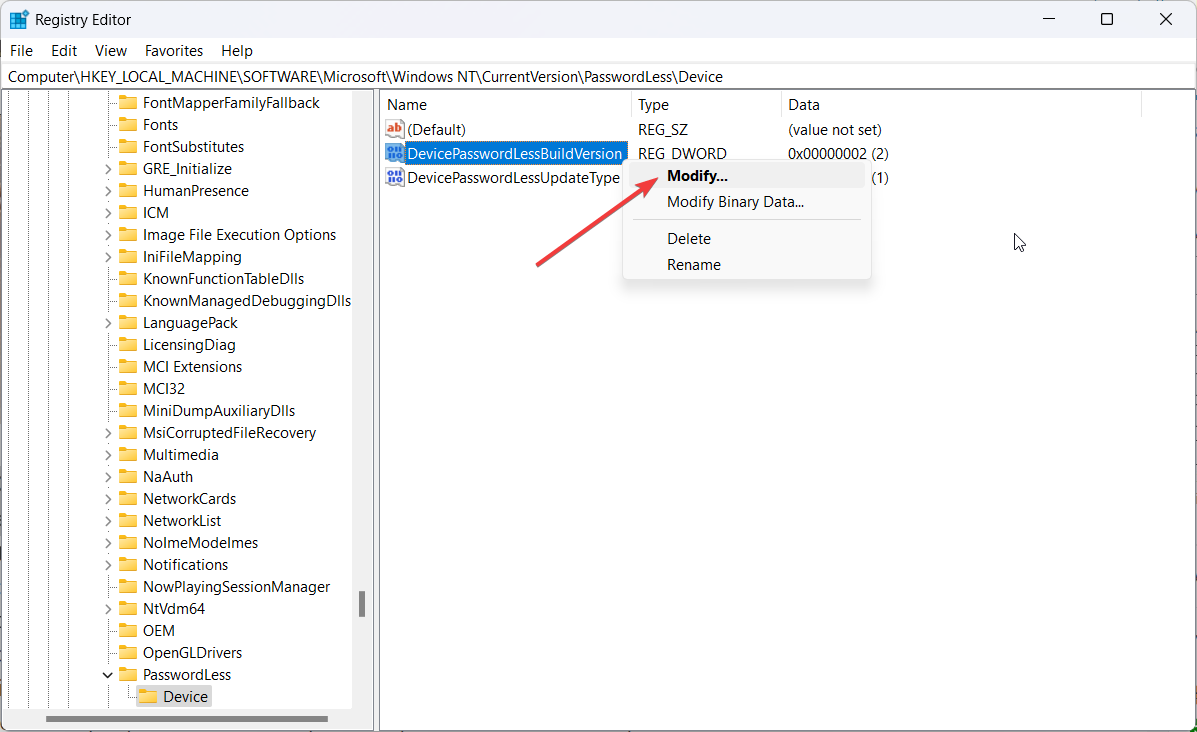
HKEY_LOCAL_MACHINE\SOFTWARE\Microsoft\Windows NT\CurrentVersion\PasswordLess\Device - Look for the DevicePasswordLessBuildVersion key in the right section. If not found, right anywhere and select the New option from the context menu followed by DWORD (32-bit) value.
- Rename the newly created DWORD (32-bit) as DevicePasswordLessBuildVersion.
- Right-click DevicePasswordLessBuildVersion and choose Modify from the context menu.
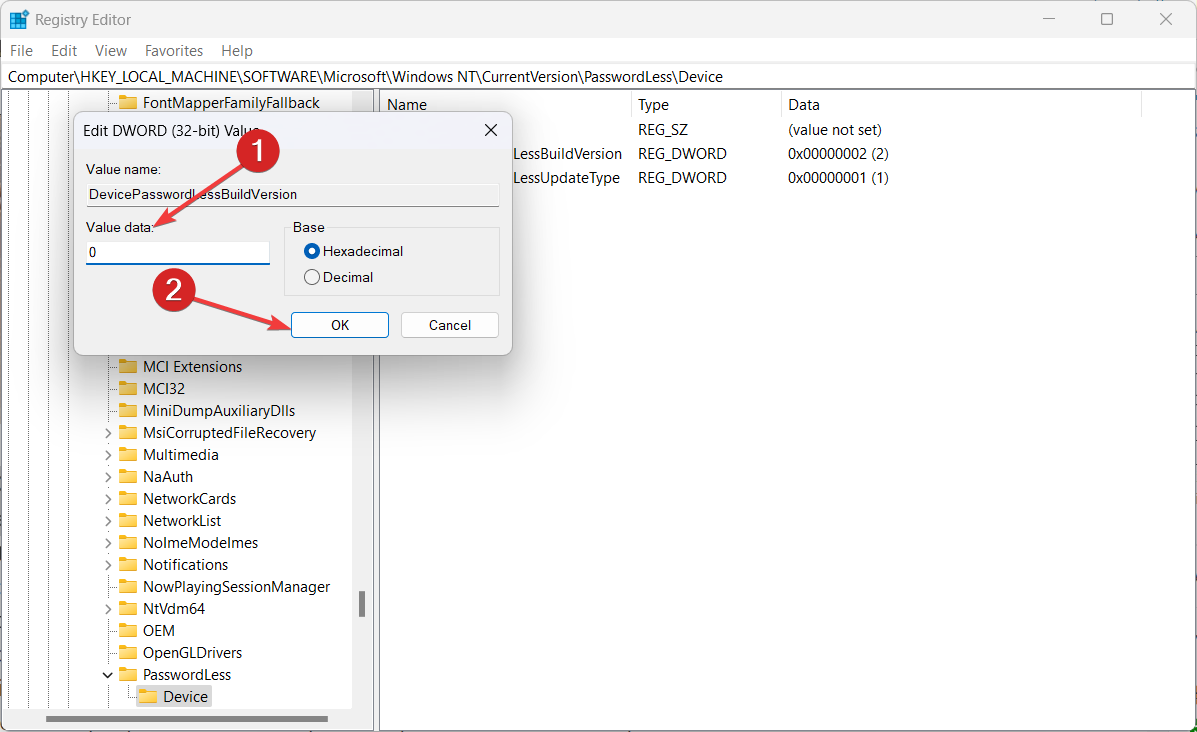
- Assign 0 in the Value data field and press OK to save the changes.
- Now close the Registry Editor to reboot your computer so that the changes can take effect.
If you don’t want to alter the key on your own, you can run these commands and get the same result.
1.2 Via Command Prompt
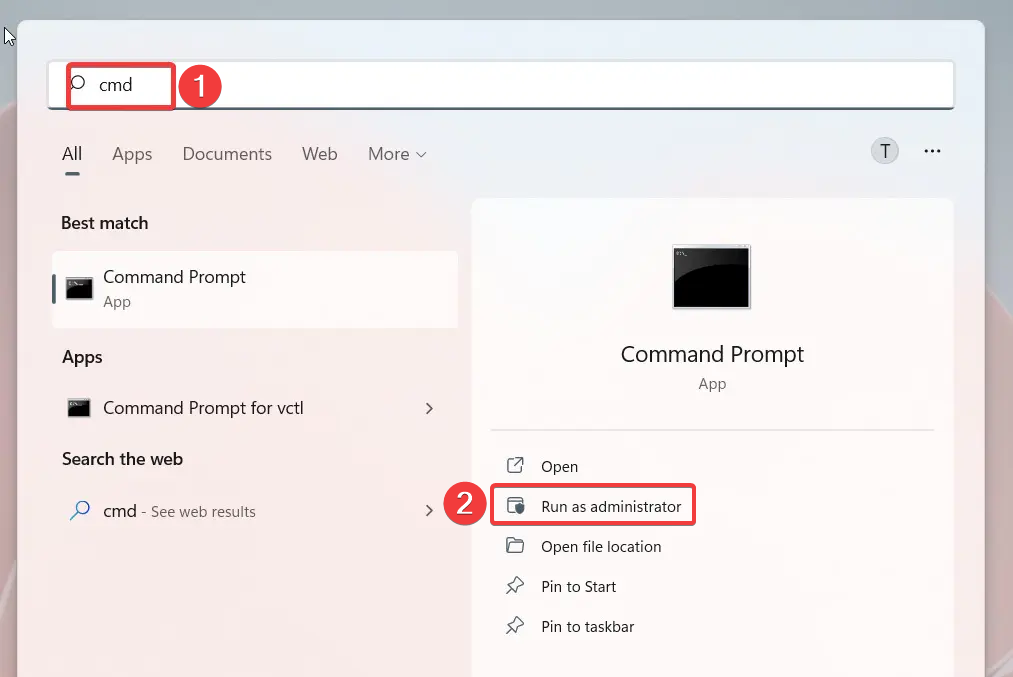
- Launch the Start menu, type cmd in the search bar on top, and choose the Run as administrator option from the search results.
- Click Yes on the User Action Control (UAC) prompt to launch Command Prompt with elevated permissions.
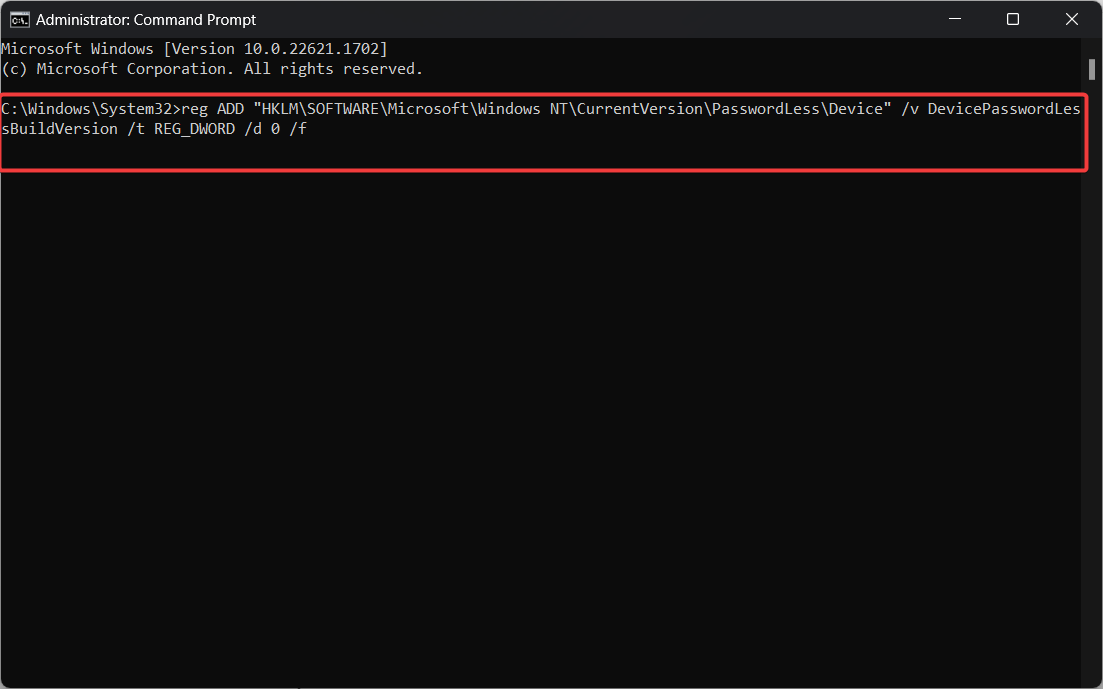
- Type or paste the following command and press Enter to execute it.
reg ADD “HKLM\SOFTWARE\Microsoft\Windows NT\CurrentVersion\PasswordLess\Device” /v DevicePasswordLessBuildVersion /t REG_DWORD /d 0 /f - After executing the command, exit the command prompt window and reboot your PC.
Now access the user account settings window using the netplwiz command and look for the missing checkbox.
2. Adjust User Account settings
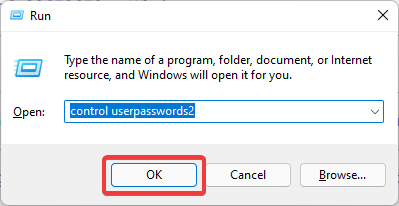
- Right-click the Start button and select Run.
- In the Run field, type control userpasswords2 and hit Enter.
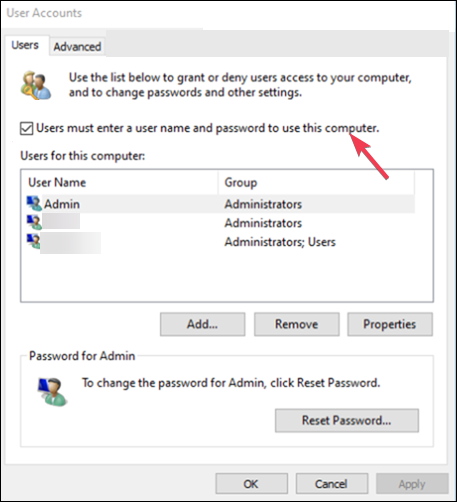
- In the User Accounts dialog box, check the box for Users must enter a user name and password to use this computer.
- Click Apply, then OK.
- Restart your computer and check if netplwiz now shows the check box.
3. Disable Windows Hello sign-in
- Launch the Settings app using the Windows + I shortcut.
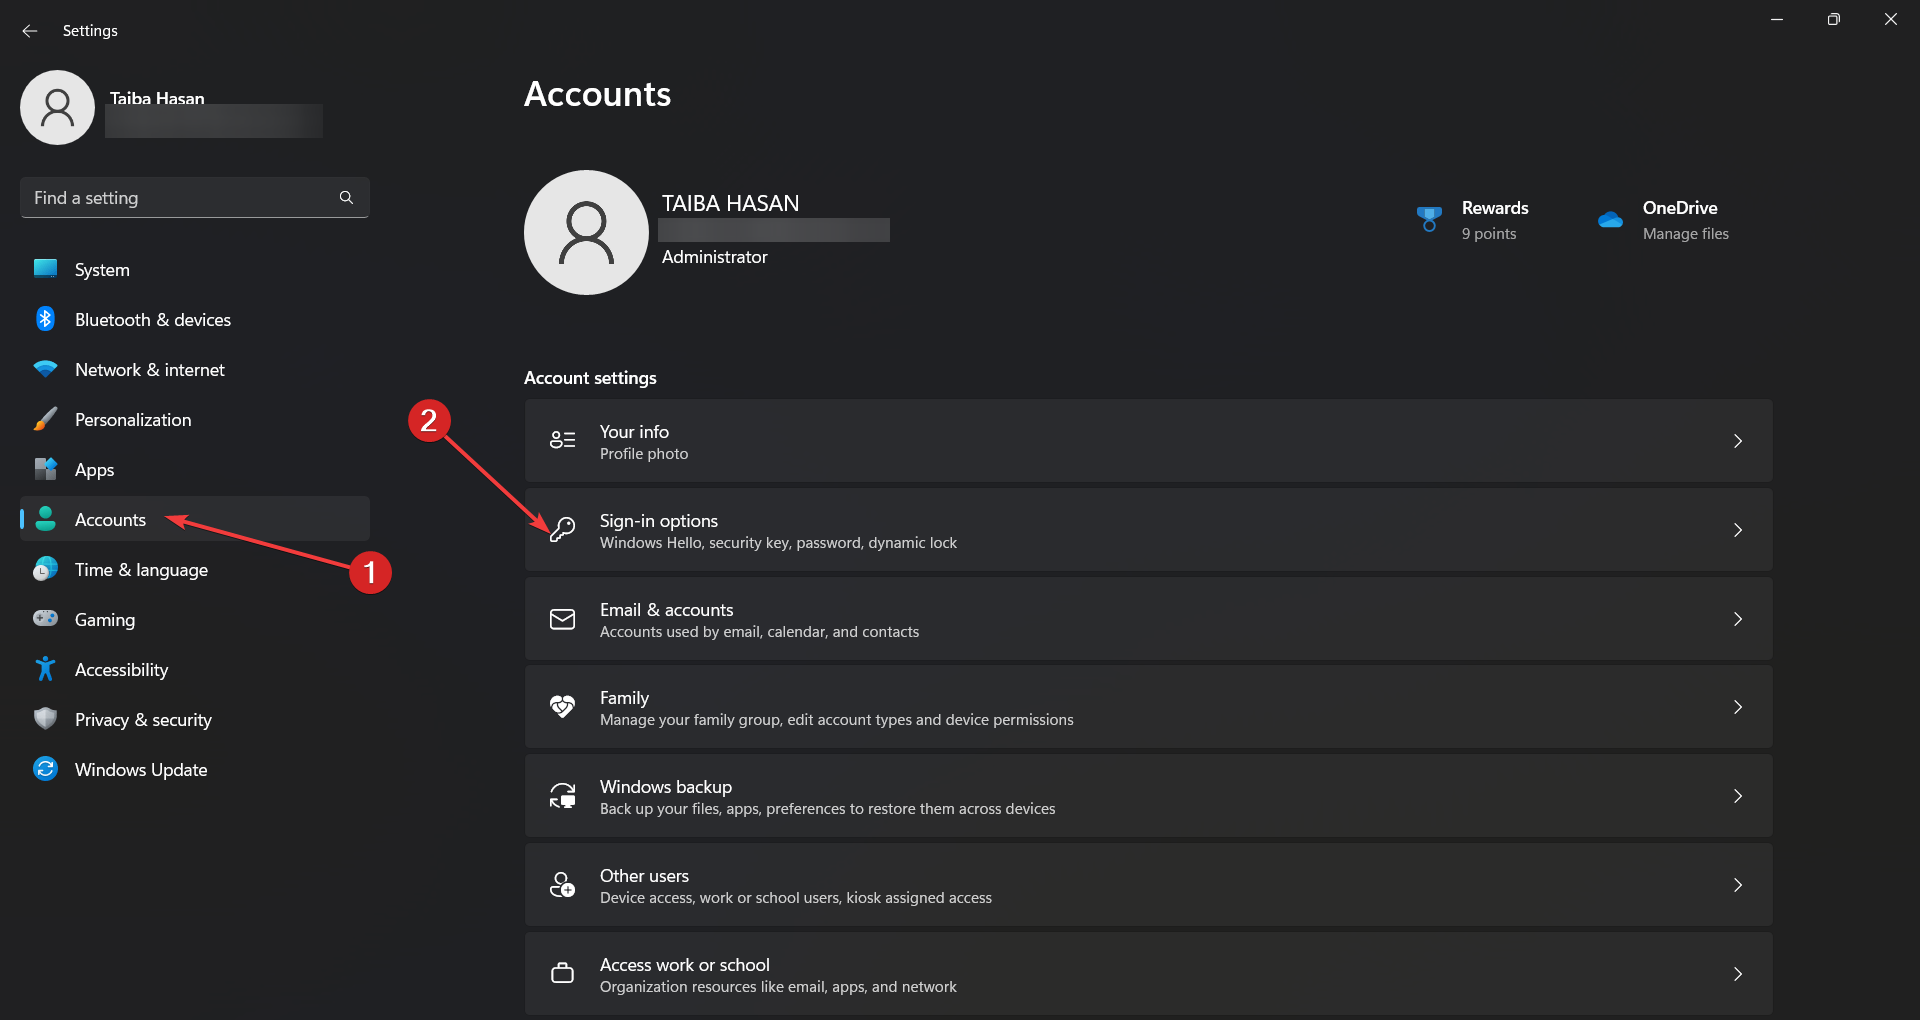
- Choose Accounts from the left navigation panel and select Sign-in options from the right section.
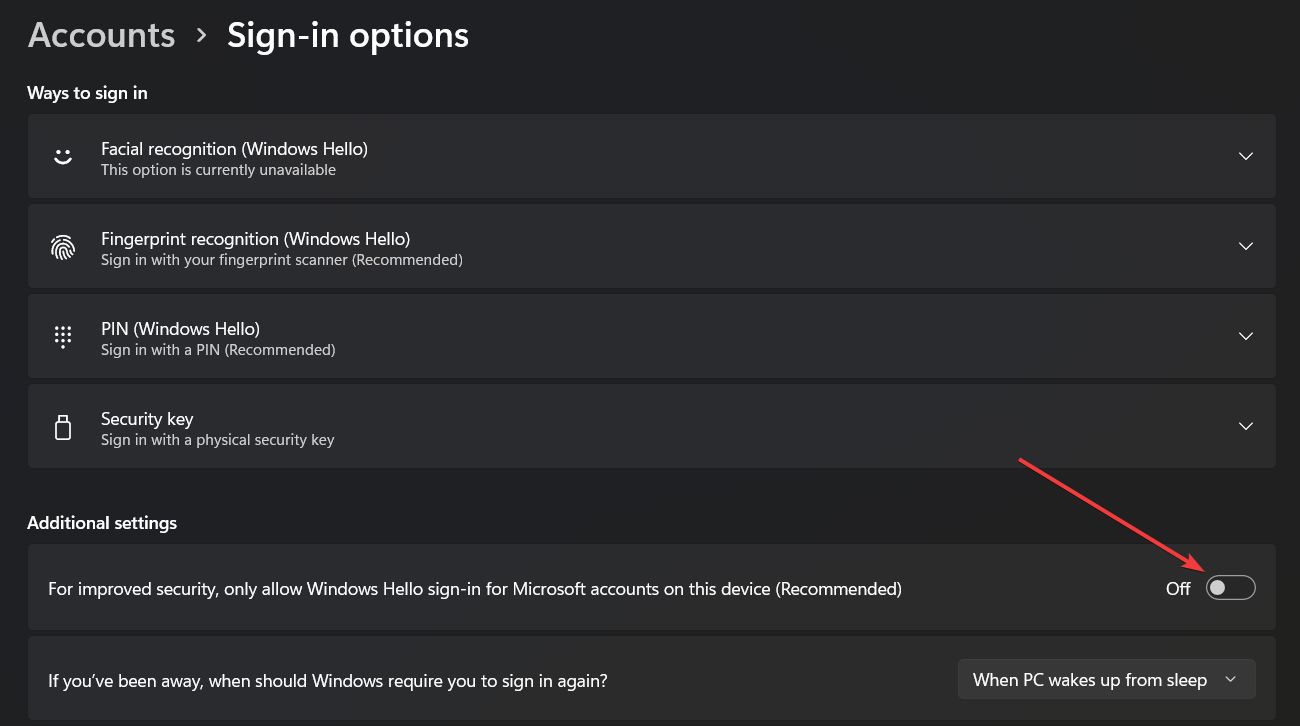
- Look for the For improved security, only allow Windows Hello sign-in for Microsoft accounts on this device option under Additional settings and move the toggle next to it in the Off position. If this option is not present, look for the Make your device passwordless option and disable it.
4. Disconnect the work or school accounts
- Launch the Settings window using the Windows + I shortcut.
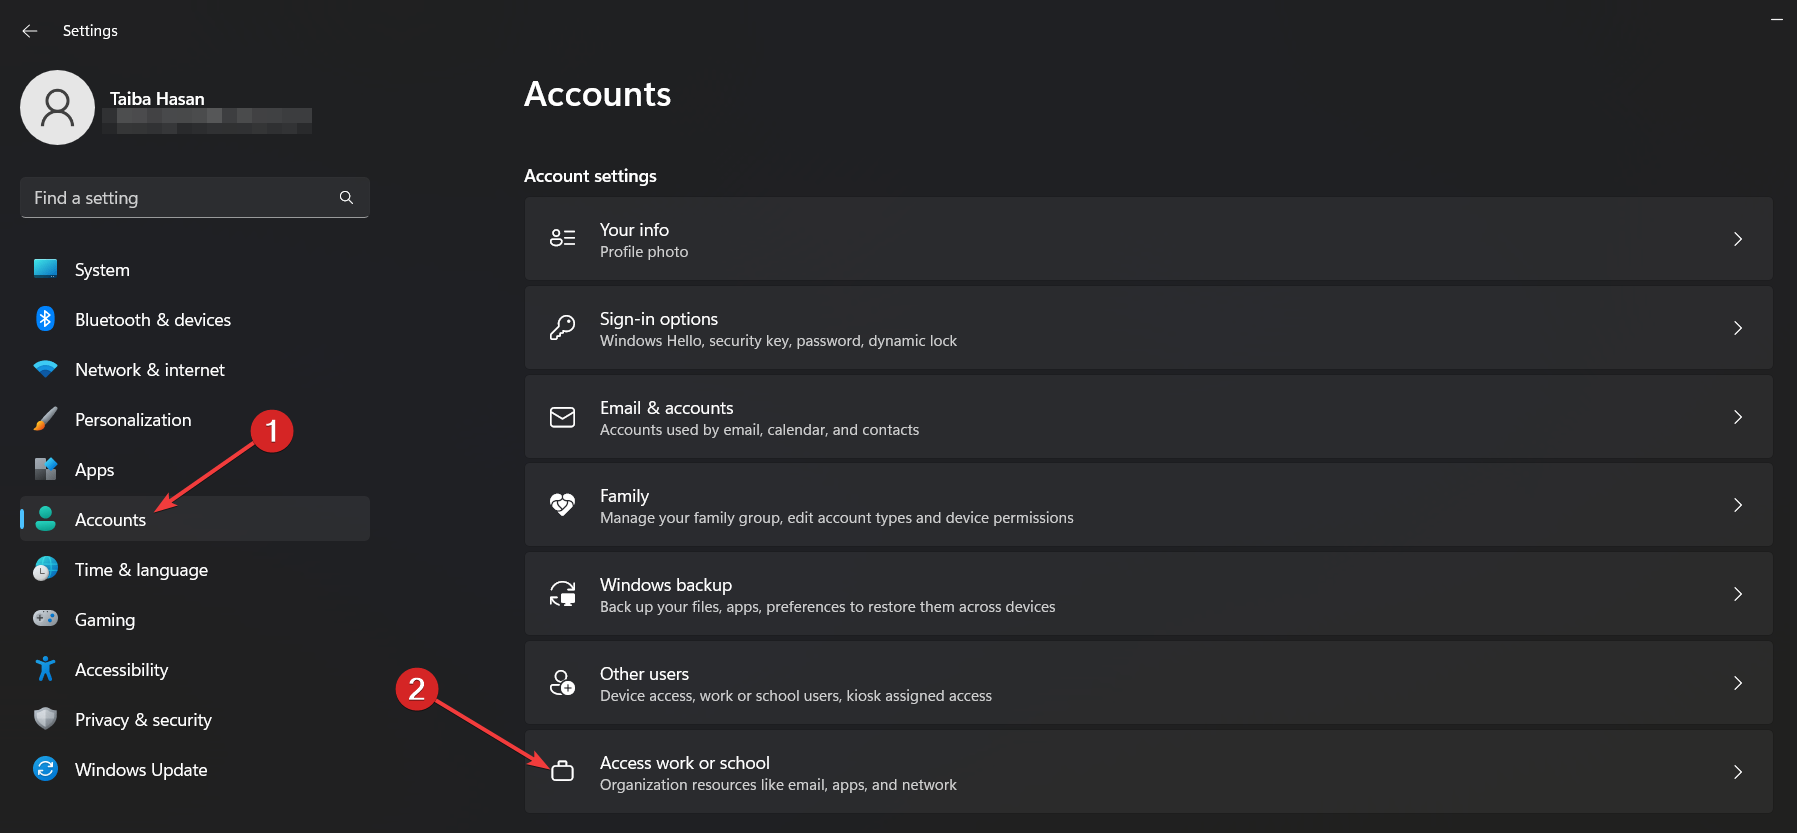
- Choose Accounts from the left navigational menu and click the Access work or school option listed under Account settings.
- Look for any accounts currently added for work or school. If you find any click the expand the settings and press the Remove button.
Disconnecting the work or school accounts from your Windows PC will ensure that the missing Users must enter a user name and password checkbox is now visible in the netplwiz user settings window.
That’s it! We’re sure you could easily resolve the no checkbox issue in the netplwiz window by trying the workarounds recommended in this guide.
Before you leave, you may be interested to know the easiest ways to enable auto login in Windows.
For any questions or feedback, feel free to drop us a comment below.




User forum
0 messages