Bing Fix: Sorry, Network Settings Prevent Access to Feature
This error prevents you from using Bing's chatbot
![]() 6 min. read
6 min. read
![]() Updated on
Updated on
Share this article

Improve this guide
Read our disclosure page to find out how can you help Windows Report sustain the editorial team Read more
Key notes
- You won’t be able to set up conversations if you encounter the network settings prevent access to the feature error in Bing AI chatbot.
- Misconfigured network settings and geographical restrictions on some Bing AI features usually lead to this error.
- You can use a VPN and reset the network settings to access the features of the Bing AI chatbot.

Several of our readers have been getting the Sorry, looks like your network settings are preventing access to this feature error while trying to access the Bing AI chatbot. This error indicates network-related issues that are restricting you from conversing with the chatbot.
Why am I getting the network settings prevent access to the feature error?
After conducting our extensive research, we are listing the potential causes of this network error below:
- Incompatible extensions – Sometimes the extensions installed on your browser, negatively affect the performance leading to various errors and issues.
- Slow internet – Poor internet connection can be another reason why you are facing the network settings prevent access to this feature in Bing AI.
- Geographical restrictions – Certain chatbot features are region-centric and may not be available in your location, giving you the network settings prevent access to the feature error.
- Server issues – Since Bing AI is extremely popular, it can be bombarded with tons of requests at a time and may crash.
- Corrupt browser cache or cookies – Corrupt cache and browser cookies are known to trigger several errors and restrict several websites, including Bing AI from operating.
Now that you know about the potential causes of this issue, let’s explore the possible fixes to resolve the network issue in New Bing AI.
How do I fix error network settings prevent access to this feature?
Before you move on to the software-related fixes, implement the tricks recommended here:
- Restart your router and then perform the intended action.
- Switch to a different network if the connection is unstable. You can switch to a wireless network or set up Wi-Fi hotspot to access Bing AI.
- Enable VPN to access the geographically restricted feature, and if you are already using one, we will recommend you disable the VPN for time being.
- As BIng AI is getting exceptionally high demand, you can wait for a few hours and try accessing the feature once again.
If none of these methods could help you resolve the problem, try the ones listed next.
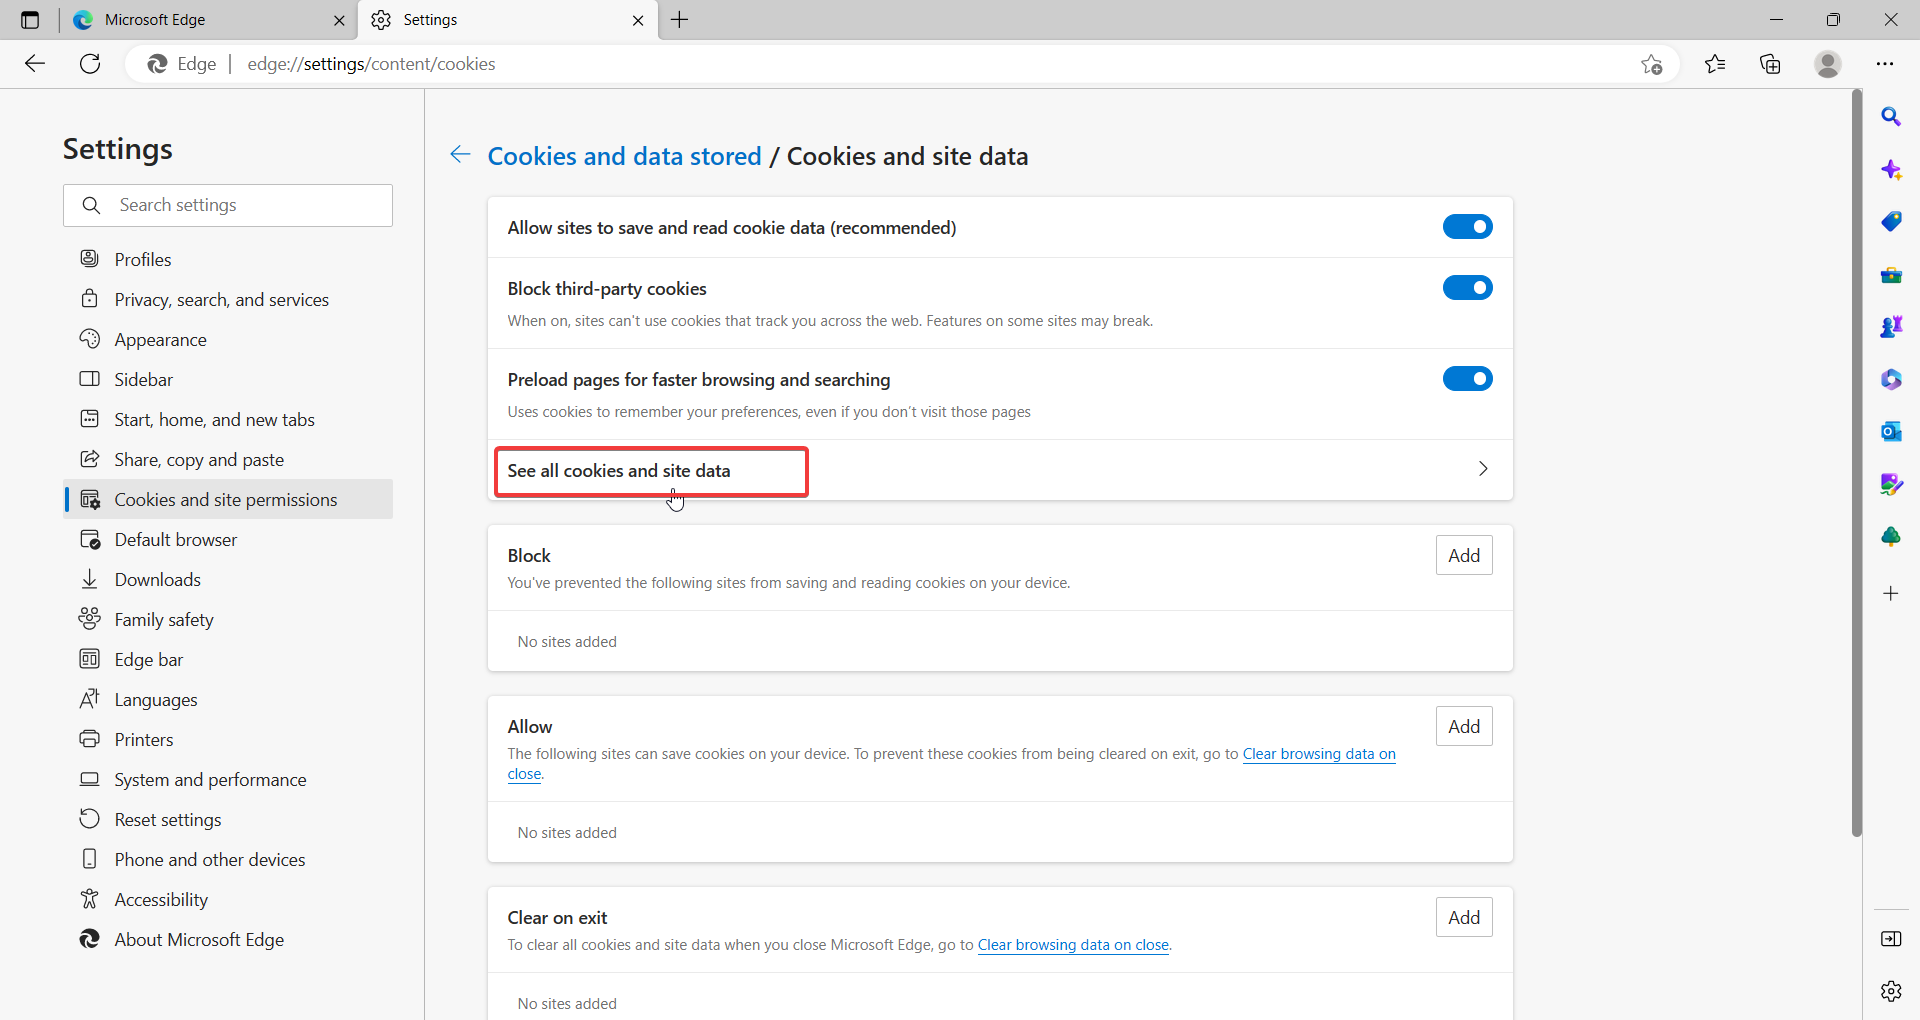
1. Clear browsing history and cached data
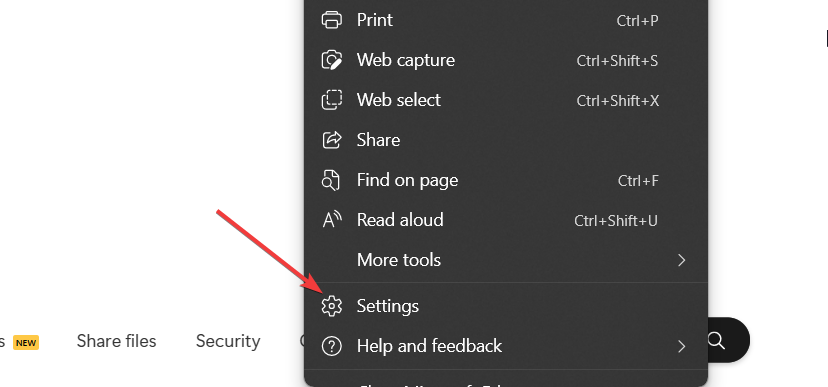
- Launch the Microsoft Edge browser on your computer and click the Menu icon (three dots) on the top right.
- Select the Settings option from the drop-down menu.

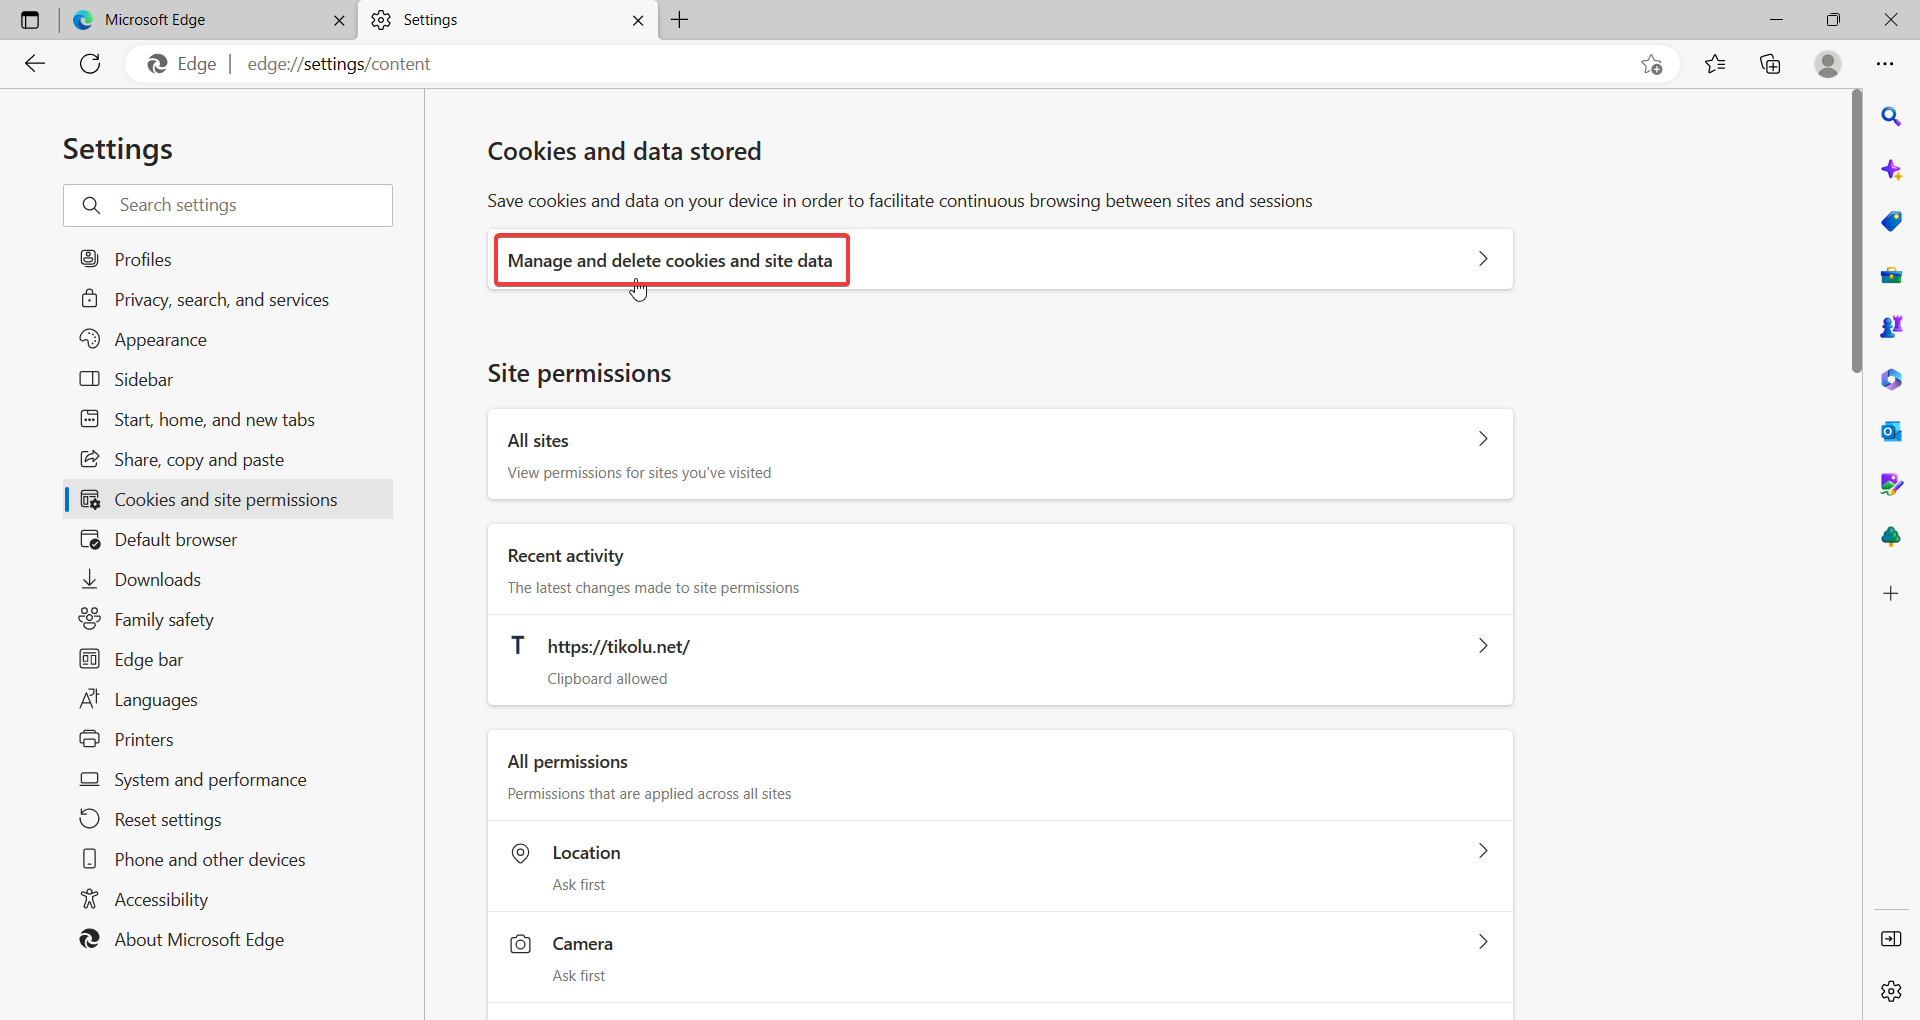
- From the left sidebar, navigate to the Cookies and site permissions.

- Choose the Manage and delete cookies and site data option from the right side.

- Click the See all cookies and site data option.
- Press the Remove All button on the top.
- Now choose the Privacy, search, and services options from the left sidebar.
- Scroll down and press the Choose what to clear button next to Clear Browsing Data Now option.
- In the next window that pops up, select all the categories you wish to delete and press the Clear Now button.


There is another method to avoid the manual steps above and that is to automatically clean up browsing data with a reliable tool like CCleaner.
That’s it! All the browser cookies and browsing history will now be deleted for good. And hopefully, the looks like your network settings are preventing access to this feature error message will no longer bother you.
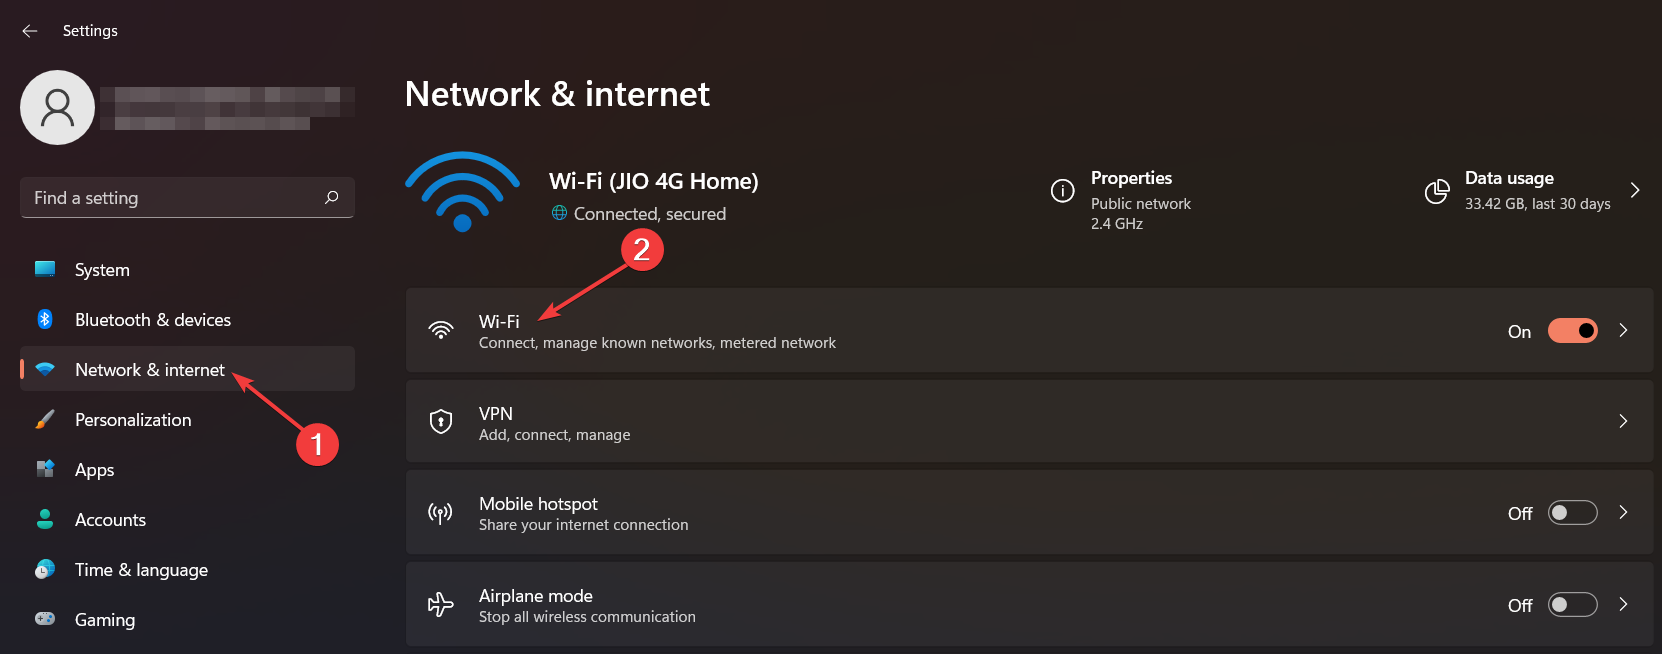
2. Disable the metered connection
- Use the Windows + I shortcut to bring up the Settings app.
- Select Network & internet from the left navigation panel and choose Wi-Fi or Ethernet, depending on the network type you are currently using.

- Next, select Wi-Fi properties.
- Look for the Metered connection option and turn the toggle next to it in the Off position.

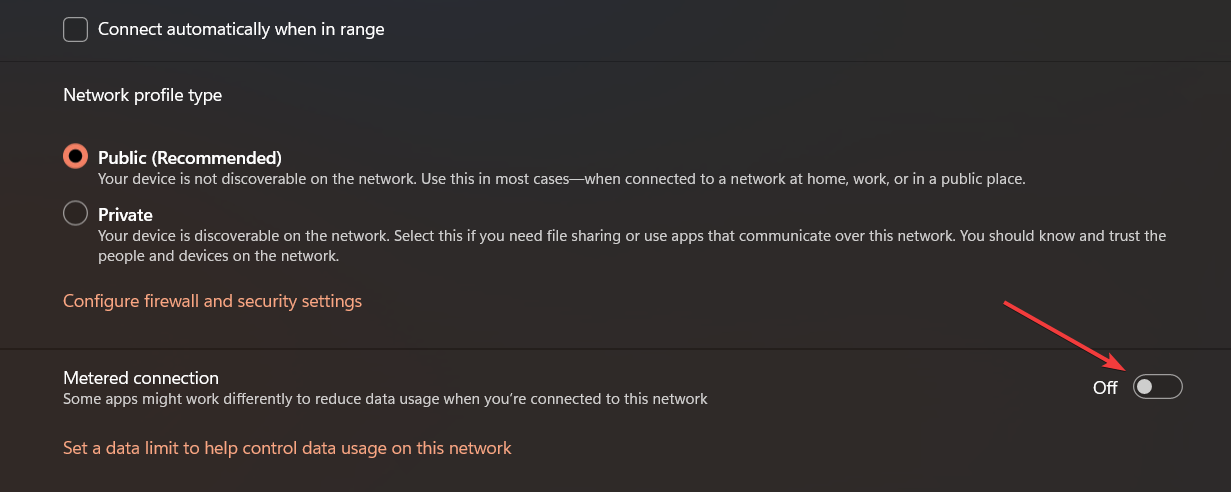
When the network connection is metered, Windows imposes a data limit over it. As a result, certain features are not available as a measure to conserve data and reduce data usage. Disabling metered connection ensures that you can utilize the internet with maximum available bandwidth.
3. Disable or uninstall extensions
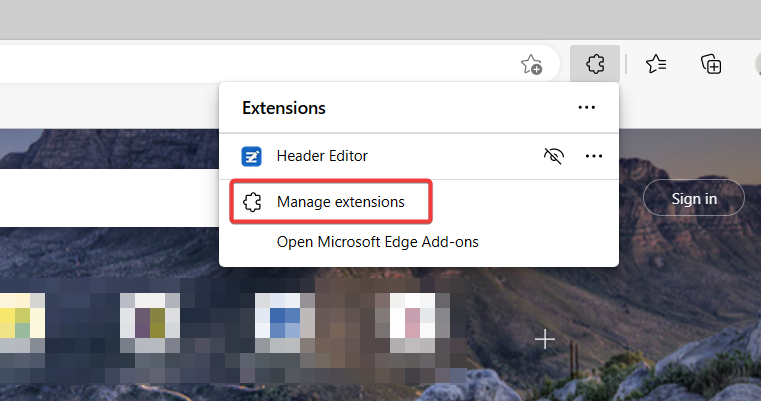
- Launch the Edge browser, click the Menu icon (three dots) located in the top right corner, and choose Extensions from the drop-down menu.

- Choose Manage extensions from the prompt window.

- In the extension tab, look for the extension you wish to remove and toggle off the switch next to it.

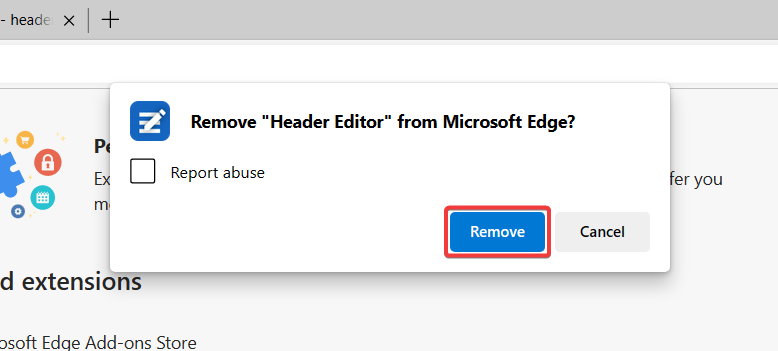
- To uninstall the extension completely, press the Remove button present below the extension description.
- Click the Remove button on the confirmation popup to confirm the action.

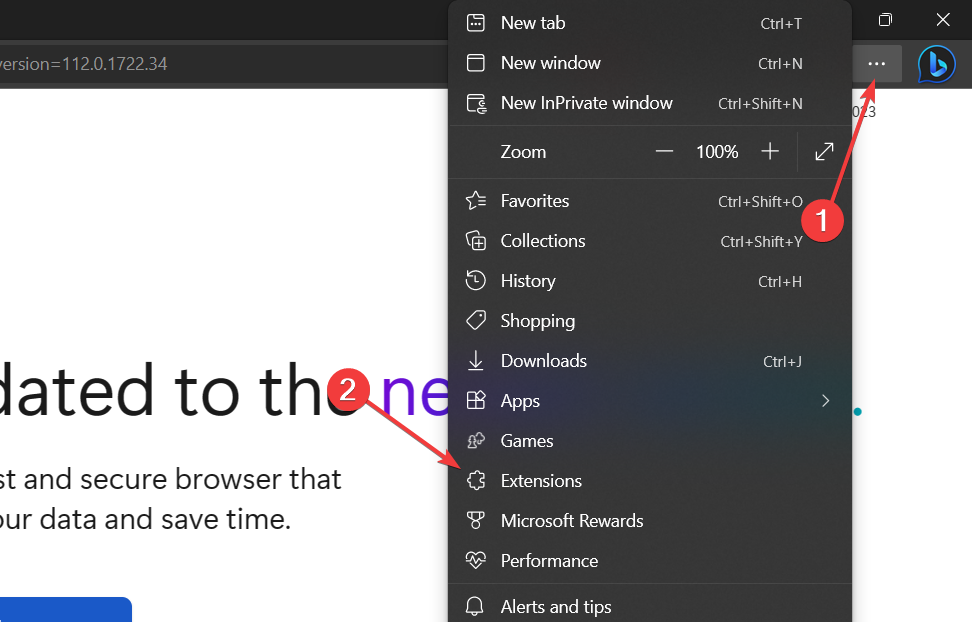
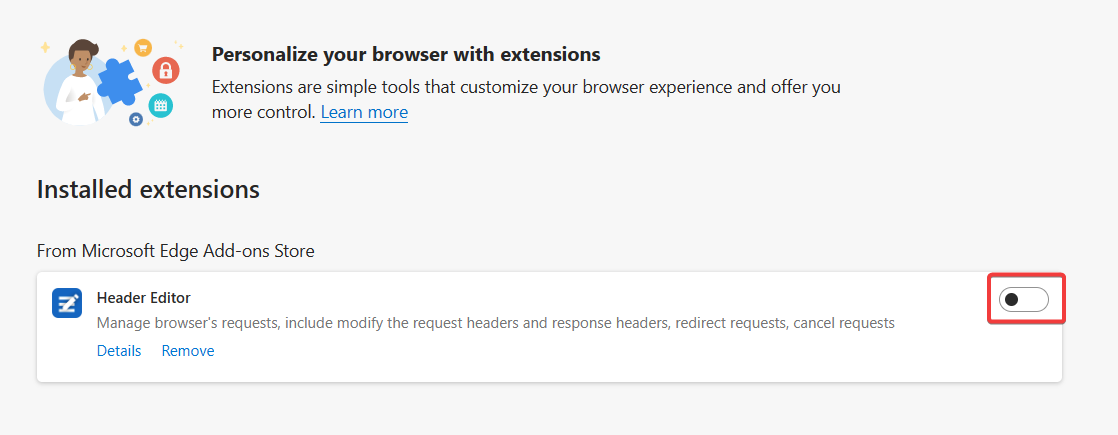
Several of our readers have reported that an extension named Header Editor is causing issues when using Bing AI. You can disable it and other similar extensions temporarily to see if the issue is resolved. If it does the trick, you can consider uninstalling them completely.
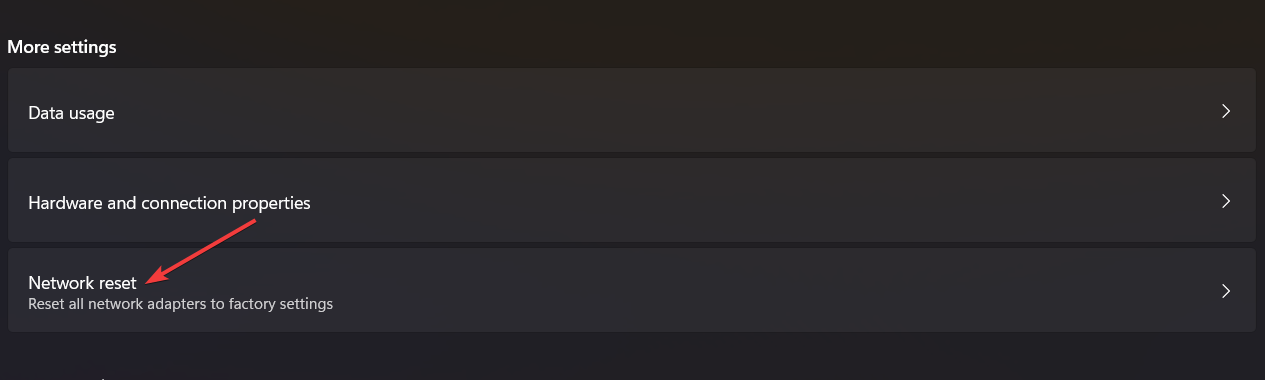
4. Reset the network settings
- Use the Windows + I keyboard shortcut to launch the Settings window.
- Choose Network & internet from the left pane, followed by Advanced network settings from the right section.

- Click the Network reset option listed under the More settings section.

- Press the Reset now button to reset the network settings. Select Yes on the confirmation pop-up if it appears, and then restart your Windows PC.

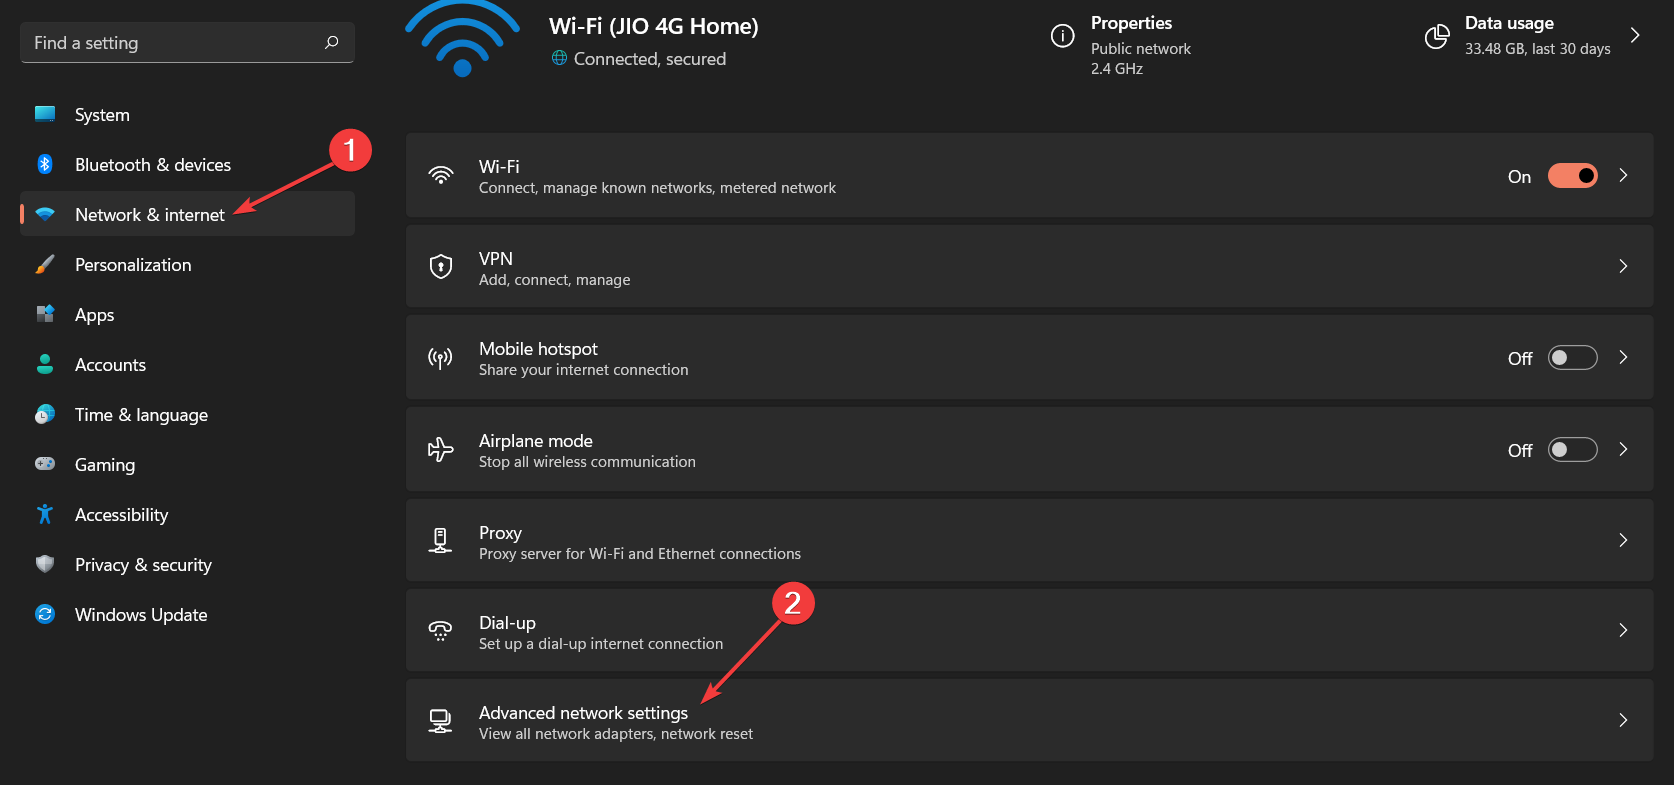
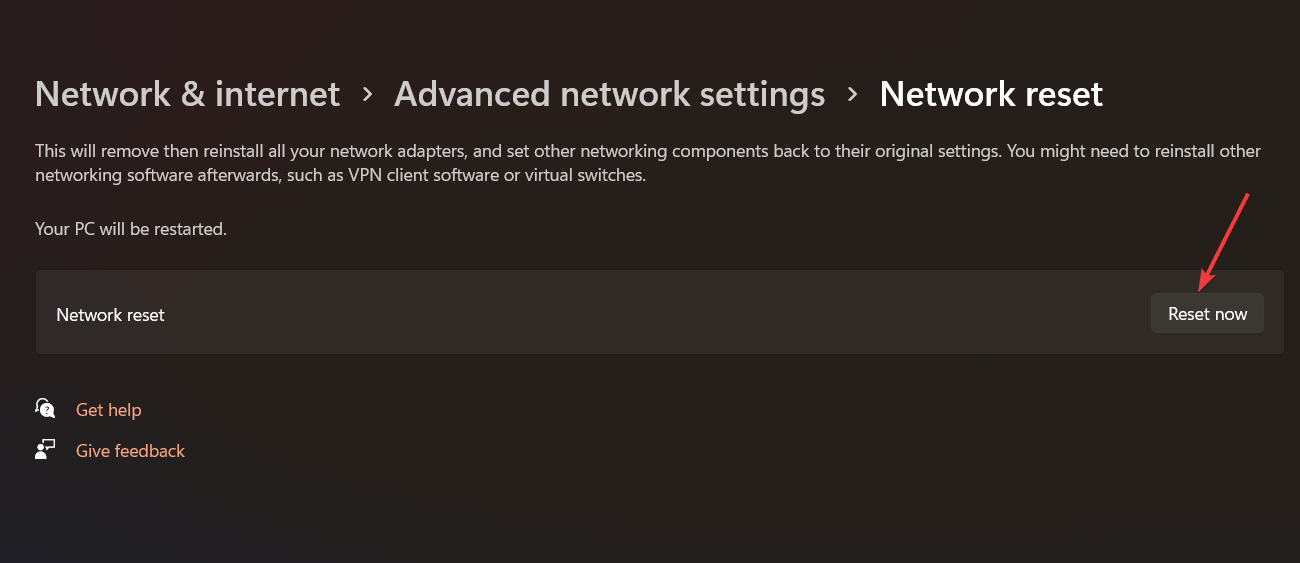
Misconfigured network settings can also be the reason why you are unable to access certain features in the Bing AI chatbot. You can reset the network configuration of Windows to the initial state and then try using Bing once again.
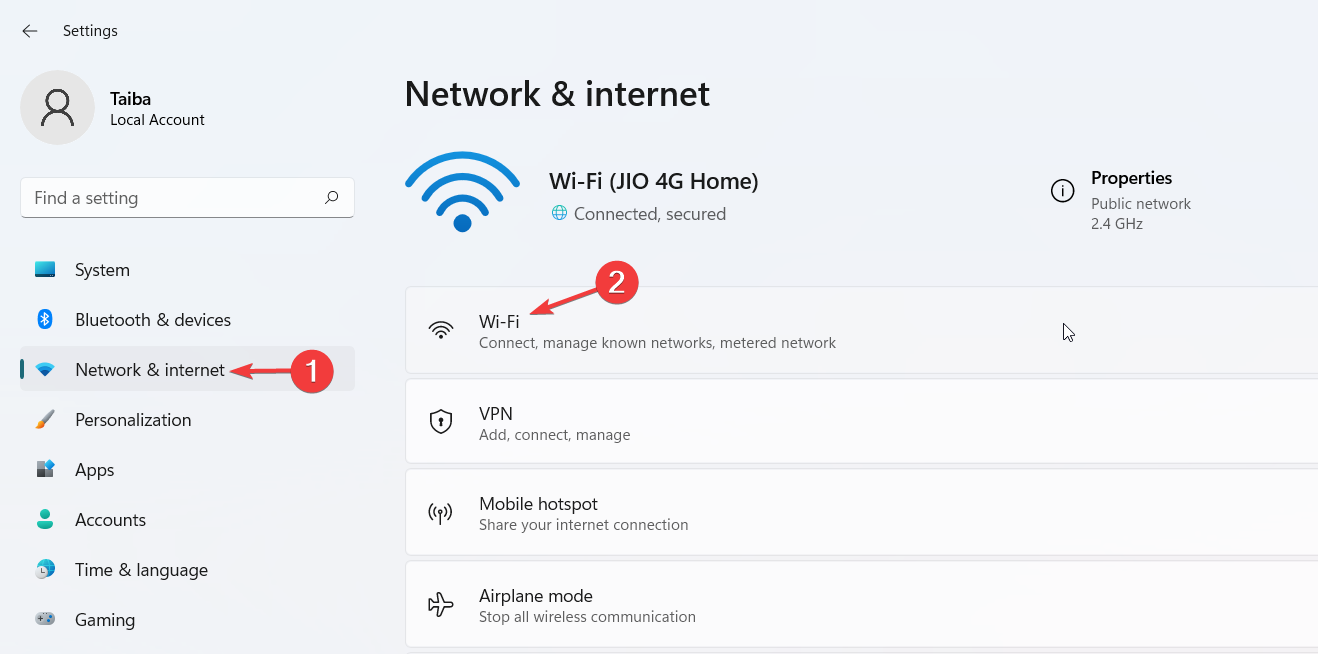
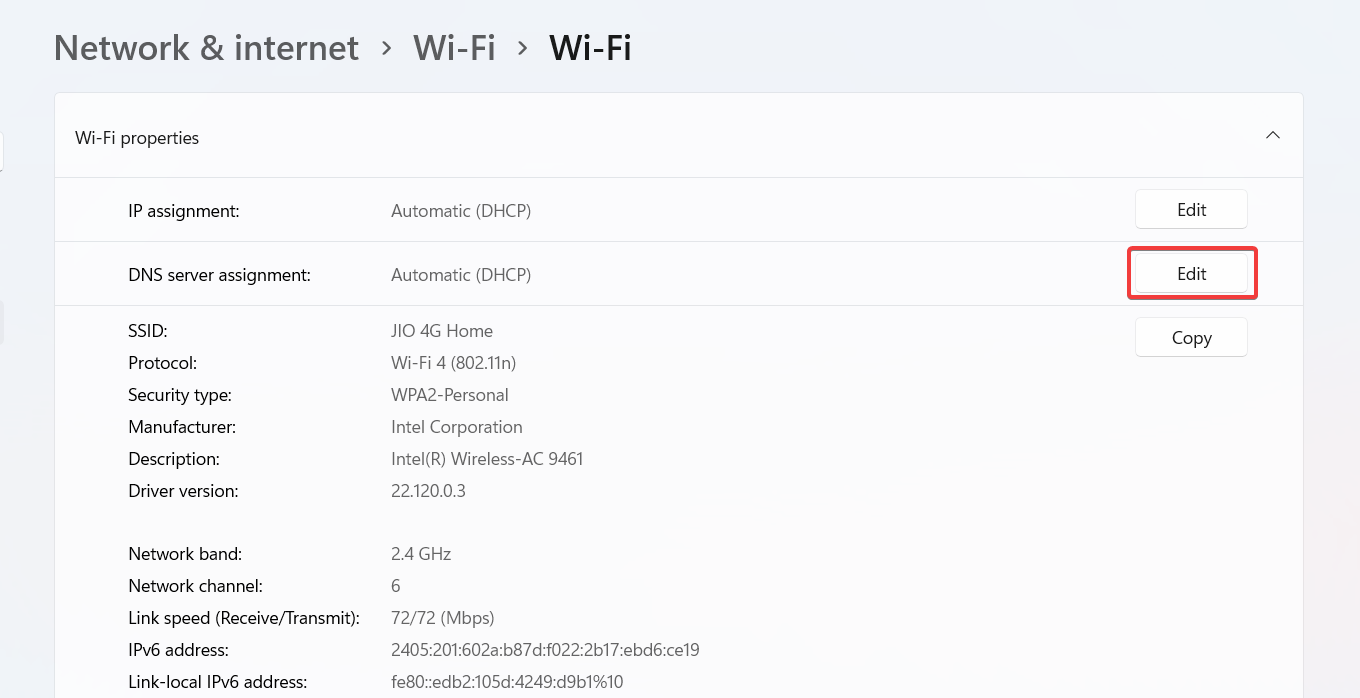
5. Change the DNS settings
- Use the Windows + I shortcut key to launch the Settings app.
- Select Network & Internet from the left sidebar, and depending on the current network you are connected to, choose Wi-Fi or Ethernet from the right section.

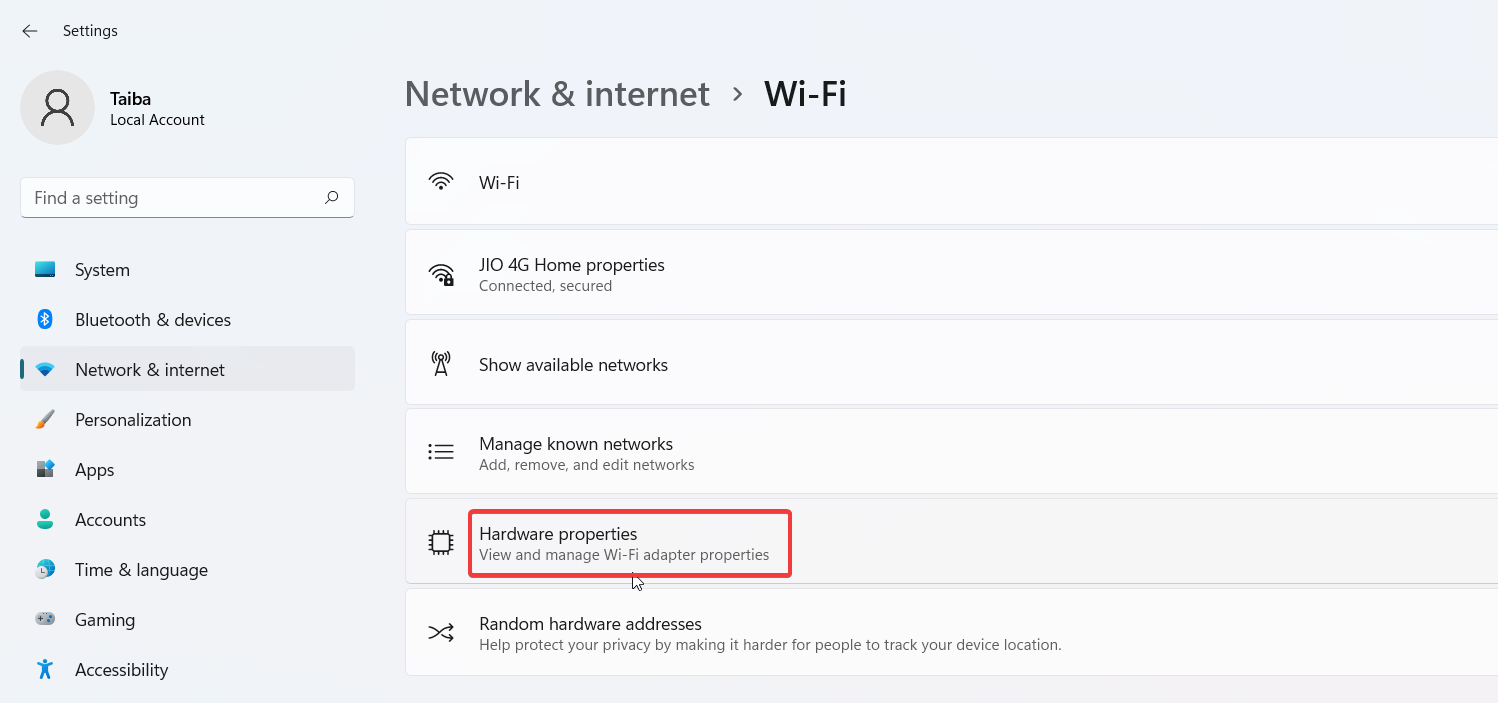
- Scroll down and select Hardware properties.

- Look for the DNS server assignment option and click the Edit button next to it.

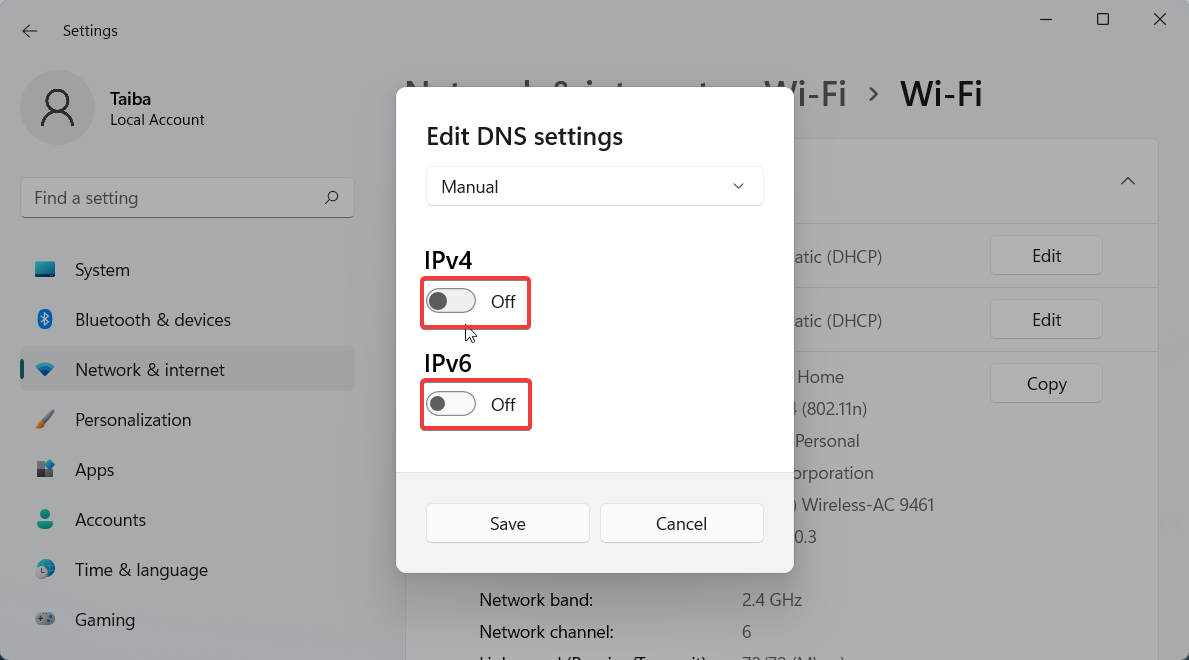
- Expand the drop-down on the top and choose Manual instead of Automatic (DHCP) from the Edit DNS settings popup.
- Next, enable the toggle for either IPv4 or IPv6, based on the IP connection type.

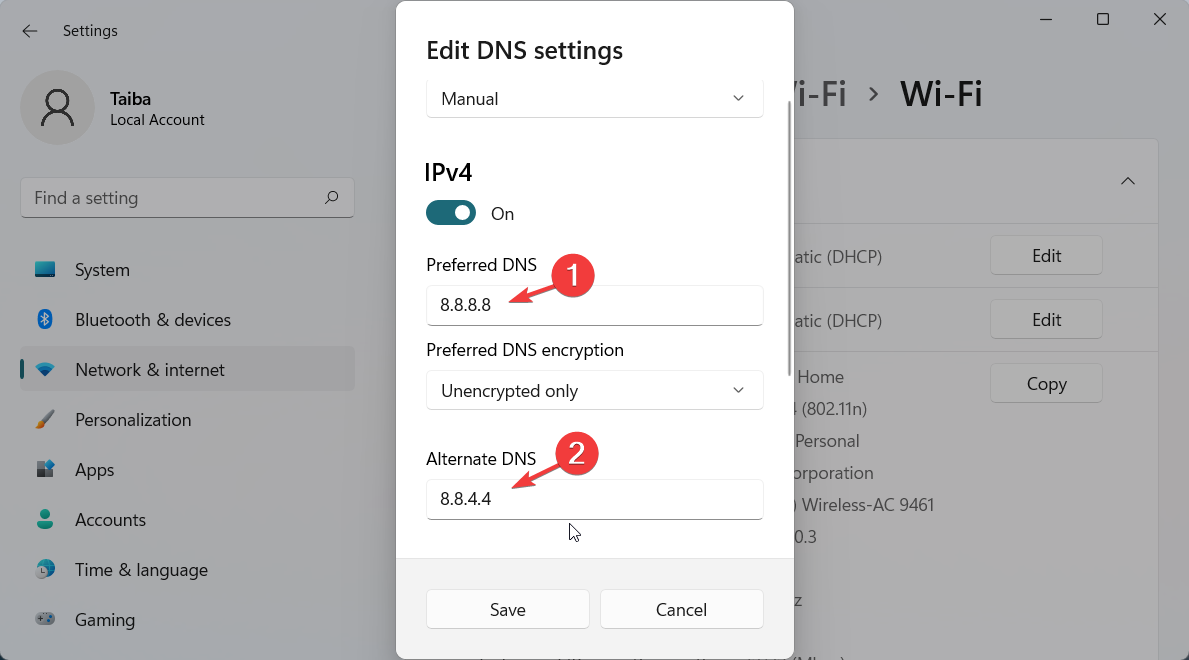
- Now provide the primary DNS server address in the Preferred DNS field followed by a secondary DNS server address in the Alternate DNS field. (Here, 8.8.8.8 and 8.8.4.4 are the preferred and alternative DNS addresses for Google’s DNS server respectively)

- Select Encrypted only (DNS over HTTPS) for both Preferred DNS Encryption and Alternate DNS Encryption dropdowns to apply the DNS over HTTPS feature for encrypting DNS requests.
- After making the changes, press the Save button.
Incorrect DNS settings can also create issues when you access Bing AI. You can try changing DNS settings on your PC to resolve the recurring error message for good.
That’s pretty much it! You can implement these tips to resolve network-related issues in Bing AI and carry on your conversations.
In case you are also facing the daily limit reached error on Bing AI, you can refer to the guide above for relevant tricks to bypass the restriction.
If you have any queries or have some solutions handy, mention them in the comments below.