Nvidia Driver Crashing on Windows 11: How to Fix it
Key notes
- If the Nvidia driver keeps crashing in Windows 11, it would affect the effective functioning of the PC.
- To fix the issue, try reinstalling and updating the driver, modifying settings, running the DISM tool and SFC scan, amongst other methods listed below.
- Also, find out how to disable automatic updates in Windows 11.
The Nvidia graphics card is probably one of the best out there, with a lot of users getting it for the system, owing to its exemplary performance. However, several users have reported that the Nvidia driver keeps crashing in Windows 11.
Drivers play a critical role in the effective functioning of every piece of hardware connected to the PC. They relay commands between the OS and the device and are specific to both.
If these cease to function or crash, you are likely to encounter issues with that particular device. For instance, if the printer driver is not working, you will not be able to use the printer but the other components will work fine.
However, that’s not the case with the display driver, since these are critical and their crash could cause the screen to black out in Windows 11.
Therefore, it becomes imperative that you identify what’s causing the Nvidia driver to keep crashing in Windows 11, along with the most effective solutions to the problem. Read ahead to find out the answer to both these questions.
Why does the Nvidia driver keeps crashing in Windows 11?
If the Nvidia driver keeps crashing in Windows 11, it’s most likely that it is either corrupt or outdated. Identifying and fixing the former is rather easy, while the latter will take up some of your time.
Apart from that, it could also be a bug in the current version of the driver itself. This should be evident if you started encountering the problem after updating it.
In case you are running low on GPU memory, the Nvidia driver may, just as well, crash. So, learn what to do if the GPU memory is full in Windows 11.
Misconfigured settings and corrupt system files too could cause the Nvidia driver to crash. Also, certain apps, generally third-party antivirus, conflict with the functioning of the driver and the OS, and cause it to fail in Windows 11.
No matter the underlying cause, there’s always a solution for it. In the following sections, we have listed the best methods to fix issues causing the Nvidia driver to keep crashing in Windows 11.
What do I do if the Nvidia driver keeps crashing in Windows 11?
1. Reinstall the Nvidia driver
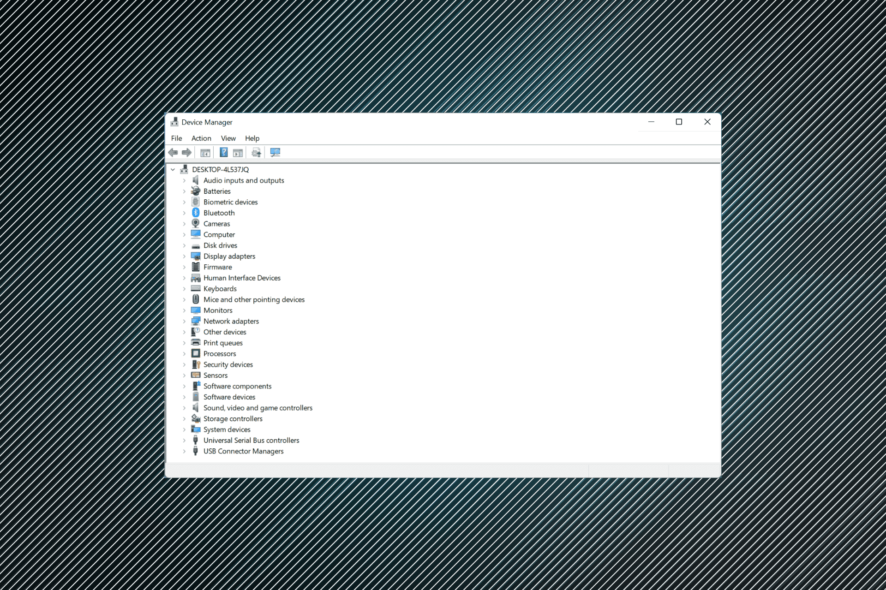
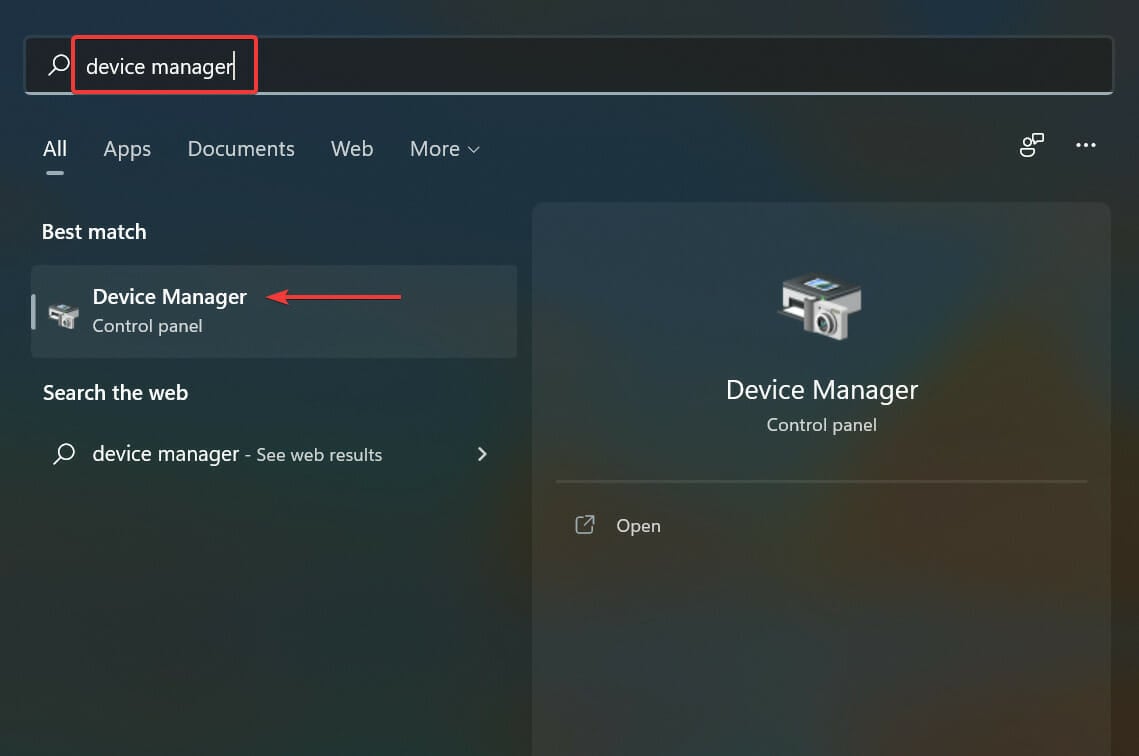
- Press Windows + S to launch the Search menu, enter Device Manager in the text field at the top, and click on the relevant search result.

- Next, double-click on the Display adapters entry to expand and view the graphic cards under it.
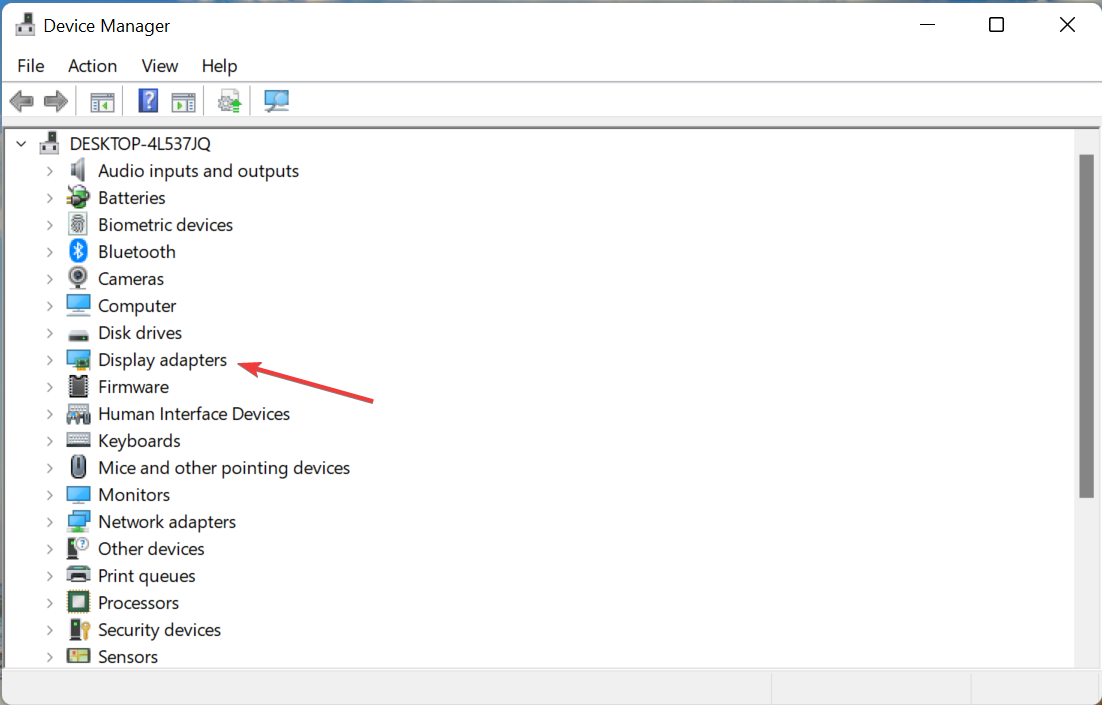
- Right-click on the Nvidia adapter, and select Uninstall device from the context menu.
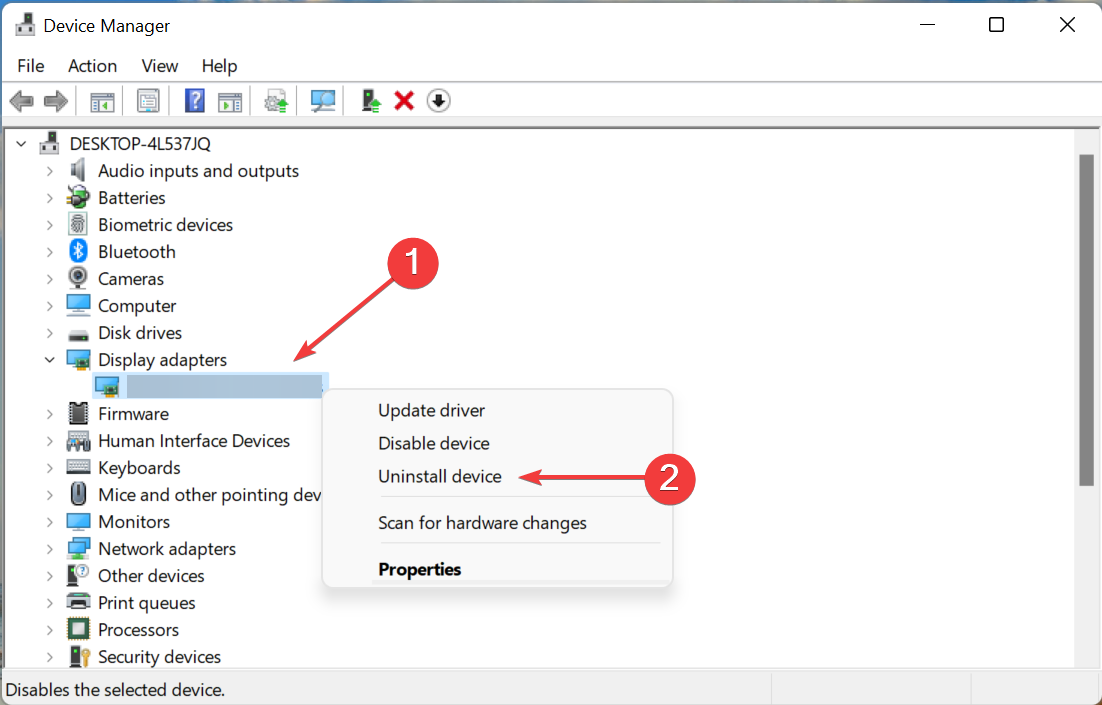
- Tick the checkbox for Attempt to remove the driver for this device, and click on Uninstall at the bottom.

- Now, restart the computer, and once it turns on, Windows will automatically install a fresh copy of the driver.


If the currently installed driver is corrupt, the Nvidia driver will keep crashing in Windows 11. A corrupt driver has a warning sign near the bottom-left corner of its icon in the Device Manager, which helps easily identify these.
2. Update the Nvidia driver
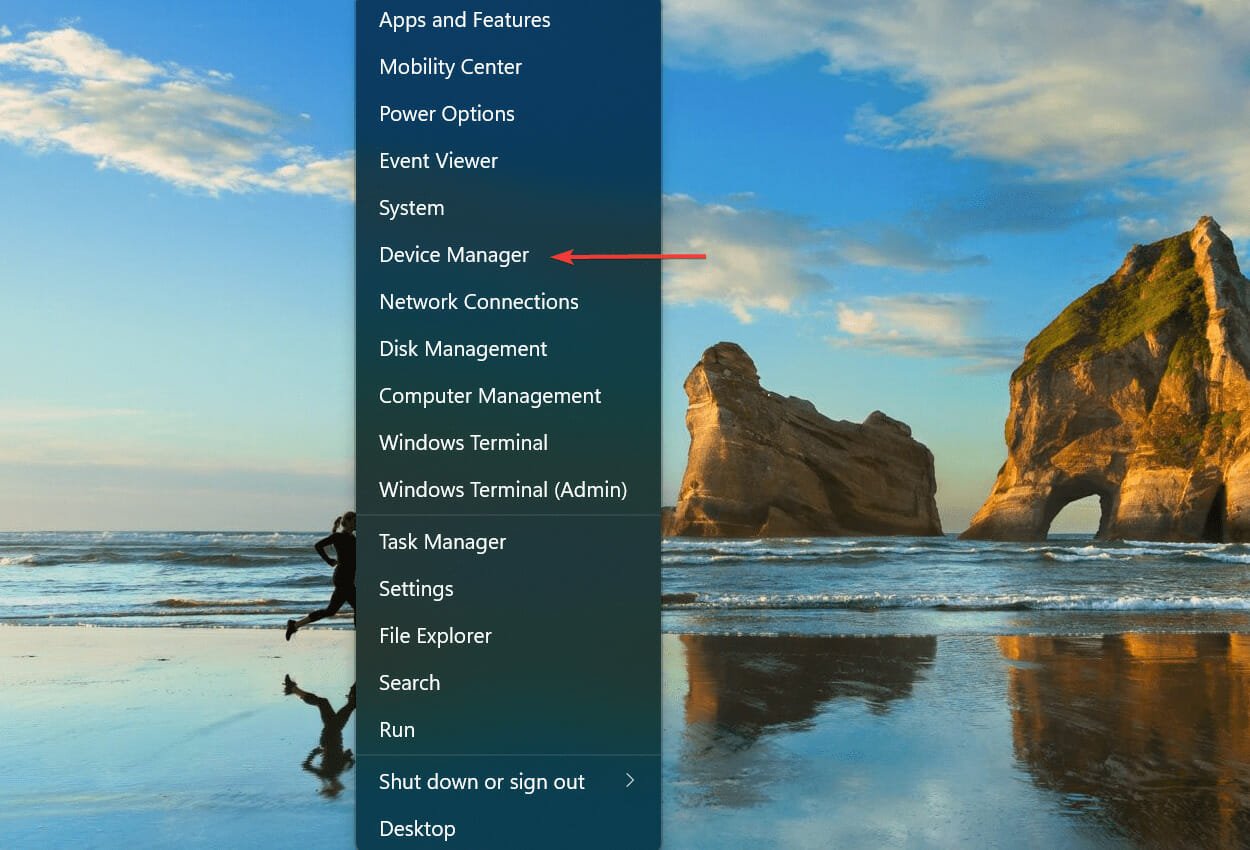
- Press Windows + X or right-click on the Start icon to launch the Quick Access menu, and select Device Manager from the list of options.

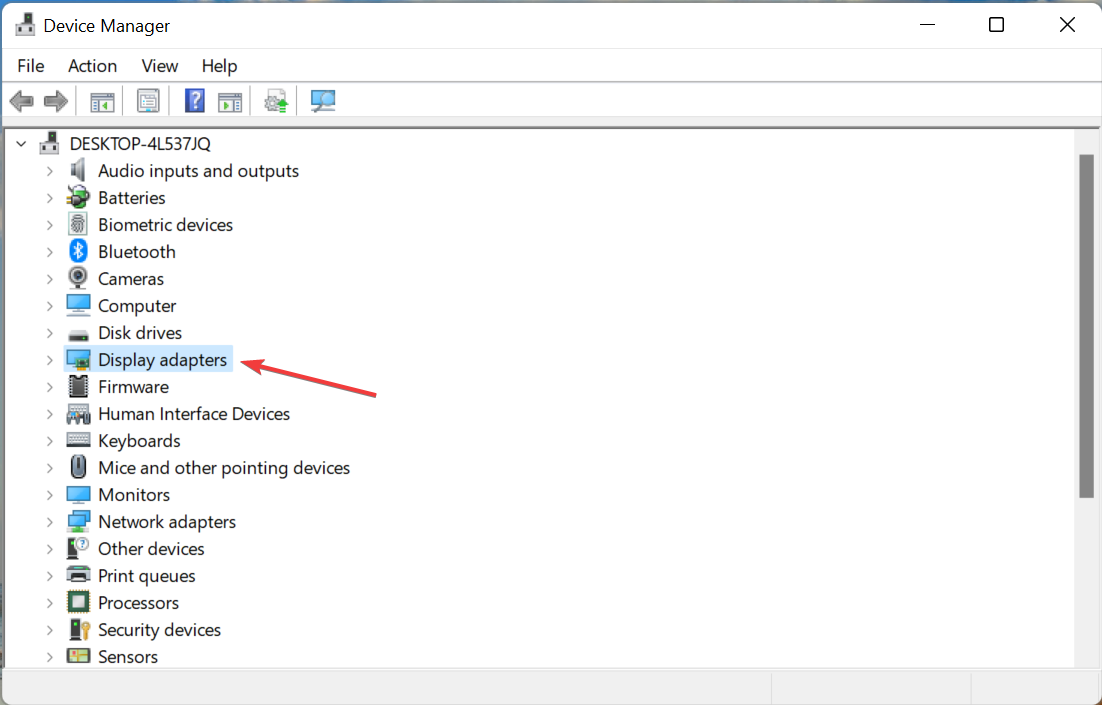
- Double-click on the Display adapters entry.

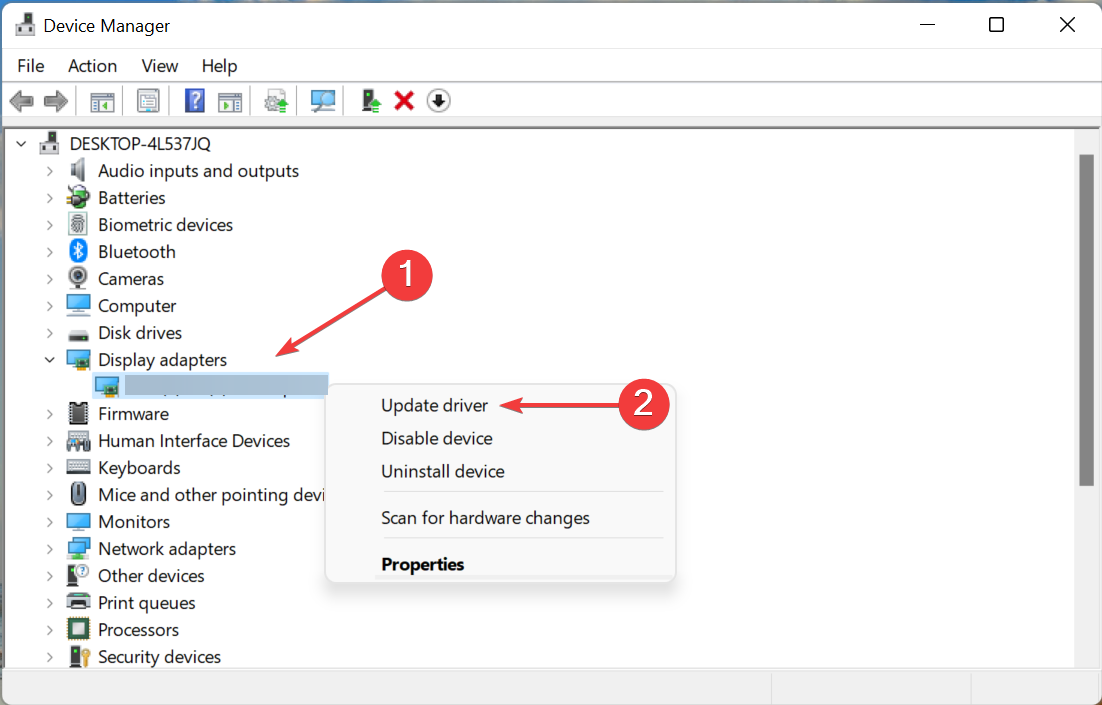
- Locate and right-click on the Nvidia adapter, and select Update driver from the context menu.

- Select the Search automatically for drivers option in the Update Drivers window.
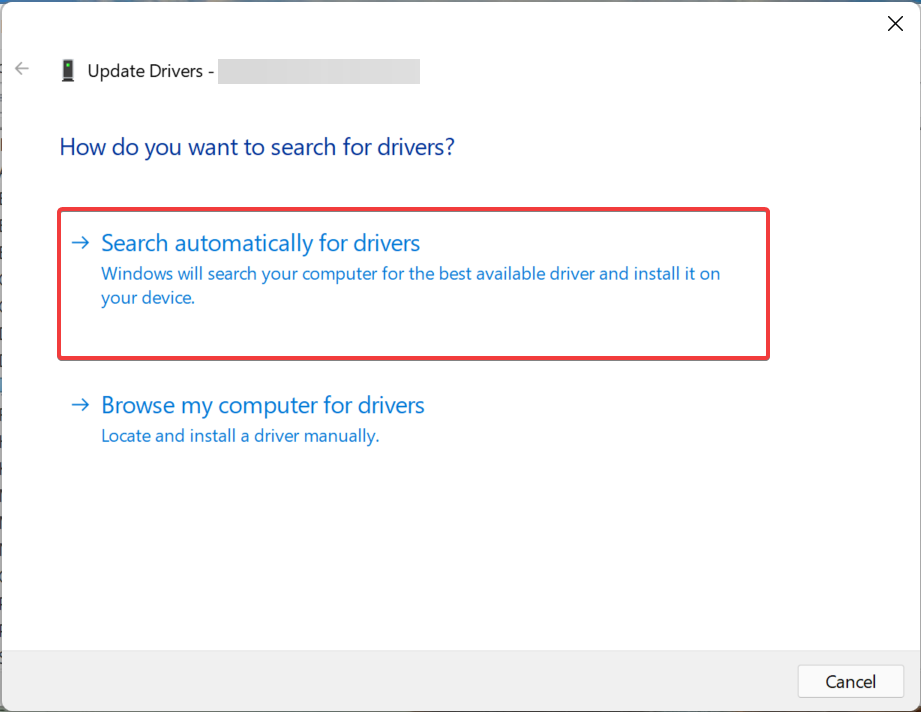
- Windows will now scan your system for the best available driver and install it for the graphics card.

If you are unable to find the latest version using the Device Manager, do not forget to check the Windows Update section for driver updates.
Manually updating the driver can be both tricky and time-taking. We recommend using Outbyte Driver Updater, a dedicated tool that will scan the web for the latest version, and install these updates for all the drivers on your system, thus ensuring that they are always up-to-date.
Also, learn how to fix the outdated drivers error in Windows 11.
3. Download Nvidia driver from the official website and install it
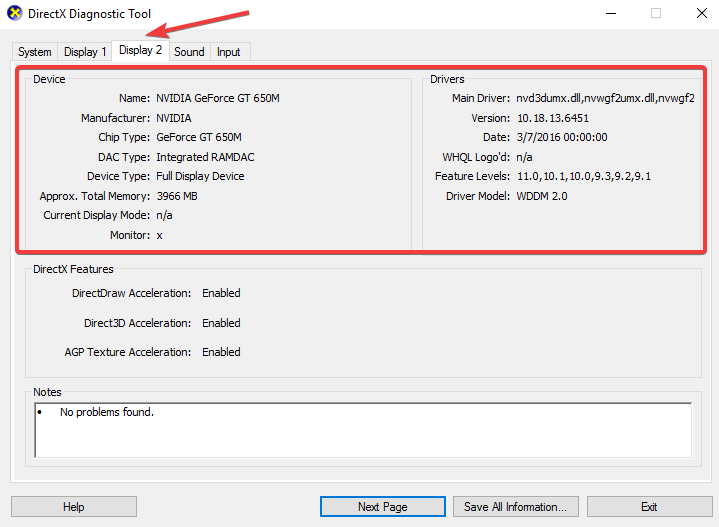
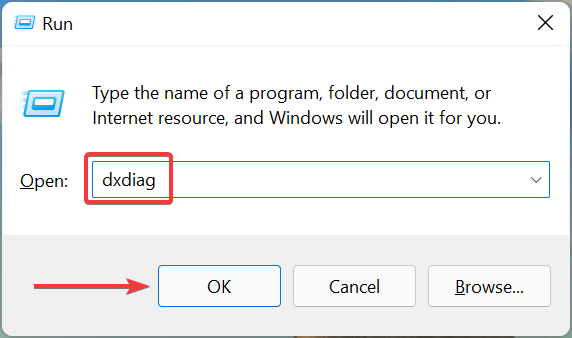
- Press Windows + R to launch the Run command, enter dxdiag in the text field, and either click on OK or hit Enter to launch the DirectX Diagnostic Tool.

- Navigate to the Display tab, and check all the information regarding the installed Nvidia graphics card.
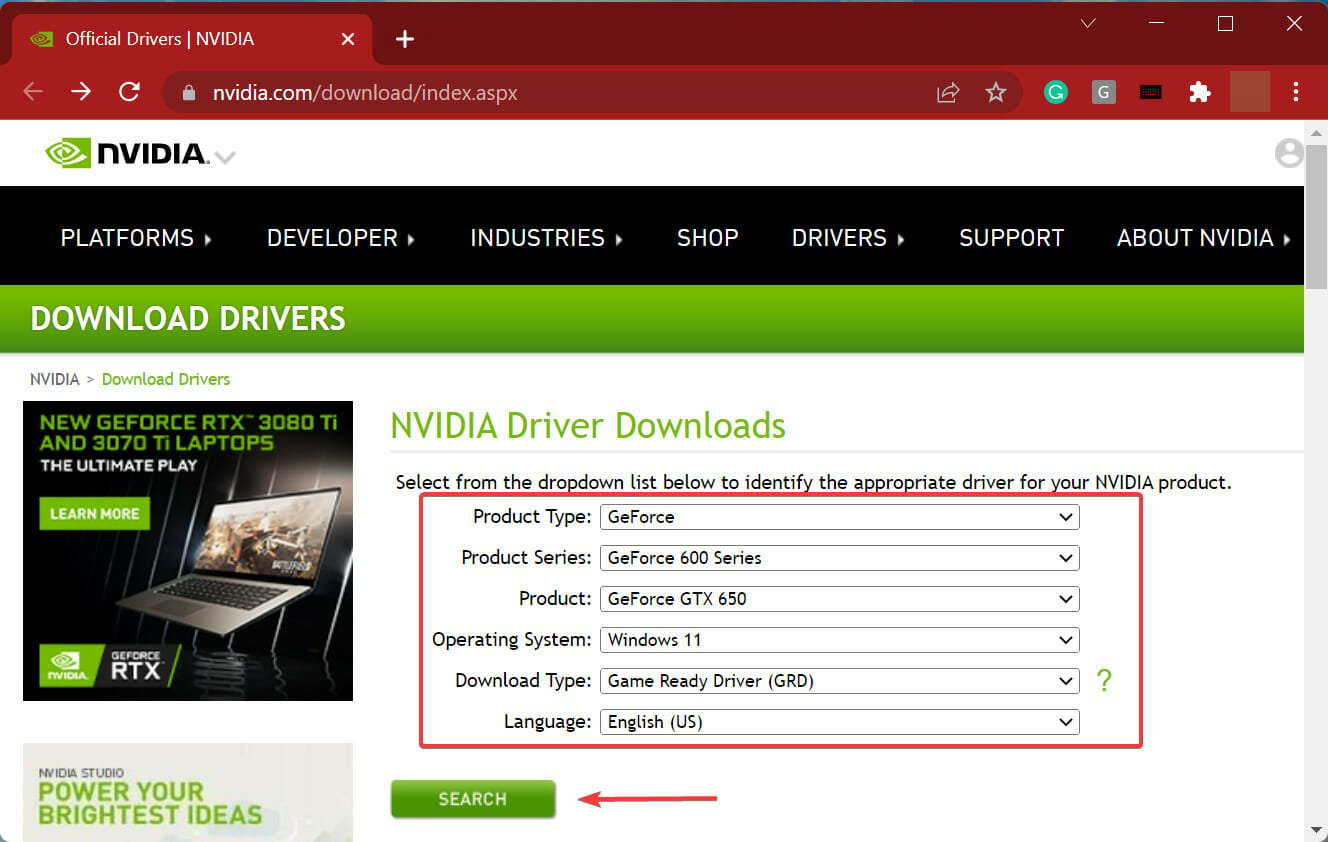
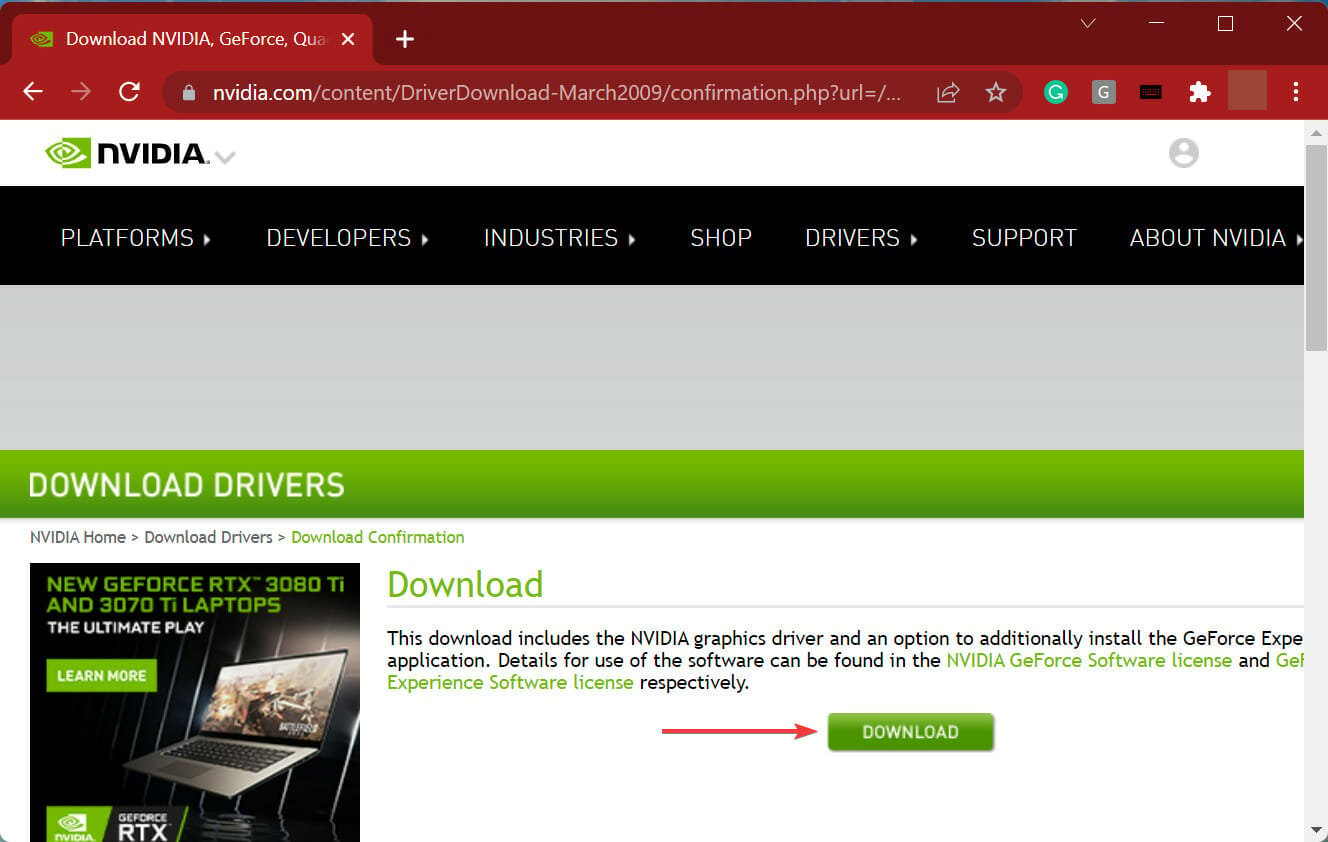
- Open any web browser, go to Nvidia’s official website, choose the relevant options from each of the dropdown menu, depending on the Nvidia graphics card installed on your system, and click on Search.

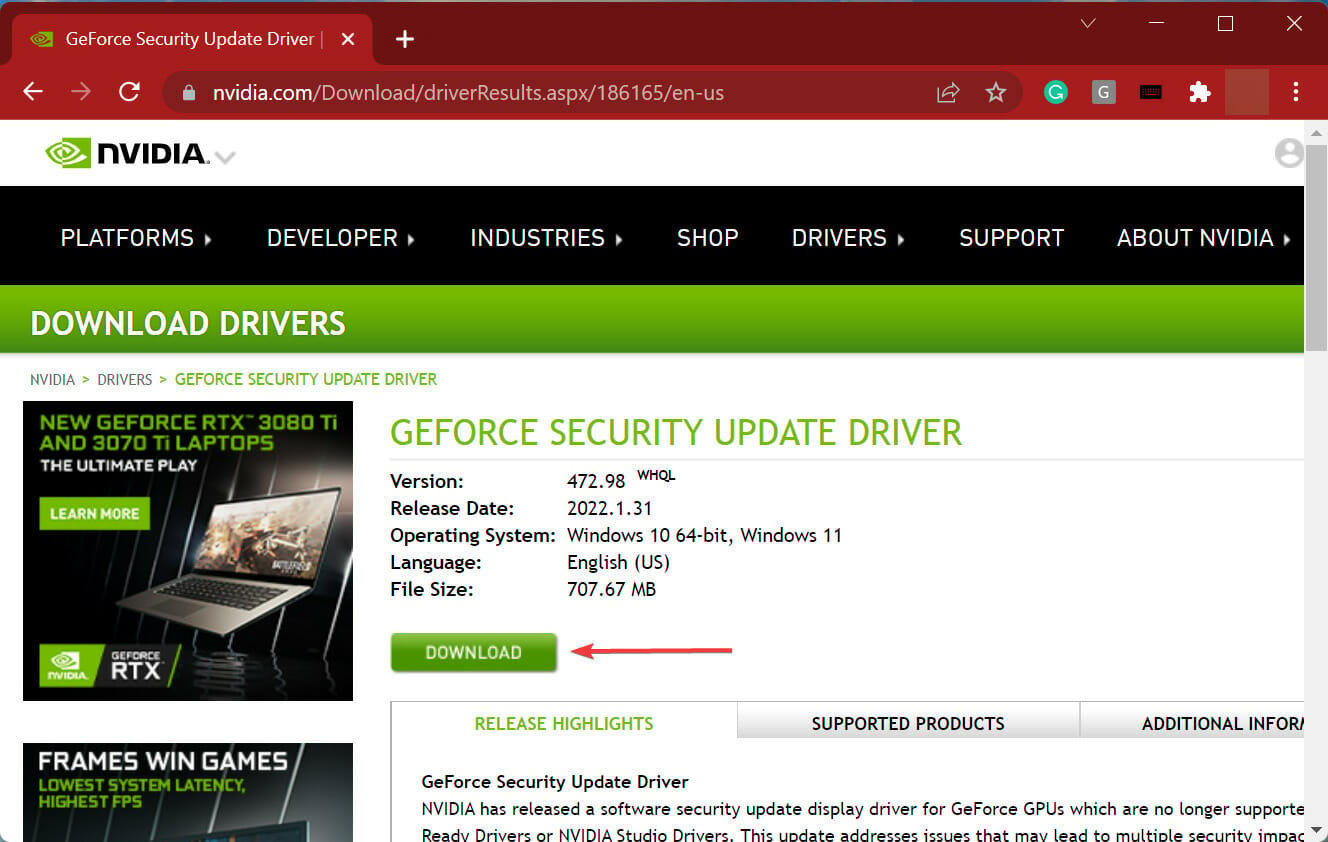
- Now, click on the Download to get the driver setup.

- Again, click on the Download button on the next page.

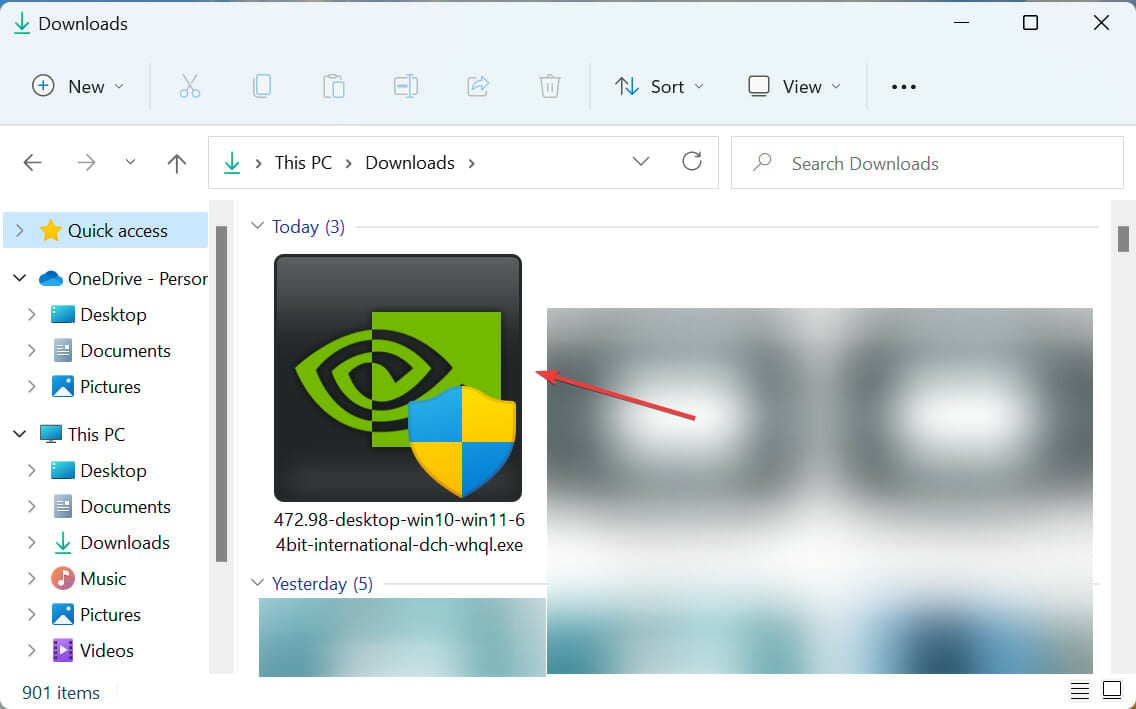
- After the download is complete, double-click on the file to launch the installer, and follow the on-screen instructions to complete the installation process.

- Once done, restart the computer for the changes to come into effect and check if Nvidia driver still keeps crashing in Windows 11.

4. Reconfigure settings in Nvidia Control Panel
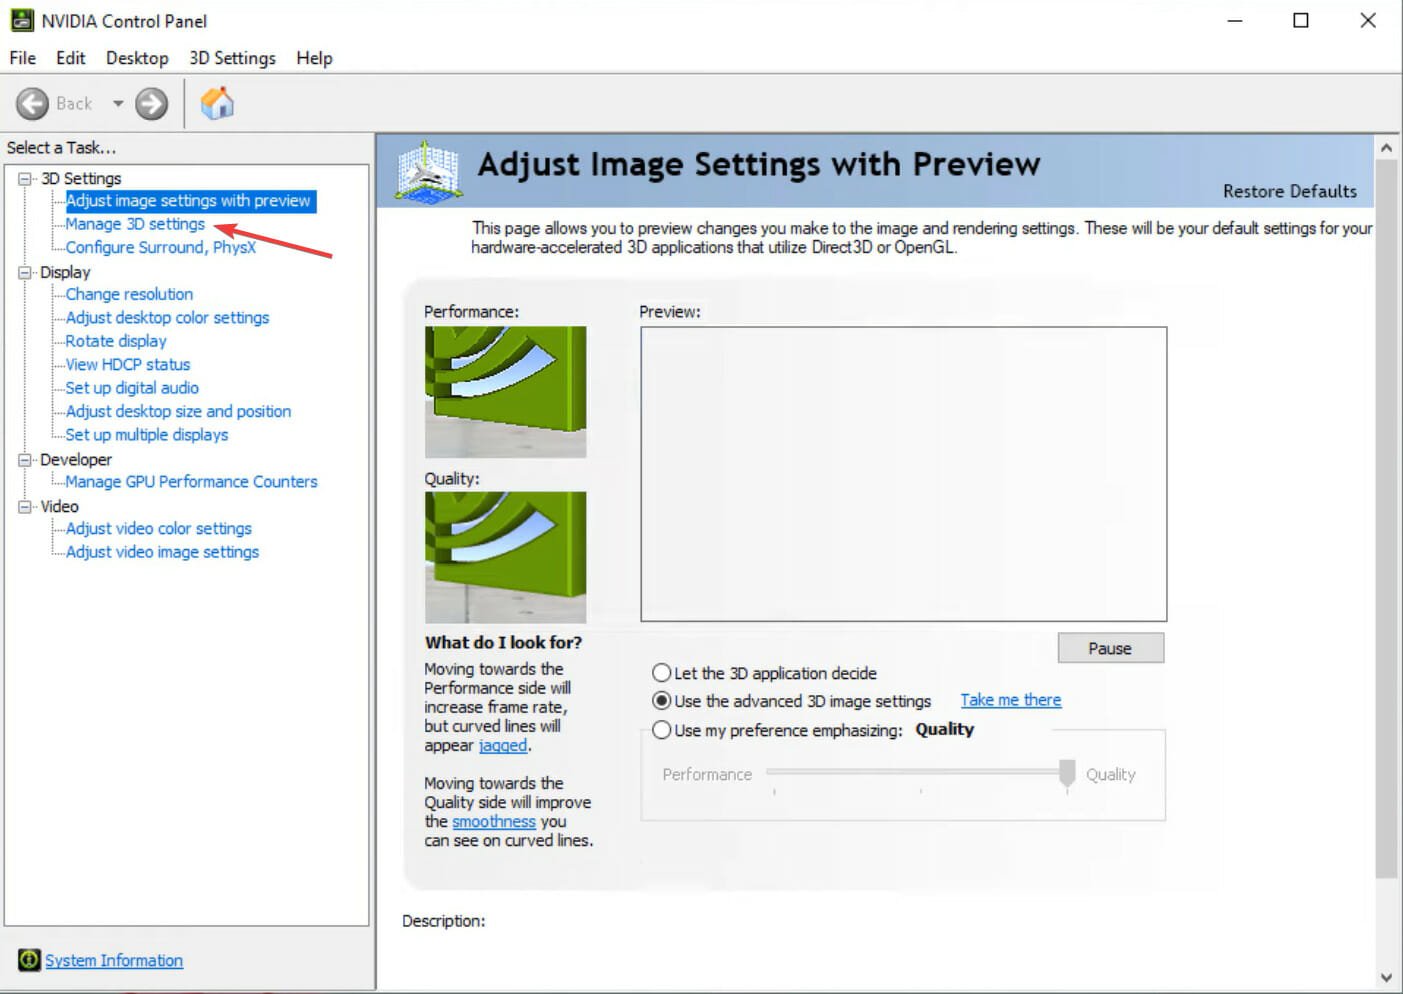
- Launch the Nvidia Control Panel from the search menu.
- Next, select the Manage 3D Settings option under 3D Settings from the navigation pane on the left.

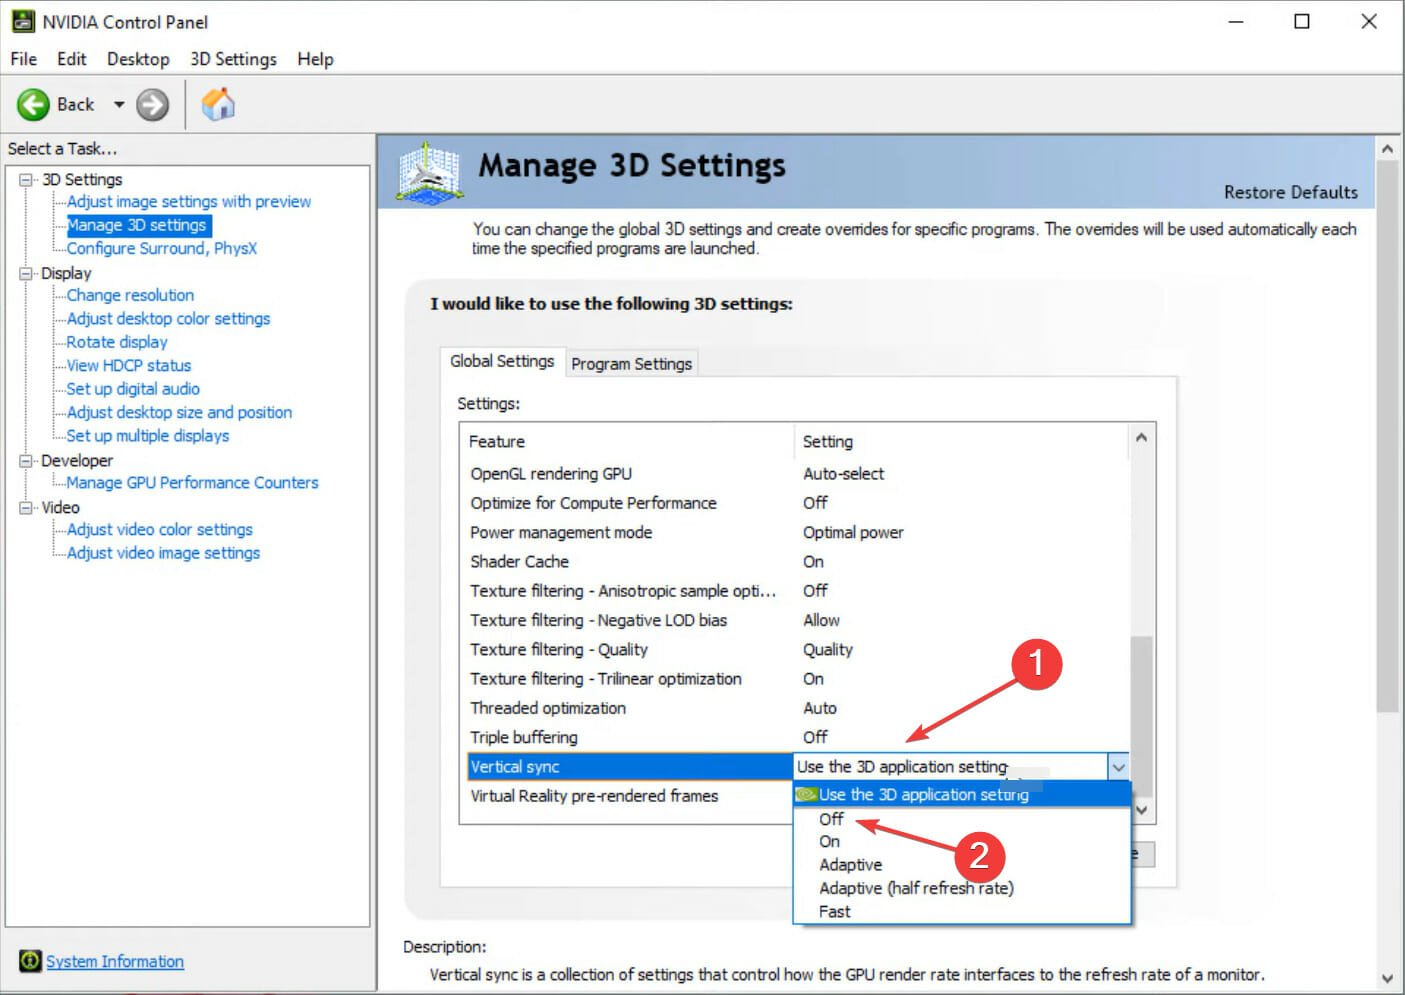
- Click on the Vertical sync dropdown menu, and select Off from the list of options.

- Also, make sure that Power management mode is set to Prefer maximum performance.

- Save the changes, restart the computer, and check if the error is fixed.

5. Run DISM tool & SFC scan
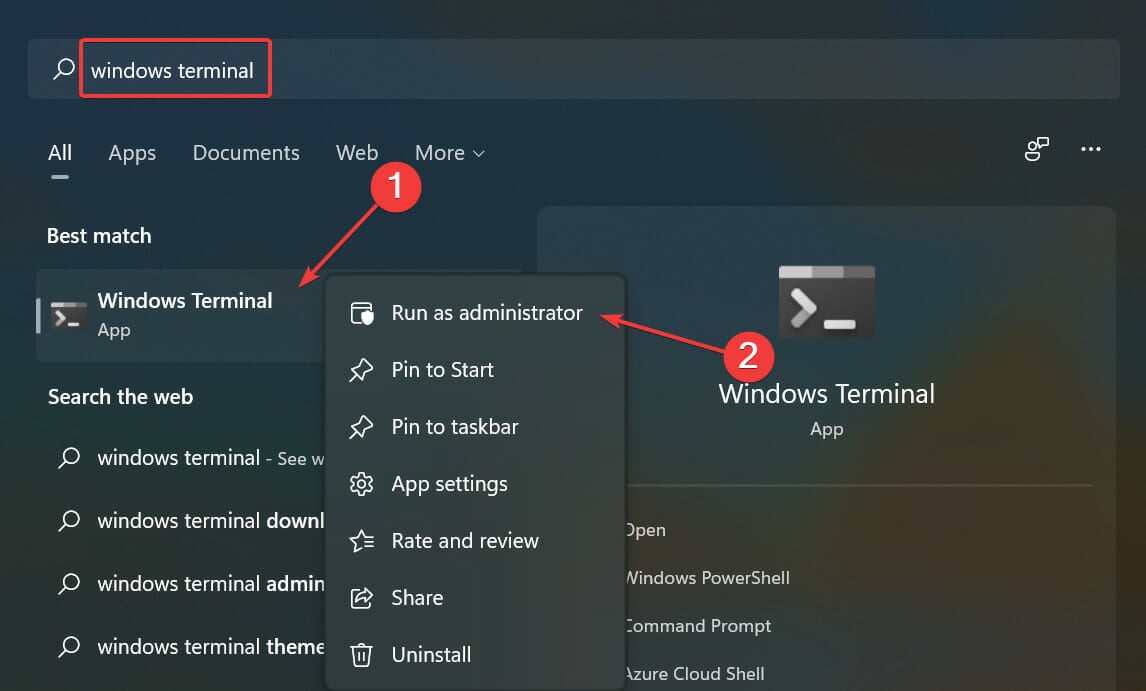
- Press Windows + S to launch the Search menu, enter Windows Terminal in the text field, right-click on the relevant search result, and then select Run as administrator from the context menu.
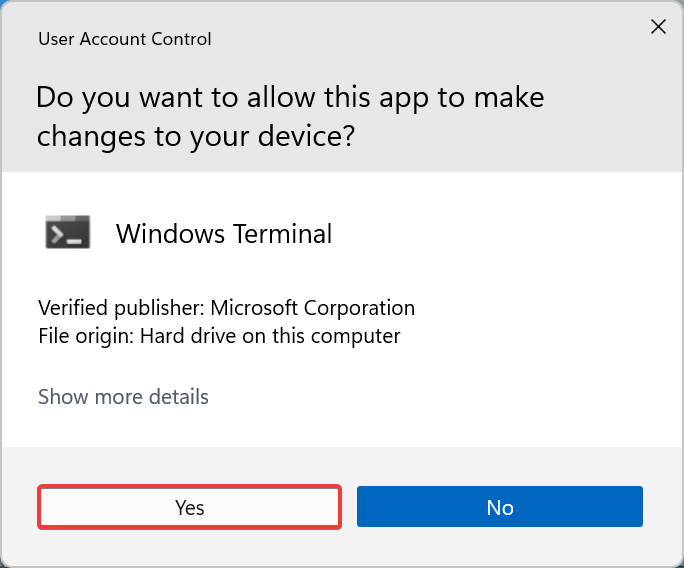
- Click on Yes in the UAC (User Account Control) prompt that pops up.

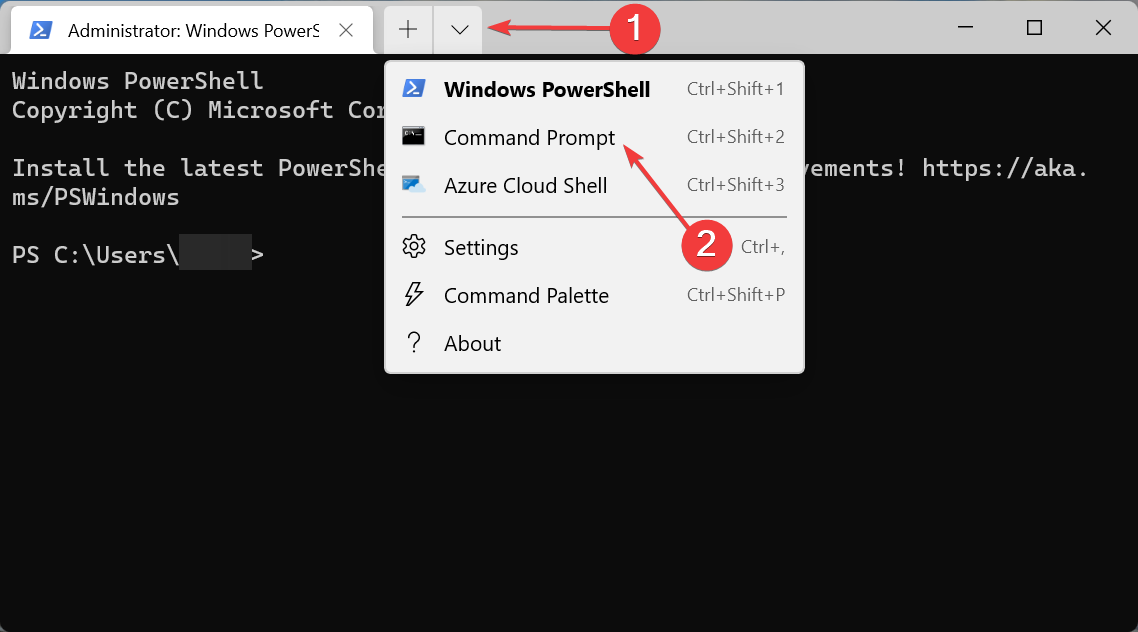
- Click on the downward-facing arrow at the top, and select Command Prompt from the list of options. Alternatively, you can press Ctrl + Shift + 2 to launch Command Prompt in a new tab.
- Now, paste the following commands one at a time, and hit Enter after each to run the DISM tool:
Dism /Online /Cleanup-Image /ScanHealthDism /Online /Cleanup-Image /CheckHealthDism /Online /Cleanup-image /RestoreHealth - Once done, execute the following command to run the SFC scan:
sfc /scannow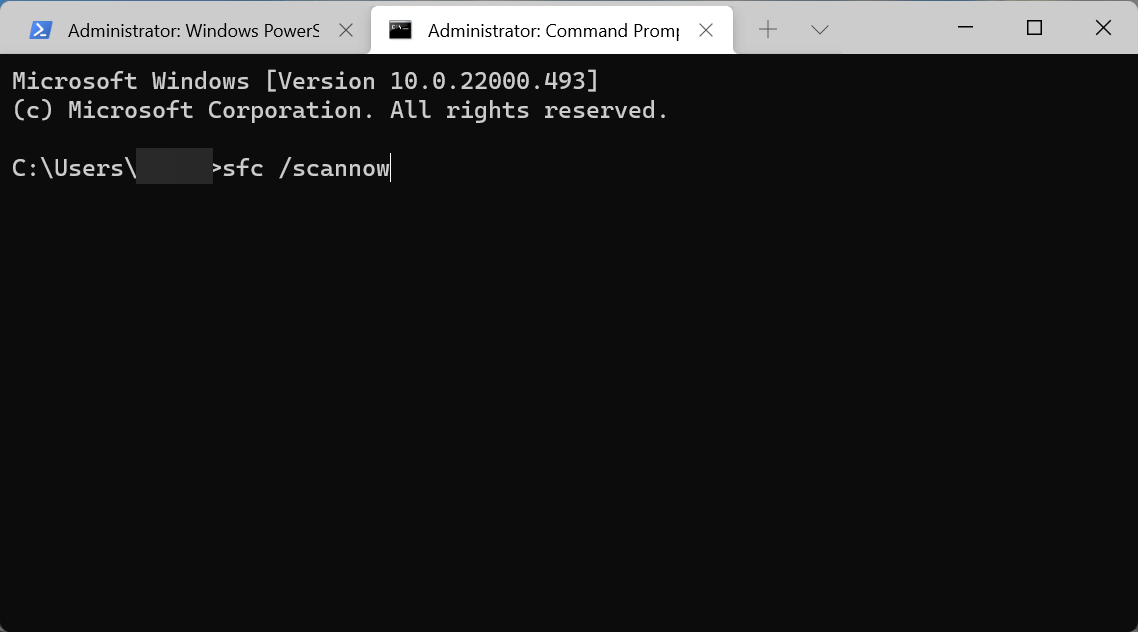


The DISM (Deployment Image Servicing & Management) tool checks for issues with the OS and resolves them. Also, it can modify the Windows image or Windows installation files, if required to fix the issue.
The SFC (System File Checker) scan is used to identify corrupt system files, and then replace them with their cached copy stored on the system. Corrupt system files are known to cause a bunch of issues, and it’s necessary to run the SFC scan to fix the problem.
After both the commands are executed, check if the Nvidia driver still keeps crashing in Windows 11. If that’s the case, head to the next method.
6. Uninstall conflicting applications
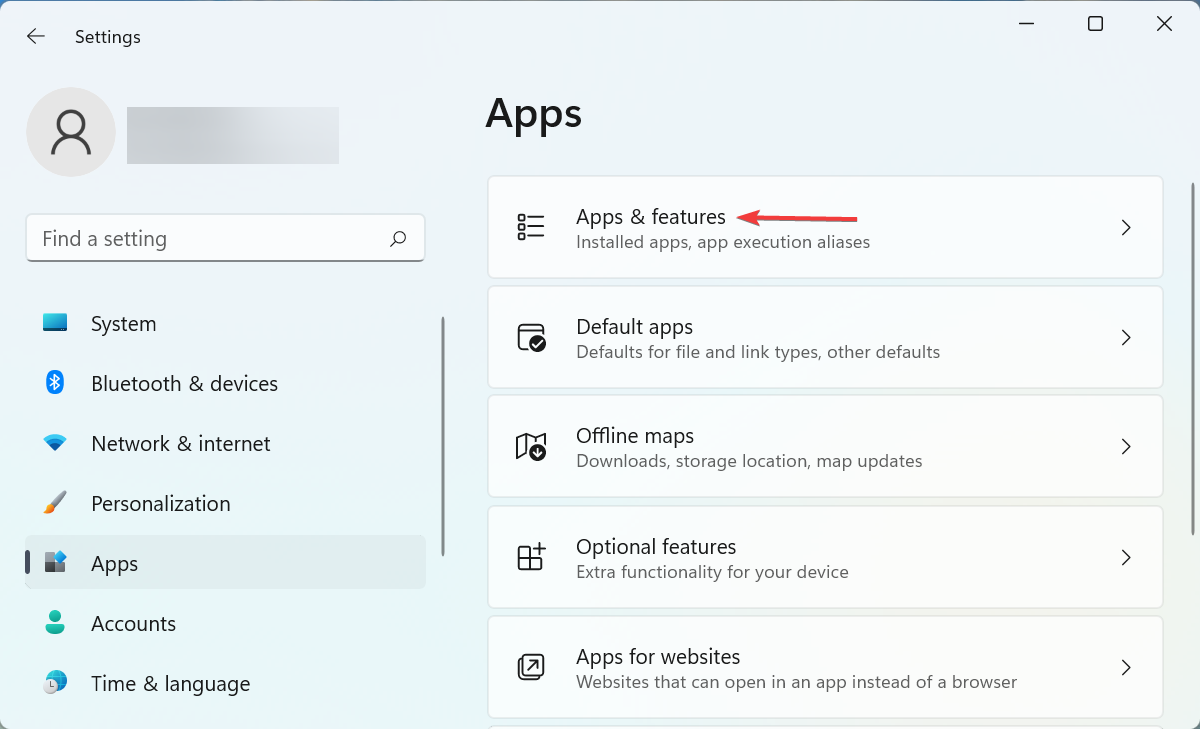
- Press Windows + I to launch the Settings, and select Apps from the tabs listed in the navigation pane on the left.

- Next, click on Apps & features on the right.

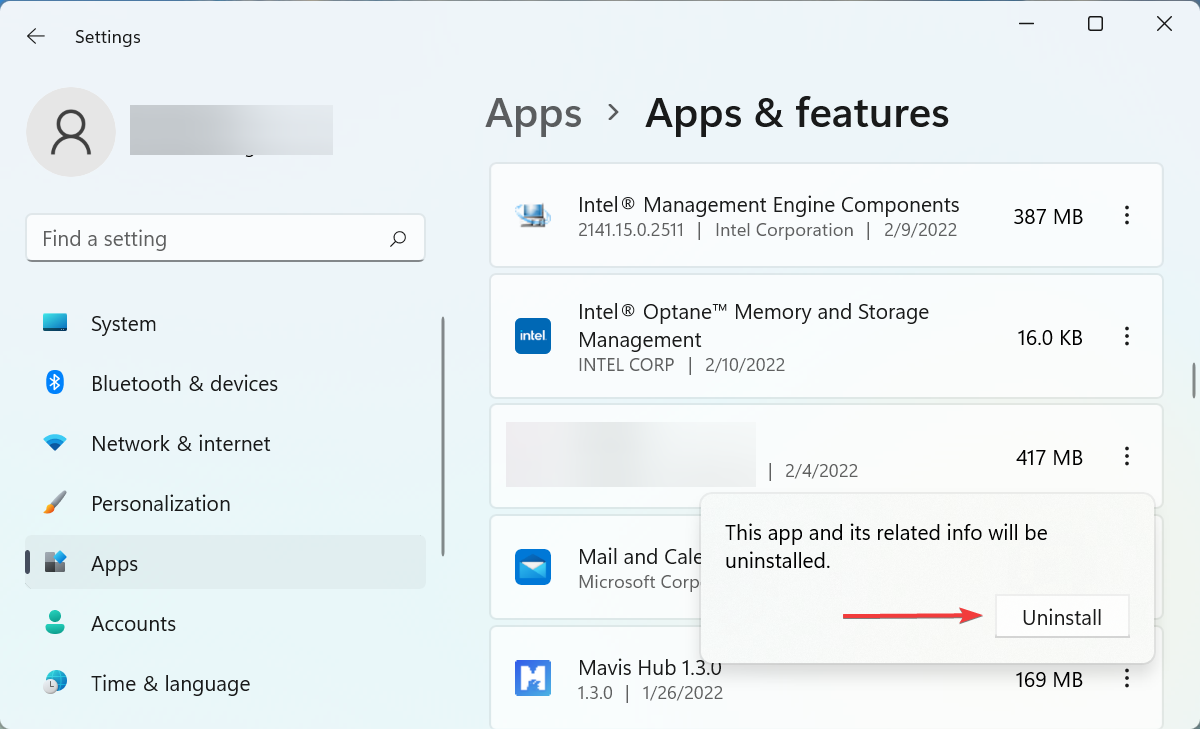
- Locate the conflicting application, click on the ellipsis next to it, and select Uninstall from the menu.
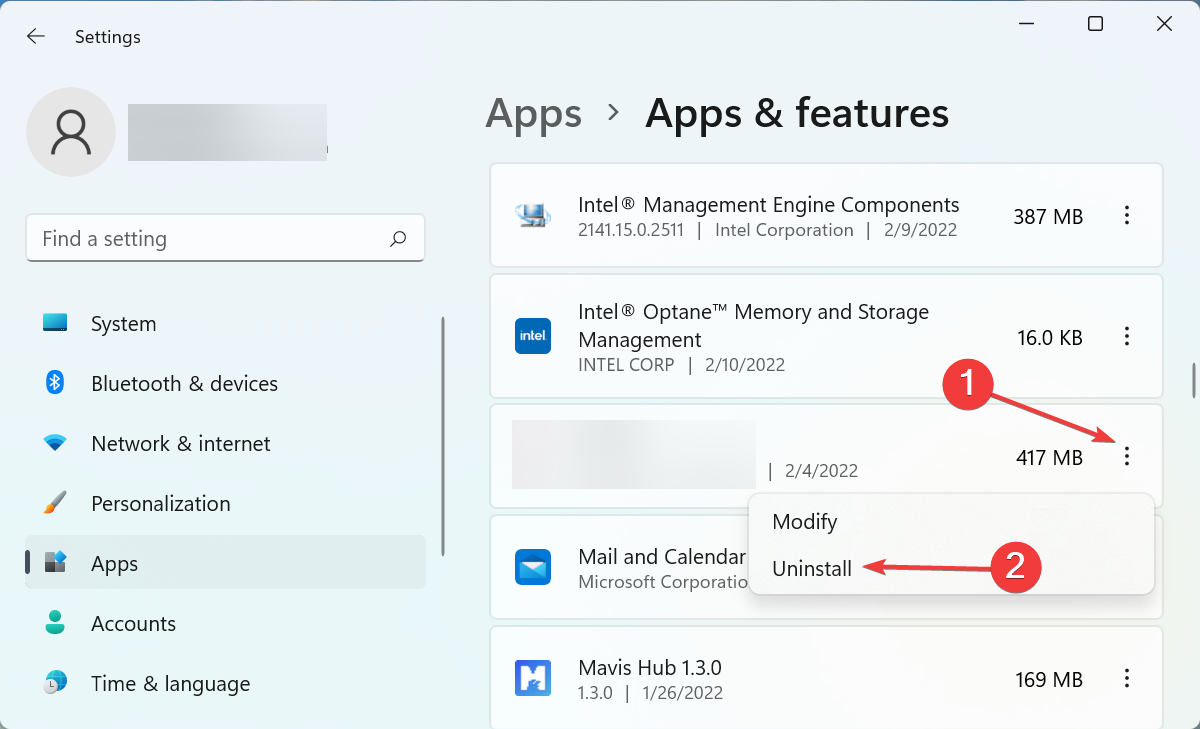
- Again, click Uninstall in the confirmation prompt that pops up.


If you started encountering the error after installing an application, it’s likely that the app is conflicting with the functioning of the driver, and we recommend uninstalling it right away.
Certain third-party antiviruses are known to cause the Nvidia driver keeps crashing in Windows 11 error. If you have any installed, remove it. Also, some of these come with a dedicated tool to effectively uninstall them. Make sure to use it, if there’s one.
7. Run the Windows Memory Diagnostic tool
- Press Windows + S to launch the Search menu, enter Windows Memory Diagnostic in the text field, and click on the relevant search result that appears.
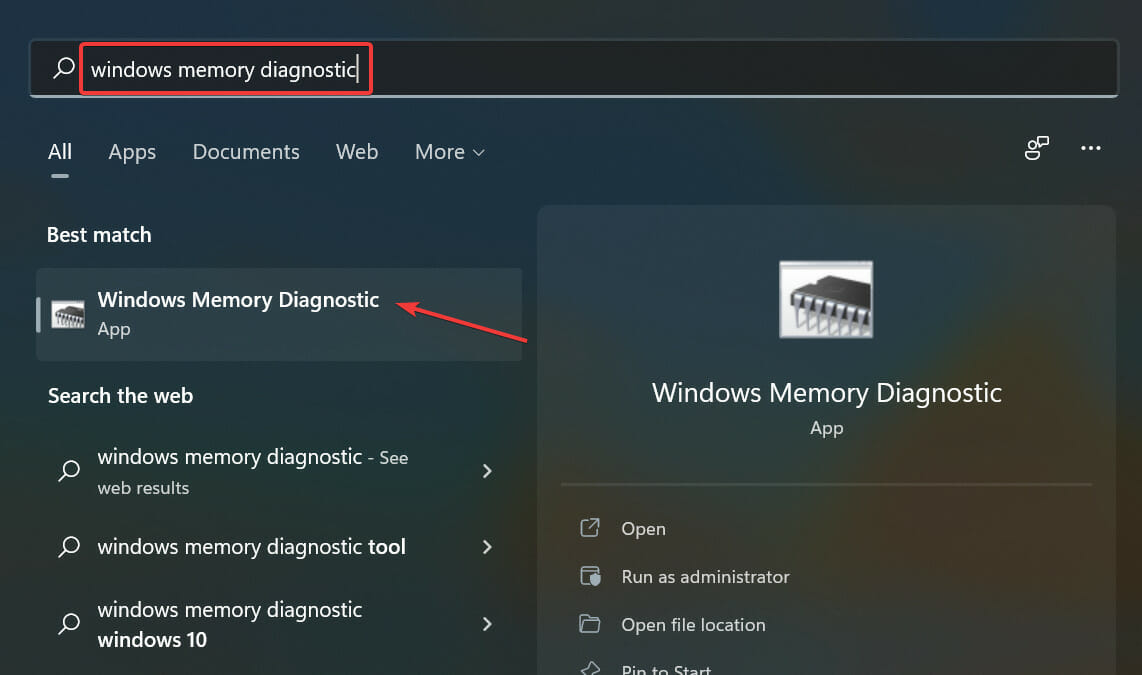
- Next, select the Restart now and check for problems option.


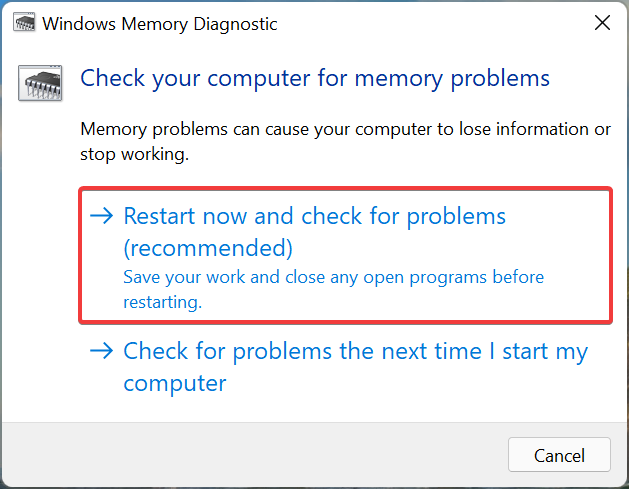
Make sure to save any open files before you proceed with this method to avoid data loss since your computer will restart during the process.
8. Reset Windows 11
If none of the fixes listed above have worked, you are left with no option but to reset Windows 11 to its factory settings. Resetting the system eliminates all sorts of software-related issues.
Though, the process will remove all the data on your computer and reconfigure the settings to their default state. So, make sure to use this method as a last resort.
How can I disable automatic Nvidia driver updates in Windows 11?
- Press Windows + S to launch the Search menu, enter Change device installation settings in the text field at the top, and click on the relevant search result.

- Now, select the checkbox for the No (your device may not work as expected) and click on Save changes at the bottom.
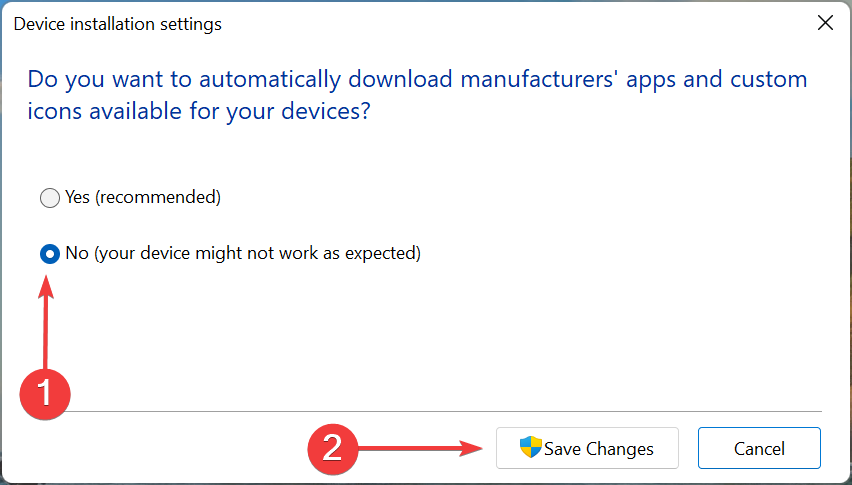
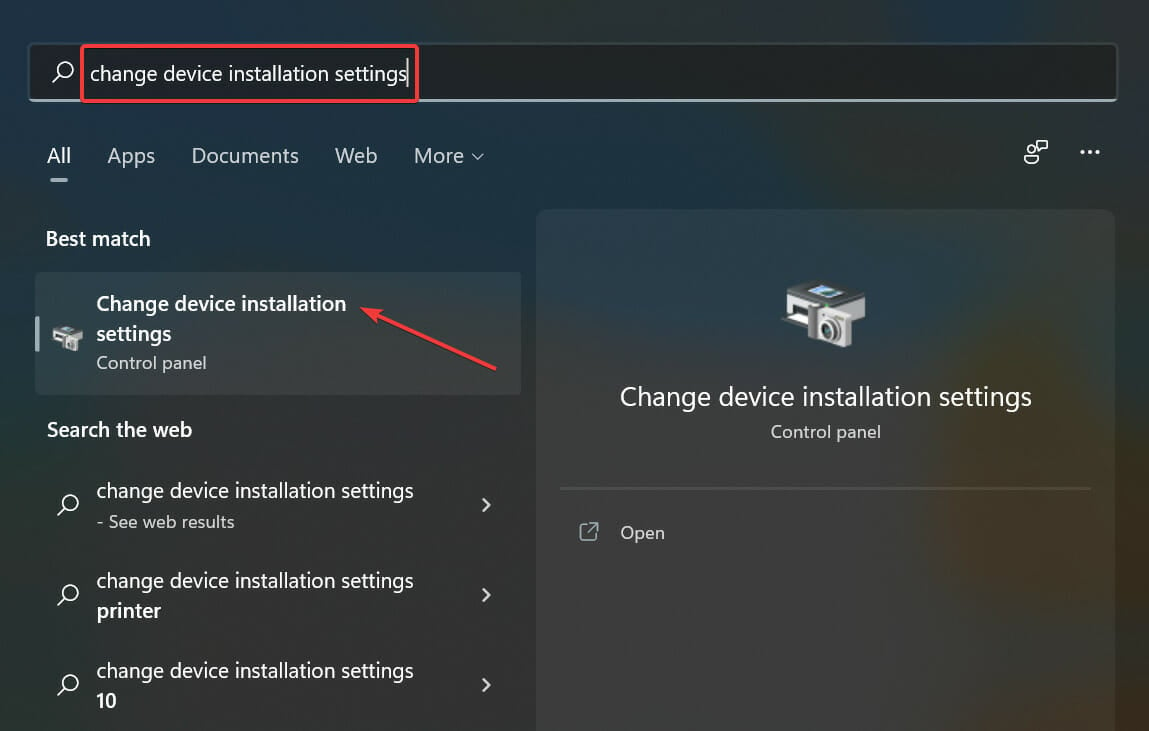

If you don’t want the drivers or other features to automatically download in Windows 11, making these changes could help. Do remember that this might affect your experience while connecting new peripherals to the computer.
With the Nvidia driver keeps crashing in Windows 11 problem solved, you can resume working on your PC, without encountering frequent crashes anymore.
Also, do not hesitate to find out what to do if the Nvidia driver is not installing in Windows 11. And it’s not just the Nvidia drivers that crash, check the best methods to fix the AMD driver crashing problem as well.
Besides, the issue is not new, it’s there with every iteration of Windows, so make sure to check our guide on resolving the Nvidia driver crashing problem in Windows 10. Also, users who reported about Intel driver crashing in Windows 10 were able to fix it using our methods.
In case you plan to install a new graphics card, check our curated guide for the best ones.
Do not hesitate to tell us which fix worked and your experience of Windows 11 thus far, in the comments section below.
Read our disclosure page to find out how can you help Windows Report sustain the editorial team. Read more


Improve this guide


User forum
0 messages