7 Ways to Fix Nvidia Drivers not Installing in Windows 11
After trying out our solutions, you'll be able to install Nvidia drivers

We all know how critical the graphics drivers are, and the significance of keeping them up-to-date. However, a lot of users have reported that the Nvidia drivers are not installing in Windows 11.
This poses a major hurdle since a lot of errors can be encountered on running an outdated version of the graphics driver. Hence, it becomes imperative that you resolve the issue and get your hands on the latest version.
To update Nvidia drivers, you can either use the GeForce Experience application or install just the driver itself. We will walk you through it as well in the later sections.
Before we head to the fixes, it’s imperative that you understand the underlying causes for effective troubleshooting.
Why won’t my NVIDIA drivers install?
This could be due to a bunch of reasons. In case you are trying to install the Nvidia drivers right after upgrading to Windows 11, there is a chance of encountering the error. This is because the OS too might be trying to locate and install the same driver.
If your PC already has a newer version installed, you may encounter the Nvidia drivers not installing issue in Windows 11. A background program, most likely an antivirus, may also conflict with the installation and lead to the error.
How do I force NVIDIA drivers to install?
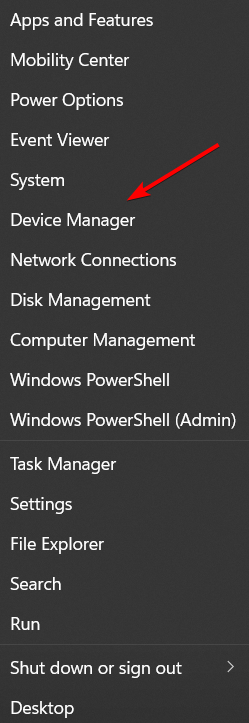
- Right-click the Start icon from your Taskbar then choose Device Manager.
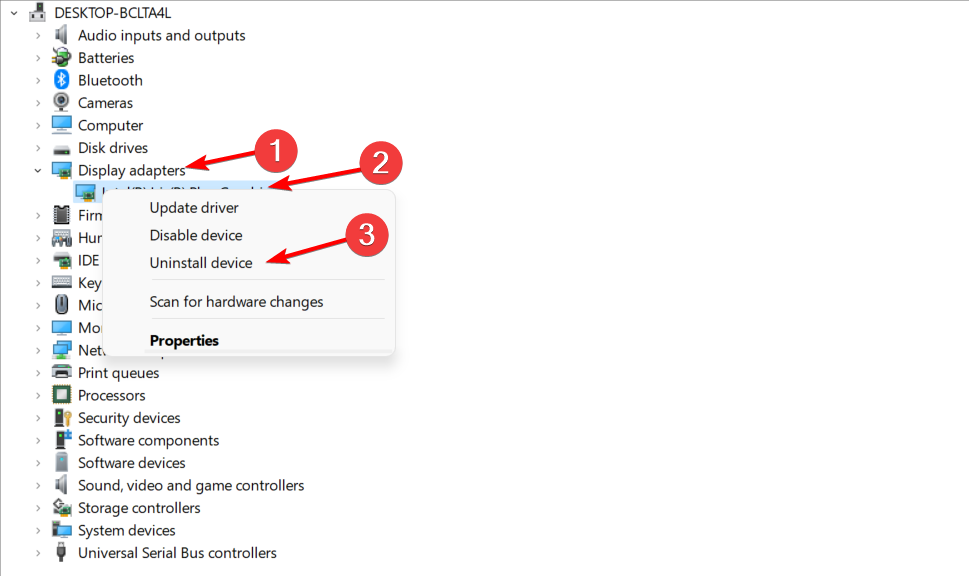
- Here, look for your Nvidia driver, under the Display adapters section. Right-click it and choose Uninstall device.
- Reboot your PC in order to automatically install the driver.
Without further ado, let’s see what you can do if the Nvidia driver is not installing on Windows 11. Follow along!
What can I do if the Nvidia driver is not installing on Windows 11?
1. Restart the Windows 11 PC
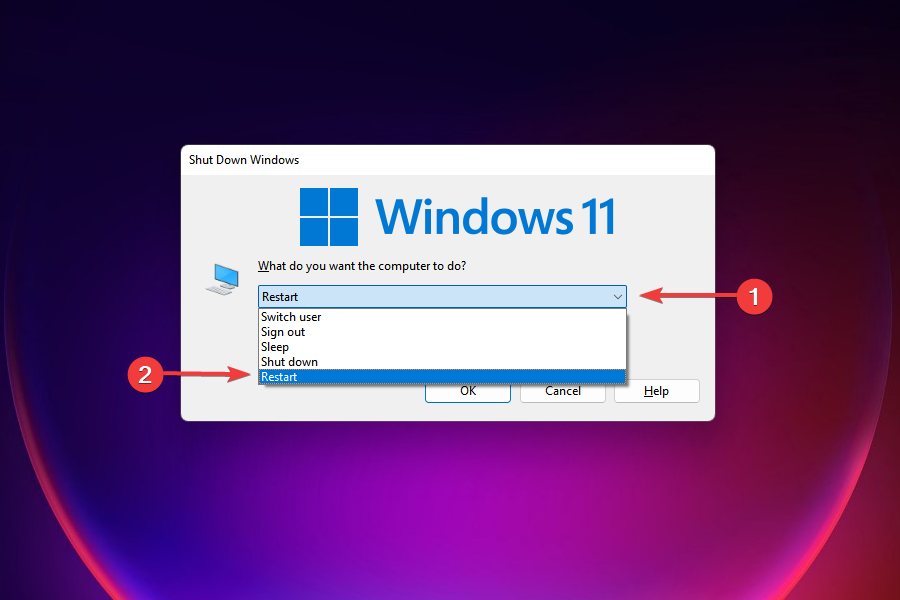
- Navigate to the desktop and press Alt + F4 to launch the Shut Down Windows box.
- Click on the dropdown menu and select Restart from the list of options.
- Next, click on OK.
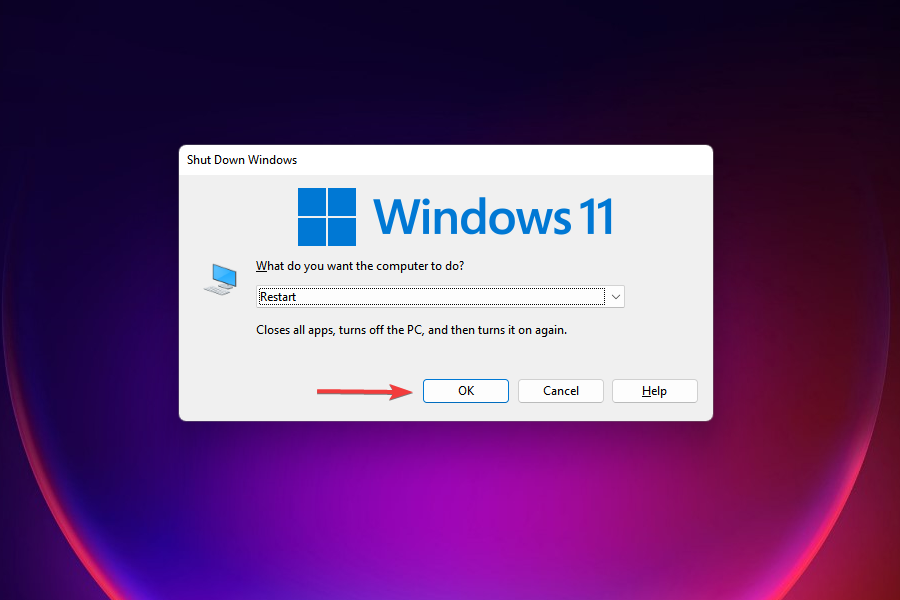
- After the computer restarts, check if you are able to install the Nvidia drivers.


Many a time, it’s a bug or a process that’s preventing you from installing the Nvidia drivers in Windows 11. Restarting the computer eliminates any such bug, fixing the Nvidia drivers not working issue.
2. Uninstall the current driver and then try reinstalling
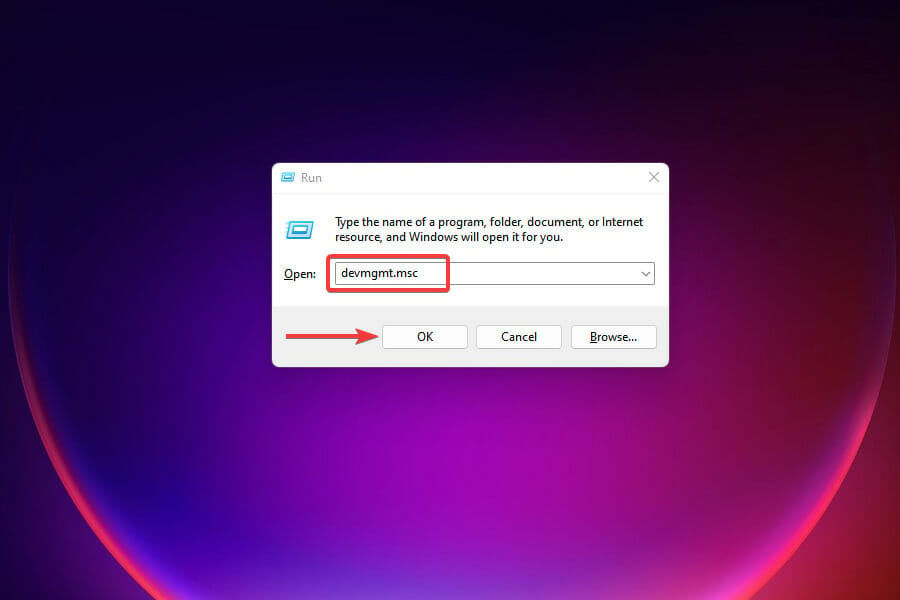
- Press Windows + R to launch the Run command.
- Type devmgmt.msc in the text field and either click on OK or press Enter to launch the Device Manager.
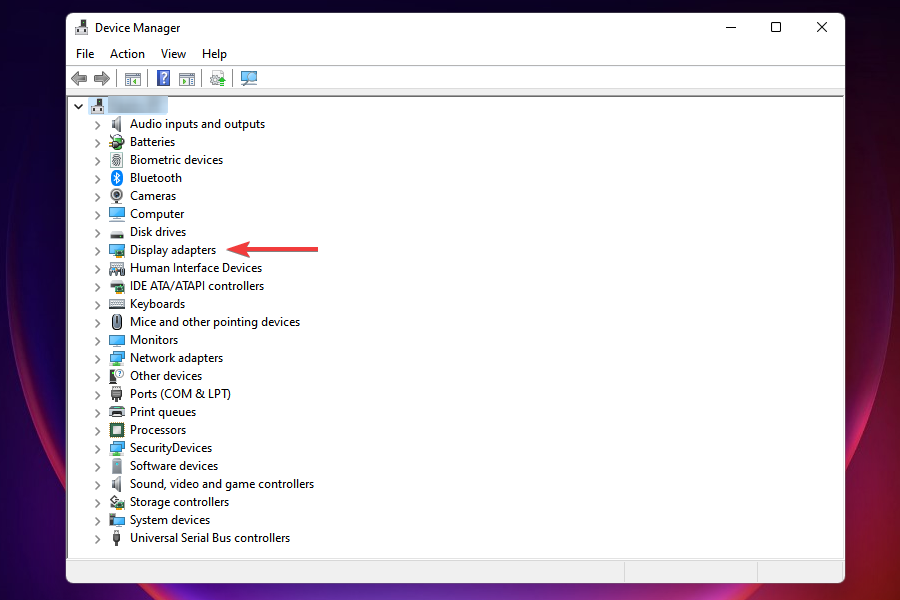
- Double-click on the Display adapters entry to view the various devices under it.
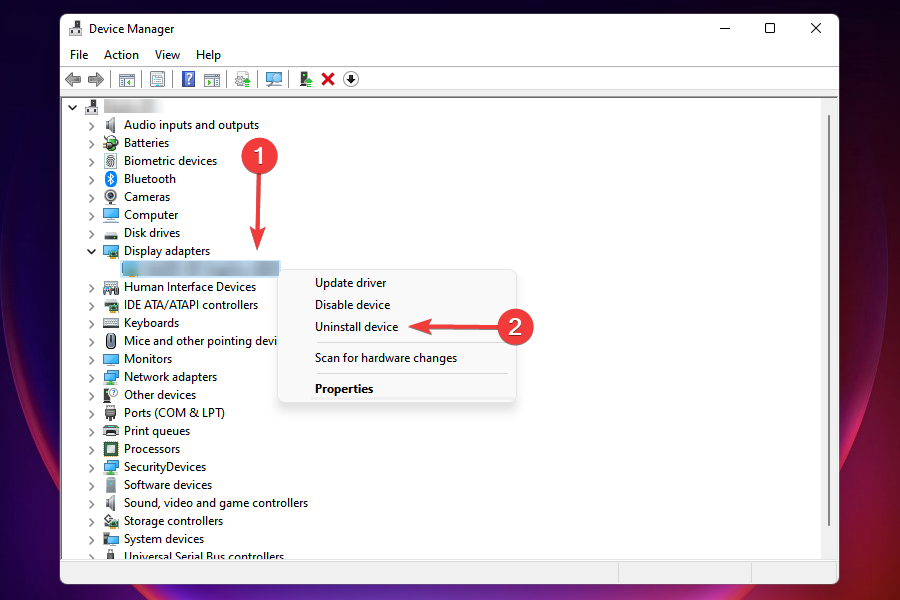
- Right-click on the Nvidia adapter, and select Uninstall device from the context menu.

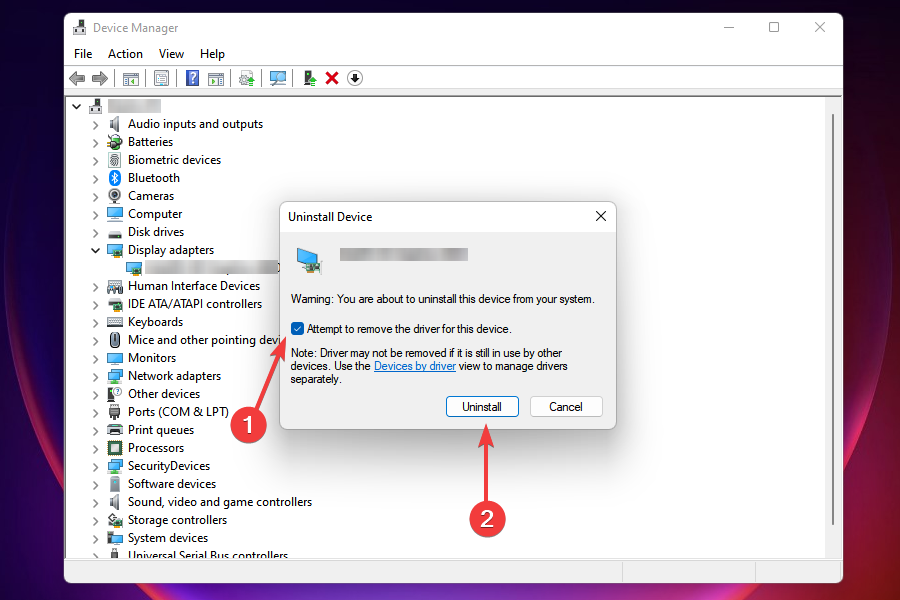
- Next, tick the checkbox for Attempt to remove the driver for this device and click on Uninstall at the bottom.

- After uninstalling the driver, restart the Windows 11 PC and check if you are able to install the Nvidia driver.


Several users found that the current driver was preventing the installation. In many cases, such as that of corruption, uninstalling the driver is the best way forward.
Even if you get the Nvidia driver not compatible with this version of Windows message, this solution will remove it and install a compatible version.
You should now be able to install the Nvidia driver in Windows 11. When it comes to automatic scans of outdated drivers, do not hesitate to take advantage of a dedicated tool.
3. Stop all the Nvidia services
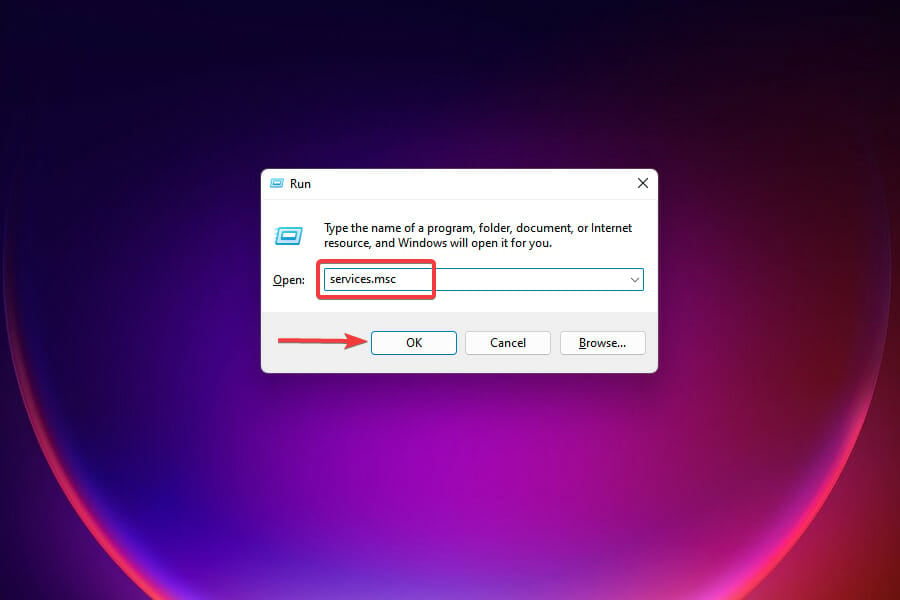
- Press Windows + R to launch the Run command.
- Type services.msc in the text field and either click on OK or press Enter to launch the Services app.
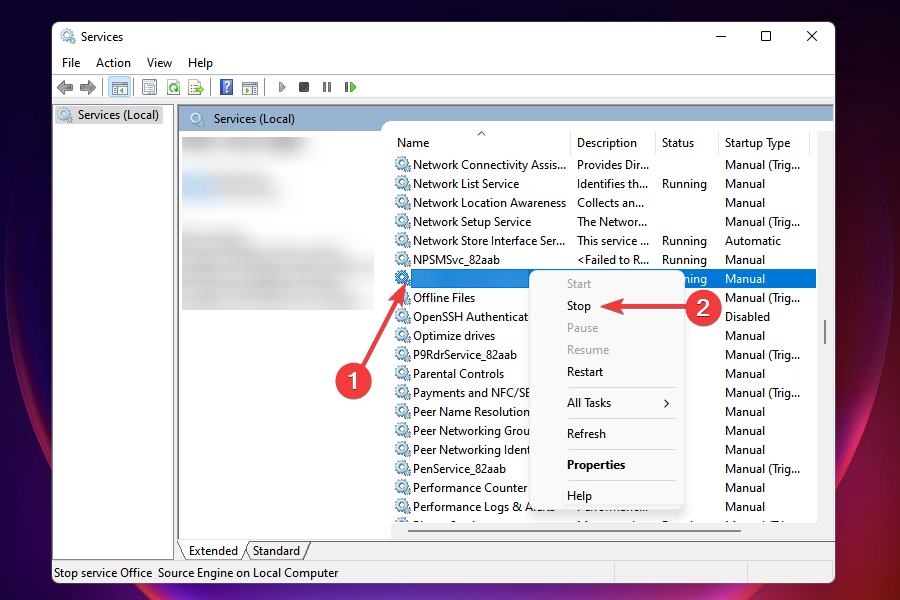
- Locate all the services that start with Nvidia, right-click on them, and select Stop from the context menu.

- After all such services are stopped, try reinstalling the Nvidia driver.

If any of the related services are running, you may face trouble installing the Nvidia driver in Windows 11. Once these are stopped, you shouldn’t encounter the issue anymore. In case the error persists, head to the next fix.
4. End Nvidia tasks, delete files, and registry entries
- Press Ctrl + Shift + Esc to launch the Task Manager.
- Locate any app or process that has Nvidia in its name, select it, and click on End Task at the bottom.
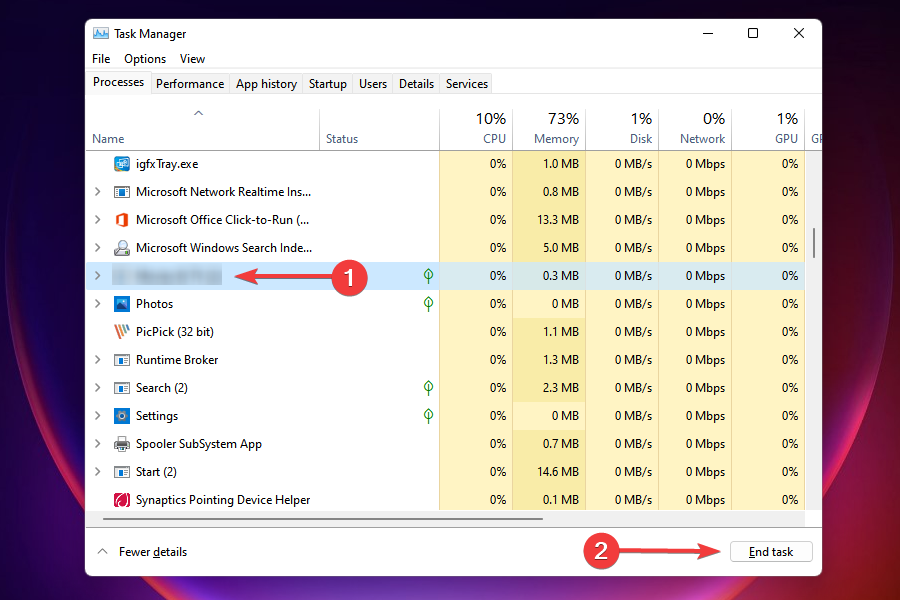
- Do the same for all such processes.
- Next, press Windows + E to launch the File Explorer.
- Either navigate to the following paths or paste them in address bar at the top, and delete the files at the end:
C:\Windows\System32\DriverStore\FileRepository\nvdsp.inf documentC:\Windows\System32\DriverStore\FileRepository\nv_lh documentC:\Windows\System32\DriverStore\FileRepository\nvoclock documentC:\Program Files\NVIDIA CorporationC:\Program Files (x86)\NVIDIA Corporation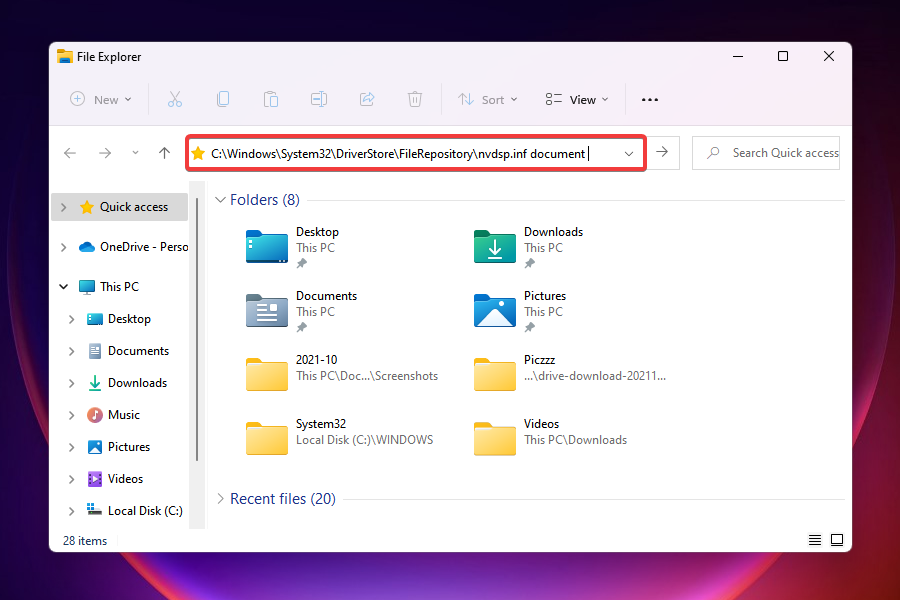
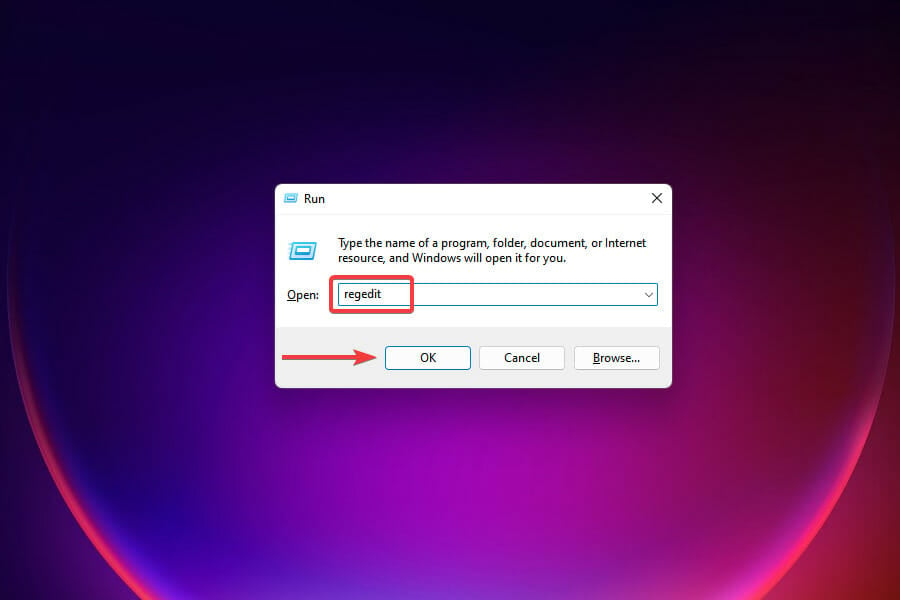
- Next, press Windows + R to launch the Run command.
- Enter regedit in the text field and either click on OK or hit Enter to launch the Registry Editor.

- Click Yes on the UAC (User Account Control) prompt that appears.
- Individually navigate the following paths or paste them in the address bar at the top and hit Enter:
Computer\HKEY_LOCAL_MACHINE\SOFTWARE\NVIDIA Corporation\LoggingComputer\HKEY_LOCAL_MACHINE\SOFTWARE\Wow6432Node\NVIDIA Corporation\Logging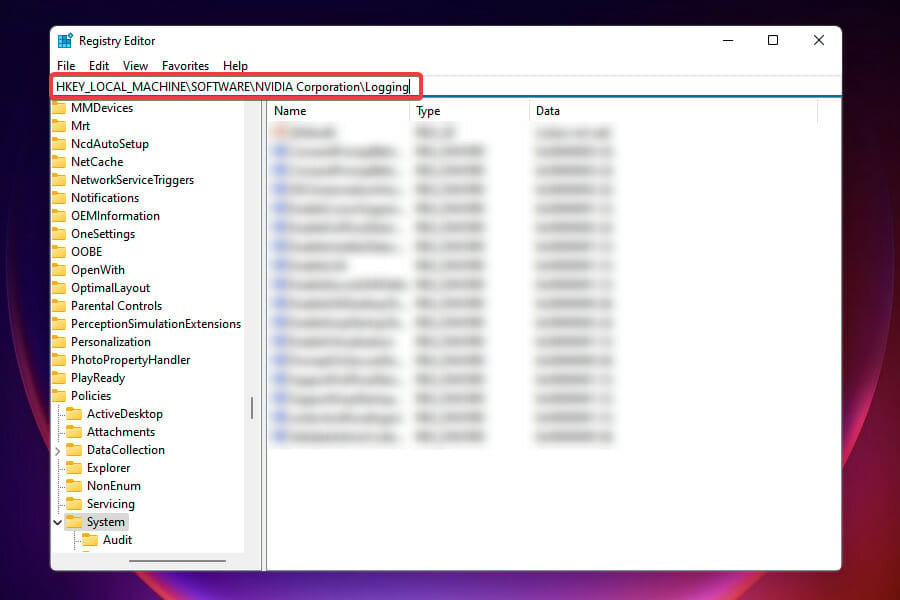
- If the registry keys are found, delete them.
- Once done, try to reinstall the Nvidia driver.


Certain processes, files, or registry keys may be preventing the driver from installing. Hence, it’s best that you remove all these, and try to install the Nvidia driver afresh in Windows 11.
5. Disable antivirus and firewall
 NOTE
NOTE
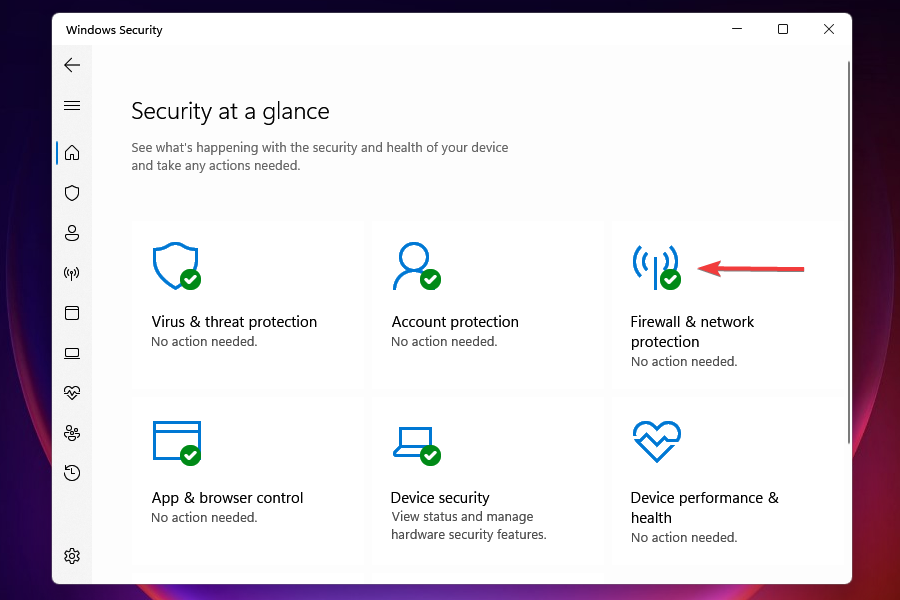
- Press Windows to launch the Search menu and enter Windows Security in the text field at the top, then click on the relevant search result that appears.
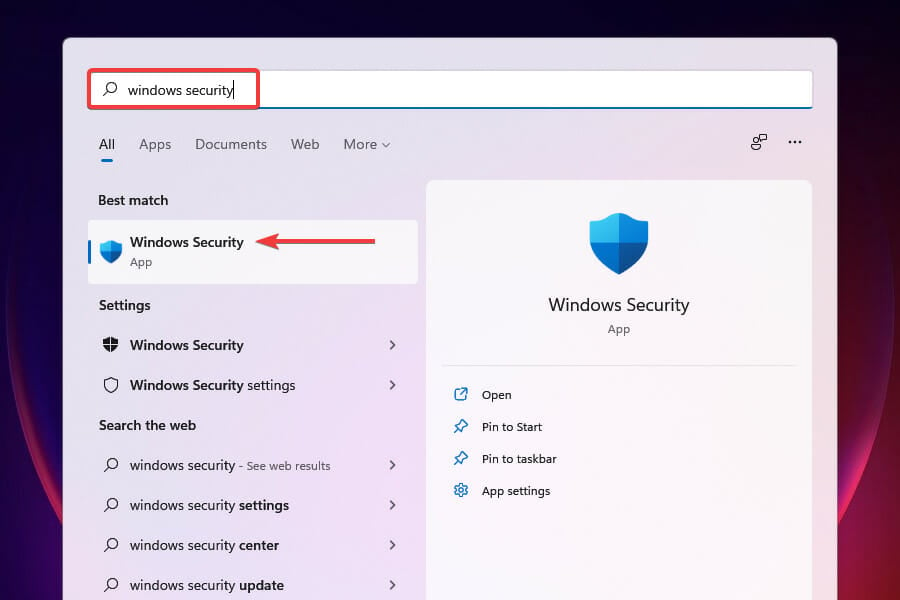
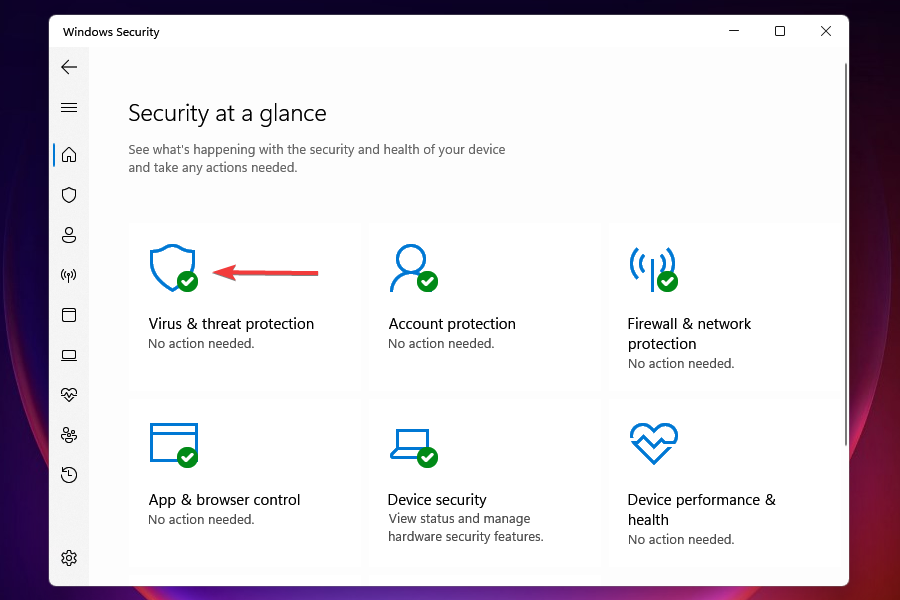
- Click on Virus & threat protection from the options that appear.

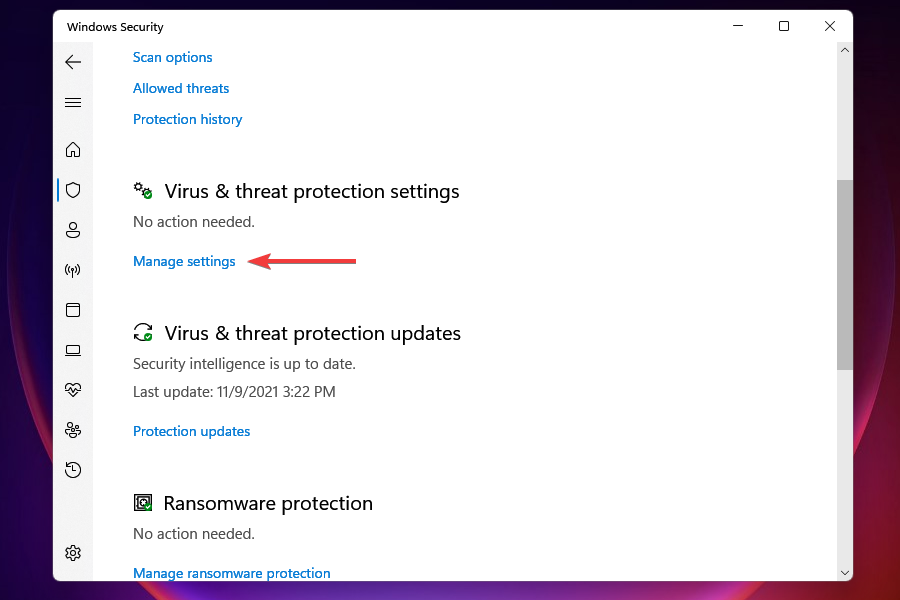
- Next, click on Manage settings under Virus & threat protection settings.

- Turn off the toggle under Real-time protection.
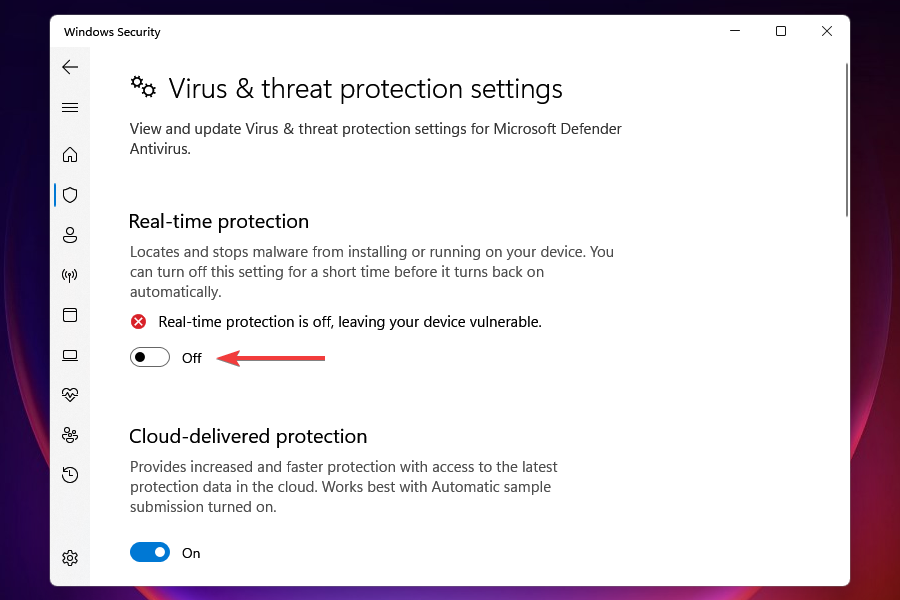
- Click Yes on the UAC (User Account Control) prompt that appears.
- Go back to the main screen, and click on Firewall & network protection.

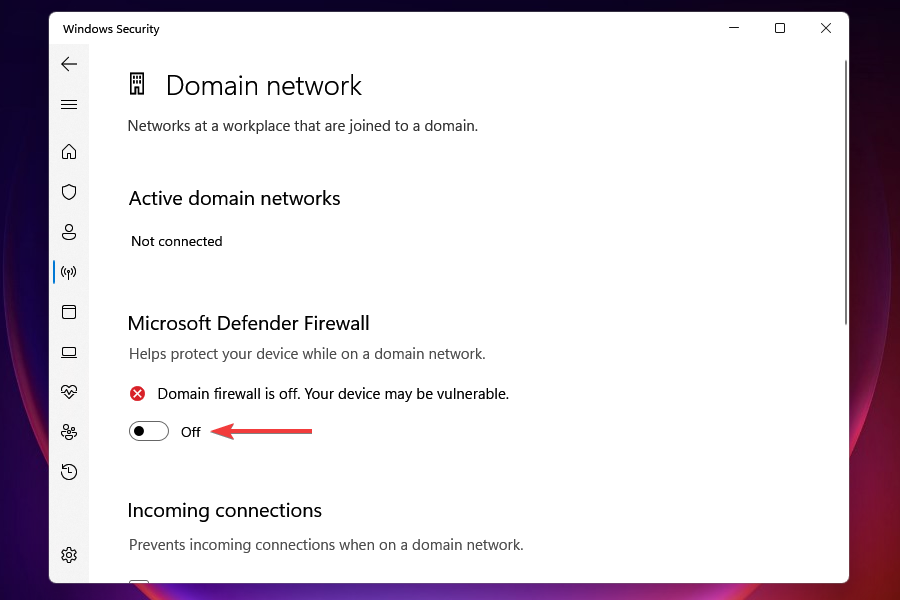
- Select Domain network from the list of options that appear.

- Turn off the toggle under Microsoft Defender Firewall.

- Click Yes on the UAC (User Account Control) prompt that appears.
- Similarly, disable the other two, i.e., Private network and Public network.
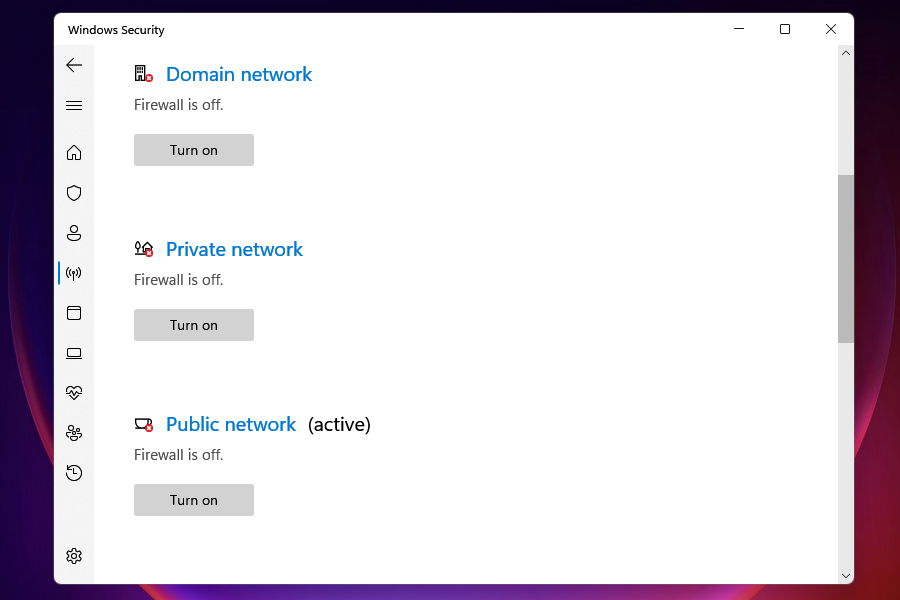


In many instances, it was the antivirus that lead to an error while installing the Nvidia driver in Windows 11. Also, the firewall settings are known to cause trouble while installing certain software. Hence, it’s best that you disable both and check if the driver can now be installed.
Do remember to revert the changes after installing the driver, as keeping them disabled exposes your computer to threats and cyber attacks.
6. Rename Nvidia folder
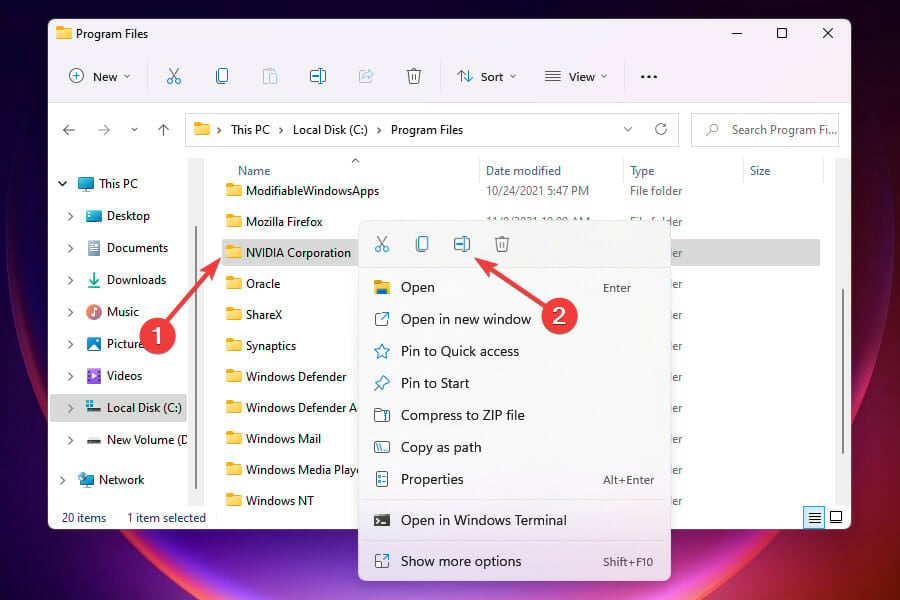
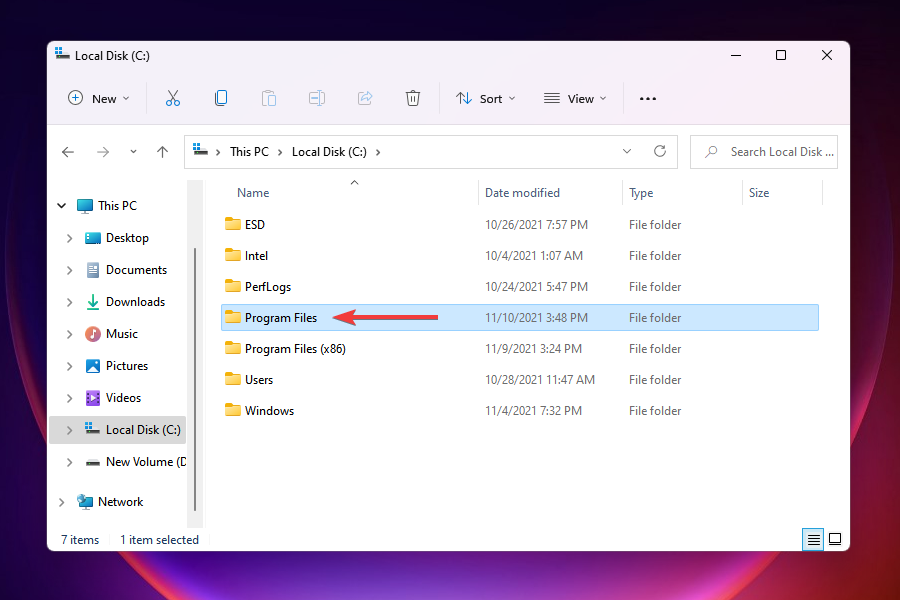
- Press Windows + E to launch the File Explorer and navigate to the system drive, which should most likely be the C: drive.
- Select Program Files from the folders listed here.

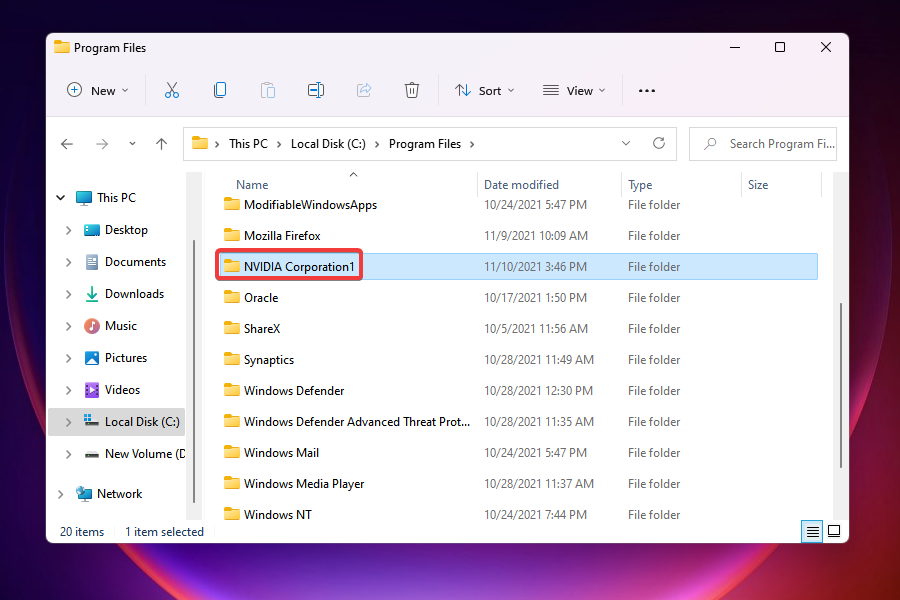
- Locate the NVIDIA Corporation folder, right-click it, and select the Rename option.
- Rename the folder as NVIDIA Corporation1 and hit Enter to save the changes.
- Check if you are now able to install the Nvidia driver via the setup in Windows 11.


Though it may sound a bit unconventional, this method has fixed the Nvidia driver installation error for a lot of users. If none of the other methods listed here work, this one is worth a shot since you are only left with the option to reset Windows 11, as discussed in the next section.
7. Reset Windows 11
This should ideally be the last fix since the saved data and programs will be lost during the process. You can, however, create a backup of the files to avoid data loss.
The process to reset Windows 11 to its factory settings is quite similar to the one in the previous OS. You should be done with the whole process in a few hours without the need for a bootable USB drive.
Can I install the Nvidia drivers without the GeForce Experience app?
While some users prefer the GeForce application owing to the added functionality and ease, many still go with just the Nvidia driver in Windows 11 since for them the GeForce Game Ready driver installation failed. Here’s how you can do that.
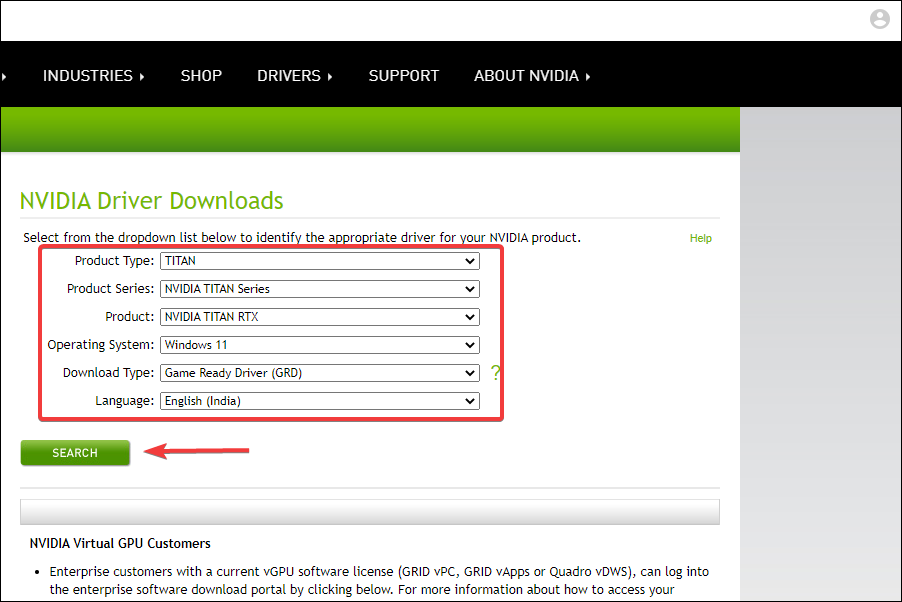
- Go to the NVIDIA Driver Download page, select the appropriate options from each of the dropdown menus, and click on the Search at the bottom.

- Click on the Download button when the most suitable is displayed.
- After the file is downloaded, navigate to the folder where it’s stored and double-click on it to launch the installer.
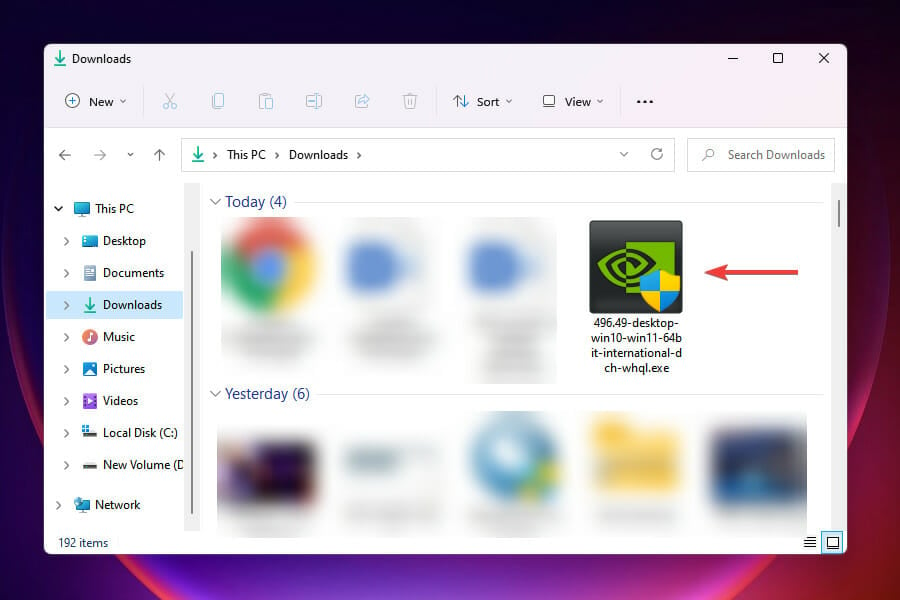
- Click Yes on the UAC prompt that appears.
- Choose the extraction path and click on OK to continue.
- It will take a few moments to save the required files to your computer.
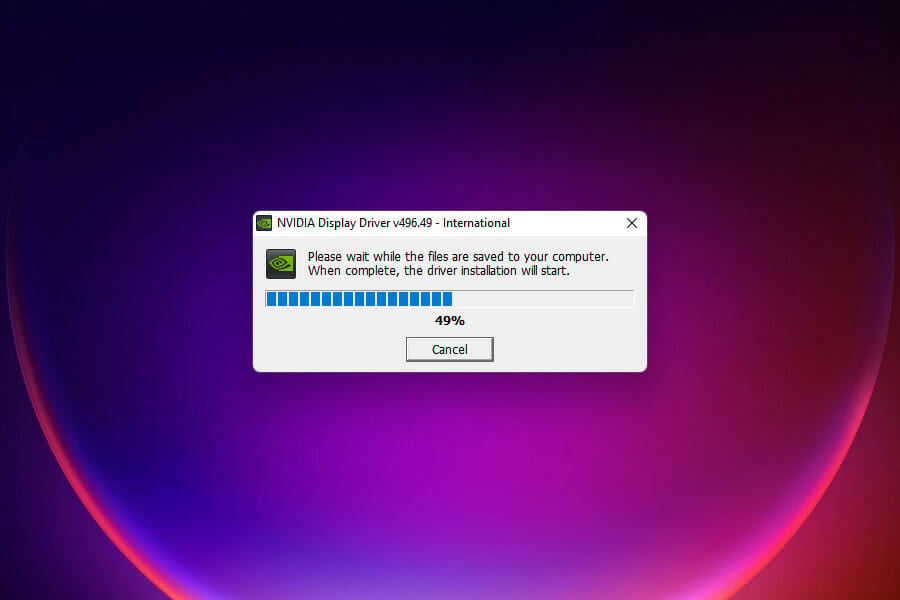
- The installer will launch next and check whether the system requirements are met.
- Next, select the NVIDIA Graphics Driver option instead of instead of NVIDIA Graphics Driver and GeForce Experience to install just the driver, and click on AGREE AND CONTINUE at the bottom.
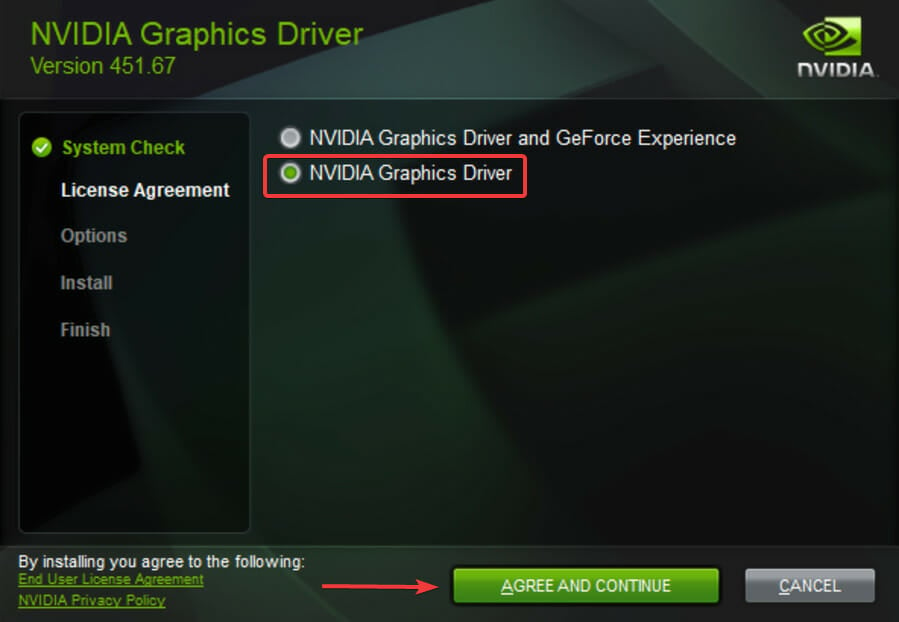
- Follow the on-screen instructions to complete the installation process.


Once the installation is complete, you will only have the Nvidia graphics driver on the system and not the application, thus saving some space.
If you are using an older graphics card such as the NVIDIA GT 210 1GB, you can follow this GT 210 1GB driver download guide to get the right package and ensure compatibility with Windows 11.
What will happen if I uninstall NVIDIA drivers?
Uninstalling your Nvidia drivers won’t have any negative consequences for you. They will be erased from your computer and then replaced with fresh ones.
You have the option of either restarting your computer or going to the company’s website to look for the most recent version of the software that is available for download.
Uninstalling your drivers is a frequent solution to use in situations in which they have a glitch or cease working properly.
There are all the ways you can fix issues while installing Nvidia drivers in Windows 11, along with a quick method to get just the driver. Many users faced the Nvidia driver installation issues in Windows 10 as well, and the fixes are pretty much the same.
Also, see how you can resolve problems preventing the Nvidia control panel from opening. We covered a similar subject in our Geforce Experience driver downloads but doesn’t install guide, so don’t miss it.
Let us know which fix worked for you in the comments section below, and whether you choose to install the Nvidia driver with the GeForce Experience application or without it.
Read our disclosure page to find out how can you help Windows Report sustain the editorial team. Read more


Improve this guide


User forum
0 messages