Nvpcf.sys Blue Screen Error: 3 Ways to Fix it
Perform the SFC/DISM scans to resolve the error
Key notes
- Ensure you have a backup of your PC before running a system restore.
- Roll back your Nvidia graphics drivers or rename the file to old to resolve the nvpcf.sys error.
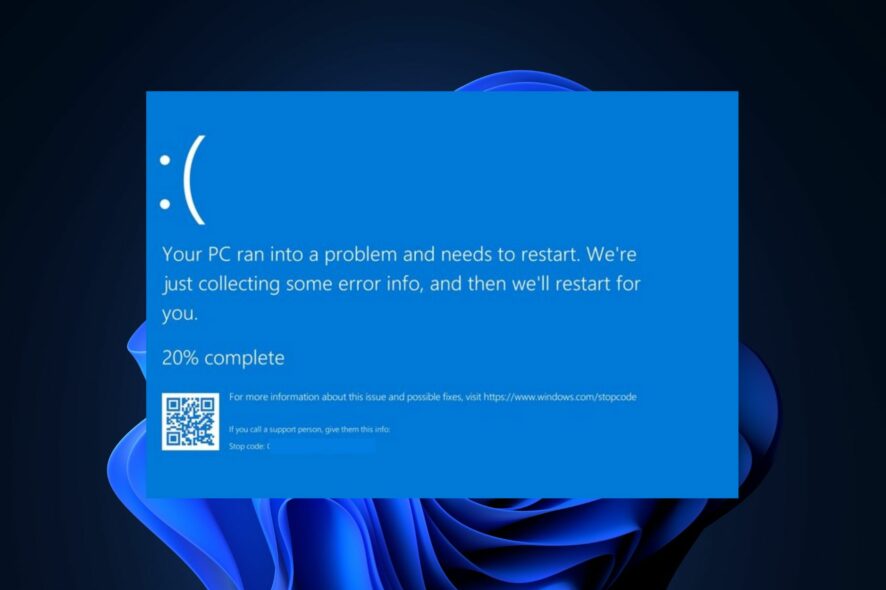
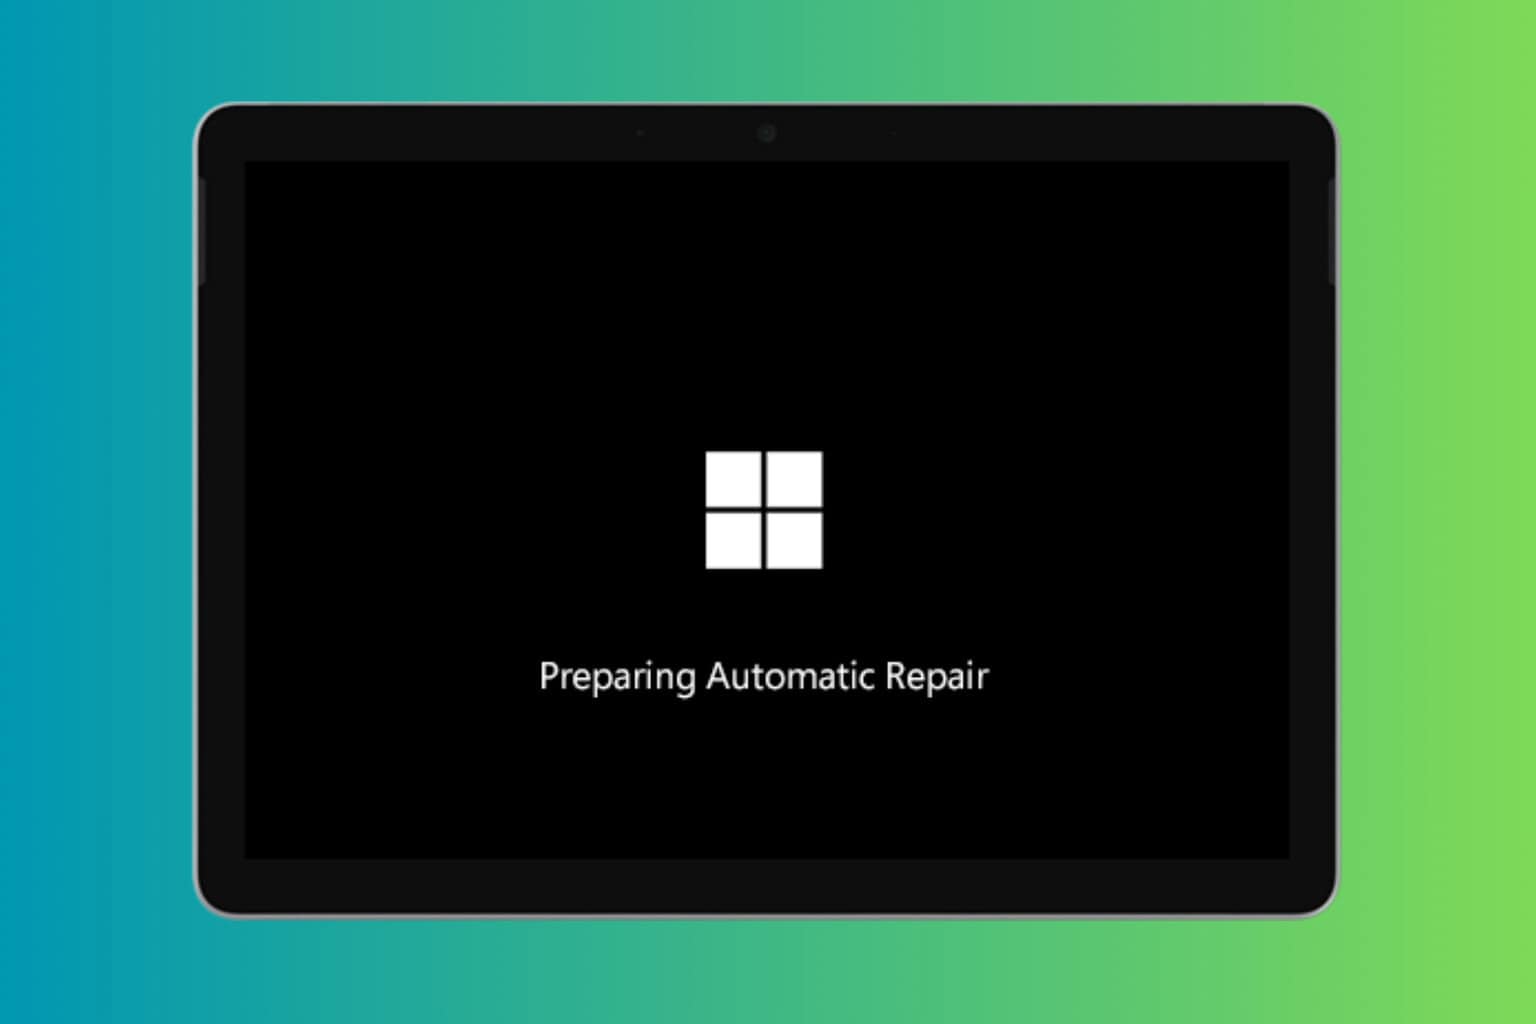
Blue screen errors are common errors every Windows user has faced at least once. One such error is the nvpcf.sys BSoD error. Also, this error is more associated with the Dell Precision 7560 / 7760 laptops.
If you’re experiencing the nvpcf.sys blue screen of death error, this article will provide ways to help you fix it.
What is nvpcf.sys and what causes the BSoD error?
Nvpcf.sys is an Nvidia driver-related file contributing to the driver’s functionality. The file is usually located in the following directory: C:\\Windows\System32\drivers
The nvpcf.sys BSoD error can be caused by:
- Corrupt Nvidia drivers – This is the primary cause of the nvpcf.sys error. Corrupt graphics drivers can prevent Windows from functioning correctly, leading to crashes and BSoD errors.
- Viruses & Malware – Viruses are among the most common causes of BSoD errors. If you’re experiencing it, your PC is likely infected with a virus.
- Corrupt system files – If your PC has corrupted system files accumulated due to viruses or forced PC shutdowns, you’ll run into errors like the nvpcf.sys during booting.
How can I fix nvpcf.sys blue screen error?
Before anything else, try the following preliminary checks:
- Perform a system restore to the last point before the error starts.
- Update your Windows OS to fix bugs that may cause this error.
If the error persists, try the tweaks below.
1. Boot into Safe Mode
- Press the Windows key + I to open the Settings app.
- Select System and select the Recovery tab in the next window.

- Scroll to locate the Advanced Startup option and click Restart now.

- Once your PC restarts into the WinRE environment, select Troubleshoot.
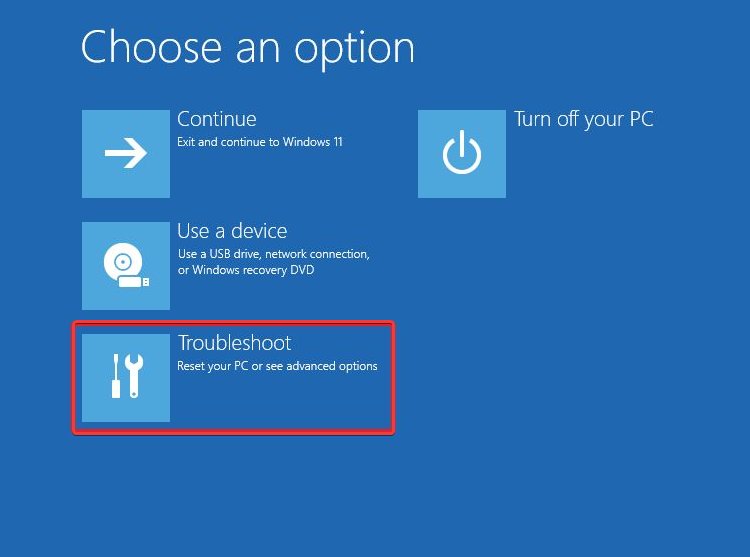
- Click Advanced Options in the Troubleshoot menu, and then click Startup Settings.
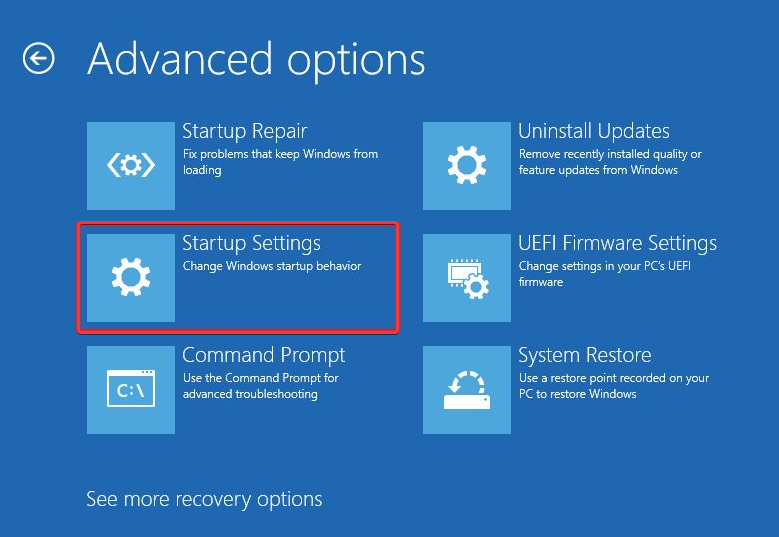
- Then, select F4 to Enable Safe Mode and click Restart.
- When your PC restarts, press the Windows key, type Device Manager, and hit Enter.
- In the Device Manager window, locate the Software Devices option, click on it, and select Nvidia Platform Controllers and Framework.

- Click on all the Devices under the Nvidia section, and select Uninstall.
- Then, manually download and install the latest Nvidia drivers.
Sometimes, Nvidia drivers can get corrupted, leading to BSoD errors during booting. Reinstalling the drivers is one of the best ways to fix the nvpcf.sys BSoD error.
Here is a detailed guide showing you how to manually install the latest drivers for your PC.
2. Rename the file to old
- Launch the File Explorer and input the following path into the address bar:
C:\Windows\System32\drivers - Locate the nvpcf.sys, right-click it, and select Rename option.

- Change the file from nvpcf.sys to nvpscf.sys.old.
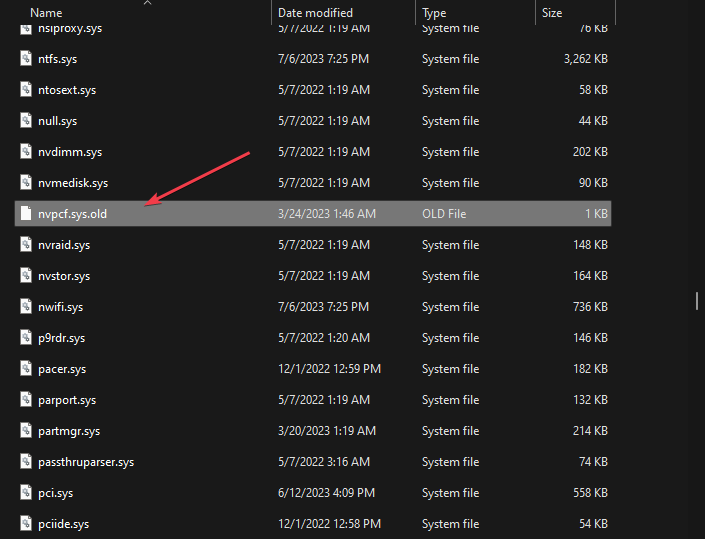
- Then close your File Explorer and check if you still encounter the issue.
Some users have claimed this process worked for them. However, any update to the Nvidia drivers will undo this and may prompt the error again.
3. Roll back the Nvidia driver
- Right-click the Start menu and click on the Device Manager.
- Expand the Display adapter, right-click the Nvidia driver, and click Properties.

- Then, select Driver tab and click on Roll back button.

- Then follow the prompts to complete and check if the error persists.
More often than not, Nvidia graphics update often cause the error, Hence, returning to the previous point before the issue occurred will troubleshoot it.
For more details, you can check our guide detailing the steps involved in rolling back your drivers in Windows 11.
4. Run the SFC/DISM scans
- Press the Windows key, type in cmd, and select Run as Administrator.
- Click Yes to grant the app administrative access in the User Account Control window.
- Once the command prompt opens, type the following, and hit Enter:
sfc /scannow
- After entering the command, type in the following, and hit Enter:
DISM.exe /Online /Cleanup-Image / Restorehealth
- Wait till the scan is complete, then restart your PC to check if the error is fixed.
An SFC scan helps identify and fix corrupt system files, which can cause boot-up errors like the nvpcf.sys.
If you run into a Windows resource protection error while running the scan, read our guide on how to fix it.
Resolving BSoD errors on Windows isn’t a complex task but can be chaotic if you do not know what to do. Luckily, in this article, we’ve listed X best ways for you to resolve the nvpcf.sys blue screen error. You can also learn how to deal with a similar issue, DRIVER_INVALID_STACK_ACCESS.
Suppose you’ve fixed the nvpcf.sys BSoD error using alternative methods, we’d like to hear your solutions in the comments.
Read our disclosure page to find out how can you help Windows Report sustain the editorial team. Read more


Improve this guide


User forum
1 messages