OrangeEmu64.DLL: What is It, and How To Fix the Errors Related to It?
First, ensure the game and Windows OS is up to date
5 min. read
Updated on
Read our disclosure page to find out how can you help Windows Report sustain the editorial team. Read more
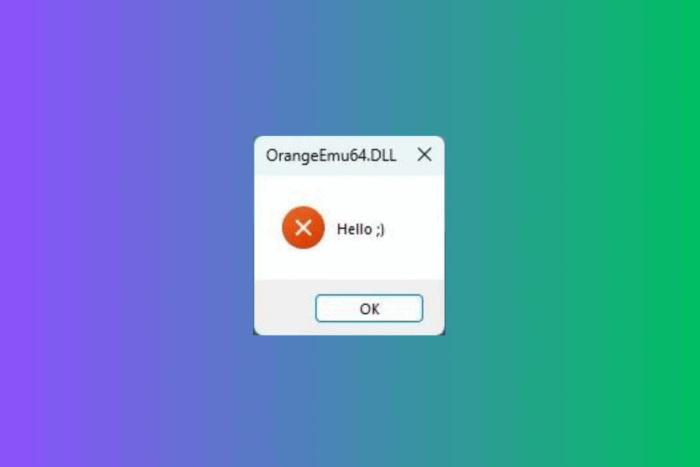
Many users have reported encountering the OrangeEmu64.dll missing error message or a Hello with Wink smiley pop-up when launching SIMS 4. This error usually occurs when the OrangeEmu64 DLL file is corrupted or deleted. The OrangeEmu64.dll is a third-party tool that can modify or enhance the game.
How can I fix the OrangeEmu64.DLL is missing error?
1. Disable Memory Integrity
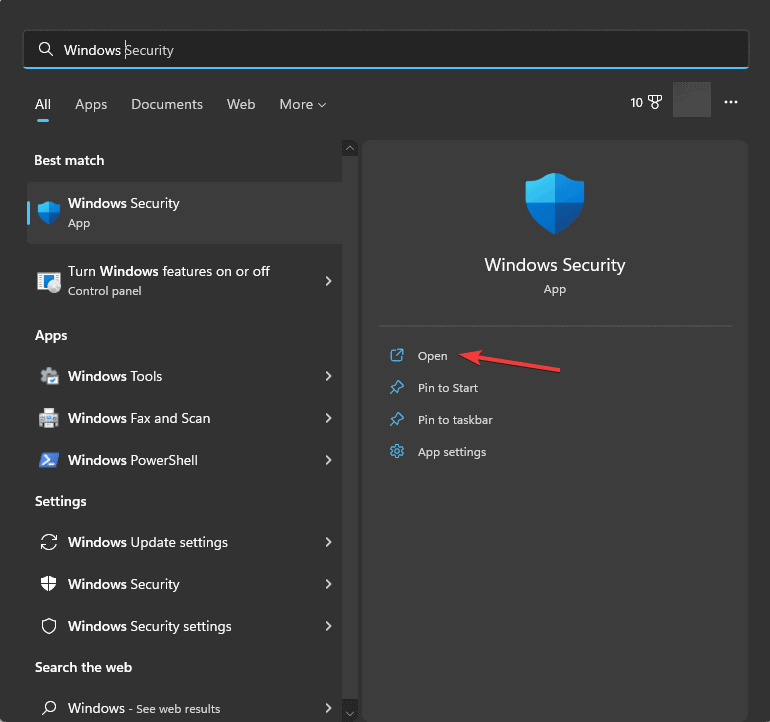
- Press the Windows key, type window security in the search box, and click Open.
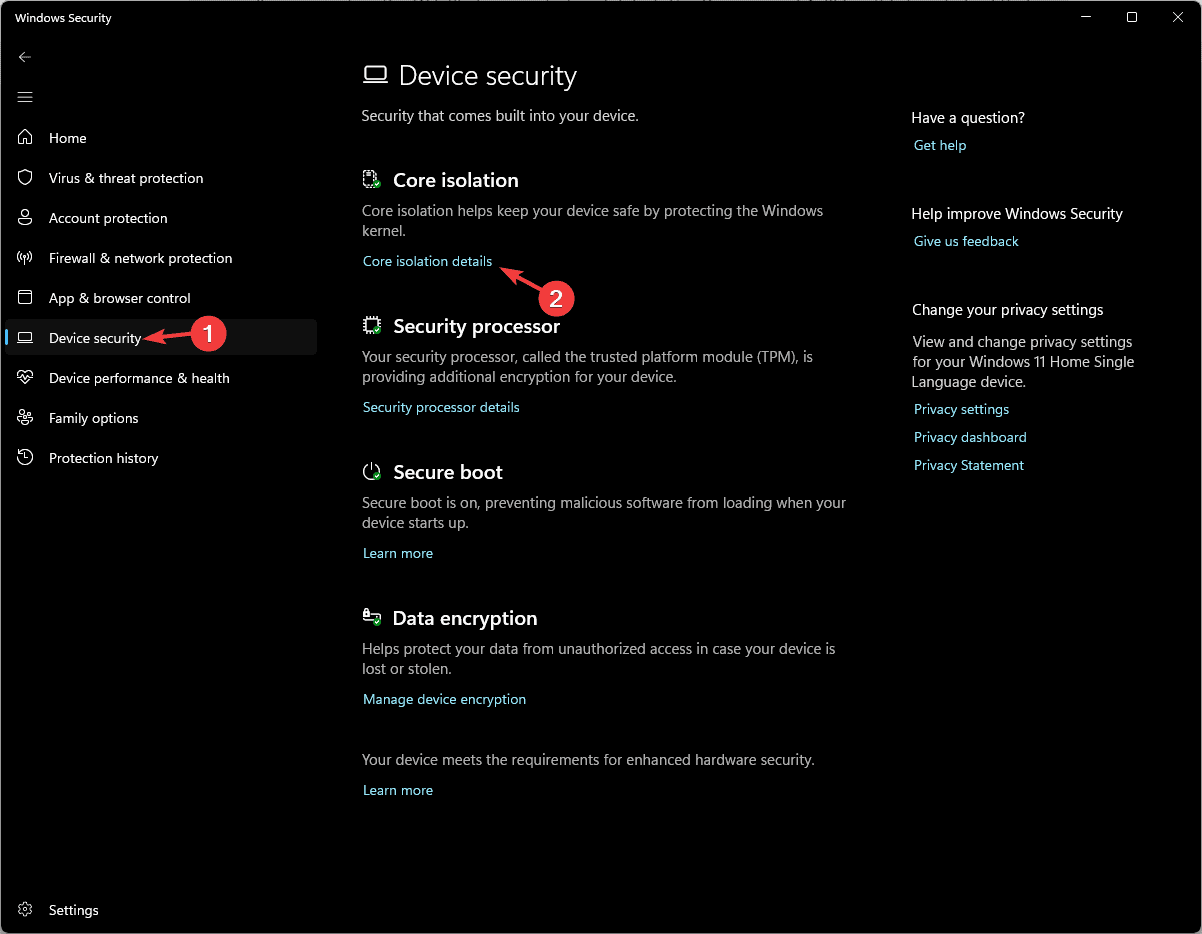
- Click Device security.
- Locate Core isolation, then click Core isolation details.
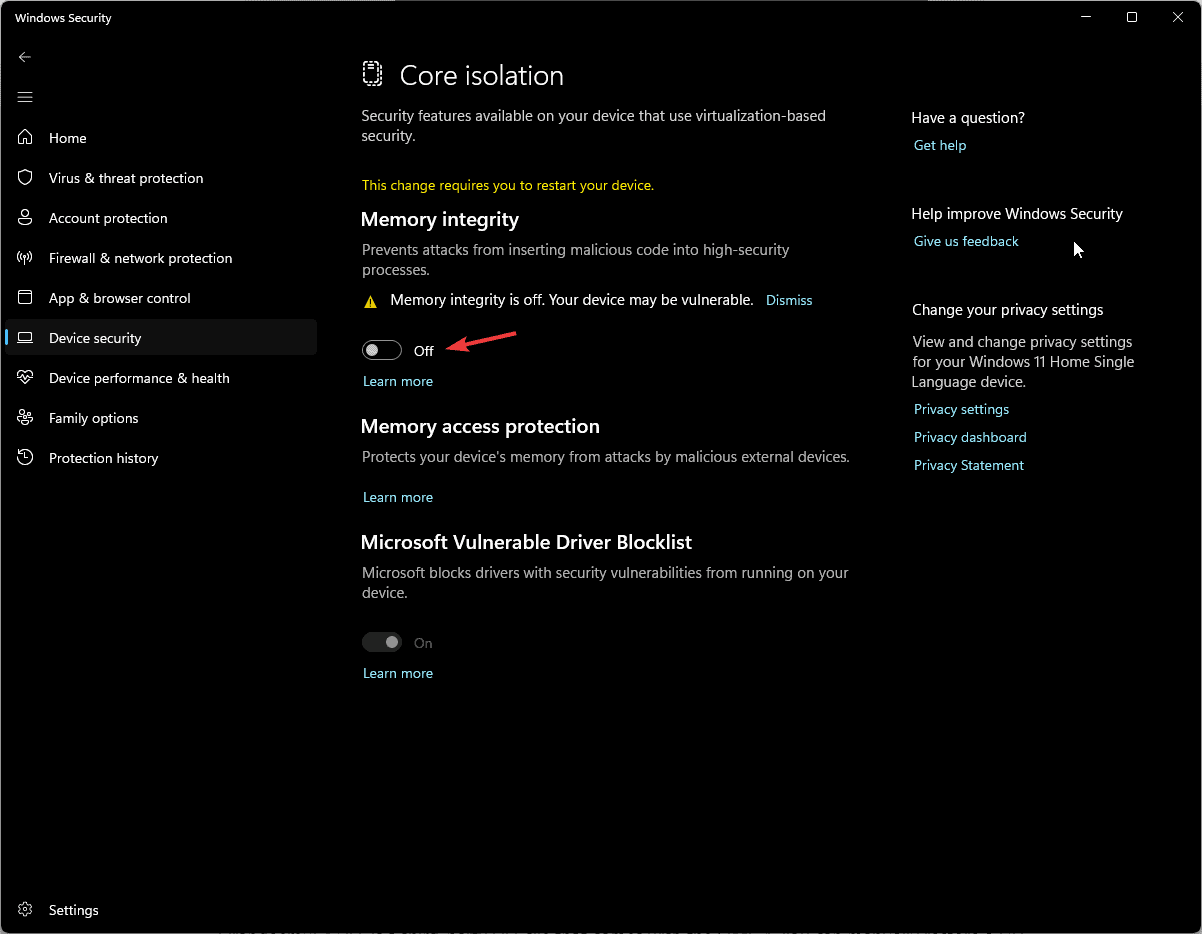
- Toggle off the switch under Memory integrity. Click Yes on the UAC prompt to confirm the choice.
- Restart your computer to let the changes take effect.
2. Turn off Windows features
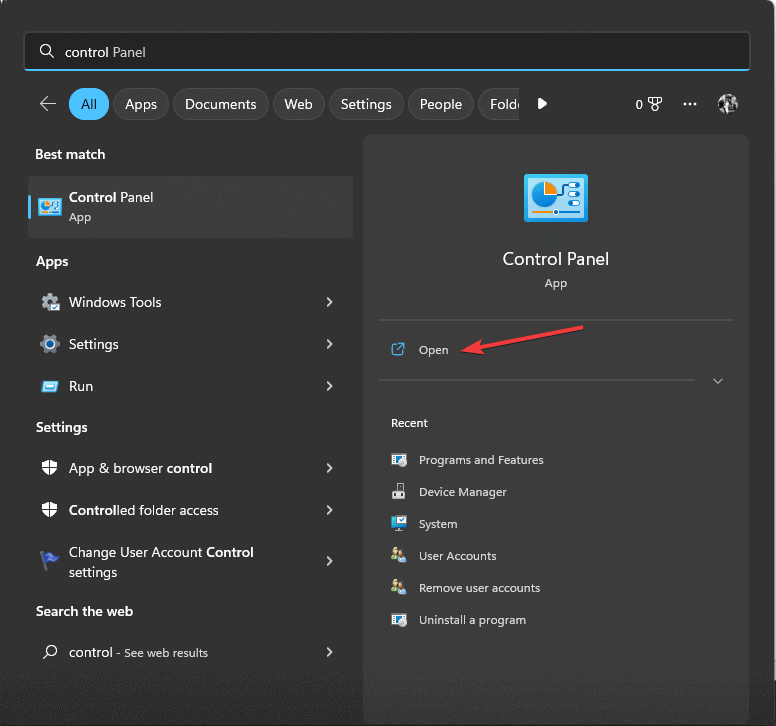
- Press the Windows key, type control panel in the search box, and click Open.
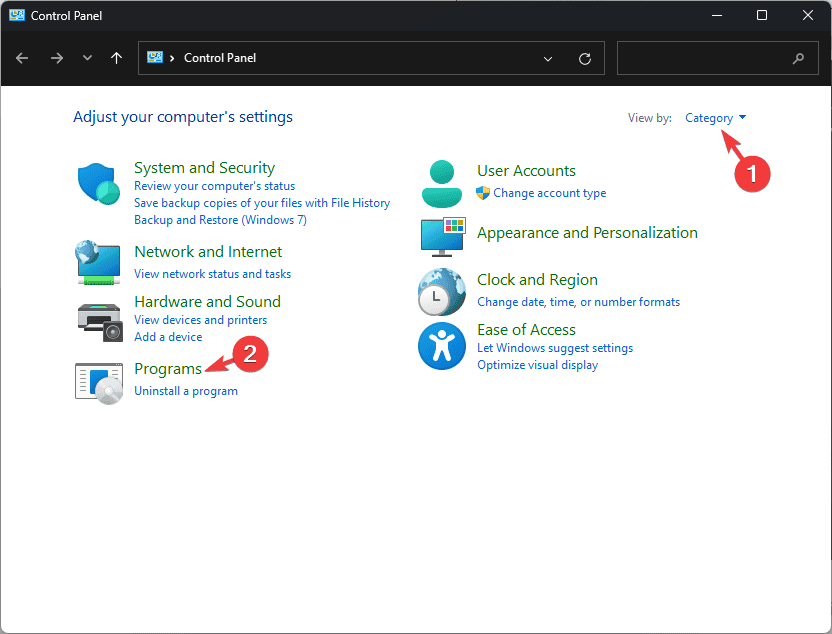
- Click View by and select Category, then click Programs.
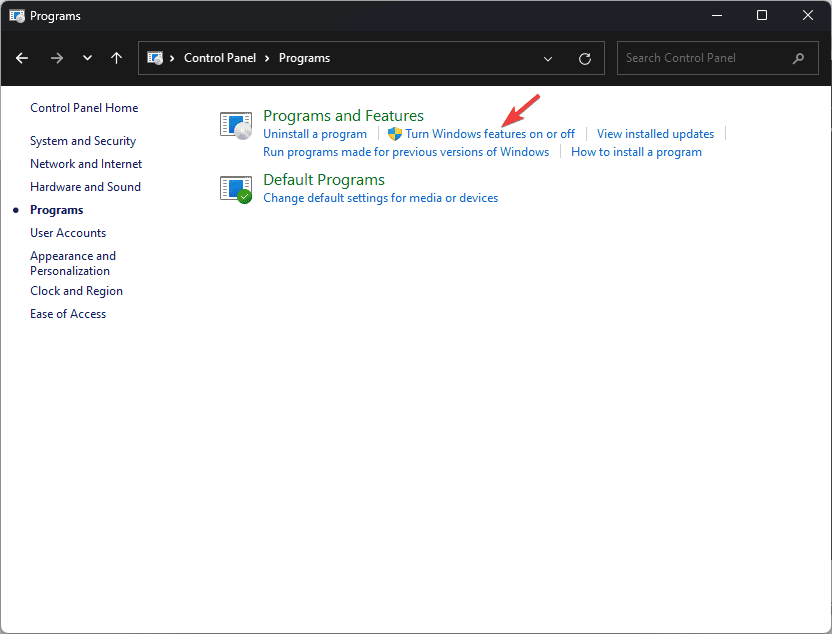
- Select Turn Windows features on or off.
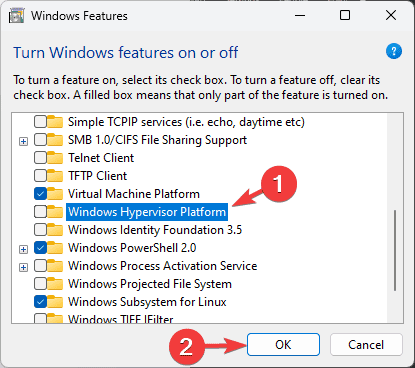
- Locate Hyper-V and all sub-components, Virtual Machine Platform, Windows Hypervisor Platform, and remove the checkmark next to them.
- Click OK, then restart your computer.
3. Use a third-party DLL fixer
Orangeemu64.DLL is a third-party DLL file that comes with the SIMS 4. You can manually restore a DLL file, but if not done correctly, it can cause more harm than good to your computer. Therefore, it is recommended that you should use a third-party DLL fixer tool.
These software are known to fix compatibility issues, which are significant problems that plague third-party DLL files and Windows PCs.
4. Check if Virtualization is enabled
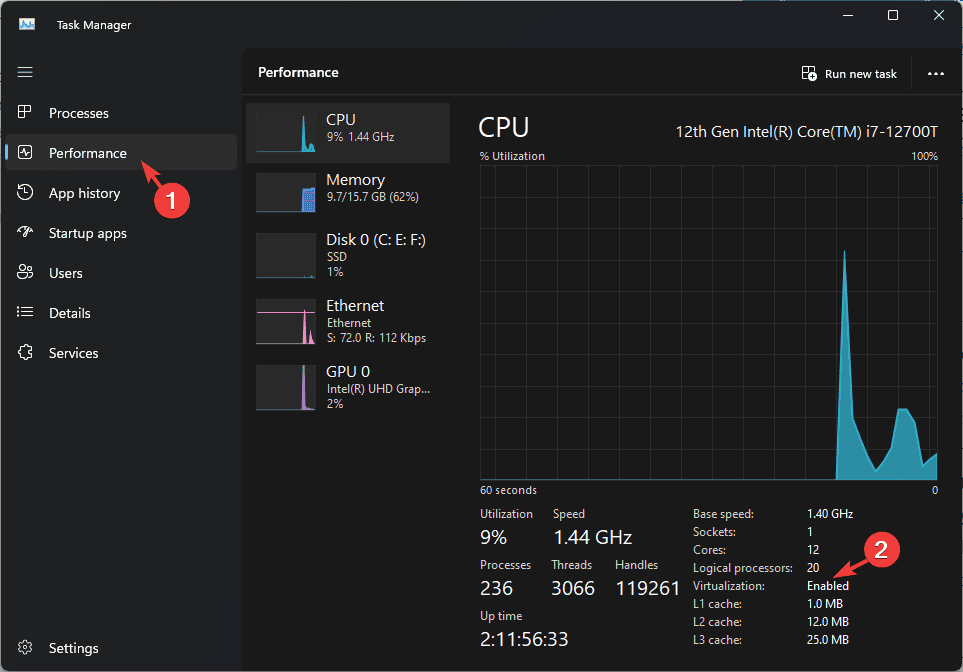
- Press Ctrl + Shift + Esc to open the Task Manager.
- Go to the Performance tab, look for Virtualization, and ensure it is Enabled.
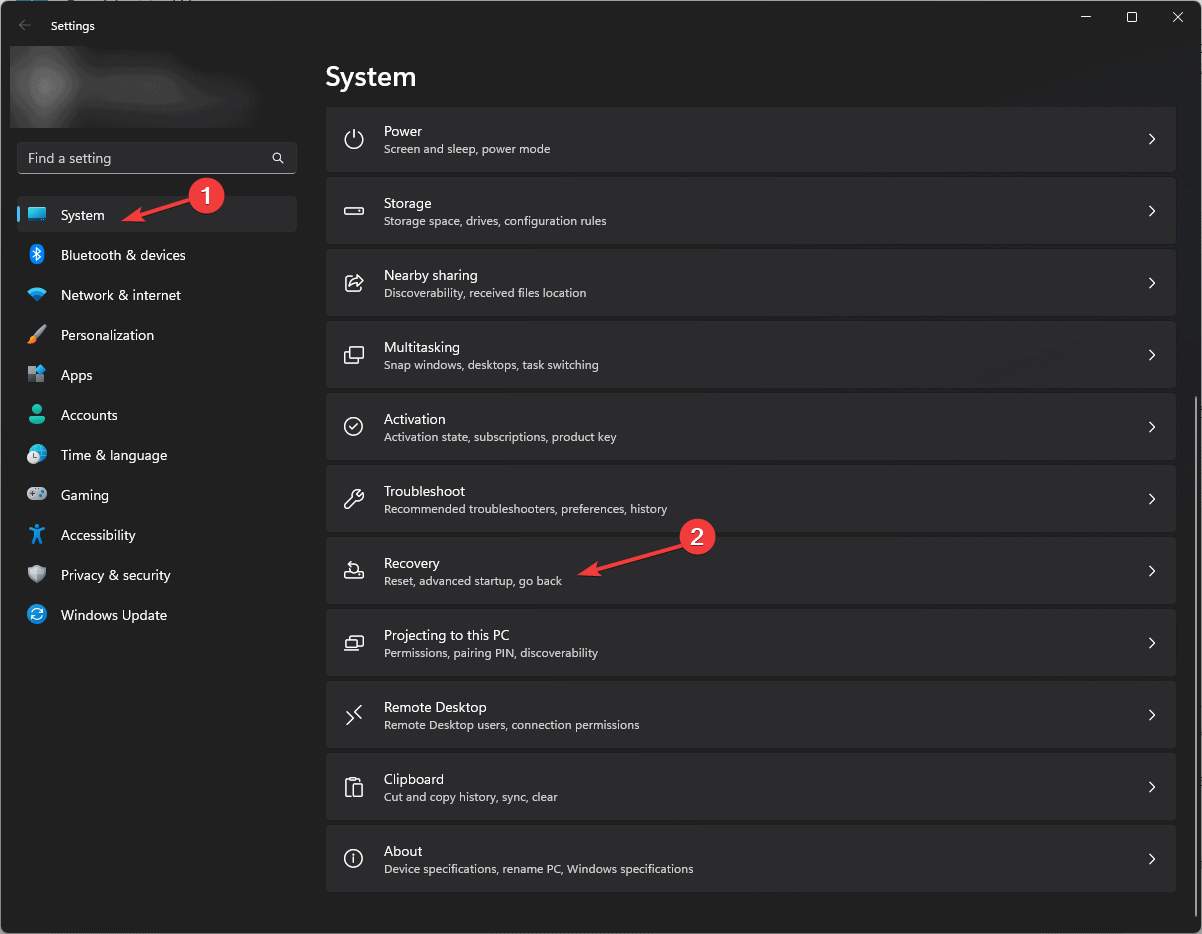
- Next, press Windows + I to open the Settings app.
- Go to System, then click Recovery.
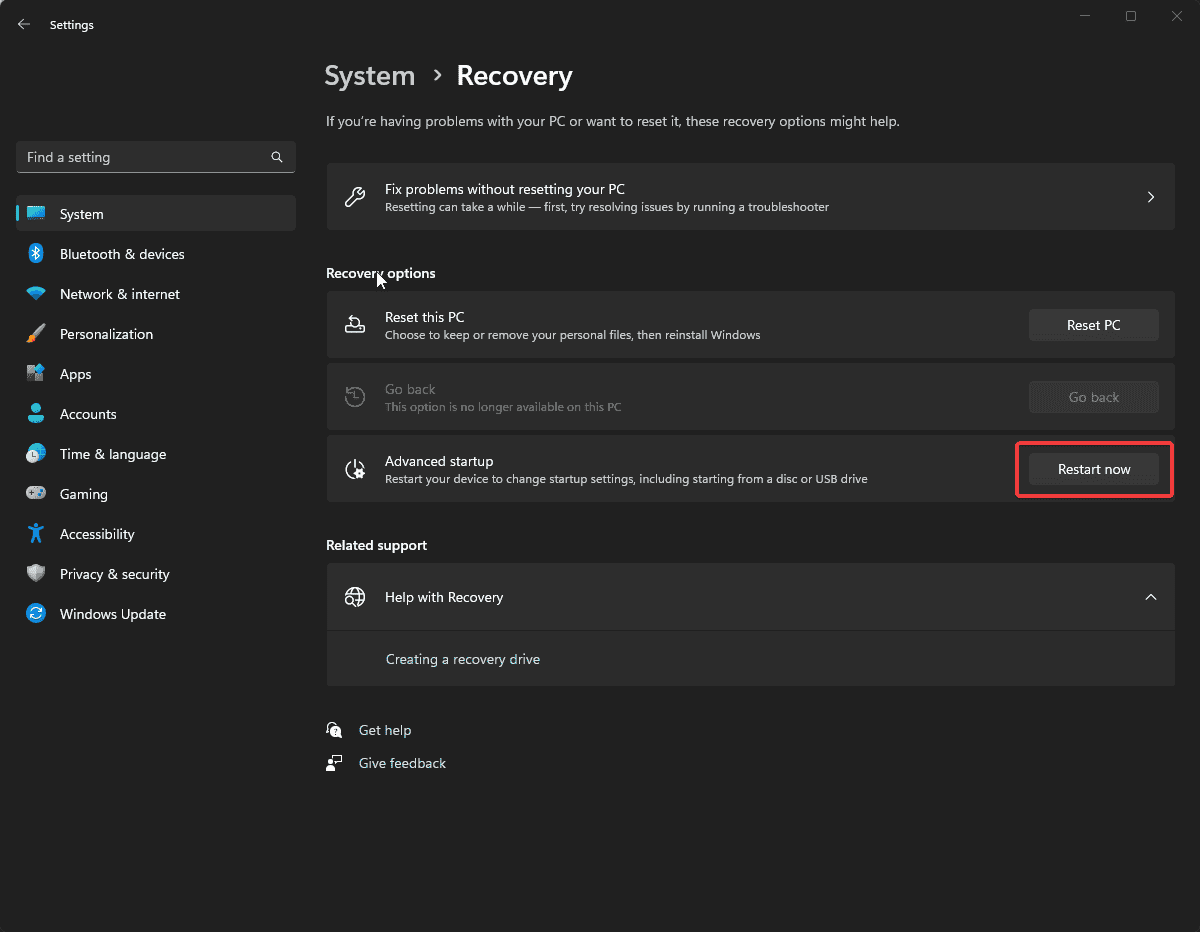
- Under Recovery options, locate Advanced options, then click the Restart now button.
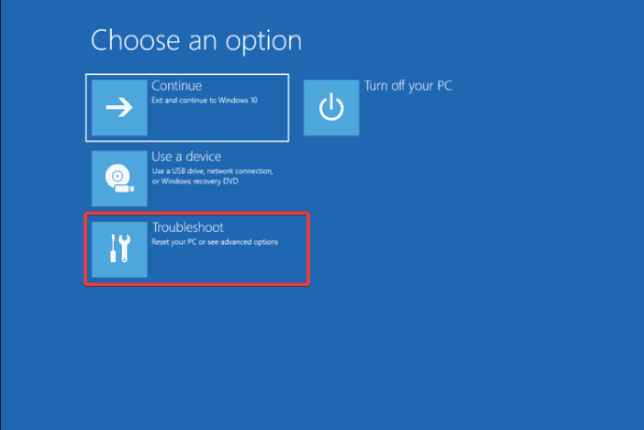
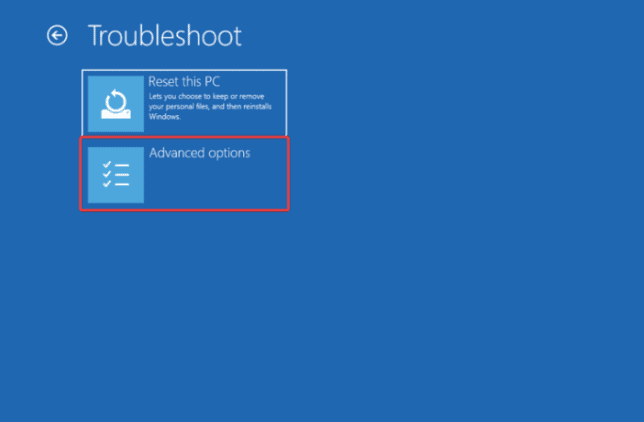
- On the Choose an option screen, click Troubleshoot.
- Select Advanced options from the Troubleshoot screen.
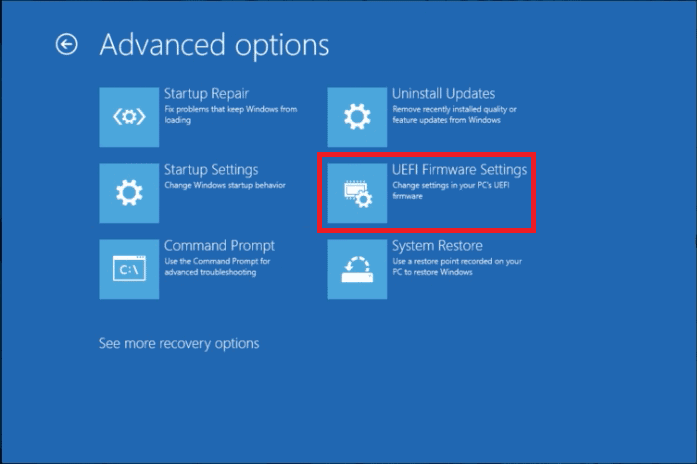
- Choose UEFI Firmware Settings, then click Restart.
- Upon restart, go to Security.
- Select Virtualization, and choose Disabled.
- Press F10 to save and exit to save the changes.
If this doesn’t work for you, reverse engineer these steps to enable Virtualization on your computer. In case the Virtualization option is already disabled, try turning it on to fix the problem.
5. Disable Force randomization
- Press the Windows key, type windows security in the search box, and click Open.
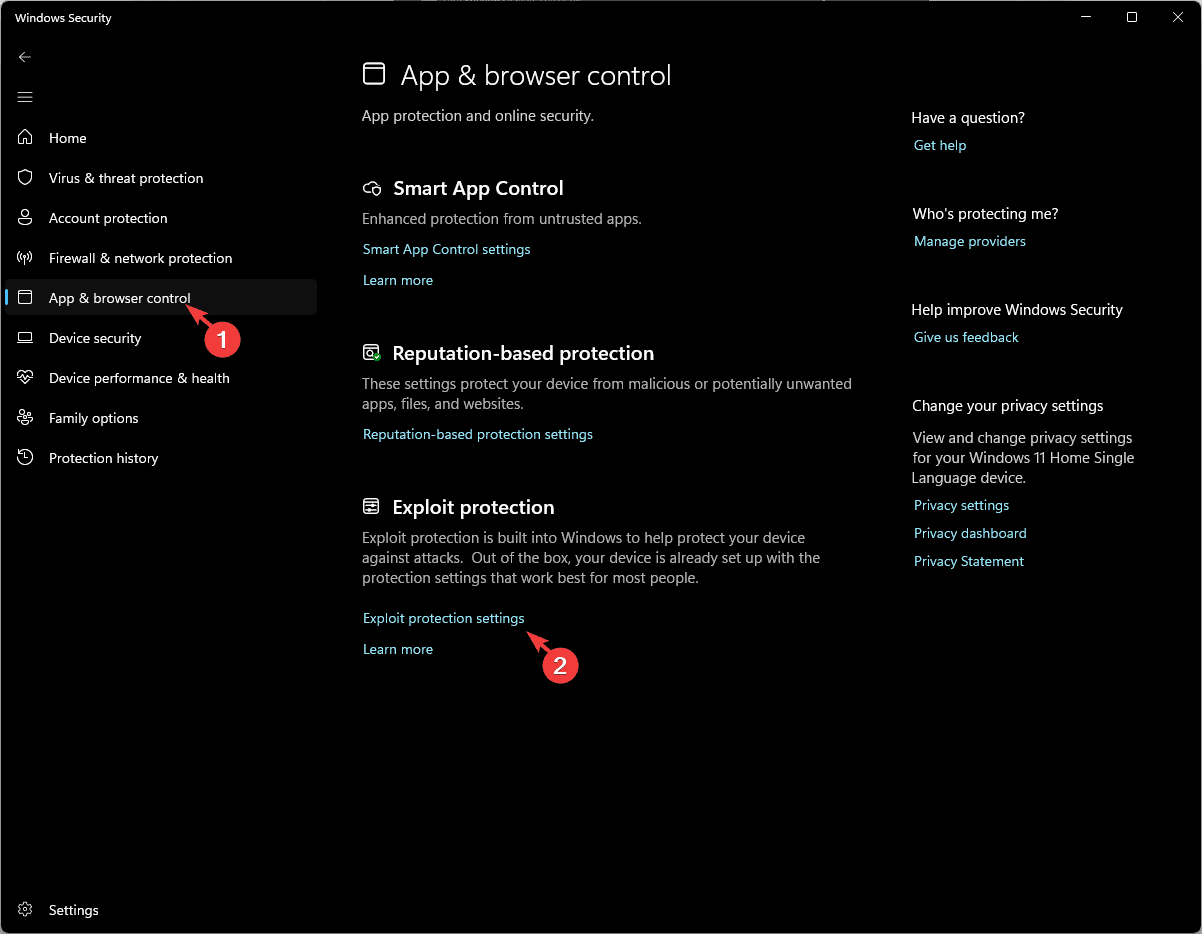
- Go to App & browser control, locate Exploit protection, and then click Exploit protection settings.
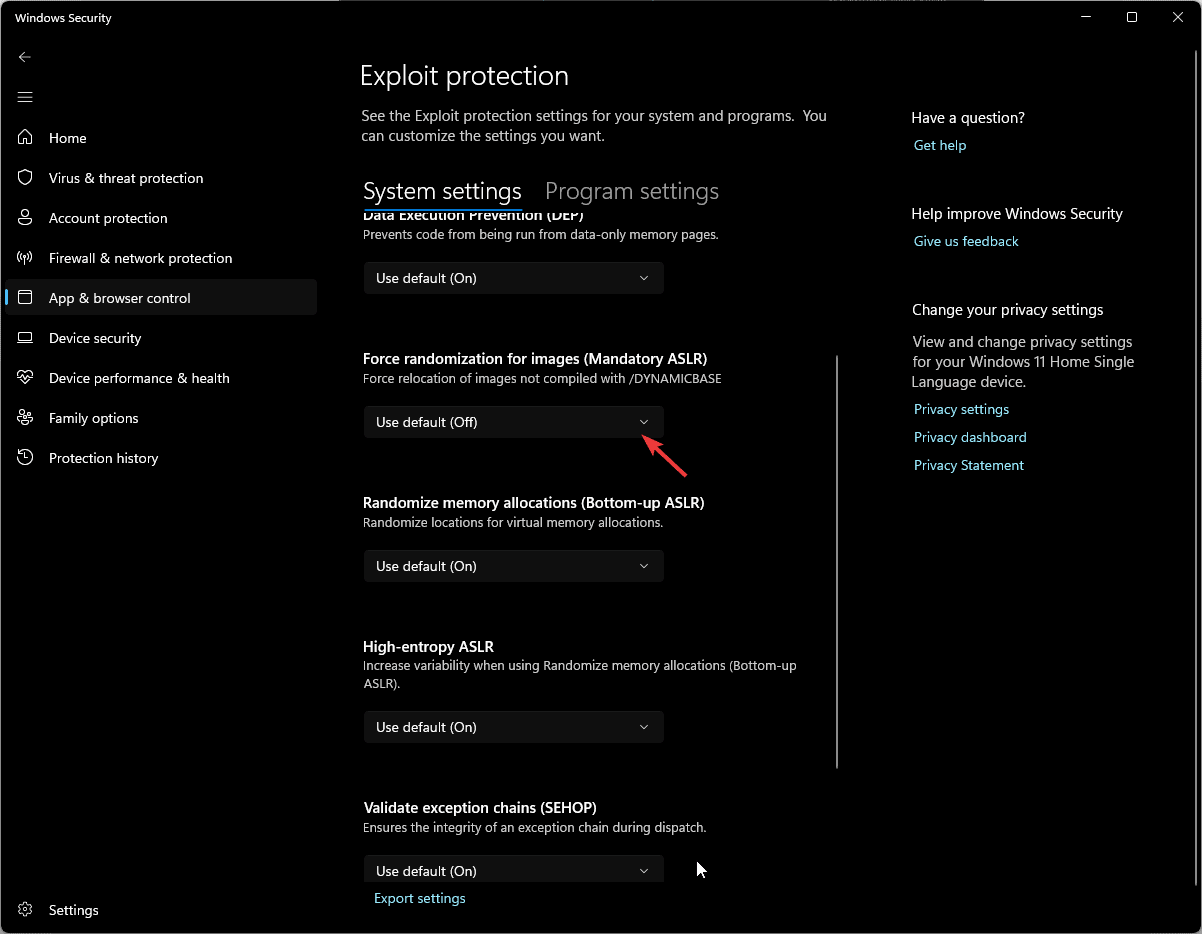
- Next, locate Force randomization for images and select Use default (Off).
6. Add Sims 4 to the Antivirus Exception list
- Press the Windows key, type windows security in the search box, and click Open.
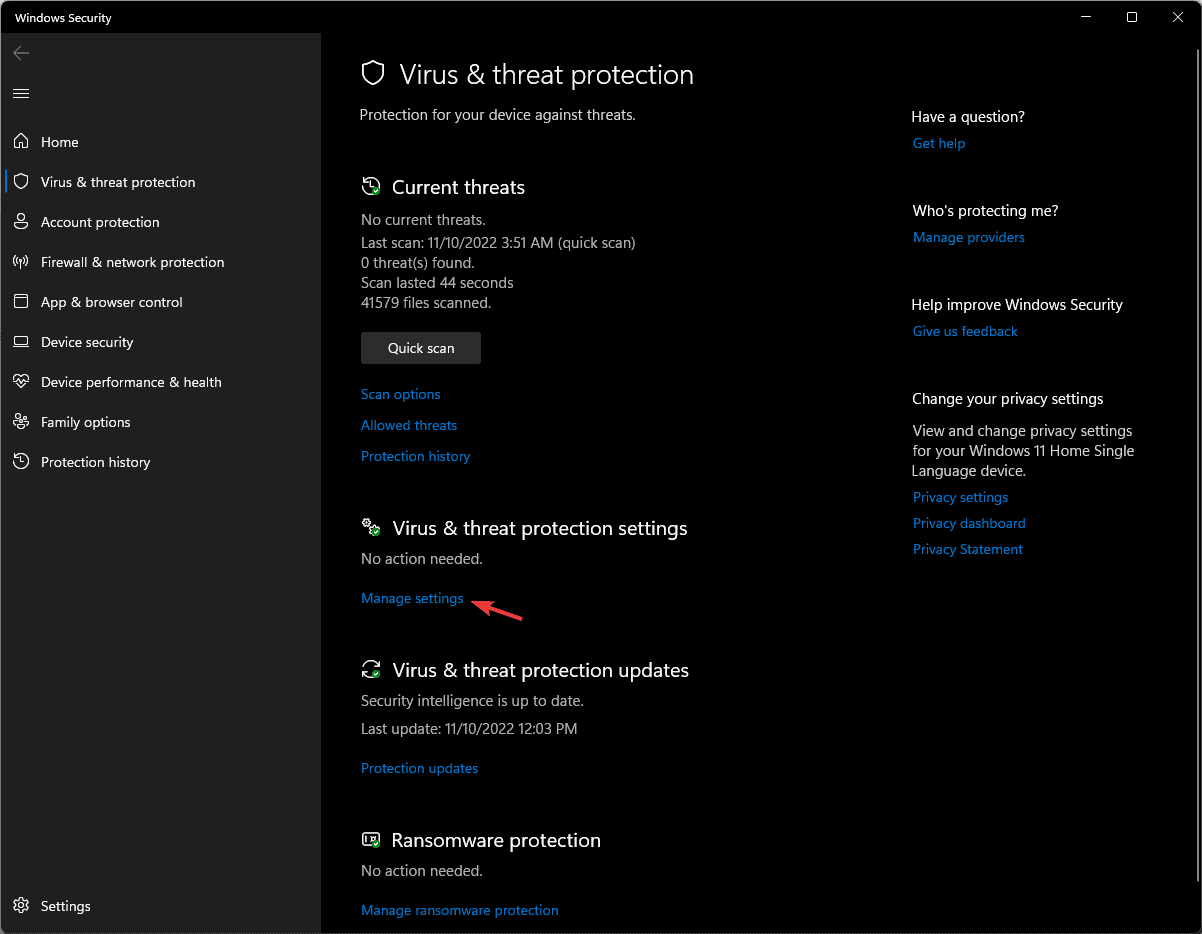
- Go to Virus & threat protection, locate Virus & threat protection settings, and click Manage settings.
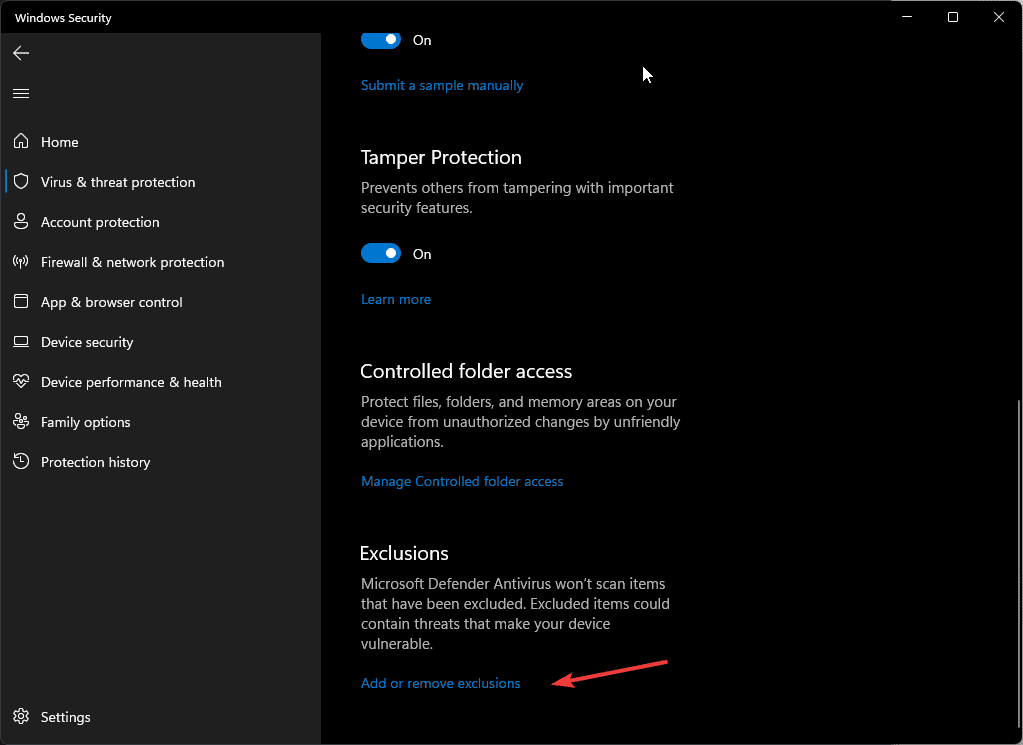
- On the following screen, scroll down to locate Exclusions, and click Add or remove exclusions.
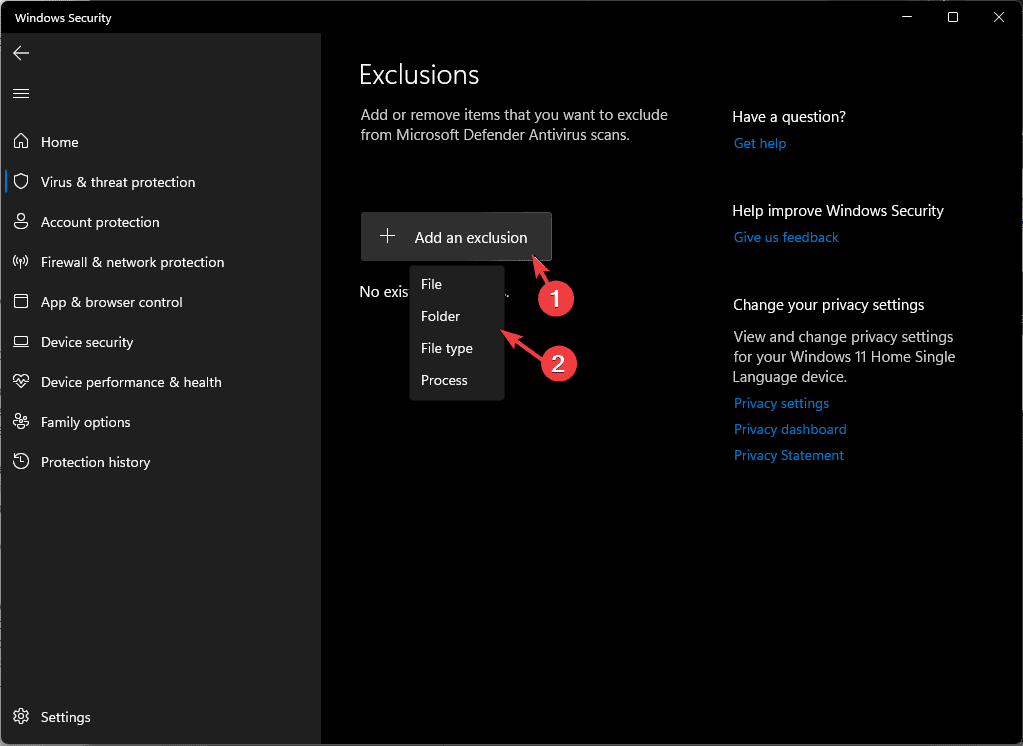
- Click Add an exclusion, then select Folder.
- Navigate to this or type in this address in the address bar after replacing C with your system Drive Letter:
C:\Program Files (x86)\The Sims 4\Game\Bin - Click Select Folder to add it to the list, then close Windows Security.
7. Perform a System Restore
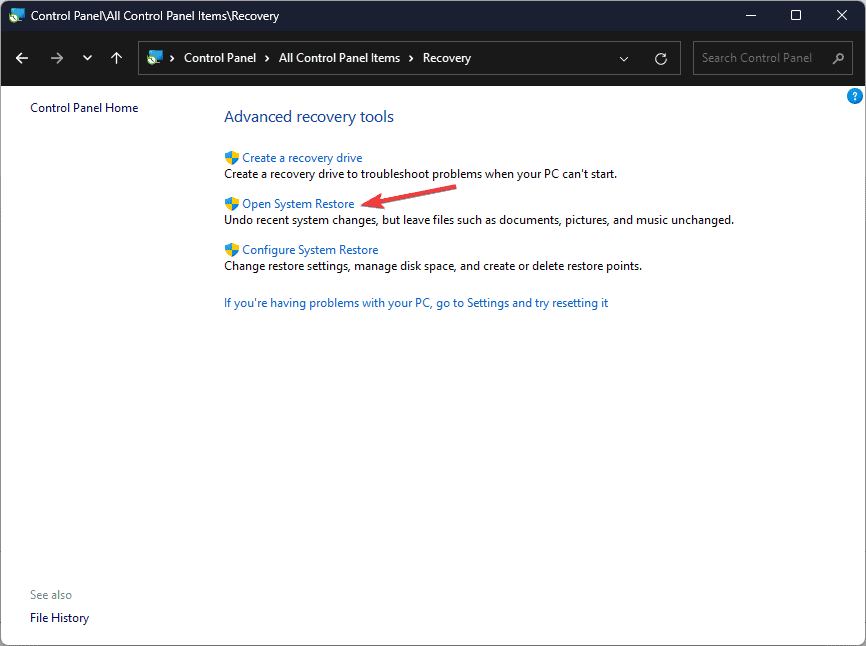
- Press the Windows key, type control panel in the search box, and click Open.
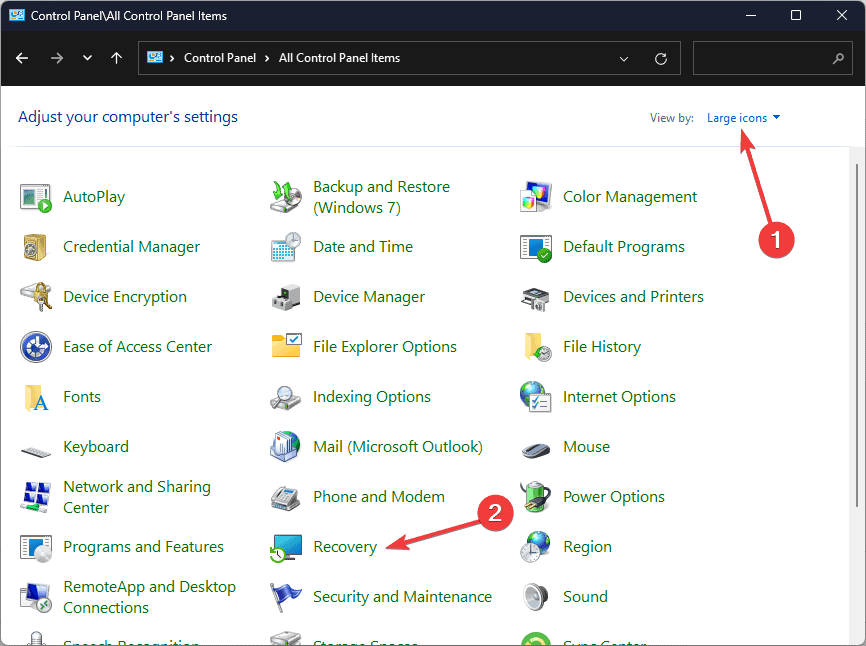
- Select Large icons as View by, then click Recovery.
- Click Open System Restore.
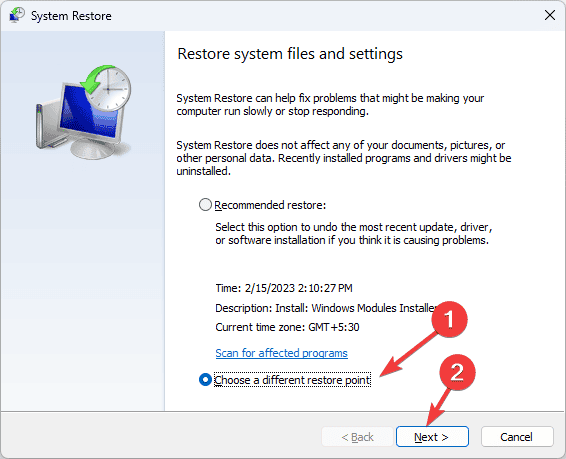
- Select Choose a different restore point in the System Restore window and click Next.
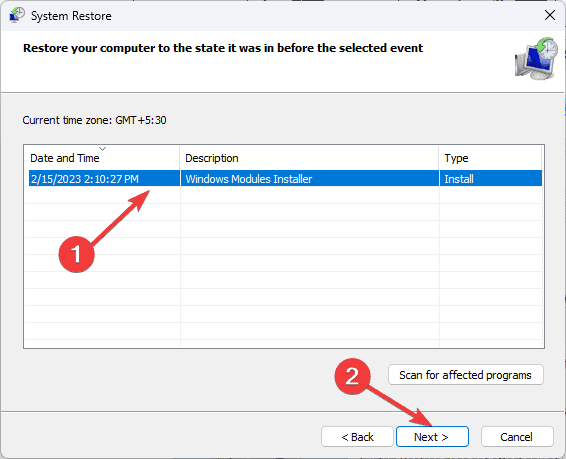
- Choose the point at which you want your Windows restored and click Next.
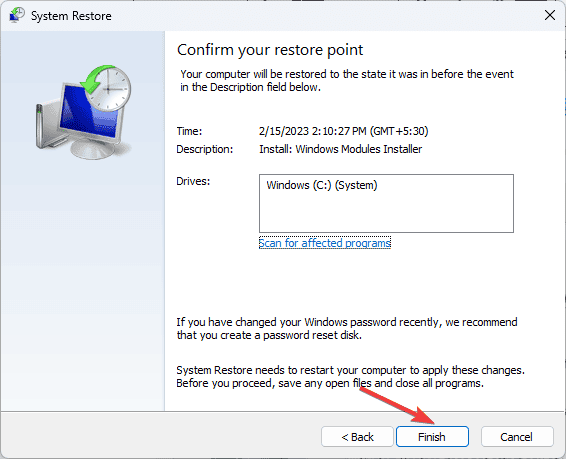
- Click Finish to initiate the process.
Windows will restart and restore to the selected version. If you get the System Restore wasn’t completed successfully message after your PC reboots, we recommend you check out this informative guide for solutions.
8. Download the DLL file manually
 NOTE
NOTE
- Visit the DLLME website, search OrangeEmu64.DLL, select an appropriate option, and click Download.
- Double-click the downloaded folder to open, locate, and copy the .dll file.
- Go to this path and paste the file:
C:\Program Files (x86)\The Sims 4\Game\Bin - If unsure where the game is, right-click the game icon and select Properties from the context menu.
- Go to the Shortcut tab and copy the path mentioned next to Target.
- Now, navigate to this path and paste the DLL file.
- Reboot your PC to save the changes.
Along with these solutions, you must also ensure that your Windows is updated to the latest version and that there are no pending updates for the game.
If you often encounter missing DLL issues on your Windows 10 computer, we have a guide to help you understand the causes and the usual fixes. You can also learn how to deal with the msstdfmt.dll missing error.
We also have a guide on buddha.dll, so feel free to check it out if you want to learn more about other DLL files.
If you have any suggestions or questions about the OrangeEmu64.dll file, feel free to mention them in the comments section below.


User forum
0 messages