How we Fixed Outlook Scheduling Assistant Greyed Out
Deleting the Outlook cache might do the trick
3 min. read
Updated on
Read our disclosure page to find out how can you help Windows Report sustain the editorial team Read more
Microsoft Outlook is one of the best email clients on Windows 10. Despite that, Scheduling Assistant is sometimes greyed out and users don’t know how to solve this issue.
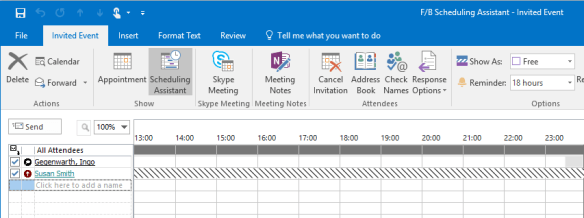
When a certain on-premise Outlook user opens the Scheduling Assistant to set up a meeting, Free/Busy shows as greyed out. This is one of the many Free/Busy information retrieval issues and the weirdest part is that accessing the shared Calendar seems to work fine.
Only booking a meeting by using the Scheduling Assistant leads to the same annoying hash marks you’re also seeing. We are here to share with you a couple of procedures that will surely solve this problem, provided that you’re eager to take matters into your own hands.
Thus, to learn more about fixing this Outlook Scheduling Assistant error, continue reading.
What can I do if Outlook scheduling assistant is greyed out?
1. Delete the cache and let Outlook recreate it
- Open Outlook and access your mailbox.
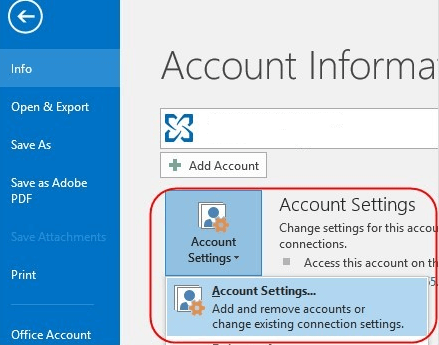
- In the Outlook main window, click the File menu.
- Select the option for Account Settings.
- Select your Outlook Exchange account.
- Then, click on the Change button.
- It’s time to uncheck the option for Use Cached Exchange Mode.
- Up next, exit out of Outlook.
- Return to the Change Account settings to turn on the Use Cached Exchange Mode button.
- Again, close out of the menus to exit Outlook.
- Open Outlook for re-caching.
Note: This procedure can take up to several hours, depending on how much data you have in the cloud.
Outlook uses a feature called caching to communicate with servers for a better view of your email that resides on a collection of servers. This involves storing remote data temporarily on the local computer, so if the cache is corrupted, then lots of strange things seem to happen all of a sudden.
Scheduling Assistant appearing as greyed out could be one of them, so follow the instructions above to remedy potential Outlook caching issues.
2. Delete Outlook entry for the affected recipient
Trying to book a meeting should work like a breeze, yet those hash marks in Scheduling Assistant prove otherwise. If accessing the shared folder is working, then try deleting the entry for the affected recipient in Outlook.
After completing this simple fix, many users forget all about the corruption of that entry and everything starts working again.
3. Run Test E-mail AutoConfiguration
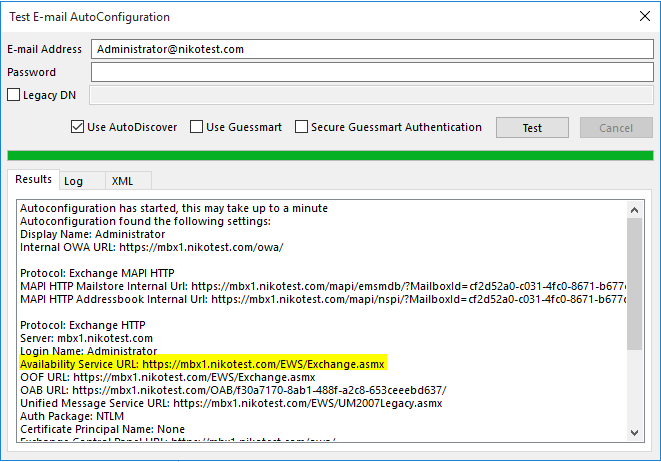
Alternatively, you may check the WebServices Virtual Directory settings, and run the Test E-mail AutoConfiguration on the Outlook client.
Verify the URLs returned from the server. If there’s nothing out of order here, it could be a misconfiguration proxy issue.
Conclusion
Not being able to see the Free/Busy status when in the Scheduling Assistant in Outlook is frustrating. The entire row is grayed out, yet simple fixes such as the ones described here should do the trick. Browse through the page to find the right solution for you.
If you need further assistance, then you can always contact us by using the comments area below.
READ ALSO:

