Fix: Computer is Not Authorized to Run iTunes
Key notes
- A computer not authorized message in iTunes can prevent you from using iTunes, but there’s a way to fix it.
- Fixing the issue is simple; you need to deauthorize all devices using iTunes.
- Alternatively, removing the corrupted directories might fix the problem as well.
- If iTunes says your computer is unauthorized, you can also try signing in and out of iTunes.

To play and sync media content in the iTunes media player, you need to authorize a Windows desktop or laptop for an Apple ID.
Some iTunes users have stated that computer not authorized error messages pop up when playing or syncing media content with the media player.
Those error messages pop up for some users even when they’ve already authorized an Apple ID with the Authorize This Computer option on the Store menu. Consequently, they can’t play or sync selected music or video in iTunes.
How do I fix iTunes saying computer is not authorized when it is?
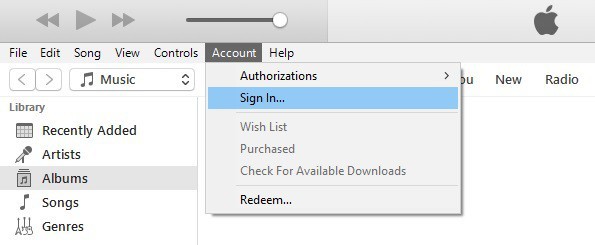
1. Log out of iTunes
- To log out, open the media player’s library, click Account, and select the Sign Out option.
- Then click Account > Sign In, and enter your Apple ID to log back in.
If iTunes says that your computer is not authorized, but it actually is, the cause of the problem might be a glitch easily fixed by logging out and logging in to iTunes again.
2. Check what user account purchased the media file
- Open the iTunes media player.
- Select the music (or other media content) you need to check the Apple ID in the Library.
- Click Edit and select Get Info on the menu.
- Then click the File tab, including the Apple ID for the person who obtained the media content to the purchase right. That’s the Apple ID you need to sign in for and authorize your desktop or laptop to play the music with.
Note that iTunes might request authorization when you select to play DRM media files that weren’t purchased with the Apple ID you’re signed in with.
Thus, somebody else who also utilizes iTunes on the same laptop or desktop might have purchased media content with a different Apple ID than the one you’re logged in with.
Or you might have downloaded DRM media content with another ID yourself. If so, you must sign in with the account ID that the music was purchased with to play it.
3. Deauthorize computers linked with iTunes

- First, open iTunes and sign in with your Apple ID if required.
- Click Account and select View My Account on the menu.
- Input your password and press Enter to open an Account info page. There you can scroll to Apple ID Summary that tells you how many computers you’ve authorized to play media content.
- Press the Deauthorize All button on the right of the summary.
- Then restart the iTunes media player.
- Click Account and Account Authorizations to expand a submenu.
- Select the Account Authorization option to authorize the PC for Apple ID.
You can only authorize a maximum of five PCs for your Apple ID. Thus, you can’t authorize a computer if you’ve already authorized the maximum number of PCs for your iTunes account.
As such, reauthorizing desktops or laptops for an Apple ID might fix the computer not authorized message in iTunes.
4. Reinstall iTunes

Some users have also stated that they’ve fixed computer not authorized error messages by reinstalling iTunes.
You can manually reinstall iTunes like any other app, but if you want to remove it completely, we suggest using IObit Uninstaller.
This application is designed for software removal, and it will completely uninstall any software you want to remove, including all associated files and registry entries.
IObit Uninstaller is simple to use, and it offers in-depth removal, unlike the regular uninstall process in Windows, so you should check it out.
Other great features:
- In-depth software removal
- Can remove stubborn applications
- Can remove Windows 10 Universal apps
- Automatic system monitoring
- Automatic leftover file removal

IObit Uninstaller
To remove any application along with all of its associated files, be sure to use IObit Uninstaller.5. Delete the SC Info folder
- Press the File Explorer button on the taskbar.
- Then click the View tab shown in the snapshot directly below.
- Click the Options button to select Change folder and search options.
- Select the View tab on the Folder Options window that opens.
- Select the Show hidden files, folders and drives option.
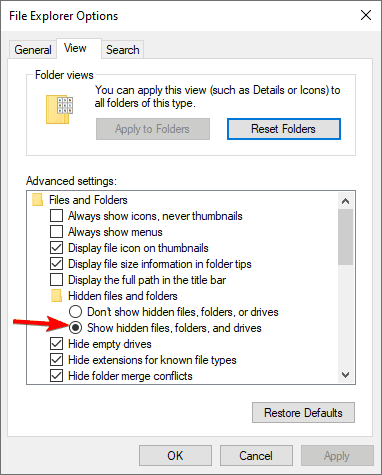
- Click the Apply button, and select OK to close the window.
- Enter this path in File Explorer’s folder path bar:
C:ProgramDataApple ComputeriTunes - Select the SD Info folder there, and press the Delete button.
- Then restart the Windows OS.
- After that, you’ll need to authorize the computer for your Apple ID again, as you erased the SD Info folder.
The iTunes computer not authorized error can be to due to a corrupted SD Info folder. Thus, deleting that folder can potentially fix the issue as iTunes will recreate SD Info.
6. Reset User Account Controls
- Resetting the User Account Controls in Windows might also fix some iTunes authorization issues. To do that in Windows 10, right-click the Start button and select Run.

- Then enter UserAccountControlSettingsin Run and press Return.
- Move the bar slider to Never notify.

- Press the OK button.
- Click Yes to confirm.
- After that, restart your desktop or laptop and open the User Account Control Settings window.
- Drag the slider up the bar to turn UAC back on. You can also leave the UAC off if you wish.
- Click the OK button.
If iTunes says that your computer is not authorized, but it is, adjusting User Account Control settings might be able to help you.
These are a few fixes that will probably resolve most iTunes computer not authorized error messages. If you encounter any issues with iTunes, it probably concerns the distnoted.exe file, so check for any errors.
Note that most of the above resolutions might also fix unauthorized issues for the Apple Mac iTunes software and its Windows counterpart.
Read our disclosure page to find out how can you help Windows Report sustain the editorial team. Read more


Improve this guide


User forum
0 messages